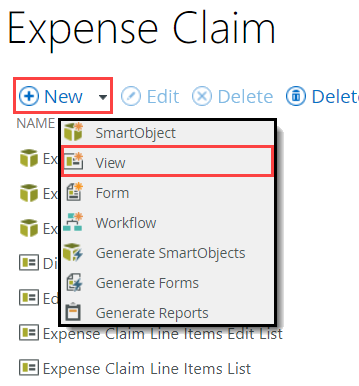
27. Create a List View for Reports
In this step, you begin creating views for a reporting form. The form has three views: two list views and an item view. The item view contains reporting controls that you add and configure from the K2 Designer - Toolbox. You add two instances of the list view to your form. You configure rules so that one list view displays items pending approval and the other displays items pending finance processing. Ultimately, you have a "dashboard" style reporting form from which you can view expense claim instance details.
- Create a new list view with the following settings:
Field Value Name Expense Claim List Description Read-only list of expense claims. Category (leave default value unchanged) View Type List View Data Source Expense Claim SmartObject List Method Get List Items Call this method when the form loads Not checked - Navigate to the Expense Claim > K2 Application elements page. Click New, then View.
- Configure the GENERAL settings for the new view as follows:
Field Value Notes Name Expense Claim List Description Read-only list of expense claims. Category (leave default value unchanged) View Type List View List views show one or more items in a list as opposed to a single item. Data Source The Expense Claim SmartObject should already be the default. If it is not, use the ellipses to navigate to and select the Expense Claim SmartObject. 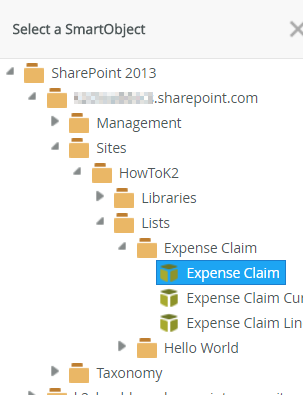
The list view displays records from this data source. List Method Get List Items This is the default method used to populate the list. Call this method when the form loads Not checked You do not want the list view to populate automatically whenever it loads. Instead, you define rules to populate the list with specific records. 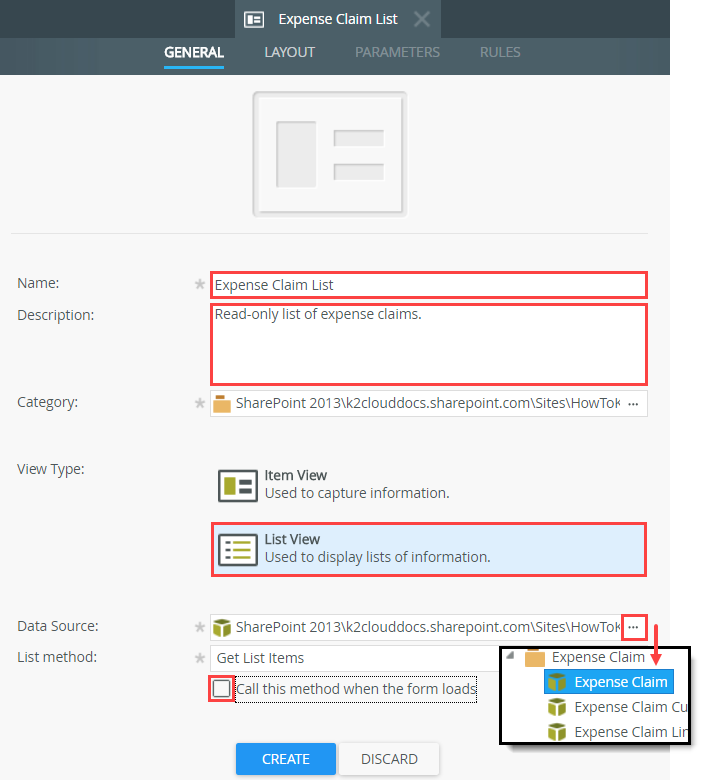
- Navigate to the Expense Claim > K2 Application elements page. Click New, then View.
- Create Labels and Controls for the following properties (do not allow list editing):
- Title
- Requester (Value)
- Approver (Value)
- Submit Date
- Total Amount
- On the LAYOUT screen, click Create Labels and Controls.
- On the Create Labels and Controls screen, select the fields listed below. Do not allow list editing. Click OK to continue.
- Title
- Requester (Value)
- Approver (Value)
- Submit Date
- Total Amount

- Rename the display value for the Requester (Value) and Approver (Value) columns to Requester and Approver.
- Rename two of the column headers to make them easier to read. Select the Requester (Value) column. Click the Header tab in the Properties pane and change the Text property to
Requester.As a reminder, the Name value is the control identifier K2 uses in rules and as the system name. The Text value is what you see on the form.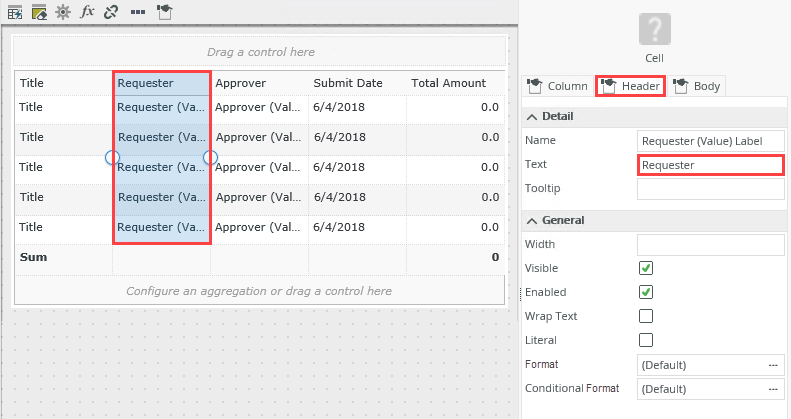
- Select the Approver (Value) column, then change the Text property to
Approver.
- Rename two of the column headers to make them easier to read. Select the Requester (Value) column. Click the Header tab in the Properties pane and change the Text property to
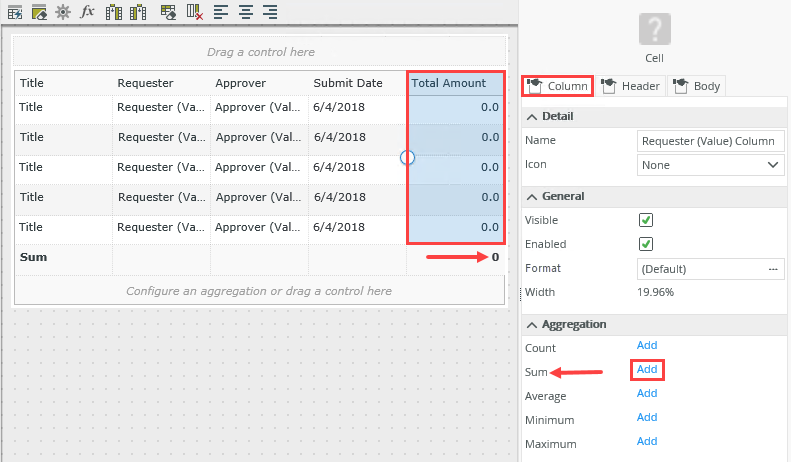
- Add a Sum aggregate for the Total Amount column.
- Add a sum aggregate. The aggregate provides a running total of expense claims to use as reference. Select the Total Amount column, then click the Column tab in the Properties pane. Locate the Sum aggregate (under the Aggregation heading) and click Add. K2 inserts a footer row with the sum aggregation.
- Add a sum aggregate. The aggregate provides a running total of expense claims to use as reference. Select the Total Amount column, then click the Column tab in the Properties pane. Locate the Sum aggregate (under the Aggregation heading) and click Add. K2 inserts a footer row with the sum aggregation.
- Resize the column widths appropriately. The view should look like the image below when complete. Finish the view.
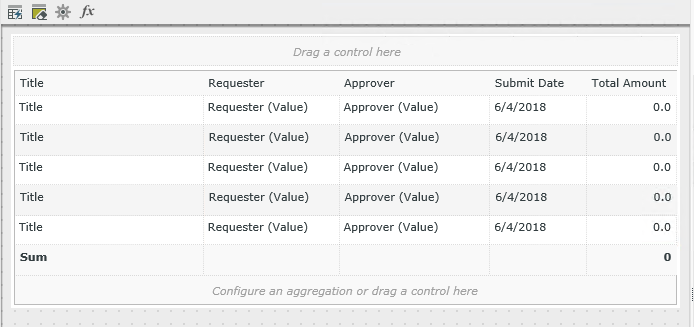
- Adjust the width of the columns so that Title is the widest and the Submit Date and Total Amount columns are narrower.
- FINISH the new view to return to the K2 Application elements page.
- Adjust the width of the columns so that Title is the widest and the Submit Date and Total Amount columns are narrower.
Review
In this step, you created a read-only list view of expense claims. Later, you add two instances of this view to your reporting form. One view displays expense claims waiting for approval, while the other displays expense claims waiting for finance processing. You configure rules for the two list views at the form level. In the next step, you create a new item view, then add reporting controls from the toolbox.