11. Create an Editable List View
Next, create an editable list view to capture, edit, and remove line items for the expense claim. This view appears on the requester's form when you submit a new expense claim and when you rework an existing expense claim.
- Create a new list view with the following settings:
Field Value Name Expense Claim Line Items Edit List Description Editable list of expense claim line items. Category (leave default value unchanged) View Type List View Data Source Use the browse icon to select the Expense Claim Line Item SmartObject List Method Get List Call this method when the form loads NOT checked 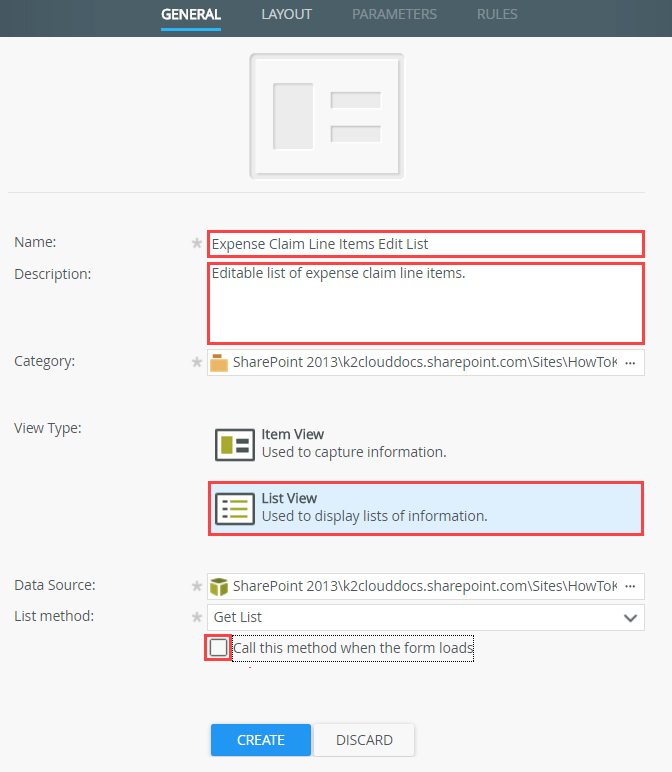
- From the K2 Application elements page, click New, then View.
- Configure the GENERAL settings as follows and click CREATE:
Field Value Notes Name Expense Claim Line Items Edit List Description Editable list of expense claim line items. Category (leave default value unchanged) View Type List View List views show a list of items as opposed to a single item. Data Source Use the browse icon to select the Expense Claim Line Item SmartObject This is the SmartBox SmartObject that you created to store the expense claim line items. (Your tree structure may not match the image exactly depending on your site and subsite names.) 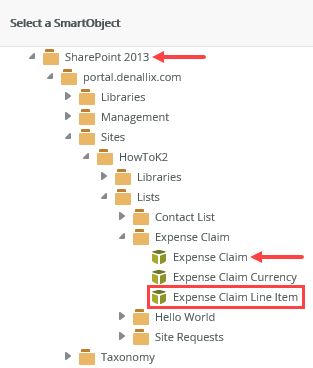
List Method Get List This is the default method that populates the list view. Call this method when the form loads NOT checked You do not want the list view to populate automatically whenever it opens.
- Create Labels and Controls and configure the view for editing list items.
- On the layout screen, click the Create Labels and Controls link.
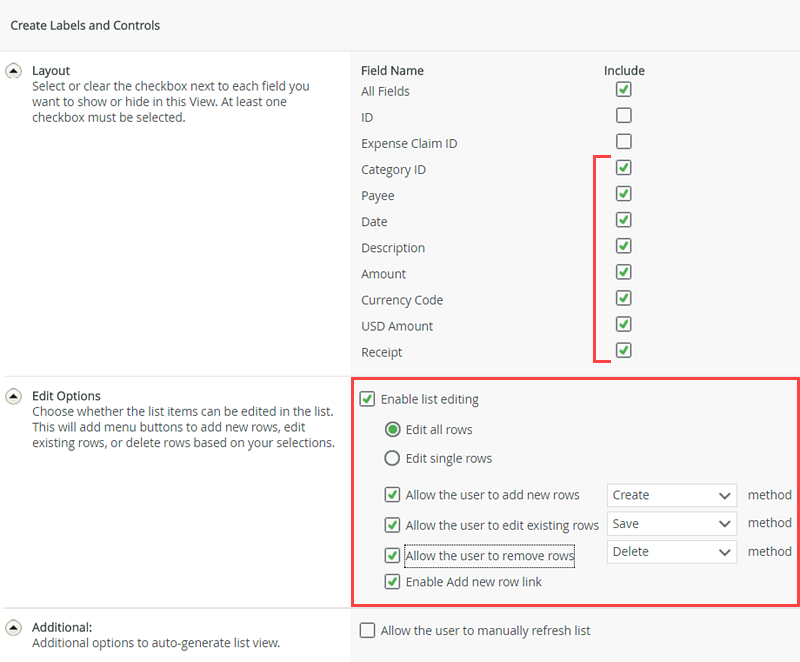
- On the Create Labels and Controls screen, select all the fields except ID and Expense Claim ID. Select the Enable list editing option and configure the edit options section with the following settings, then click OK:
Field Value Edit all rows Selected Allow the user to add new rows Checked > Create method Allow the user to edit existing rows Checked > Save method Allow the user to remove rows Checked > Delete method Enable Add new row link Checked
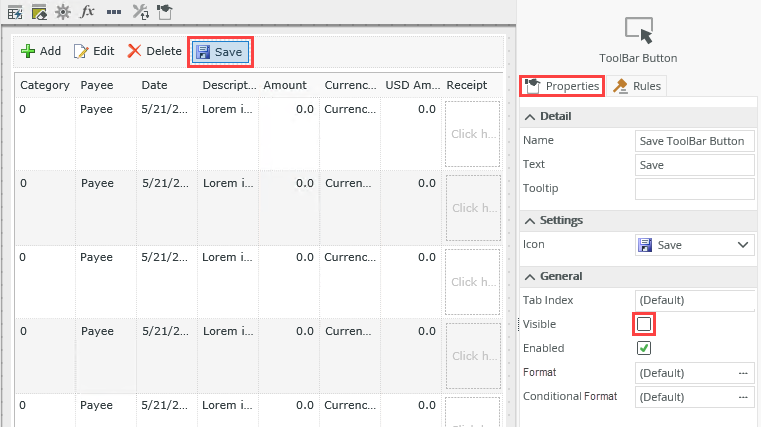
- Hide the toolbar Save button. In a later step, you add buttons at the form level, then configure the rules to save the header and details records.
- Once the table and controls generate, select the Save button in the toolbar and set its Visible property to false. You do not need this button because you configure a rule later that saves all the line items at the same time. This button only saves one row at a time.
- Once the table and controls generate, select the Save button in the toolbar and set its Visible property to false. You do not need this button because you configure a rule later that saves all the line items at the same time. This button only saves one row at a time.
- Enable Wrap Text for the Description column.
- Select the Description column, then CHECK the Wrap Text property found in the Properties pane, under the General heading.
- Configure a number format for the following controls so that they have 2 decimal places and are right-aligned:
- Amount Text box
- Amount Body Column
- USD Amount Text box
- USD Amount Body column
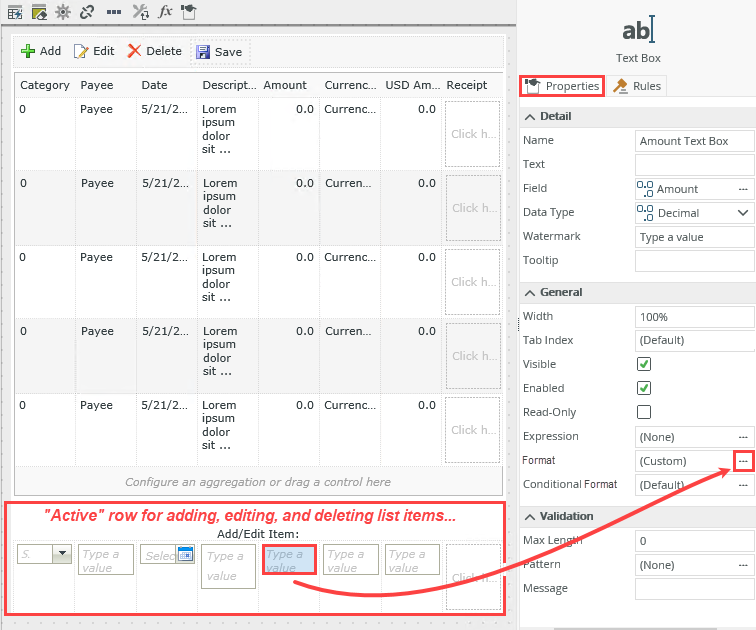
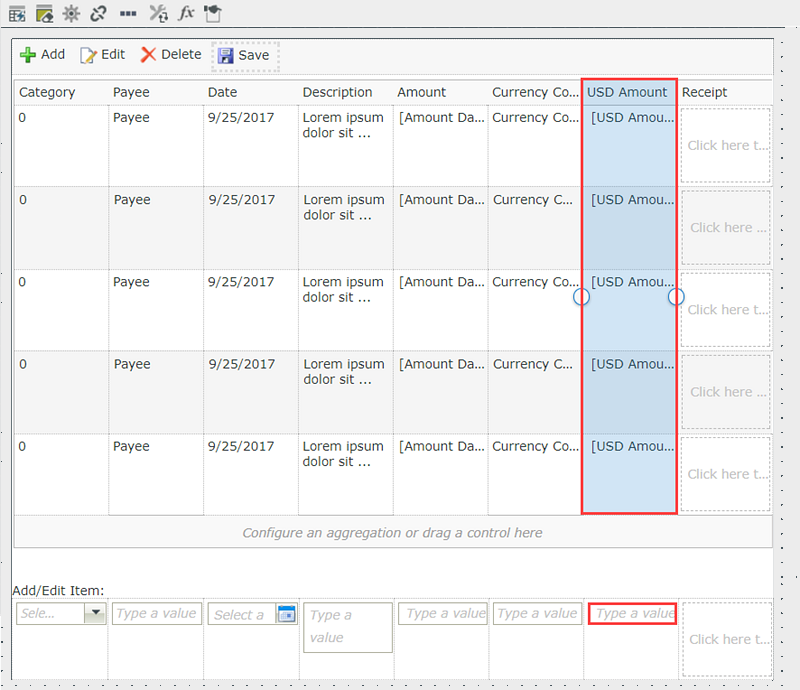
- Next, you edit the format for four number controls and set them for 2 decimal places and right-aligned. Select the Amount text box at the bottom of the list view, then open the Format editor for the control.
You might be a little confused by the canvas layout if you are not familiar with the editable list view design. The top half of the design canvas (that looks like a spreadsheet) is a representation of how the list items appear as the user adds them. Then you have the Add/Edit Items section, which is the live entry section for adding, editing, and deleting list items. At runtime, you see the two sections combined. There is the spreadsheet of entered items, with a control row that allows you to add, edit, and delete items. Think of this as being the active row.
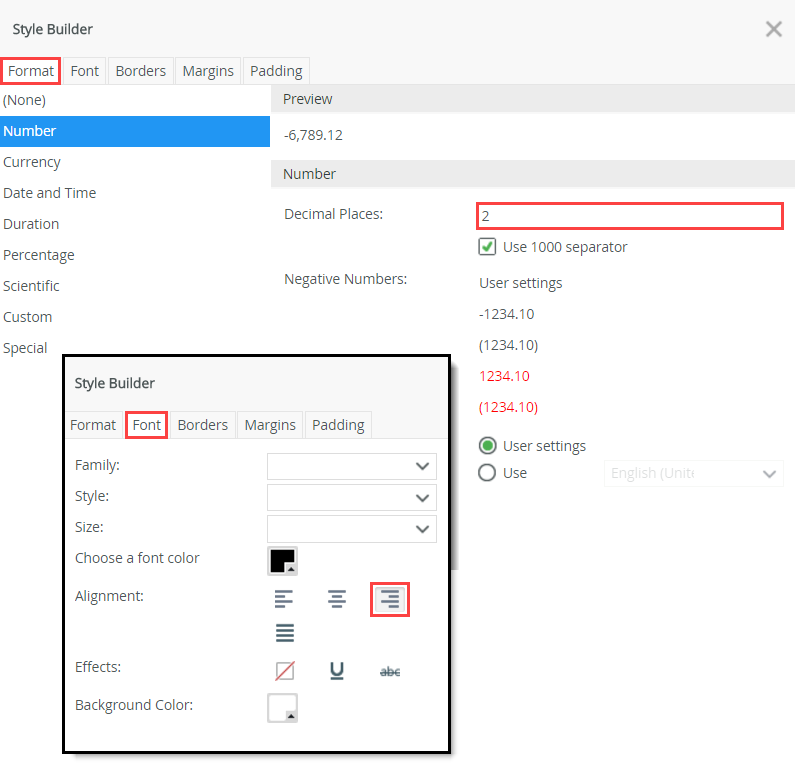
- Configure the Number format for the Amount text box to have 2 decimal places, then click the Font tab and change the alignment to right-aligned. Click OK to set the formatting.
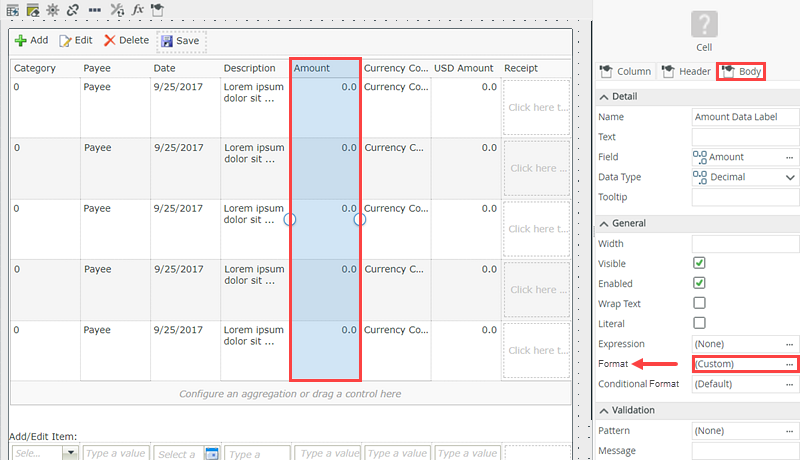
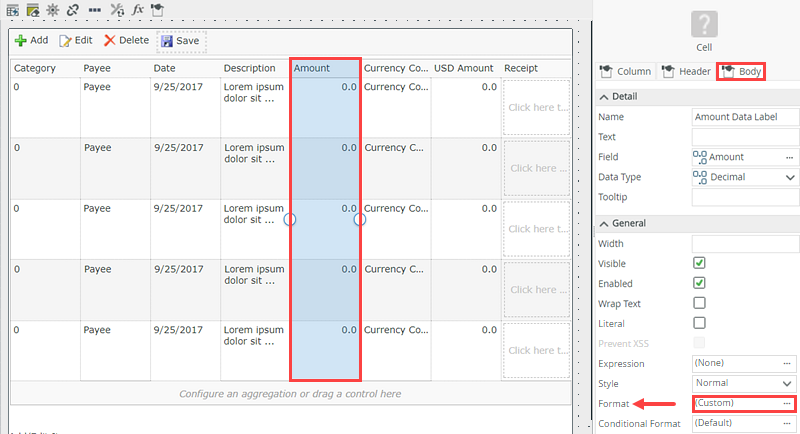
- Configure the Number format for the Amount column’s Body to also have 2 decimal places, then click the Font tab and change the alignment to right-aligned. Click OK to set the formatting.
- Follow the same procedure to set the number format for the USD Amount text box and the USD Amount column for 2 decimal places and right-aligned.
- Add a sum aggregate to the USD Amount column, rename the Sum Data Label to Sum USD Amount. Set the number format to 2 decimal places and right-aligned.
- Looking a bit closer at the USD Amount column, most users would appreciate having a column total at the bottom. This way, they can see the total amount of their expense claims as they add them. This is very simple to do by adding an aggregate to the column. Aggregations perform sum, average, and count functions for a specific column.
Select the USD Amount column. In the Properties pane, click the Column tab, then Add the Sum aggregation.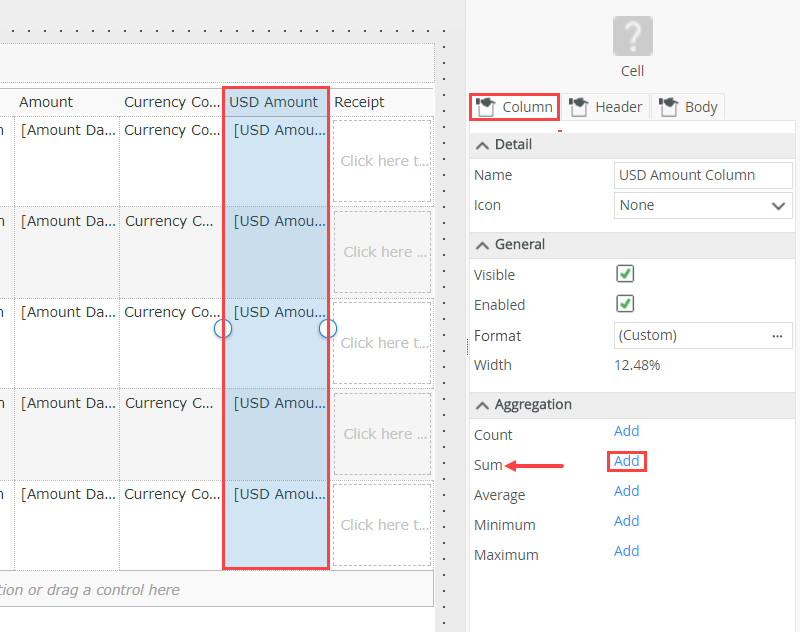
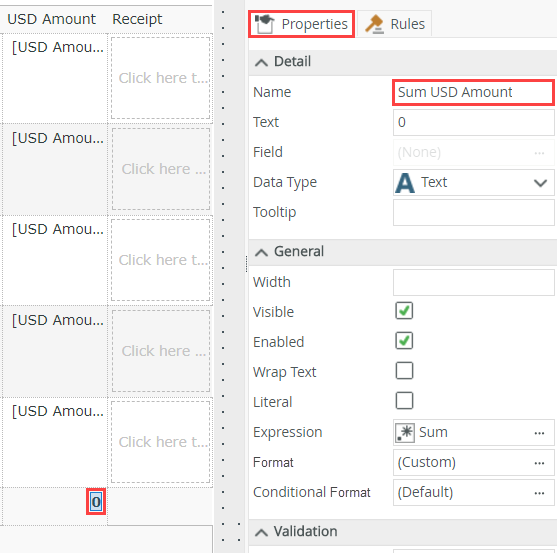
- Notice that K2 has added a new bottom row to the table and a new label (Sum) to the first cell in the row. K2 added the aggregation to the cell below the USD Amount column. The value is '0' at this point. It is a data label and you cannot change it. Like any other label and data label, you can apply formatting to these controls. First, you'll rename the Sum label.
Select the new Sum Data Label and rename it to
Sum USD Amount
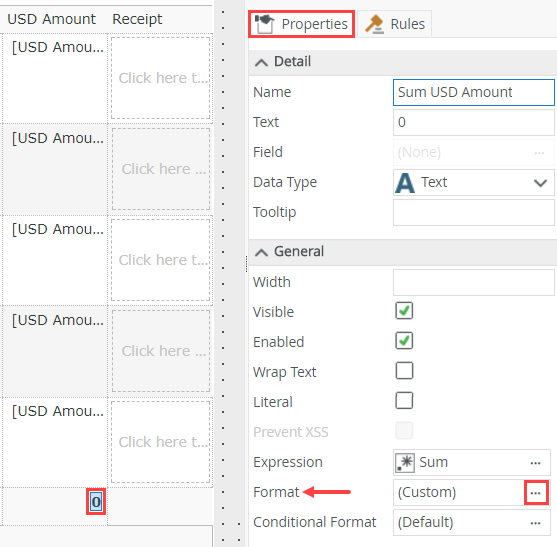
by changing the value in the Name property. - Use the Format property to configure the Sum Data Label so it has 2 decimal places and is right-aligned.
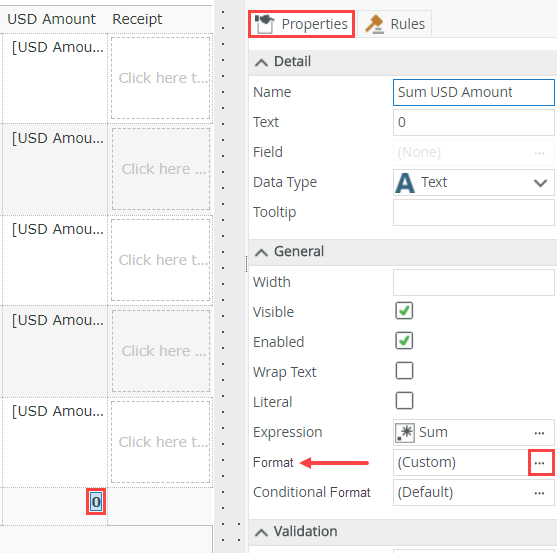
Changing the name makes it more clear what this control is. If you had several sum aggregations all named 'sum', it would be difficult to differentiate between them in rules.

- Looking a bit closer at the USD Amount column, most users would appreciate having a column total at the bottom. This way, they can see the total amount of their expense claims as they add them. This is very simple to do by adding an aggregate to the column. Aggregations perform sum, average, and count functions for a specific column.
- Next, you link the Expense Claim Currency SmartObject to the Currency Code control so that the control receives its drop-down list values from the SmartObject.
Change the Currency Code text box to a drop-down list and configure the control so that it is linked to the Expense Claim Currency SmartObject’s > ListCurrencies method.
- Change the Currency Code text box to a drop-down list and configure the control to retrieve its list values from the Expense Claim Currency SmartObject.
Select the Currency Code text box, then use the Change Control menu to change it to a Drop-Down List. Click OK.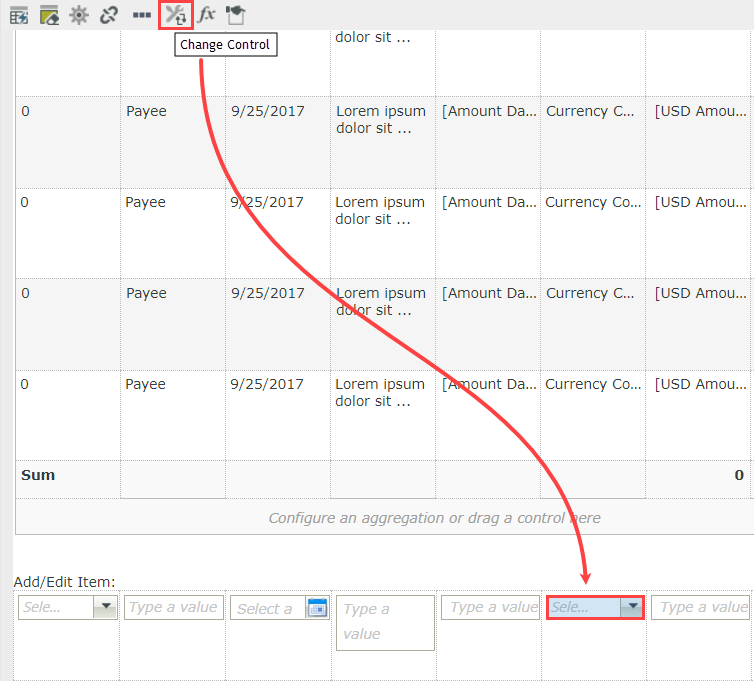
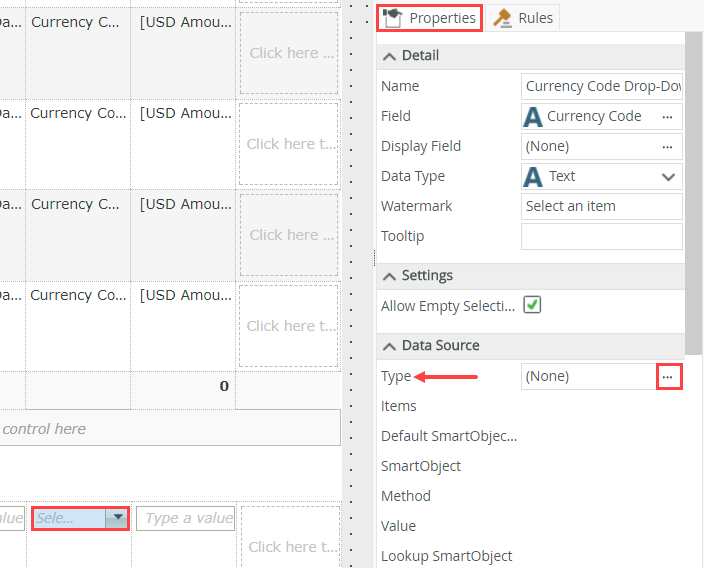
- With the Currency Code control selected, open the data source editor in the Properties pane by clicking the ellipsis for the Type property.
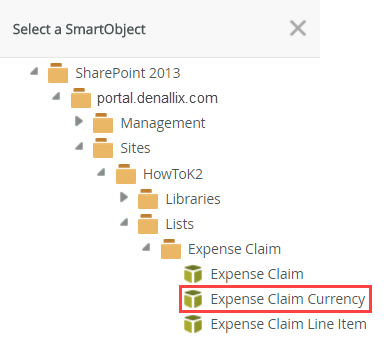
- On the Configure Data Source screen, select the Use a SmartObject as data source option. Use the browse button to select the Expense Claim Currency SmartObject. Click OK. (Your screen may not match the image below exactly, depending on your site names.)
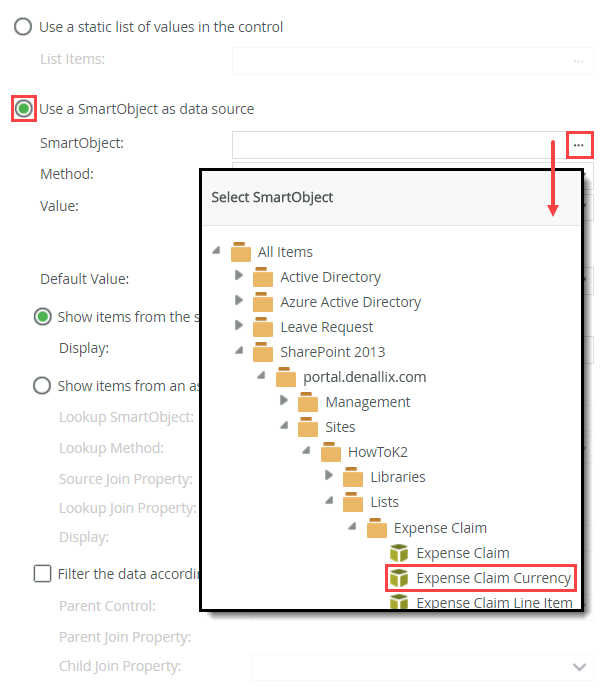
- Confirm the remaining settings are the same as below, then click OK to close the Configure Data Source window.
- Change the Currency Code text box to a drop-down list and configure the control to retrieve its list values from the Expense Claim Currency SmartObject.
- Next, you start working with rules. You call the Calculate USD Amount method (from the Expense Claim Currency SmartObject) whenever the currency code, date, or amount changes in the add/edit row.
Begin by adding a new rule that executes when the Amount text box changes. Call the Expense Claim Currency SmartObject’s Calculate USD Amount method. (Be sure to add a condition that confirms the Amount, Date, and Currency Code controls have values in the first place.) Use the images below for help in mapping the input parameters and output value.
Conditions that validate controls have values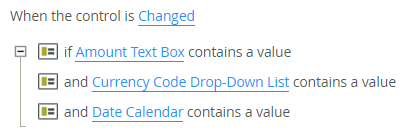
Input mappings for the Execute a SmartObject method action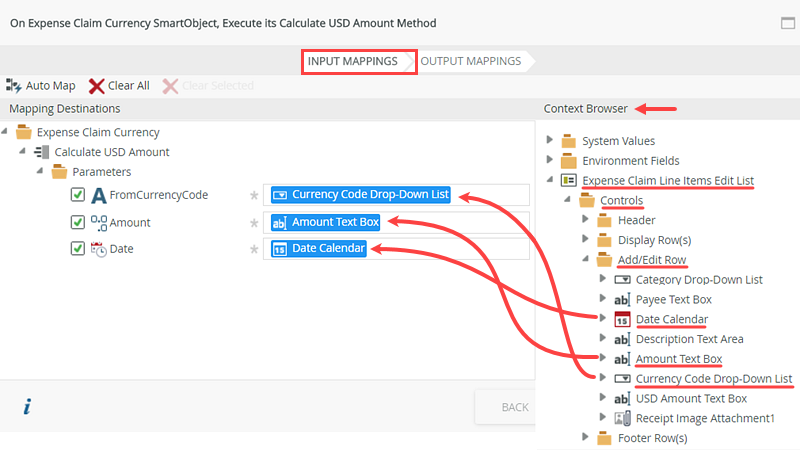
Output - return property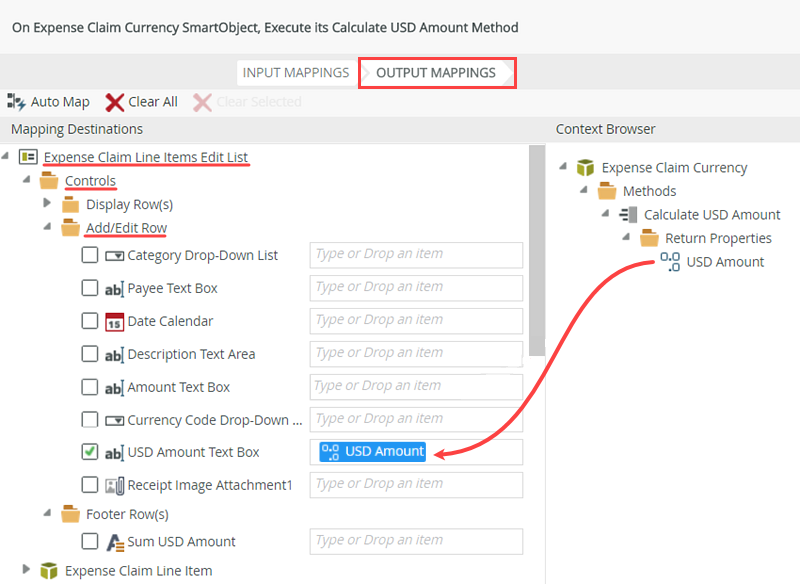
- Next, add a rule that executes the Expense Claim Currency SmartObject > Calculate USD Amount method. This action performs the currency conversion function whenever you enter an amount, change the date, or select a currency.
Select the Amount text box, then open the Rules pane for the control. Click Add Rule.Previously you accessed the view's rules screen via the RULES tab at the top of the screen. When working with control-specific rules, you can access rules from either the RULES tab (for the view) or the Rules tab for a specific control. Both guide you to the same rule designer screen.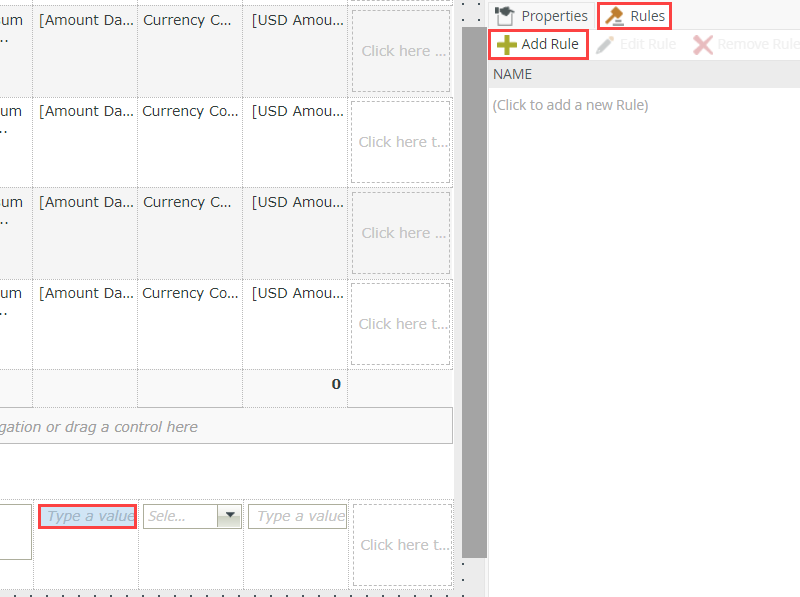
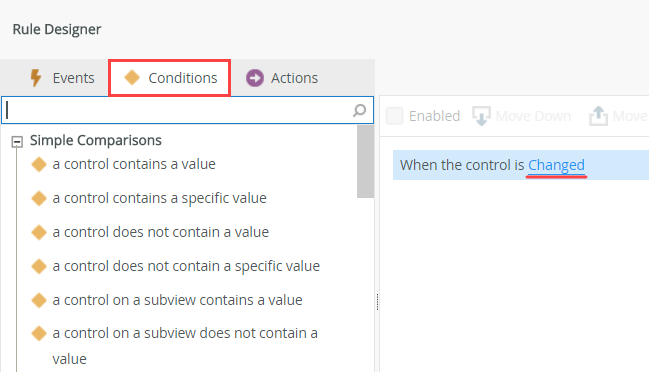
- Notice that K2 added an event for the control, 'When the control is select event'. Click the select event link and choose Changed. Initializing refers to when the control first loads; you want the event to trigger when the control value changes.
- Click the Conditions tab. Recall that a condition evaluates if a criteria of some kind has been met and if true, the rule continues to the action. You want to make sure the Amount, Date, and Currency Code controls all have values before proceeding. (Recall that this method requires four parameters: date, amount, "from" currency code and "to" currency code. The method cannot execute if one of the four parameters is missing. (The "to" currency code is hard-coded to USD, so you do not need to apply a condition for that value.).)
- You want the rule to execute if there are values for the Date, Amount, and Currency Code controls. Click the a control contains a value three times to add three conditions, one for each control.

- For the first condition, click the select control link and select Amount Text Box. Repeat this for the remaining conditions and select Currency Code Drop-Down List, then select Date Calendar. This prevents the rule from executing until all three controls have values that K2 passes to the calculate currency method parameters.
- Next, add the action to execute the calculate currency method if the conditions are true.
Select the Actions tab, then click Execute a SmartObject method to add it to the rule definition pane.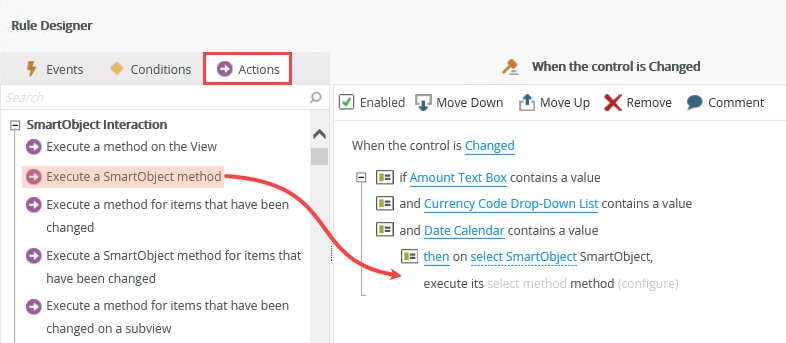
- First, you need to tell K2 which SmartObject contains the method you want to execute. Click the select SmartObject link and select the Expense Claim Currency SmartObject. Click OK.
- Now you need to tell K2 which method to execute. Click the select method link and select Calculate USD Amount.
- Configure the parameters for the SmartObject method. Remember that the method needs the following parameters: Date, FromAmount and FromCurrencyCode. The fourth parameter, ToCurrencyCode is hard-coded to USD. You map the view's controls to these parameters so that when the control value changes, the parameter value change as well. When the parameter value changes, the method executes again and recalculates the USD dollar amount.
Click the configure link to begin setting up the input parameters.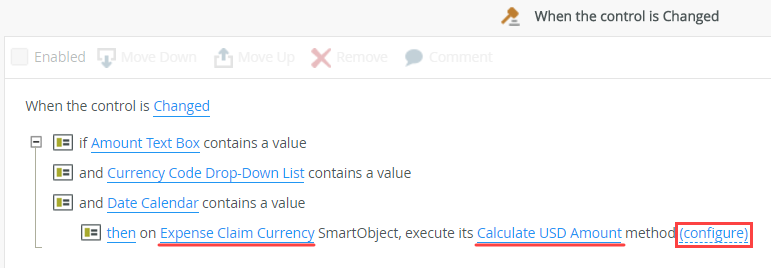
- Configure the input parameters for the method by dragging controls from the Add/Edit Row in the Context Browser to the input parameters for the method. (Expense Claim Line Items Edit List > Controls > Add/Edit Row)
- After the calculation runs, you need to return the calculated amount back to the view.
Click the Output Mappings tab. Drag the USD Amount return value into the USD Amount Text Box (under the Add/Edit Row heading), then click FINISH. When you enter a value into all three of the controls, K2 executes this rule which runs the calculation and returns the result back to the active Add/Edit row. This happens for each row, each time one of the three controls changes. Click OK to save and exit the rule designer.
Recap: you have added a new rule that calls the Calculate USD Amount (SmartObject) method when you enter a value for the amount, date, and currency code controls. The SmartObject calls the sample K2 Tutorial Currency Web Service and passes in the date, amount, and currency codes you entered. The fourth required parameter already exists because you hard-coded it to USD. The calculated value is then returned by the service and sent to the USD Amount text box.
- Next, add a rule that executes the Expense Claim Currency SmartObject > Calculate USD Amount method. This action performs the currency conversion function whenever you enter an amount, change the date, or select a currency.
- You configured a rule for when the Amount Text Box changes. Now, you need to configure rules for when the Date Calendar and Currency Code Drop-Down List changes. You can speed up the process by reusing the Amount Text Box rule you just configured.
Add a new rule for when the Date Calendar control changes. For the action, call another rule: When Amount Text Box is Changed. Repeat this for when the Currency Code Drop-Down List changes.- You want to perform this same action if the user changes the currency code or date value. Instead of re-configuring the entire rule for the other controls, you can reuse the existing rule. In the next few steps, you learn how to reuse rules for other controls.
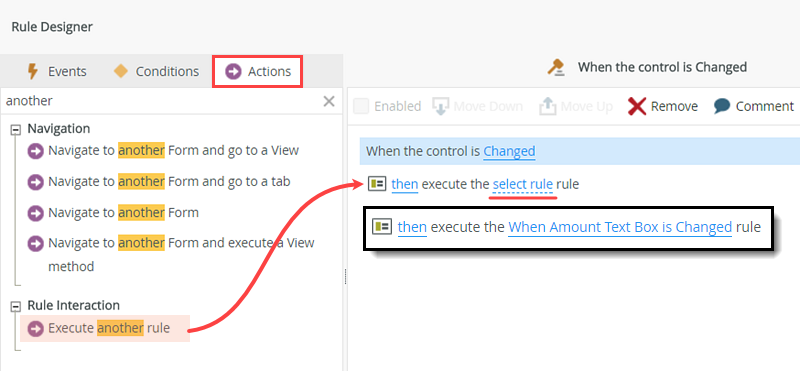
Select the Date Calendar control, then add a Rule that executes when the control is changed.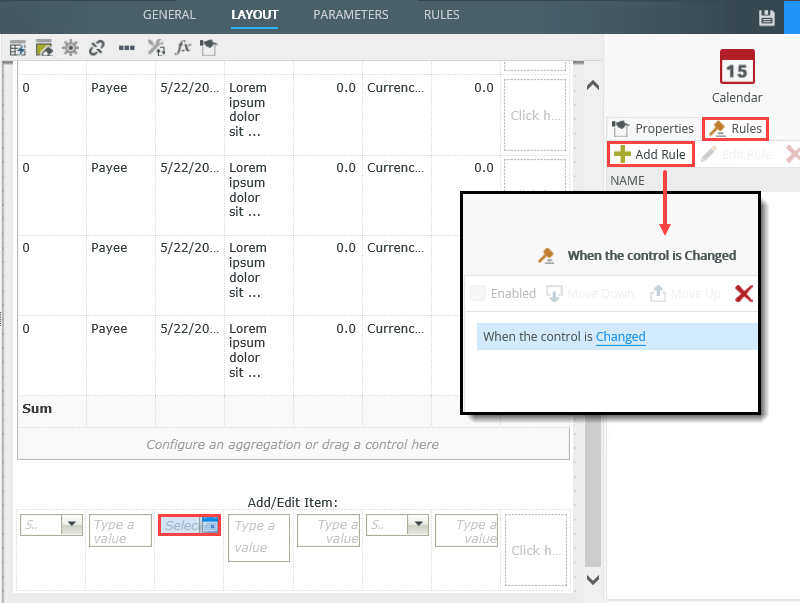
- With the Actions tab active, click Execute another rule to add it to the rule definition pane. Configure the action to call the When Amount Text Box is Changed rule. Click OK.
- Follow the same procedure to add a rule for the Currency Code drop-down list that executes when the currency code changes, then configure the rule to call the When Amount Text Box is Changed rule. Click OK.
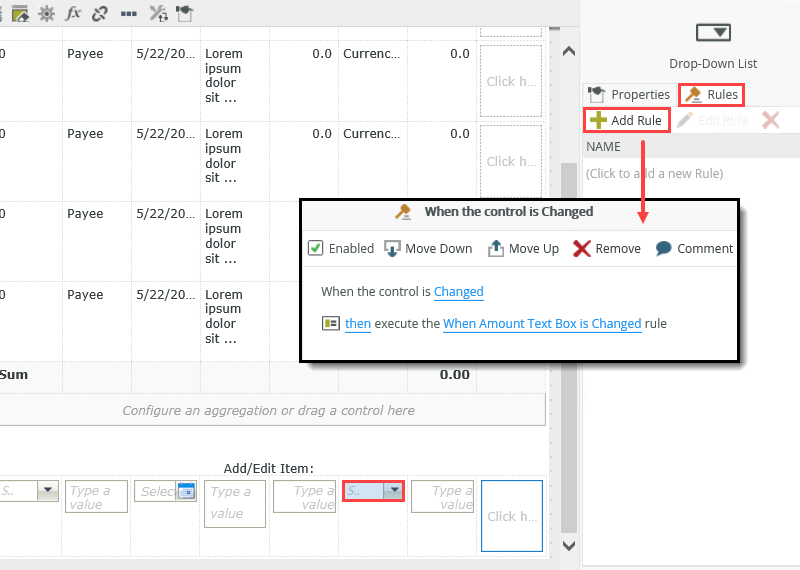
- Click FINISH save and exit the view. Check in the view.
- You want to perform this same action if the user changes the currency code or date value. Instead of re-configuring the entire rule for the other controls, you can reuse the existing rule. In the next few steps, you learn how to reuse rules for other controls.
- If time allows, open the Properties for the new view (right-click and select Properties), then use the Runtime URL to open the view. Test the Calculate USD Amount method by entering values in the Date, Currency Code, and Amount controls. You should see the USD Amount value change each time you update one of the other controls. Close the browser window. From the K2 Designer, use the browser back button to return to the K2 Application elements page.
- If you would like to see your rules in action, you can launch the new view, then enter values into the date, currency code, and amount controls.
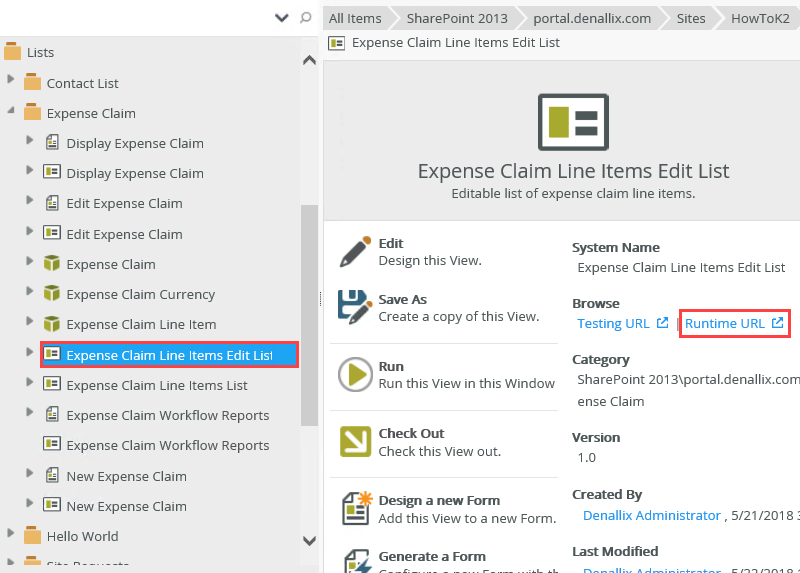
From the K2 Application elements page, right-click the Expense Claim Line Items Edit List view and select Properties.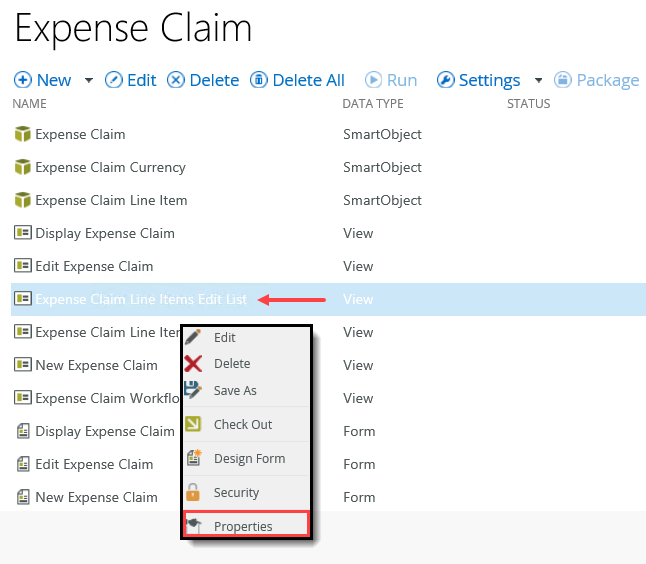
- The view opens in K2 Designer. In the central pane, click the Runtime URL link to open the view in a browser.
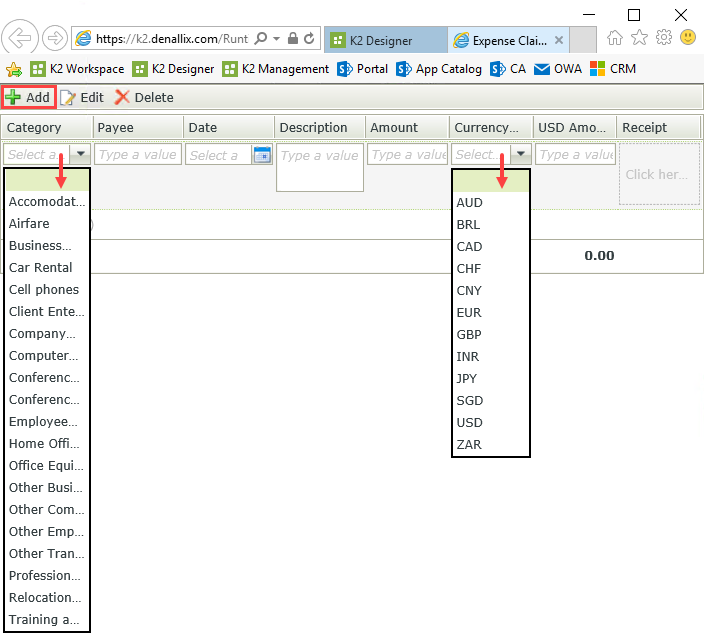
- After the view opens, click the Add button in the toolbar. If configured correctly, you should see the Category drop-down list populated with values (from the Azure SQL database) and the Currency Code drop-down list populated (with values from the sample web service).
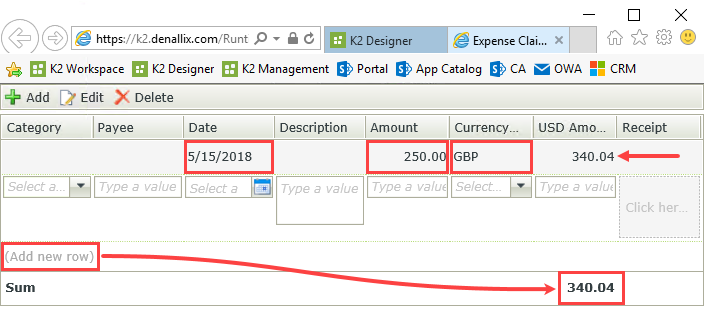
- Select a Date, enter an Amount, then select a Currency Code. After all three controls have values, the rule executes and you should see the USD Amount update with the calculated value. (The sample web service performs the calculation.) If you add a new row, you should see the Sum Data Label recalculate.
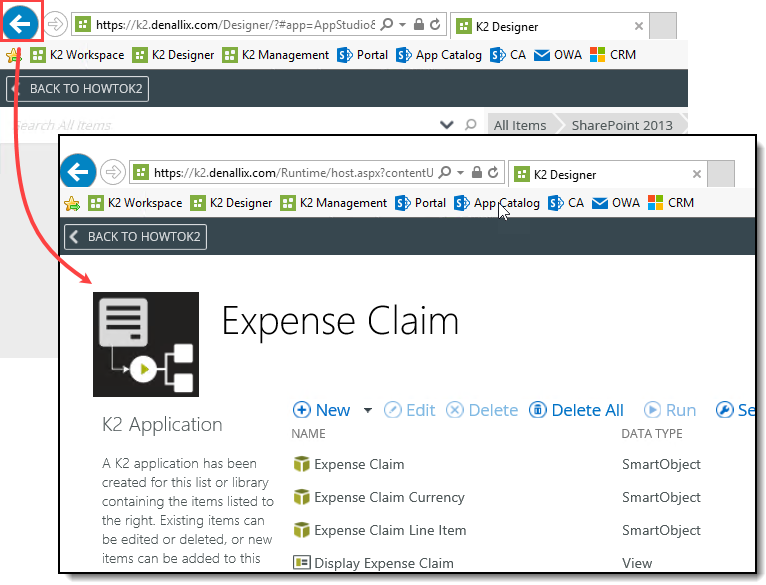
- Close the browser window displaying the view. From the K2 Designer page, click the browser's back button to return to the K2 Application elements page.
- If you would like to see your rules in action, you can launch the new view, then enter values into the date, currency code, and amount controls.
Review
In this step, you created an editable list view that you use to add expense claim line items. You learned how to add an aggregation to a column (the sum aggregation that provides a running total of the USD Amount entries). You learned how to use SmartObjects to populate drop-down lists. Finally, you learned how to add rules to perform calculation functions with SmartObjects and how to re-use rules for other controls. In the next step, you create a new item view for capturing comments from the approver or finance processor.