6. Create the Leave Request Workflow
In this step you will create the Leave Request Workflow. You will create a new workflow, then add steps and outcomes (lines) to automate the leave request approval process. You will add a (user) Task step and assign it to the requester's manager. The manager must decide to either approve or deny the leave request. You will add several system tasks that update the status property as the workflow moves through the steps.
-
Create a new workflow from the Workflow category and Name it Leave Request Workflow.Each workflow name must be unique. You will see an error if you try to duplicate workflow names. If you are working in a shared environment where there may be multiple builds of this workflow, consider adding your initials to the name so that it is unique. For example, Leave Request [YourInitials], like Leave Request KL.
- Similar to creating the Leave Request Form, you will create the Leave Request Workflow directly from its category. K2 saves the workflow in the appropriate workflow category.
Right-click the Workflow category and select New Workflow. Do not select the New Workflow (Legacy) option.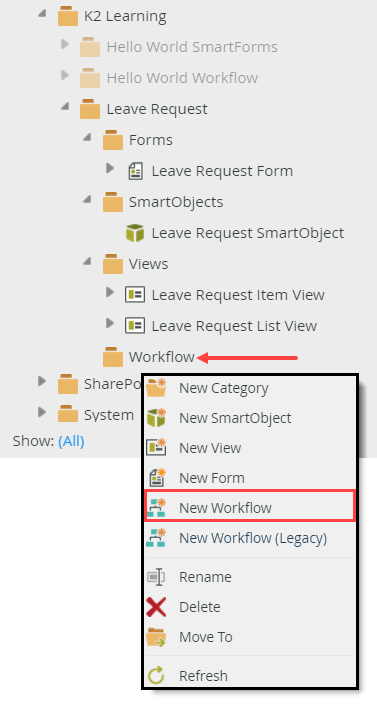
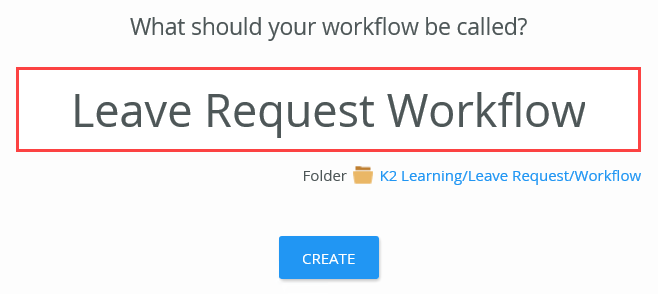
- On the workflow designer landing page, Name the workflow
Leave Request Workflow
then click CREATE.Each workflow name must be unique. You will see an error if you try to duplicate workflow names. If you are working in a shared environment where there may be multiple builds of this workflow, consider adding your initials to the name so that it is unique. For example, Leave Request [YourInitials], like Leave Request KL.The folder category selected is correct. You can change folders if needed by clicking the link next to the folder icon.
- Similar to creating the Leave Request Form, you will create the Leave Request Workflow directly from its category. K2 saves the workflow in the appropriate workflow category.
-
The K2 Workflow Designer launches with a helpful tips screen. If you like, step through the helpful tips to learn more about the workflow designer. Otherwise, click CLOSE.

- Begin by configuring the Start step. Here, you will associate the Leave Request Form as the form that starts the workflow. You will create a new State, then confirm that the start rule specifies the workflow starts when you click the Create button. Expand the Configuration Panel for the Start step. Add the Leave Request Form (SmartForm) as the form that starts the workflow. Complete the wizard configurations using the values in the table below. If a value is not specified, assume the default value.
Wizard Screen Value REFERENCES Leave Request SmartObject START RULE Help me configure it FORM STATE Create a new State: Leave Request Workflow FORM STATE Make this state the default for the form: CHECKED HOW DOES YOUR FORM START THE WORKFLOW? On Leave Request Item View, when Create Button is Clicked The Leave Request Workflow with SmartForm Association
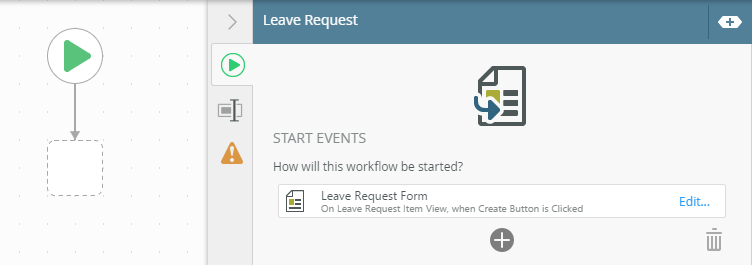
In this step, you will configure the workflow Start button. You will associate the Leave Request Form with the workflow. Once K2 recognizes the workflow's SmartForm, you can create a new state on the form (you will learn about states later), then configure the rule on the form that tells K2 to fire the workflow when you click the Create button. Before you start the next steps, take a minute to learn about the basic layout of the K2 Workflow Designer.
The K2 Workflow Designer environment contains four primary sections:
- the Toolbox on the left-side of the page
- the Design Canvas in the center of the page
- the Configuration Panel on the right-side of the page
- the Context Browser located within the Configuration Panel
The Toolbox is where you will find the different types of steps that you can add to a workflow. You can drag and drop the steps you need for your workflow onto the canvas. User steps usually involve human interaction, such as a person having to make a decision for the workflow to continue. System steps, such as sending an email or updating data in some other system, are performed by the K2 server. Lines connect steps to each other, and define the "path" that the workflow will follow.
Accessing steps in the Toolbox
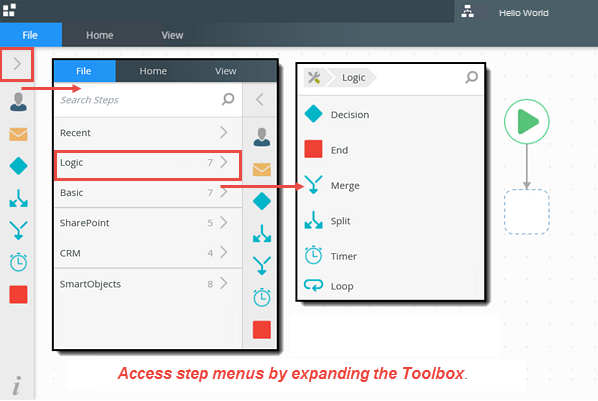
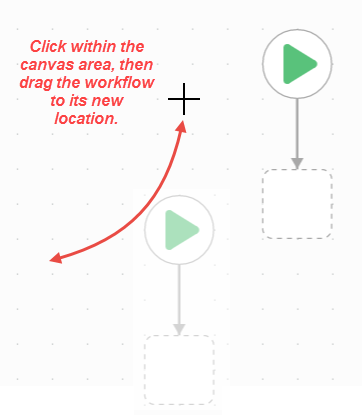
The Design Canvas is where you drag and drop the steps you need for constructing your workflow. You can move the workflow around by clicking within the canvas, then dragging your mouse to a new location. This is helpful if your workflow is larger than your browser screen.
Moving the workflow around the design canvas
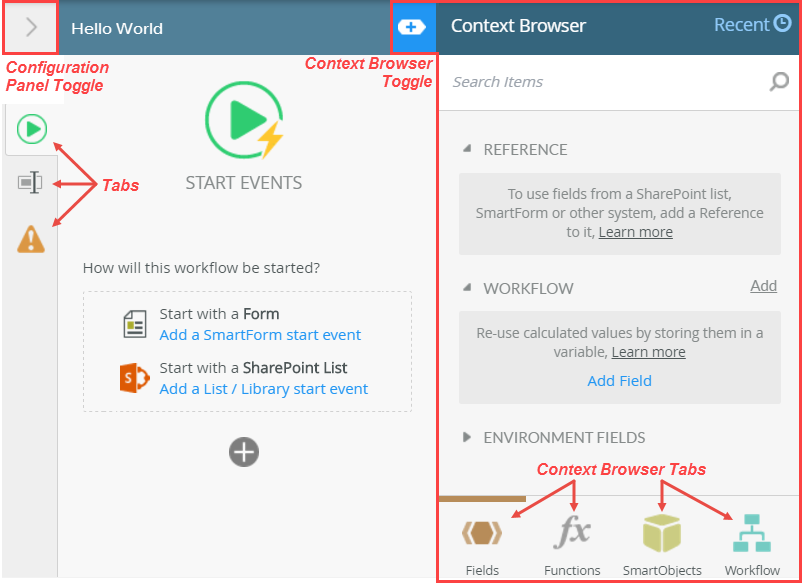
The Configuration Panel contains the settings for each step. After highlighting a step on the canvas and expanding the Configuration Panel, the Configuration Panel will display a series of tabs. The tabs are specific to the step type. The Configuration Panel also contains the Context Browser. The Context Browser provides access to variables, functions, SmartObjects, and workflow variables.
Accessing step tabs in the Configuration Panel; expanding the Context Browser
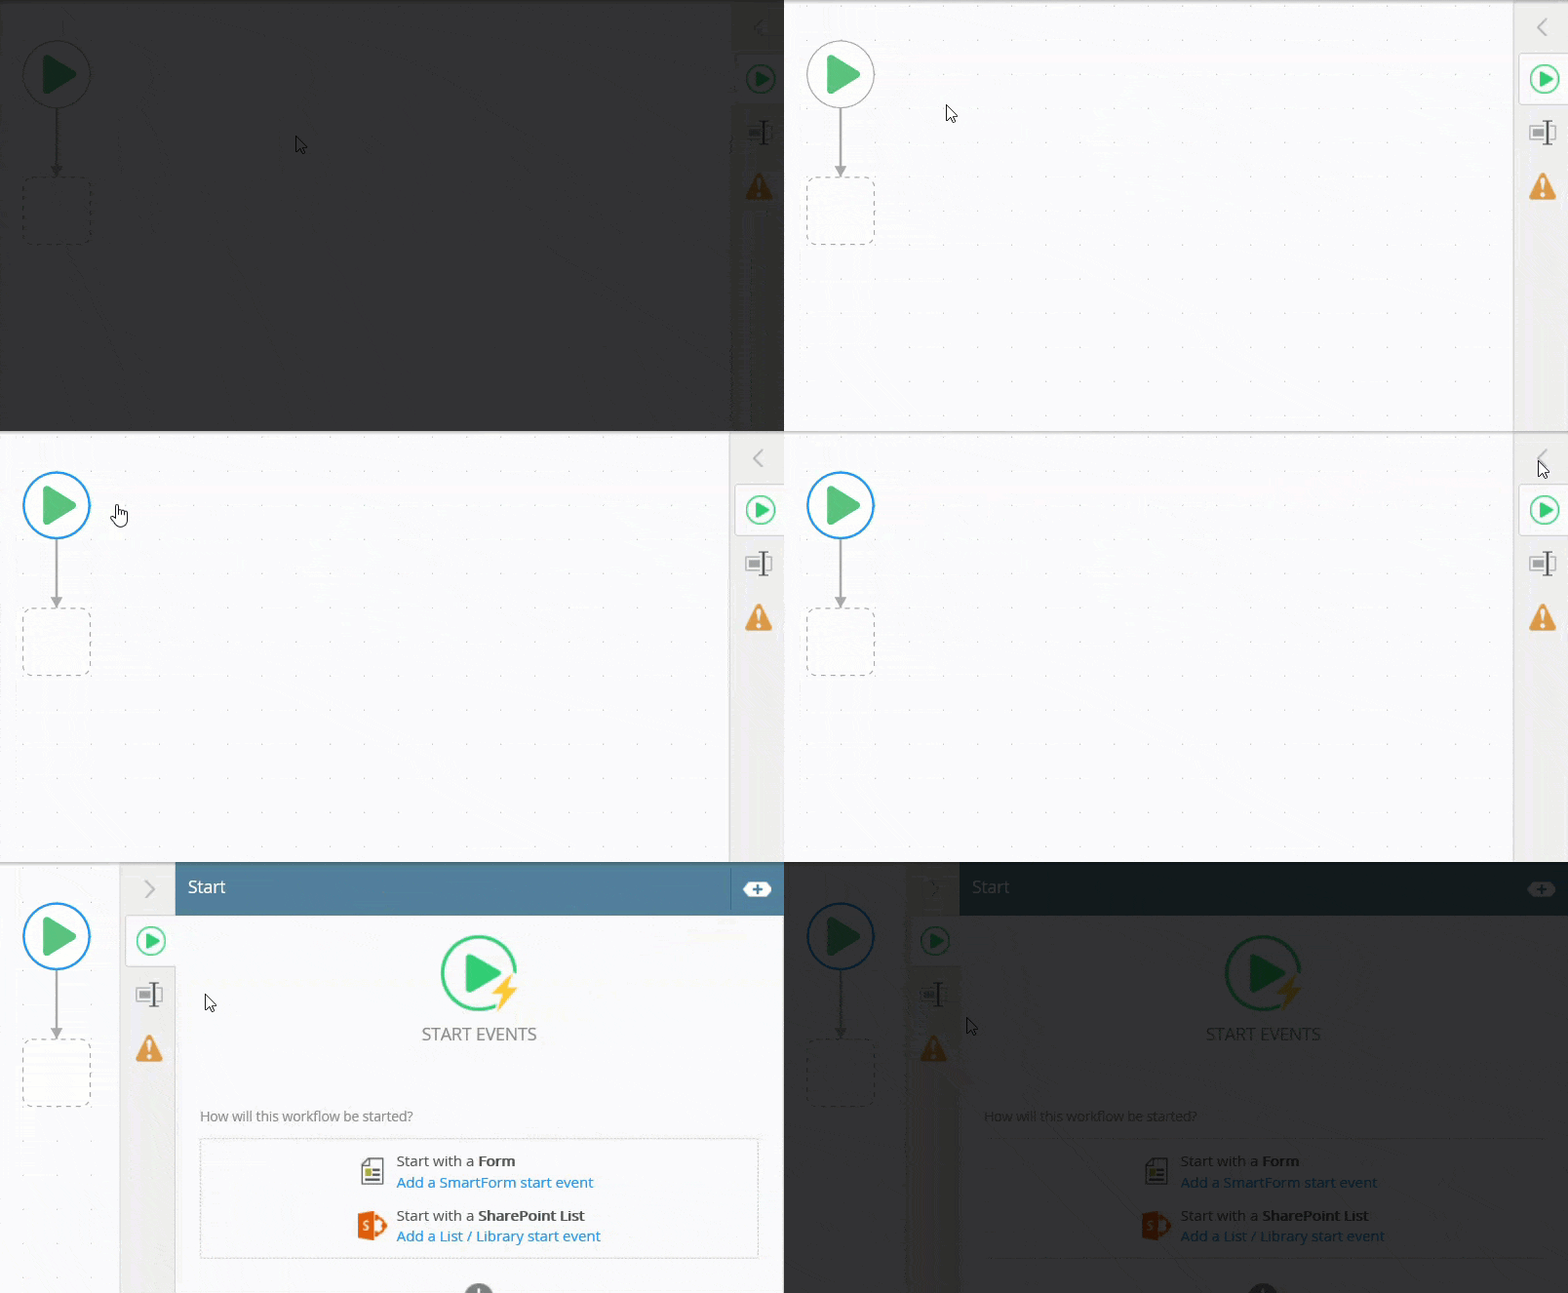
- Begin the Start step configuration. Click the green Start step to highlight it. When highlighted, a blue border will appear around the step. Expand the Configuration Panel.
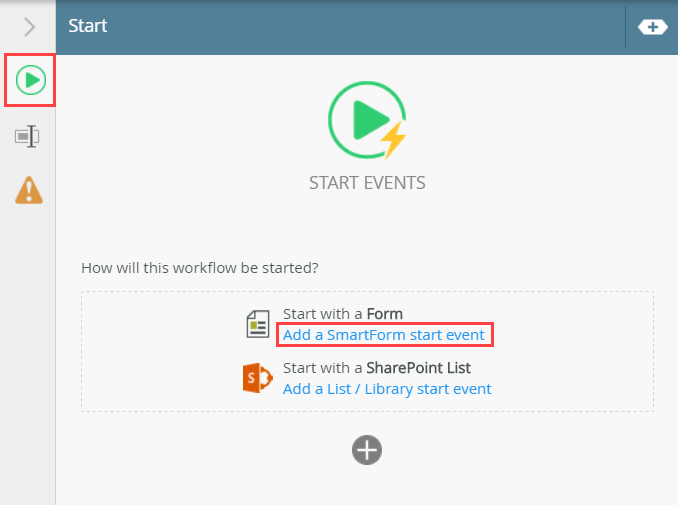
- Each step has associated tabs in the Configuration Panel. Clicking a tab opens the configuration settings. The Start step has three tabs: START, PROPERTIES, and ERRORS. You will begin with the START tab. The START tab is where you associate a SmartForm with a workflow. After selecting a SmartForm, the Start Workflow from a Form wizard launches and displays the configuration for starting the workflow. You want the workflow to start when the requester clicks the create button on the Leave Request Form. Begin your Start step configuration by clicking the Add a SmartForm start event link.
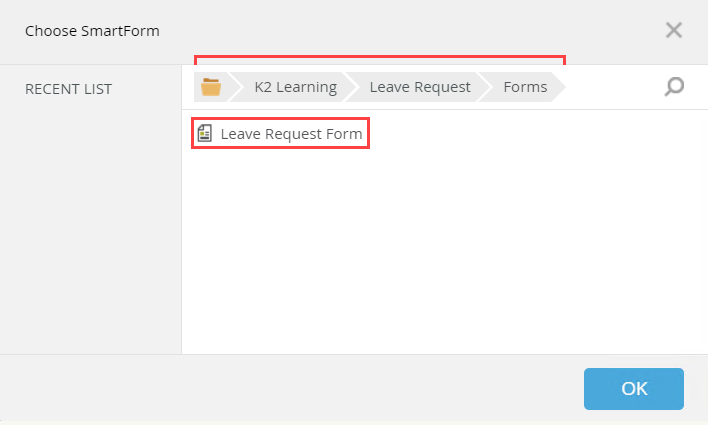
- Now you will select the Leave Request Form to associate the form with this workflow. On the Choose SmartForm screen, click K2 Learning, then Leave Request. Click Forms. Select the Leave Request Form, then click OK.
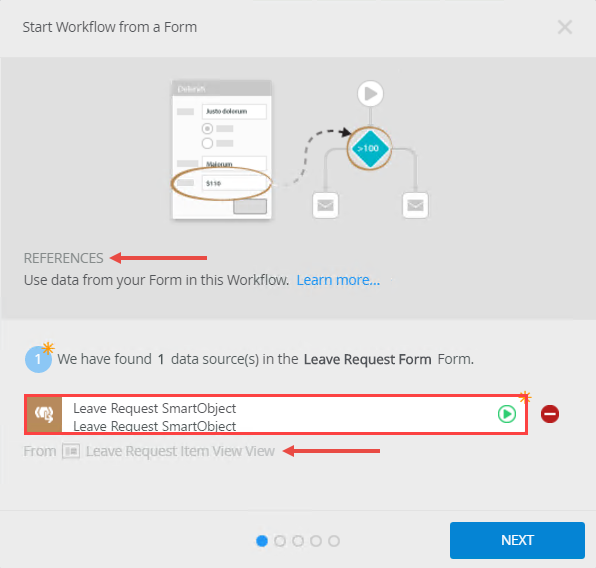
- The Start Workflow from a Form wizard launches. The first screen is the REFERENCES screen. K2 discovered the Leave Request SmartObject as the workflow data source. This is because the form contains the Leave Request Item View and the Leave Request List View. You created both views from the Leave Request SmartObject. K2 is now referencing the SmartObject in the workflow. You can now easily reference this SmartObject in other steps and rule configurations (you'll see how this works in the later steps). Click NEXT to continue.
A reference is essentially an association between a workflow instance and record(s) in some data store. For example, an item added to a SharePoint list starts a workflow. K2 creates a reference between the workflow instance and the item that was created in the SharePoint List. This allows you to easily work with the list item that started the workflow.
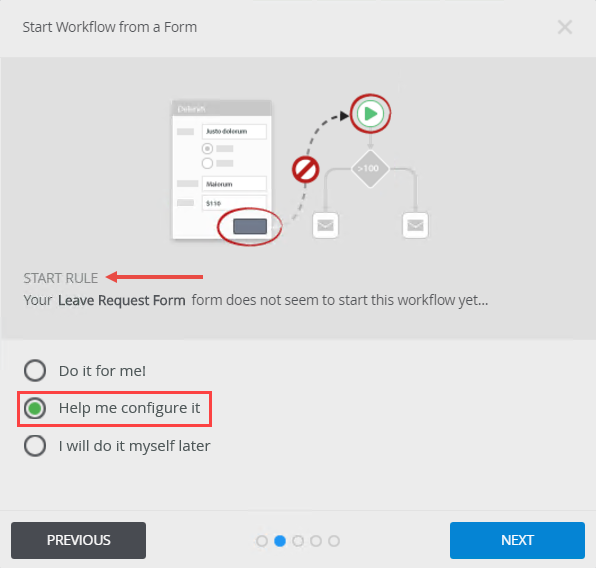
- On the START RULE screen, select the option to Help me configure it. The wizard will walk you through the steps for configuring the start rule on the Leave Request Form. Click NEXT to continue.
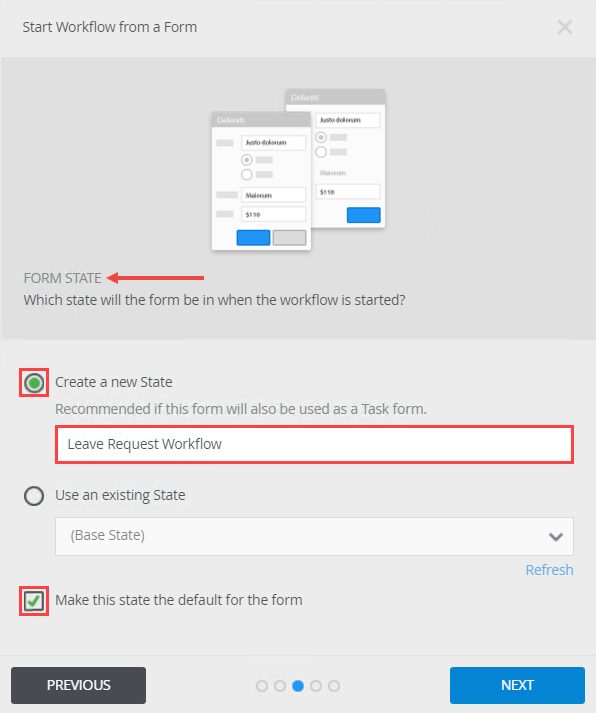
- On the FORM STATE screen, keep the default Create a new State option. Confirm the state name is Leave Request Workflow. Confirm the Make this state the default for the form option is true. (See the note box below for an explanation of states.) On this screen, you are creating the state for the form's configuration that the leave requester uses. Click NEXT to continue.
A state represents the configuration and behavior of a form for a specific use. States are generally configured for a (user) Task step. For example, a request approver's form may have form fields disabled because as the approver, they do not need to change any form field values. A form used for rework will have the same fields enabled, because the workflow originator needs to update those form field values. Rather than creating two separate forms, you can use different States for each step, then use rules to control how the same form should behave in each of those two states.
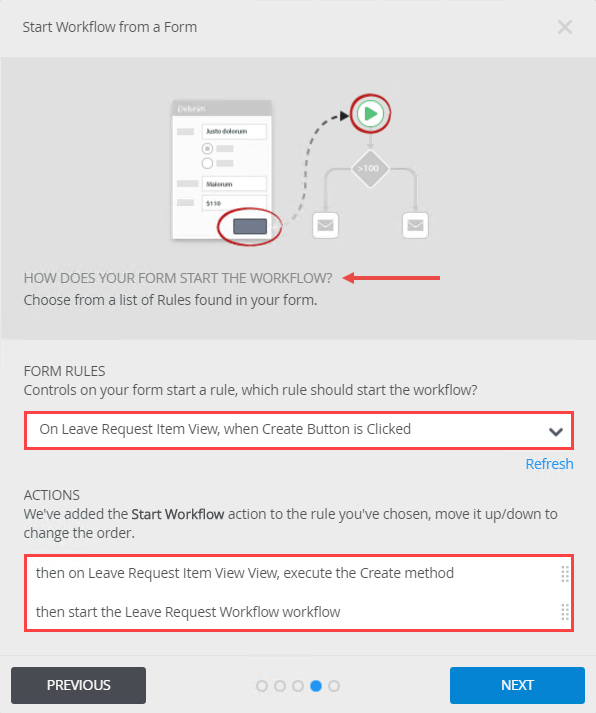
- The next screen is HOW DOES YOUR FORM START THE WORKFLOW? This is where you specify the action that starts the workflow. In this application, clicking the Create button starts the workflow. Confirm the FORM RULES drop-down list displays the create button clicked rule. If it does not, change the start rule to the create button clicked rule. Confirm the ACTIONS show that first, K2 executes the create method, then the workflow starts. Click NEXT to continue.
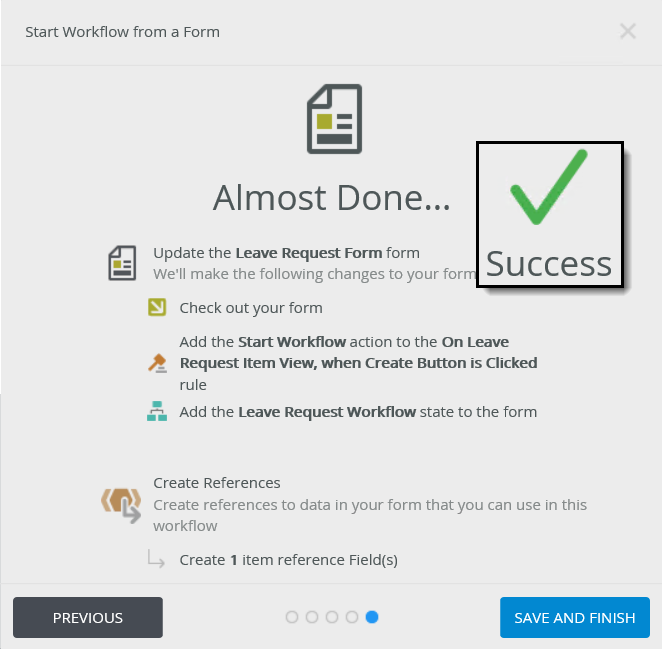
- The last screen displays a summary of the actions K2 takes for configuring the START tab. This screen displays all the rule configurations that K2 performs based on the wizard settings. Review the settings, then click SAVE AND FINISH. When you see the Success check, click OK to close the wizard.
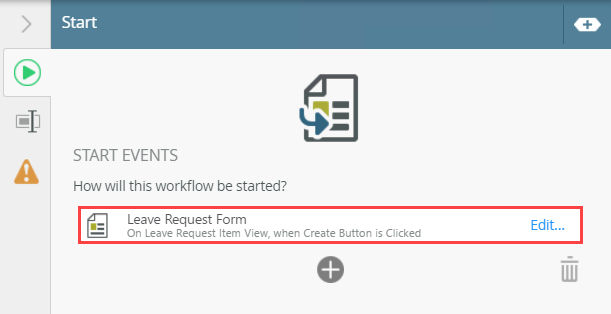
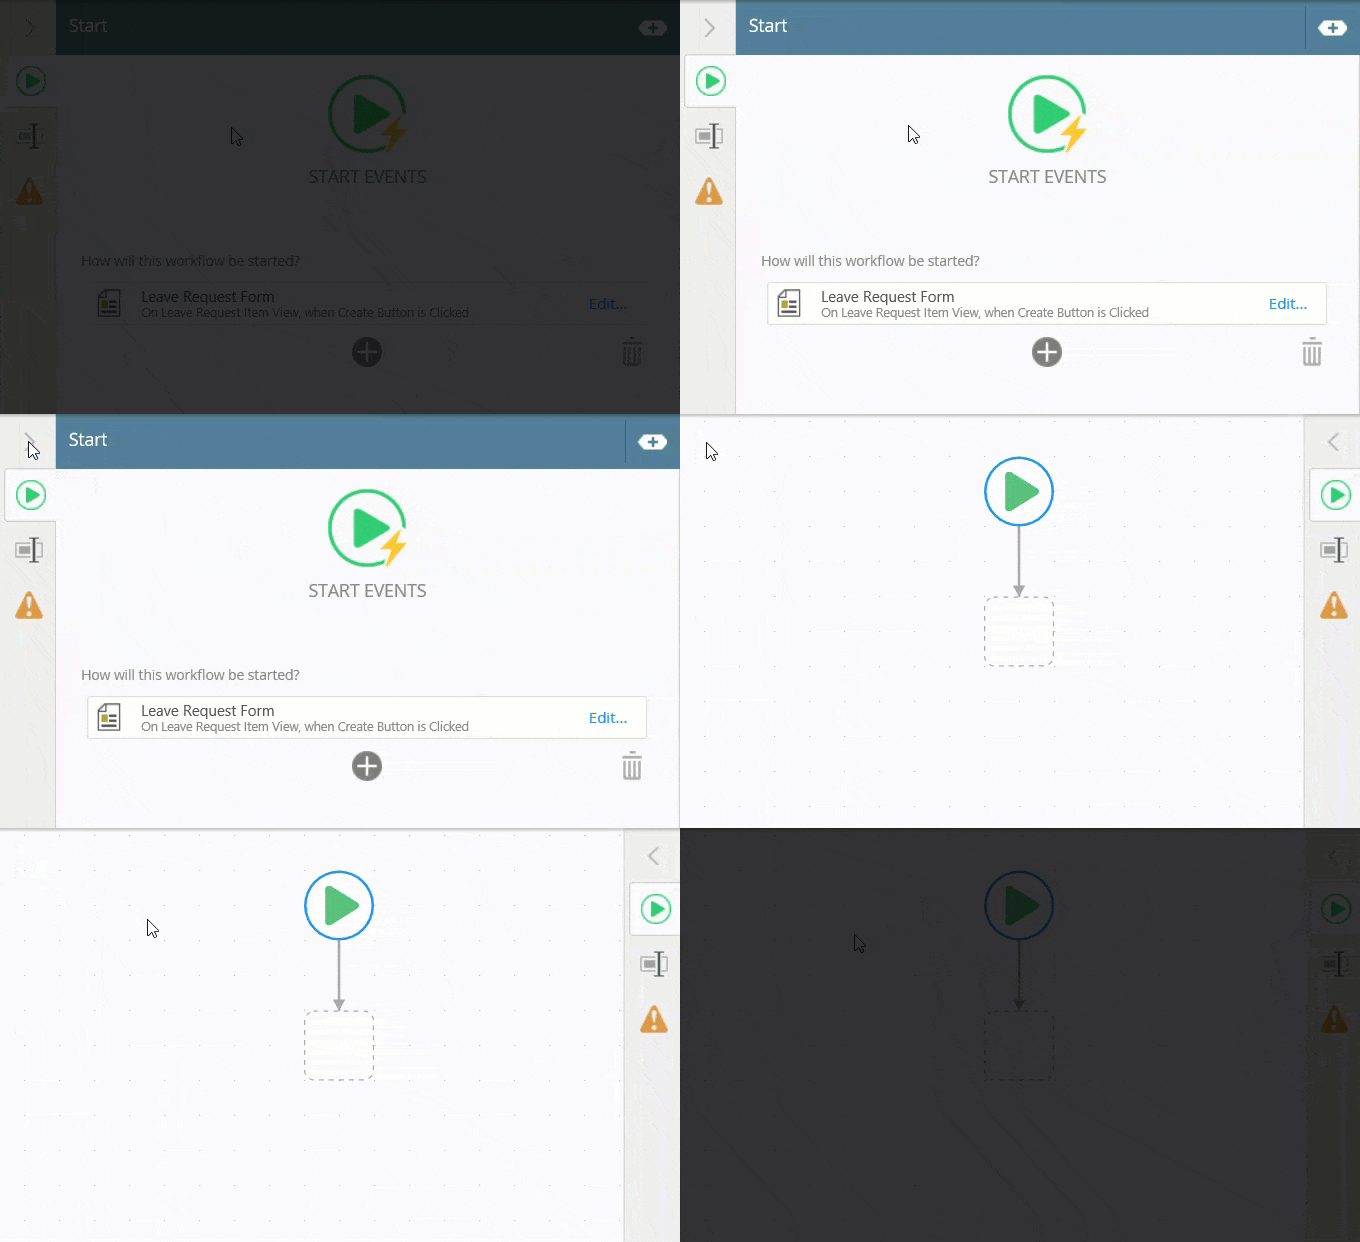
- In the Configuration Panel, notice the Leave Request Form starts the workflow. Collapse the Configuration Panel.
Review
In this step, you created the Leave Request Workflow. You selected the SmartForms option with the Leave Request Form. K2 discovered the Leave Request SmartObject and configured it as the default reference to use in the workflow. You created a new state that contains the form configuration and behavior that the requester sees. Last, you confirmed that clicking the create button is the action that starts the workflow. In the next step, you will add a SmartObject Method step that updates the status property. Then, you will add a Task step and configure the approval task (approve or deny) for the approving manager.