Configurations
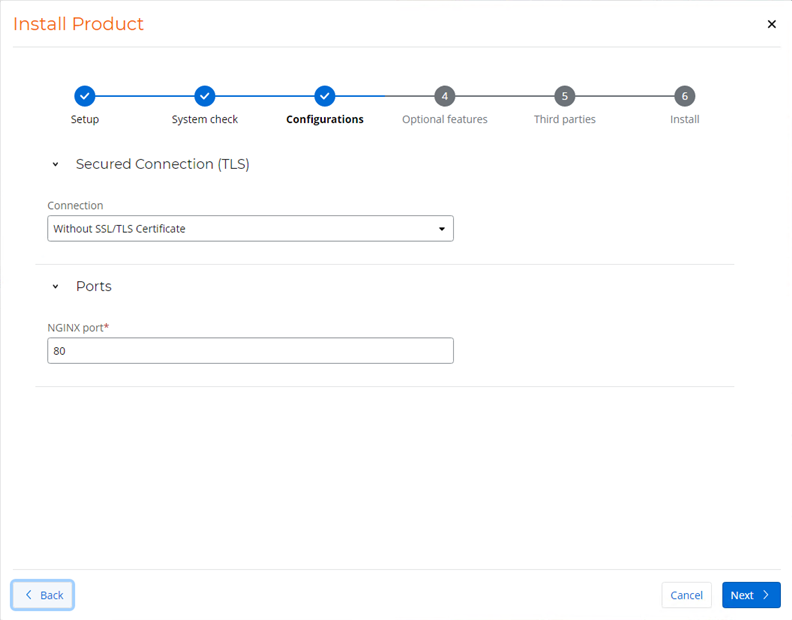
The Configurations page for Process Discovery server installation allows you to choose whether or not to use secure connections with SSL/TLS, and to specify the port settings for your environment.
Configure components
Follow the steps below to configure each of these sections according to your specific requirements.
-
Select the connection:
-
Without SSL/TLS Certificate: Select this option if you do not require secure communication and do not want to use SSL/TLS encryption for your connection. This option is suitable for non-secure environments or when SSL/TLS encryption is not necessary.
-
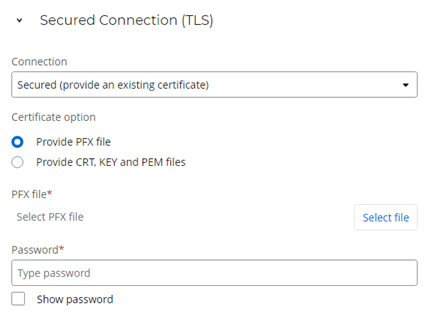
Secured (provide an existing certificate): Select this option if you need a secure connection for your setup and intend to use an existing PFX file, or CRT, KEY, and PEM certificate files to enable SSL/TLS encryption. This is suitable for ensuring secure communication in environments where valid certificates are already available.
- Make sure that the certificates (PFX, PEM, CRT, and PEM) are trusted on the client machine (Discovery Robot).
-
Your files must meet the following requirements:
-
They must be signed by the organization's certificate authority (CA).
-
The Subject field should contain the Process Discovery server FQDN (for example, CN=prodserver.mycompany.com).
-
The Subject Alternative Names field should also include the Process Discovery server FQDN (for example, DNS=prodserver.mycompany.co).
-
-
-
If you select Secured (provide an existing certificate), you must provide either a PFX file or CRT, KEY, and PEM files:
-
Complete the following required fields to provide a PFX file (this is the default option):
-
Provide PFX file: Click Select file to locate and choose the PFX file that contains your valid certificate.
-
Password: Enter the password associated with the selected PFX file. This password is required to access and use the certificate. Double-check for accuracy and avoid any typing errors, as incorrect passwords can result in installation failures.
OR
-
-
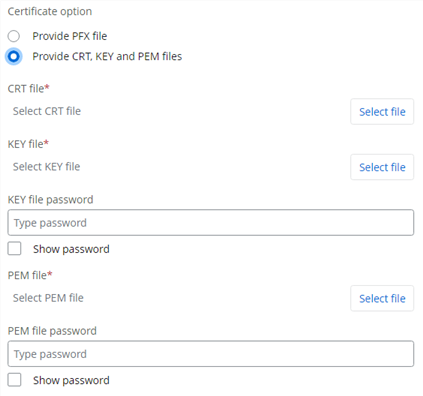
Complete the following required fields to provide CRT, KEY, and PEM files:
-
CRT file: Click Select file to locate and choose the CRT file that contains your valid certificate.
-
KEY file: Click Select file to locate and choose the KEY file that contains your private key.
-
KEY file password: Enter the password associated with the selected Key (KEY) file; this password is necessary to access and use the certificate. Double-check for accuracy and avoid any typing errors, as incorrect passwords can result in installation failures.
-
PEM file: Click Select file to locate and choose the PEM file that contains your valid certificate in PEM format.
-
PEM file password: Enter the password associated with the selected PEM (PEM) file; this password is necessary to access and use the certificate. Double-check for accuracy and avoid any typing errors, as incorrect passwords can result in installation failures.
-
-
-
Configure the NGINX port as needed. Check that the default port is not currently in use on the server. If the port is already in use, change it to an available port.
-
80: The default port for installations that do not use SSL/TLS.
-
443: The default port for installations that use SSL/TLS to establish secure connections.
-
-
(Optional) To set up the necessary firewall rules for the application, go to Windows Settings > Update & Security > Windows Security > Firewall & network protection > Advanced settings and select Open all ports in Windows Firewall. (The exact location may vary depending on your Windows version.)
Once you have finished configuring your settings, proceed with the installation by clicking Next >.
< Previous step: System Check
> Next step: Optional Features