Step 7: Installation Package Contents
The default Installation package contents are displayed:

Customize prerequisites
Mandatory components cannot be customized, however, you will probably want to install Notepad++ and the HeidiSQL Database viewer, if not already installed.
-
Select the optional components you want to install.
-
Click Next.

To accept the default values, click Next and skip to Step 8: Set Install Folder Location; otherwise, click Customize and follow the steps below:
Customize application database
If you want to configure the database engine that's automatically installed as part of the installation package, you can use this window to:
-
Override the default port
3306. -
Provide strong passwords for the two users created: root and pdbdev (the default for both is
Kryon2022!).
Or, you can use this window to connect to a preinstalled database engine.
To configure the automatically installed application database engine:
-
Select Install locally.
-
Leave the default port
3306unchanged or enter another port number. -
Provide strong passwords for both the
RootandPdbdevusernames. -
Click Next

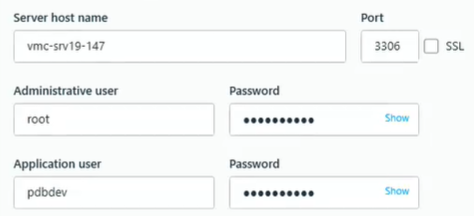
To connect to a preinstalled Application database:
-
Select Connect to an existing database.
-
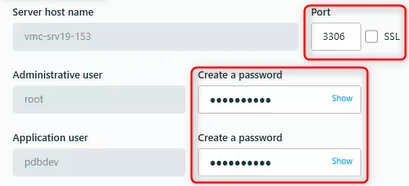
Fill out the required fields.
-
Enter the preinstalled Server Host Name.
-
Enter the Port number of the existing database.
-
Enter the user names and passwords for both the Administrative and Application users.
-
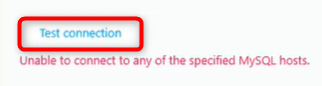
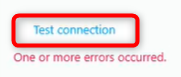
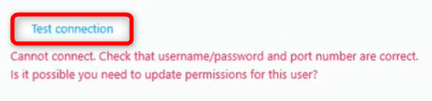
Click Test Connection to verify that your server connection is working.
-
-
-
-
When the test is successful:
 , click Next to continue.

The Administrative user needs full permissions to create schema and tables.
Input details carefully to prevent error messages:
Customize Mongo database
If you want to configure the database engine that's automatically installed as part of the installation package, you can use this window to:
-
Override the default port
27017. -
Provide strong passwords for the two users created: the Administrative and Application users (the default for both is
Kryon2022!).
Or, you can use this window to connect to a preinstalled database engine.
To configure the automatically installed Mongo database:
-
Select Install locally.
-
Leave the default port
27017unchanged or enter another port number. -
Provide strong passwords for both the Administrative and Application usernames.
-
Click Next.

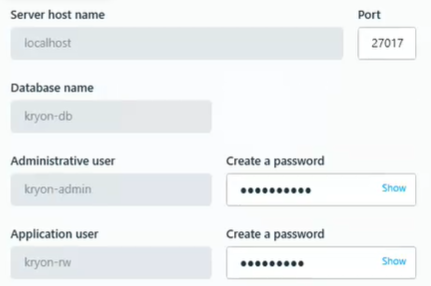
To connect to a preinstalled Mongo database:
-
Select Connect to an existing database.
-
Enter the preinstalled Server Host Name.
-
Enter the Port number of the existing database.
-
Enter the Database name.
-
Select the checkbox if you want to use Secure Sockets Layer (SSL).
-
Enter the user names and passwords for both the Administrative and Application users.
-
Click Test Connection to verify that your server connection is working.
-
Click Next.

The Administrative user needs full permissions to create schema and tables.
Customize Queue manager
If you want to configure the queue manager (RabbitMQ server) that's automatically installed as part of the installation package, you can use this window to:
-
Override the default port
5672. -
Provide a strong password for the admin user (the default is
Kryon2022!).
Or, you can use this window to connect to a preexisting RabbitMQ installation.
To configure the automatically installed Queue manager:
-
On the Customize Queue Manager window, select Install locally.
-
Leave the default port
5672unchanged or type in your port number (for SSL/TLS change the port to5671). -
Provide a strong password for the admin Username.
-
Click Next

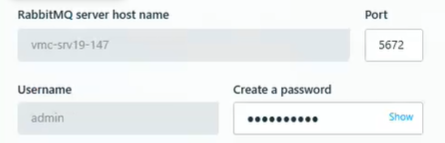
To connect to a preinstalled Queue manager instance:
-
On the Customize Queue Manager window, select Connect to an existing database.
-
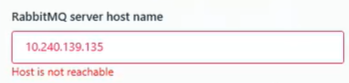
Enter the RabbitMQ Server Host Name
When testing the connection, a digit mistype can appear as an unreachable host.
-
Enter the port number of the preexisting RabbitMQ server.
-
Enter the Username and provide a strong Password.
-
Click Test Connection to verify that your server connection is working.
-
Click Next.

Customize Console
-
Leave the default port
80unchanged, or type in your port number (to work with SSL/TLS use port443). -
Click Next.
