One Save Button Per Page
This tutorial shows you how to consolidate all your Save/Cancel buttons into one.
When you have complex pages, the buttons can get pretty cluttered.
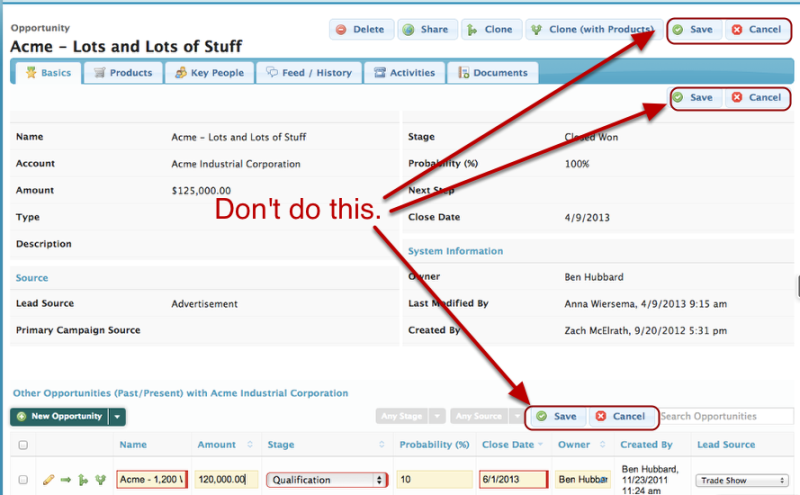
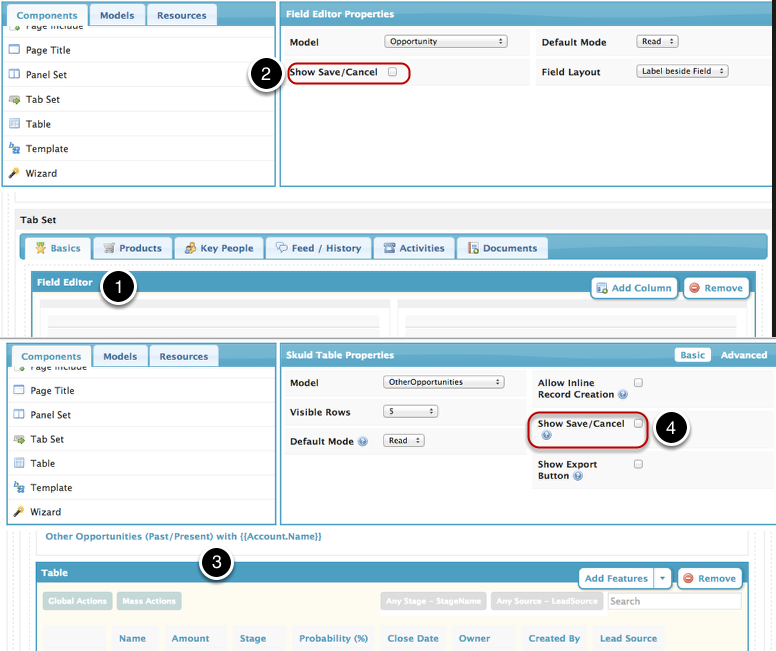
Step 1: For each field editor and table on your page, unclick "Show save and cancel buttons."
Step 2: Add a Save / Cancel button on your Page Title.

- Add a Page Title component if you don't already have one.
- Click Add action.
Choose Save / Cancel as the action type, and choose which models to Save with this button.
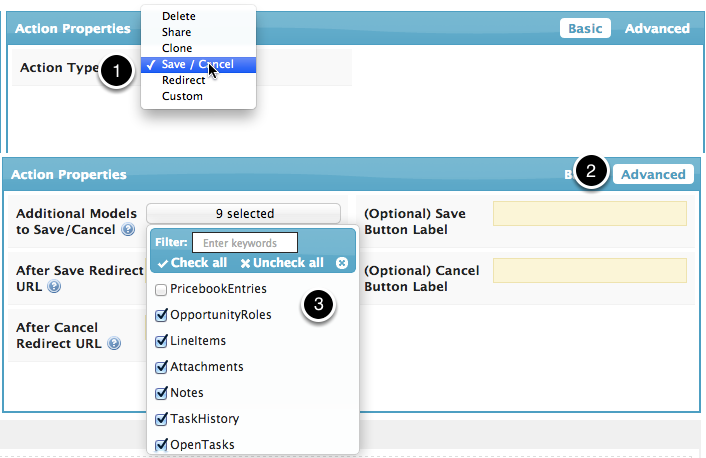
- In General Action Properties, choose Save / Cancel as the action type.
- Click Advanced.
- In Additional Models to Save / Cancel, check each model that you want this button to Save / Cancel.
Step 3: Click Save and then click Preview.

Enter any necessary parameters.
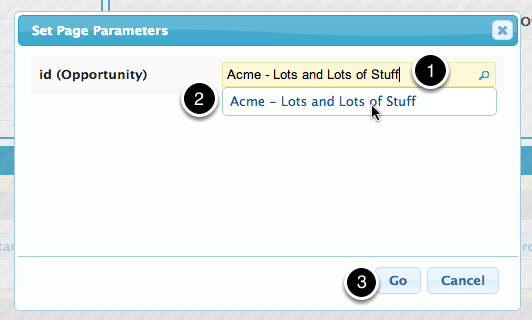
- Start typing the name of a record.
- Select it from the list.
- Click Go.
Success!
Now this one Save button will Save changes for all the models in your page.
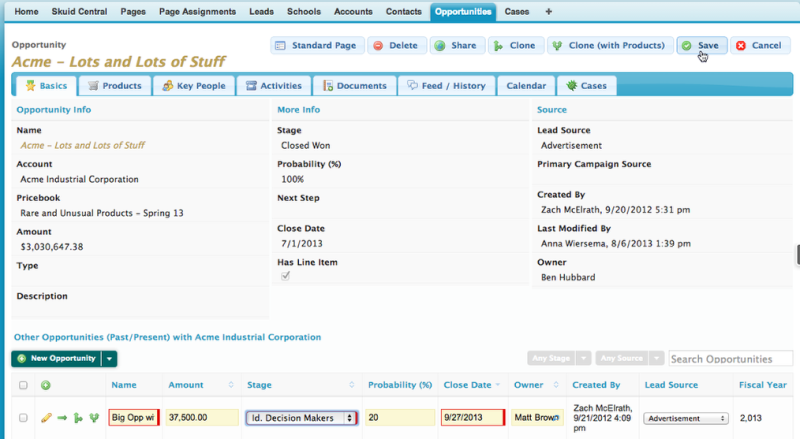
And your page is less cluttered and easier to use.
Having trouble? Go to the community to ask questions, share ideas, and report problems.
Save button best practices and caveats
- If possible, use a Button Set component or Page Title component to create a universal Save button at the top of the page instead of having individual save buttons on each field editor and table component on the page.
Note: This approach will not work when saving information in a page include using a save button on the parent page.
- While the Button Set component is generally the best option, it may be necessary to use a Page Title button bar for certain pages. Note that Nintex Apps for Salesforce only displays validation rule or trigger errors for components if the initiating Save button is on a component tied to the model being saved. For example, if the Page Title is on the User model, but the Save button saves Opportunity items, error messages returned by Salesforce for the Opportunity data will not display. The fix: change the Page Title's model to Opportunity.