Agent Designer
Important: Agents is currently in beta. For more information, see the Nintex Beta terms document.
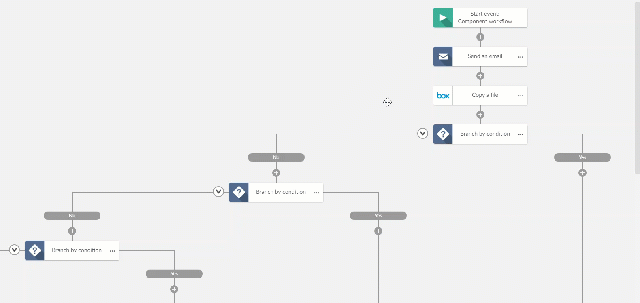
Use the Agent Designer to design your agent and configure your agent start event An event that triggers a workflow to run when it occurs. An example is Box - New file, which triggers the workflow to run when a new file is uploaded to the specified folder. and actions A tool for building the processes, logic, and direction within workflows. Actions are the steps the workflow performs to complete a process.. The Agent Designer includes the toolbar, actions toolbox, and designer canvas.
Jump to:
Open the Agent Designer
-
Go to Agents > All agents.
-
Open the Agent Designer:
-
New agentflow: Click Create agentflow.
-
Existing agentflow: Select the agentflow you want from the agentflows page.
-
Add an action to the agentflow
Actions define the sub processes that occur when your agentflow runs.
Add from the actions toolbox
- On the left side of the Agent Designer, in the actions toolbox, find the action.
To search for actions, click inside the Search text box above the action groups and begin typing the action name.
To browse actions, expand action groups.
For example, Logic and flow includes actions to call a agentflow and related tasks while Operations includes actions to log instance details and set a variable value.
-
Drag the action onto a drop zone (
 ) on the designer canvas.
 Initially, the action is unconfigured and indicated by (
 ). For details on action configuration, see Action configuration panel.
Rename, copy, disable, and delete actions
Rename an action
-
Double-click the action name to open the action name for editing.
You can also click
 to the right of the action and then select Rename.
Copy and paste an action
- Click to the right of the action and then select Copy.
- Click a drop zone () and then select Paste.
Disable or enable an action
Disabled actions (including any child actions) appear greyed out on the designer and are omitted when the agentflow runs.
- Click to the right of the action and then select the option you want.
Delete an action
- Click to the right of the action and then select Delete.
Navigate large agentflows
Compress the agentflow design by collapsing container actions. Zoom in or out on your agentflow design using the zoom selector.
-
Click
 or
or  on the upper left border of the container action.
-
Drag and drop the actions, one by one, to a drop zone (
) within the container action's borders. The container action must be expanded to see the drop zone.
Note: To summarize the actions contained in an Action Set container, click Action Set to open its configuration panel and then update the Description field.
- Click
 (Collapse all) the upper left of the designer canvas to hide all container actions in the Agent Designer.
 - Click
 (Expand all) the upper left of the designer canvas to display all container actions in the Agent Designer.
- Click the plus or minus sign on the zoom selector on the upper left of the designer canvas.
- Click and drag on the designer canvas to navigate agentflow, instead of using the vertical and horizontal scroll bars.
Action options menu
The action options menu contains options to manage an action in a agent. It provides options such as copy, rename, disable or enable, and delete.
-
Click
to the right of the action.
The following options are available:
| Option | Description |
|---|---|
|
Configure |
Opens the Action configuration panel. |
| Copy |
Copies the action and its configuration settings for pasting to a drop zone on the designer canvas. Note: The options menu for a drop zone ( |
|
Delete |
Removes the action from the agentflow. |
|
Disable |
Omits the action (and any child actions) when the agentflow runs. |
|
Enable |
Includes the action (and any child actions) when the agentflow runs. |
|
Rename |
Displays the action name in editable form for you to customize. The custom name is displayed on the canvas; when the action is executed during the run of the agentflow, the custom name is also displayed on the Instances page. |