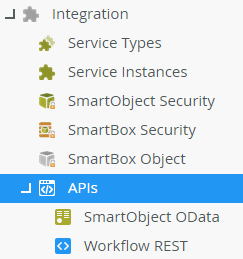
APIs
Use the SmartObject OData API to interact with SmartObject data and expose that data to developers and third party tools, such as Microsoft Power BI and Microsoft Excel. Also, build custom reports using SmartObject data, such as workflow statistics and line of business information for which you have SmartObjects.
Use the Workflow REST API to manage workflows, workflow instances, and tasks in custom ASP.NET pages, custom apps, and third party tools, such as Microsoft Power Automate.
For API integration, the logon permissions for the K2 service account and application pool account using the API must be enabled. For more information see : Interactive Logon Authentication
Click on APIs to load the API Authentication and Administrators configuration page.


You must set up Azure Active Directory permissions before you can enable the APIs. See AAD Consent for more information. You do not need AAD consent with Nintex Automation using Active Directory.
Authentication Methods
The APIs use Basic and OAuth for Authentication.
- Turn off Multi-Factor Authentication before granting consent. You can then turn MFA back on once consent has been granted.
This is because the underlying code was created before Microsoft's latest MFA implementation and therefore the consent loop will not work unless MFA is disabled. Note that the consent loop does not affect runtime authentication. Once the app is consented, you can enable MFA again and the runtime authentication will operate as expected. In other words, disabling MFA is only required while you are granting consent. - You cannot log in to the Workflow REST API and the SmartObject OData API using Basic Authentication with an Azure Active Directory account that has Multi-Factor Authentication (MFA) enabled.
You must use a custom connector when using OAuth for authentication.
You can create your own custom Power BI Extension for use with OAuth authentication. See https://www.progress.com/tutorials/odata/connect-to-odata-from-power-bi-using-oauth2-authentication for further information.
AAD Consent
Click on the Setup AAD Consent button to enable Azure Active Directory authorization. You only need to do this once.
You must login with a Tenant Admin account to setup AAD consent as it requires the Directory.Read.All permission. It also requires User.Read and Directory.AccessAsUser.All.

You need AAD consent for K2 Cloud, and Nintex Automation with SharePoint Online. The SETUP AAD CONSENT button only works when AAD access was set up through SharePoint Online. If you manually configured AAD you must manually grant Admin consent by editing the {YourTenantID} value in the following URL with your details, then browsing to the URL.
https://login.microsoftonline.com/{YourTenantID}/oauth2/authorize?client_id=57928c92-7074-45f8-b89e-fe2556ac187f&response_type=code&redirect_uri=https://help.nintex.com/en-US/HELP_DOC/AADpages/AADSuccess.html&resource=https://api.k2.com&prompt=admin_consent
For more information on OAuth resources and manually configuring the product for AAD see the following articles:
- Configure K2 for Inbound OAuth - this article explains the configuration steps needed to configure the product for inbound OAuth including the importance of configuring the Bearer Token OAuth resource in the product.
- Manually Configure K2 for Azure Active Directory (AAD) - this article explains step by step how to manually configure the product for AAD.
You might run into the “Receiving AADSTS90094: The grant requires admin permission.” error when you open Package and Deployment Tool if you didn’t enable AAD Consent.
You do not need AAD consent with Nintex Automation using Active Directory.