How To: Create a SmartForm to Link an Application's SmartForms to a Secondary List or Library
-
This content uses the legacy Nintex K2 for SharePoint app. For more information about using the new Nintex Automation for SharePoint app, see Adding the App.
K2 for SharePoint allows you to reuse artifacts with matching lists and libraries. To reuse a K2 for SharePoint application's SmartForm, you execute a system SmartObject method to get the URL link properties of the primary list or library's SmartForms and then execute a second system SmartObject method to link them to the secondary list or library.
Using a SmartForm to execute SmartObject methods to reuse a K2 for SharePoint application's SmartForm

Scenario
You have regional staff employee lists (Employees_US, Employees_EU, and Employees_APAC) in SharePoint, and the data structure of the lists is the same and they are on the same SharePoint Web Application, you appify a primary list (Employees_US) with SmartObjects and SmartForms, and then reuse the SmartForms to view data from your secondary lists (Employees_EU and Employees_APAC).
You create a SmartForm that executes the system SmartObject methods that link a secondary SharePoint list or library to a primary list or library's SmartForms. You can link any standard primary K2 for SharePoint application SmartForm to a matching secondary list or library.
Steps
You first create your SharePoint matching lists, then appify your primary list, creating SmartObjects and SmartForms. The SmartObject methods that create the mapping between the primary list's SmartForms and the secondary list require the Site URL and List ID of both lists. You'll create a new SmartForm with four text box inputs and three storage parameters used to execute the SmartObject methods as detailed in Reuse K2 for SharePoint SmartForms. Once you create the rule to execute the SmartObject methods on the view and add it to a form, run the form to link the secondary list to the primary list's SmartForms.
Setup Steps
The following steps set up the scenario from start to finish. If you want to skip the setup steps and view the topic step, go to Create the SmartForm to Link the Secondary List to the Primary List's SmartForms.
- Create two matching SharePoint lists
- In SharePoint, create a custom list for the Employees of the USA region.
- Name the List Employees_US
- Create the following columns
- Title, using column type Text
- Name, using column type Text
- Address, using column type Text
- Phone, using column type Number

- In your European Union subsite (EU), create another custom list for employees of the European Union region
- Name the List Employees_EU
- Create the same columns as you did in the Employees_US list

- Appify your primary list. This creates the artifacts to reuse.
- For your Employees_US list, select the K2 Application icon from the list menu bar
- Select the Create SmartForms option on the Create K2 Application page

- Keep the default selection of Use K2 smartforms as the New, Edit, and Display forms for this list/library option
- Click OK to finish creating the K2 application
- The system creates SmartObjects, views, and forms for the list

- Identify and store the Site URL and List ID values of your primary and secondary lists, as you'll use these in the SmartForm that links them.
- Click on your list's List Settings icon in the List menu

- On the List Settings page, copy the first portion of the URL as the Site URL. Include site and subsite values, such as https://sa-sp-current.denallix.com/HR/USA

- Copy the string at the end of the URL between =%7B and %7D as the List ID

- Do this for both Employee lists. Copy the values to a text file for later use in the form
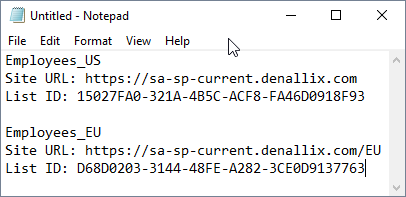
- Click on your list's List Settings icon in the List menu
Create the SmartForm to Link the Secondary List to the Primary List's SmartForms
You create a SmartForm that takes the Site URL and List ID of your primary list and executes a SmartObject method to get the New, Edit, and Display form URLs. It uses these values and the Site URL and List ID of your secondary list and runs another SmartObject method to link the SmartForms.
- Create the linking View
- In the Designer, click the Create - View option on the main page, or right-click a category and select New View. If you are not familiar with creating views, see How To: Create an Item View and a List View.
- Name the view LinkSPSmF_View
- Select a Category for the view
- Select Item View

- Click Create to start creating the view
- Click Create Layout Table Only
- Specify a table of two columns and three rows

- Add the Label, Text Box, and Button controls to the view. The text box controls hold the Site URL and List ID values for use in the rule that executes the SmartObject methods
- Drag a Label control from the Toolbox into the first cell of the table
- Specify PrimarySiteURL as the Name
- Specify Primary Site URL as the displayed Text

- Drag a Text Box control into the same cell as the label
- Specify PrimarySiteURL_Input as the Name
- Add a Label and Text Box in the cell below for the Primary Site ID
- Add Labels and Text Boxes in the cells of the second row for your Secondary Site URL and List ID
- Drag a Button control into the third cell of the first column
- Specify LinkSharePointList_Button as the Name
- Specify Link SharePoint List as the displayed Text

- Create the three parameters for storing the New, Edit, and Display form URLs
- Select the Parameters tab at the top of the view
- Add the following text parameters
- New Form URL
- Edit Form URL
- Display Form URL

- Create the rule to execute the Get SharePoint List Forms URL SmartObject method. This SmartObject method gets the form URLs of the primary list's SmartForms.
- Select the Layout tab at the top of the View
- Select the Link SharePoint List button
- Click the Rules tab of the button control
- Click Add Rule
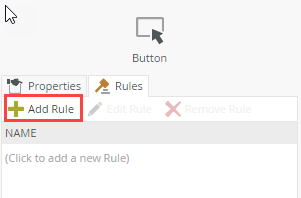
- Select the Actions tab in the Rule Designer
- Click Execute a SmartObject method from the Actions panel to add a new action

- Click select SmartObject on the new action, navigate to System > SharePoint 2013 Integration > SharePoint Integration Helper Methods

- Click OK
- Click select method in the rule
- Select Get SharePoint List Forms URL
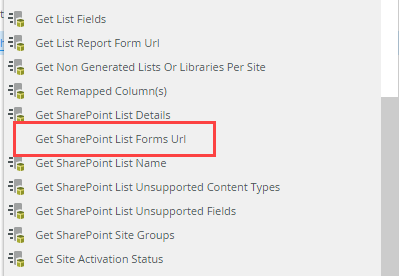
- Click configure to assign inputs and returns for the SmartObject method
- Expand the Controls folder in the Context Browser and drag the text box controls for the primary Site URL and List ID into the Input Mappings. Use PrimarySiteURL_Input for the Site URL and PrimaryListID_Input for the List ID

- Click Next
- Drag the Return Properties from the Context Browser to the matching view Parameters

- Click Finish
- Create the rule to run the SharePoint List Forms URL SmartObject method. This SmartObject method creates the links from the primary list's SmartForms to the secondary list.
- Click Execute a SmartObject method from the Actions panel to add another action
- Click select SmartObject on the new rule, navigate to System > SharePoint 2013 Integration > SharePoint Integration Helper Methods
- Click OK
- Click select method in the rule
- Select Set SharePoint List Forms URL

- Click configure to assign inputs and returns for the SmartObject method
- Expand the Controls folder in the Context Browser and drag the text box controls for the secondary Site URL and List ID into the Input Mappings. Use SecondarySiteURL_Input for the Site URL and SecondaryListID_Input for the List ID

- Expand Parameters in the Context Browser and drag the parameters to their matching input properties

- Click Next
- Click Finish
- Add a notification. This creates a popup message to tell you that the SmartObject methods have been executed and the mapping is done
- Navigate to the Notifications node of the action rules
- Select Show a message from the Actions panel to add a notification message
- Click configure to create the popup message
- Specify Linking Notification as the Title
- Specify SharePoint SmartForms Linking as the Heading
- Specify "The SmartObject methods have completed and your primary list's SmartForms are linked to your secondary list." as the Body
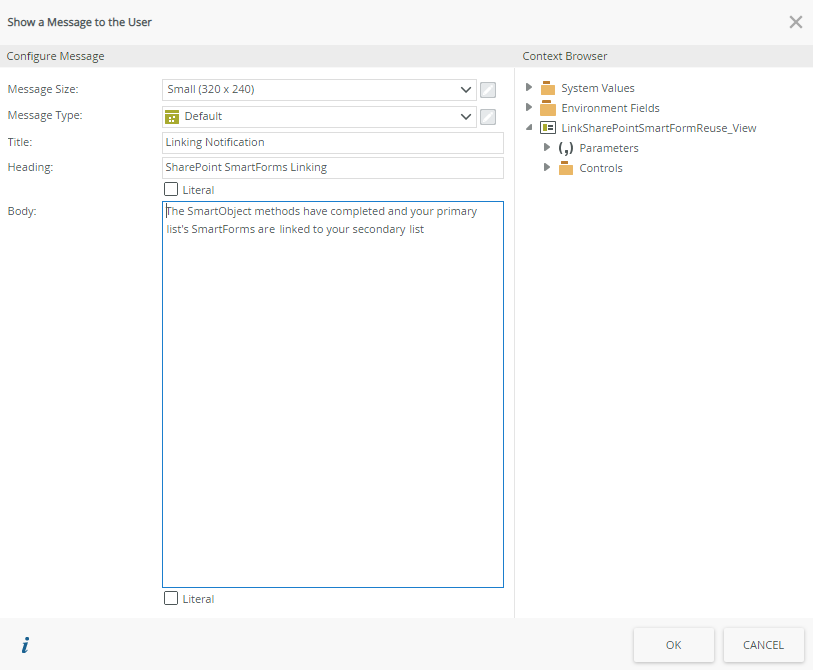
- Click OK to end this rule definition
- Click OK to complete the button rules
- Click Finish to complete and save the View
- Create the form. This adds the view to a new form
- On the LinkSharePointSmartFormReuse_View page in the Designer, click Design a new Form

- Specify LinkSharePointSmartFormReuse_Form as the Name
- Specify "Creates the links between a primary SharePoint list's SmartForm and a secondary matching SharePoint list." as the Description
- Select a Category
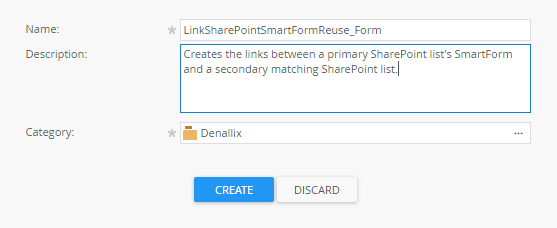
- Click Create
- Click (Enter View Title)

- Specify SharePoint SmartForm Reuse as the title
- Click Finish to complete and save the Form
- On the LinkSharePointSmartFormReuse_View page in the Designer, click Design a new Form
- Run the form, paste in the necessary Site URLs and List IDs, and then click the button to execute the SmartObject methods that create the link
- On the LinkSharePointSmartFormReuse_Form page in the Designer, click Run
- Specify LinkSharePointSmartFormReuse_Form as the Name
- Copy and paste the primary Site URL and List ID, and the secondary Site URL and List ID from the text file you created in Step 3 into the matching text boxes

- Click the Link SharePoint List button
- See the notification popup

When you need to remove the reuse links, such as if your secondary list is no longer part of the same set of lists and is customized with new columns just for that region, you must reset the list. You can then appify it and it becomes its own solution not linked to other solutions.
For SmartForm links, run the ResetSharePointListFormsUrl method of the SharePoint.Integration.HelperMethods system SmartObject. Use the Site URL and List ID values of the secondary list or library you're resetting as inputs to the method.
For lists and libraries only appified with forms, if you change your primary list from using SmartForms back to using SharePoint forms, you can appify your secondary list or libraries without resetting the form links. See Working with SharePoint Forms for more information on using SharePoint forms.
For workflow links, run the RemoveSharePointDynamicWorkflowLinking method of the SharePoint.Integration.HelperMethods system SmartObject. Use the Site URL and List ID values of the secondary list or library you're resetting as inputs to the method.
Review
In this article you created a SmartForm that executes the system SmartObject methods that link a secondary SharePoint list to a primary list's SmartForms.