Configure KeyCloak SCIM integration for Nintex Automation K2
Use this guide to configure and install the
Supported features
The following items are the current features supported by the KeyCloak SCIM integration for Nintex Automation K2:
- SP-initiated SSO
- Create Users
- Update User Attributes
- Deactivate/Reactivate Users
- Group Push
-
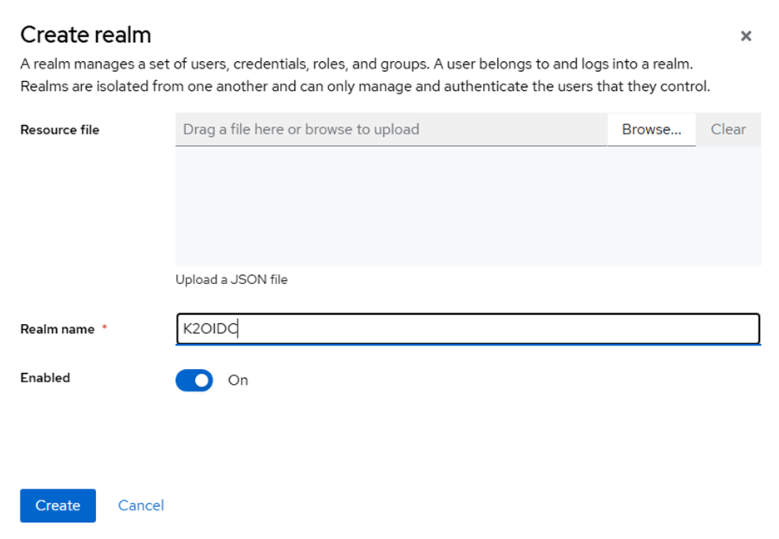
Create a new realm (optional) in KeyCloak. If you don’t want to use the default master realm, you can create a new realm for your app:
- In the admin console of KeyCloak, click on the Master drop down in the top left and select Add Realm.
- Give it a name and click Create.
- On the current realm go to the Clients section and click the Create client button
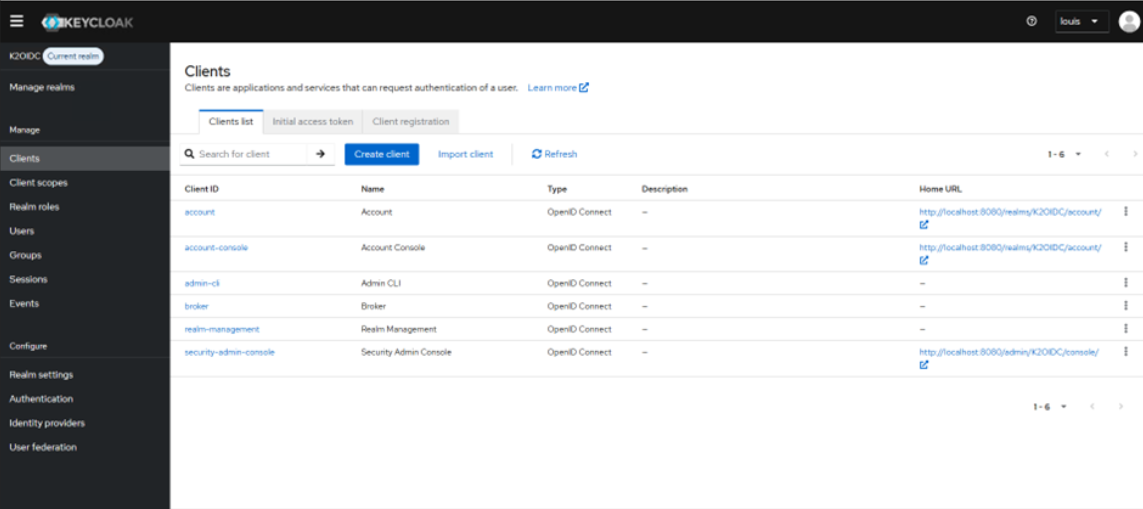
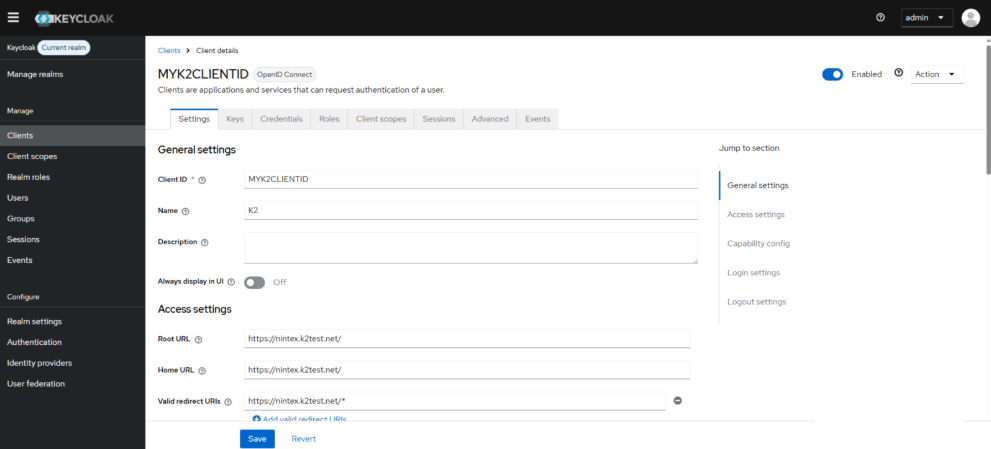
- Create a new KeyCloak client
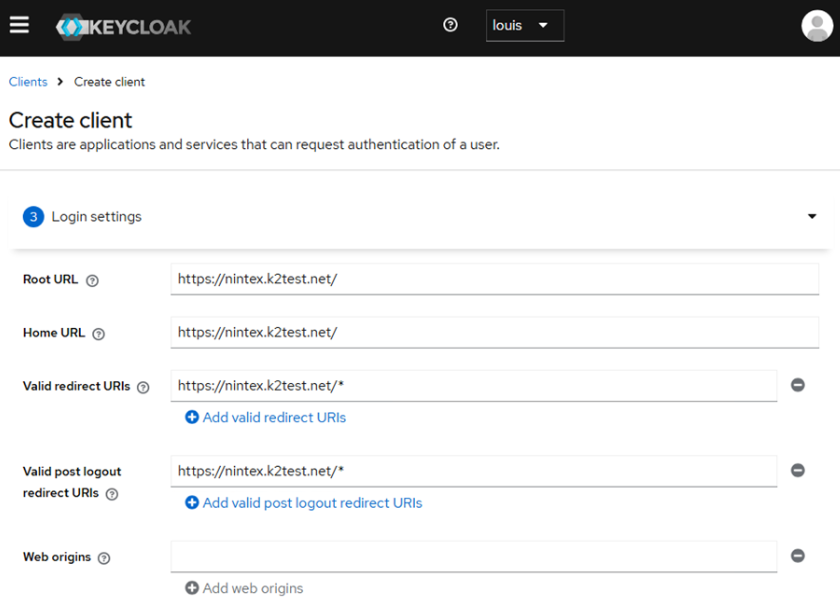
- Configure the redirect URLs
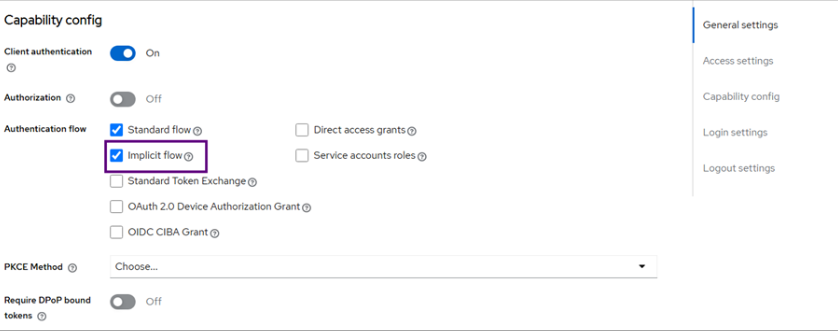
- Ensure public access is not enabled and set the Authentication flow to Implicit flow
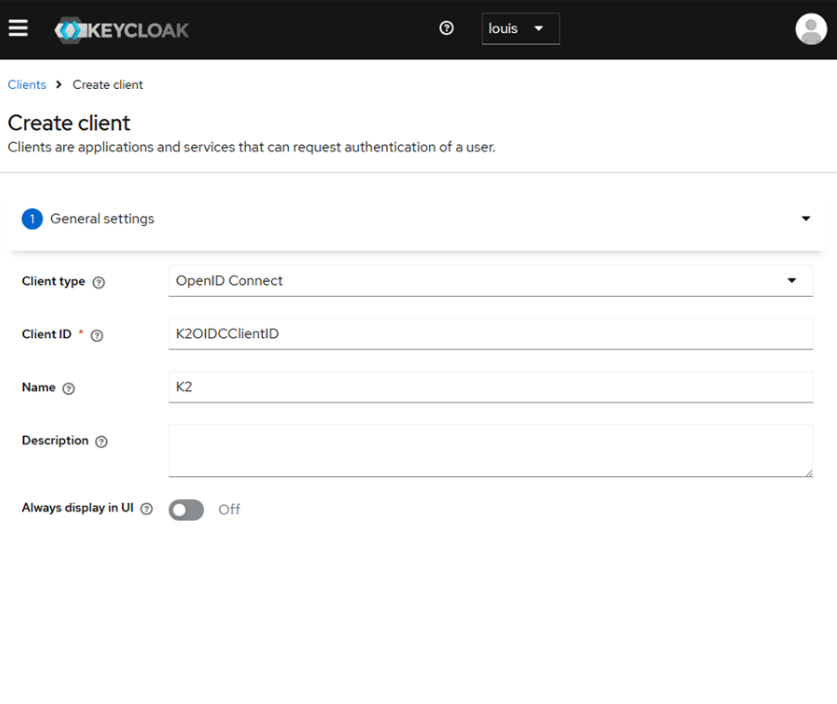
- In the General settings for your client, you can not set your Client ID
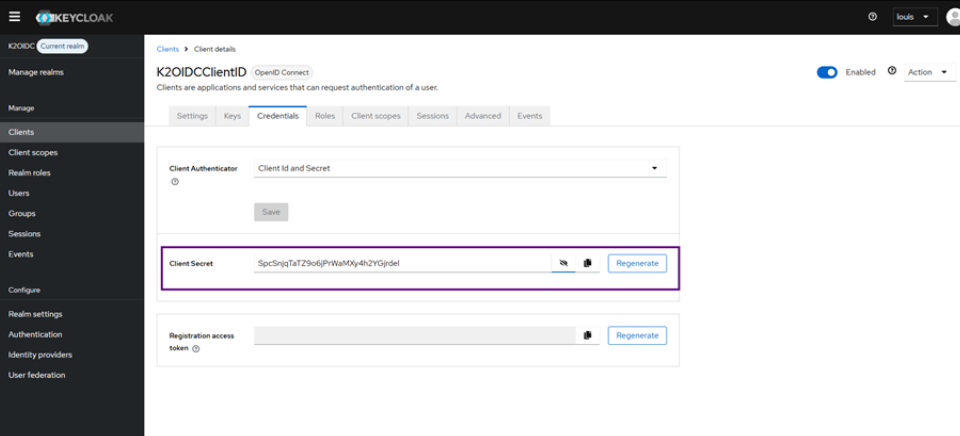
- In the Credentials section, you will find your Client Secret. This value must be saved for later.
You can now use these details to setup KeyCloak in Nintex Automation K2 with the OIDC preview tool.
- Clientid – ID for you client app
- Authority – Domain for you IDP
- Client Secret - GUID generated by your client
Follow the steps below to configure OIDC for your environment
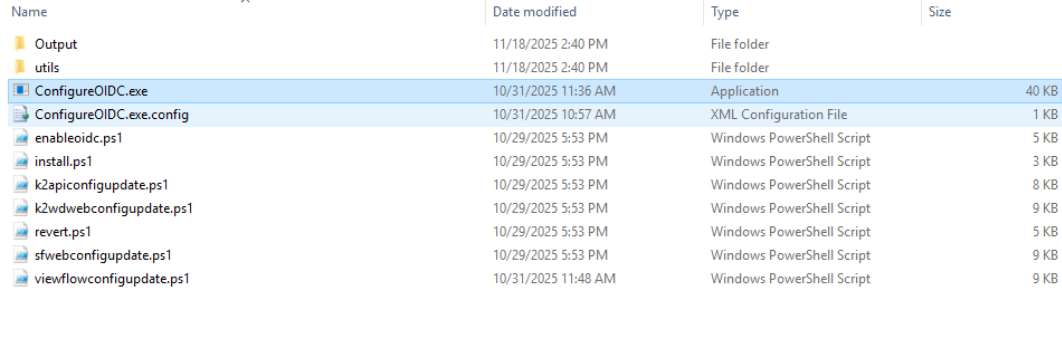
Extract OIDC preview from {K2 install location}\Setup\Features\ K2OIDC Preview.zip
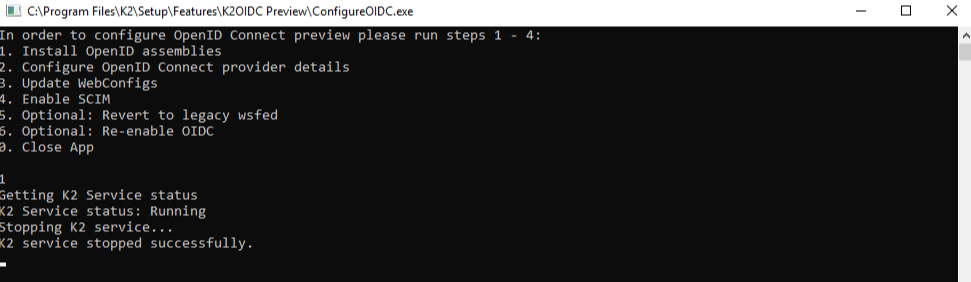
Run ConfigureOIDC.exe as administrator
Provide the K2 database connection string and press Enter. The default option will connect to localhost SQL instance database, named K2.
CopyK2 Database connection string example
Data Source=Localhost;Initial Catalog=K2;Integrated Security=True;Pooling=True;Encrypt=True;TrustServerCertificate=TrueProvide the K2 host server connection string and press Enter. We recommend using the integrated authentication to localhost, as this will work correctly if the current user has rights to execute SmartObjects.
CopyHost server connection string example
Integrated=True;IsPrimaryLogin=True;Authenticate=True;EncryptedPassword=False;Host=Localhost;Port=5555Run step 1 to install the OpenID assemblies. Once completed, you will be returned to the main menu.
Run step 2 and provide the following values:
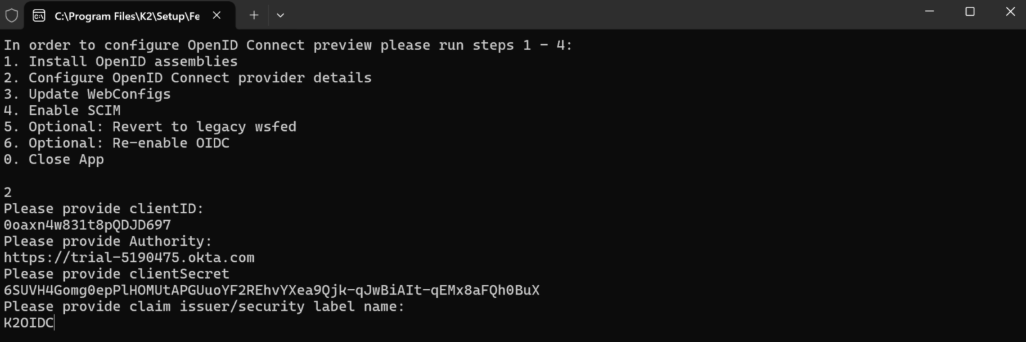
Client ID – the client Id from the OIDC application created.
Authority – the issuer base url eg https://trial-5190475.okta.com (to check locate the OIDC metadata endpoint eg https://providerurl/.well-known/openid-configuration).
ClientSecret – the client secret configured for the OIDC application.
Claim issuer/security label name: K2OIDC.
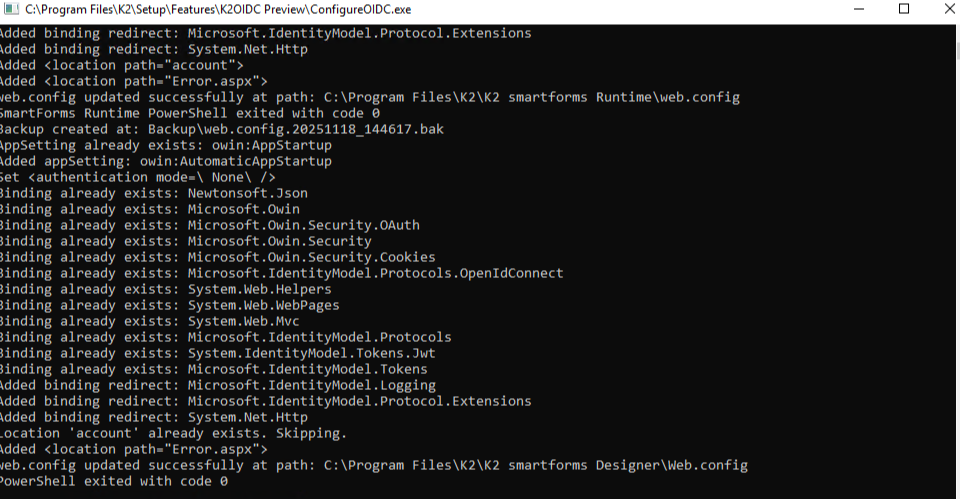
Run step 3 to reconfigure your web configurations.
Run step 4 to enable SCIM. This option will enable Sync Engine and the K2 SCIM endpoint.
On the Issuer Mapping, change the IdentityName Mapping for the issuer from nickname to preferred_username.
Remove any training slashes on the OriginalIssuer and Internet Information Services(IIS) value.
Prerequisites
Download the latest version of the SCIM provider here: keycloak-scim
Copy it to: keycloak\providers\
Restart KeyCloak
- Remember to always make sure you are on the correct realm
- The SCIM API must be enabled in Management, as the OIDC configurer does not enable that automatically.
In the K2 database run:
K2 database codes to be run
DECLARE @TypeID int = (SELECT Top 1 ID FROM [SyncEngine].[ProviderType] WHERE [Type] = 'SCIM')
                        DECLARE @ProviderID int = (SELECT Top 1 ID FROM [SyncEngine].[Provider] WHERE [ProviderTypeID] = @TypeID)
SELECT * FROM [SyncEngine].[ProviderInstance] WHERE [ProviderID] = @ProviderID-
In KeyCloak go to Console > Events > Event Configs (or in Real settings > Events), and add scim in Event listeners.
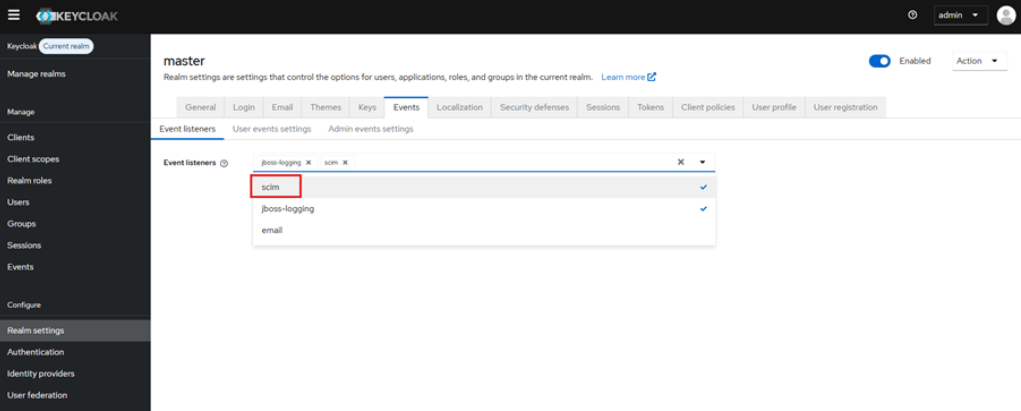
-
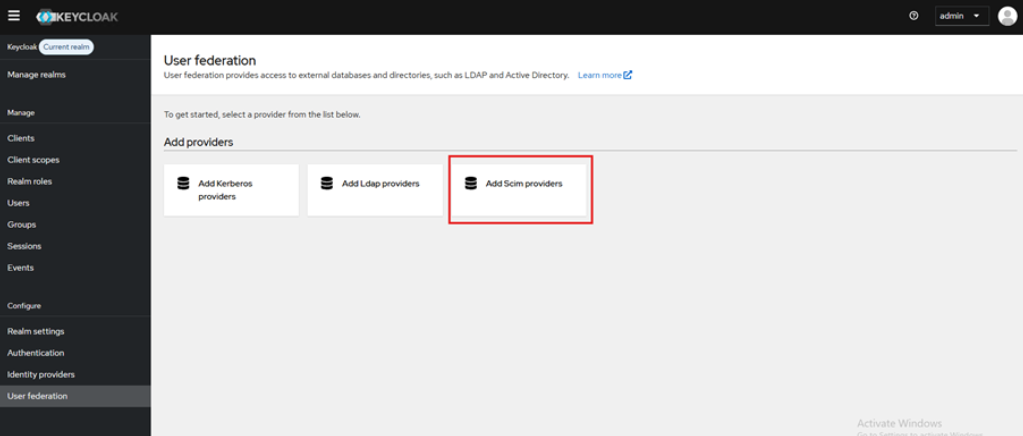
Go to User Federation and click on Add Scim providers.
-
Add the following information for the SCIM provider.
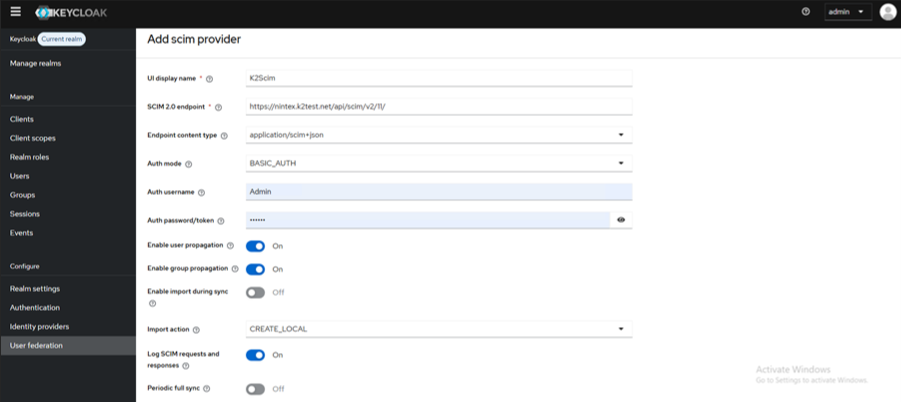
- UI display name: K2Scim
- SCIM 2.0 endpoint: https://nintex.k2test.net/api/scim/v2/{ProvInstID}/
- AuthMode: BASIC_AUTH
- Auth username: K2SQL:scim_user / Service Account
- Auth password: K2pass!
- Import action: (This field must be blank)
- Log SCIM requests and responses: ON
-
To Create a user in KeyCloack, select the Users and select Create user. From here enter the user's details and assigned groups.

Considerations
-
SharePoint OnPrem/Online login with K2 configured using OIDC is not supported
-
K2 Mobile Workspace using OIDC is not supported
-
We do not take responsibility for issues caused by the keycloak-scim provider or its compatibility with specific Keycloak versions. Customers use this third-party component at their own risk.
-
SCIM was tested with Keycloak v26.4.5 (latest at the time of Nintex Automation K2 (5.9) testing), and later versions v26.4.6 and v26.4.7 are not compatible due to a Keycloak defect that prepends a “/” to the user ID, causing user lookup to fail before any SCIM call is made.