Creating a Custom Font Project
To create a custom font, follow the instructions below:
-
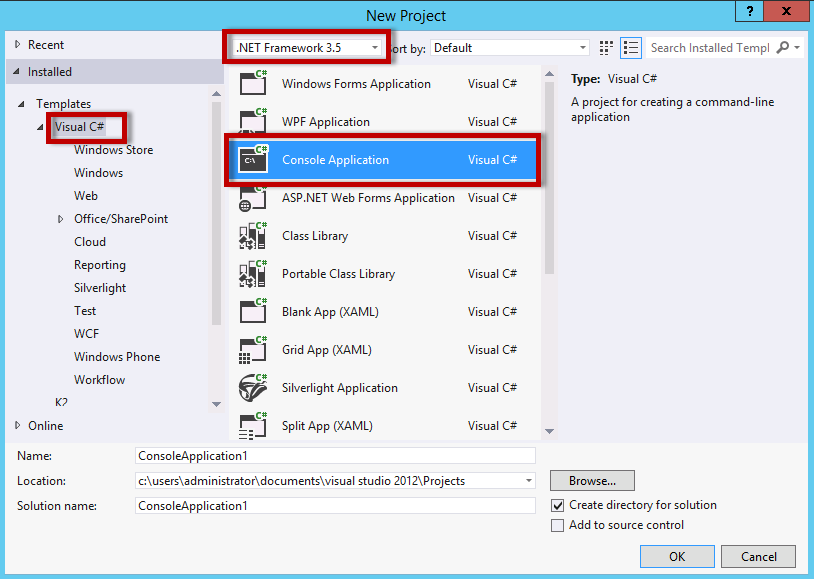
Create a New Project in Microsoft Visual Studio and select
Console Application
-
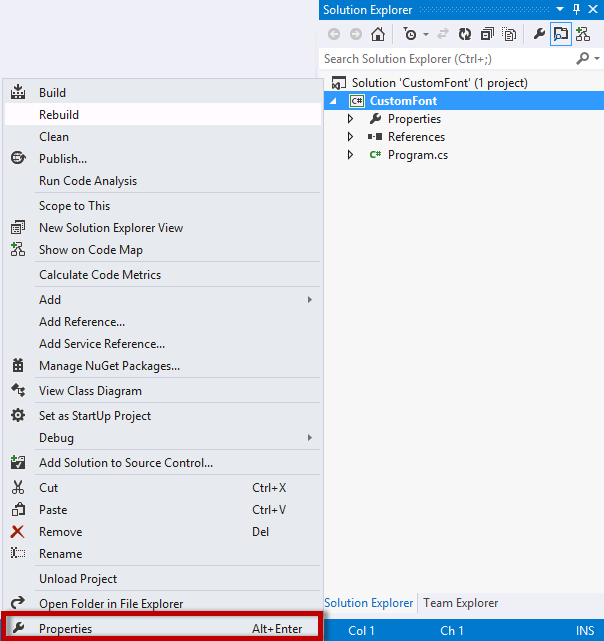
Right click the project and select Properties to configure the Project Properties:
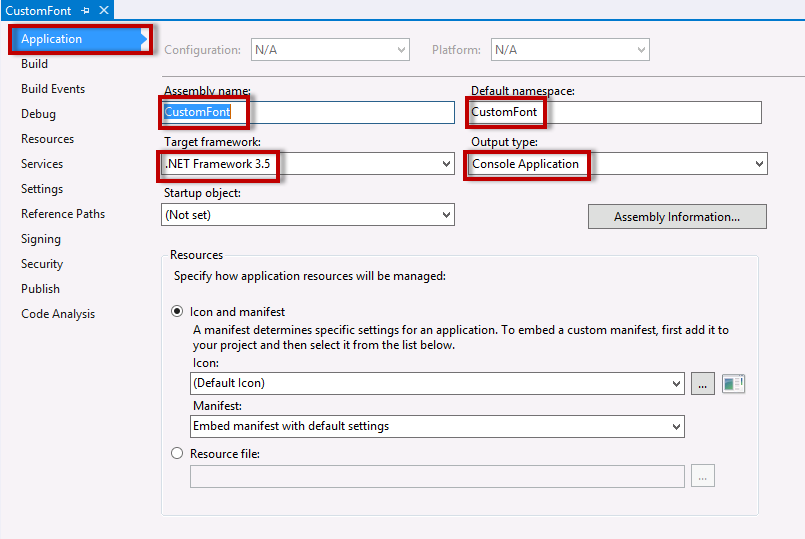
- Click on the Application tab and create an Assembly name and a Default namespace if you need them to be different from the Project names (for example, companyname.projectname.customfontname). In this example we kept the names the same.
-
Make sure that the Project is set to .NET 3.5 for the Target framework and the Output type is set to Console Application.
- Save the Project
-
Right-click References and select Add References to configure the Project References
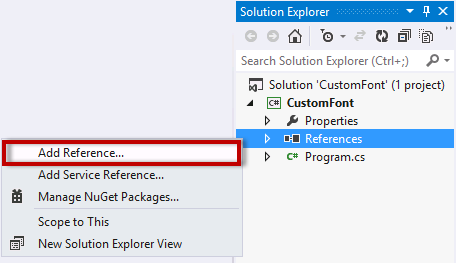
- Remove unneeded Microsoft C# references if you need to.
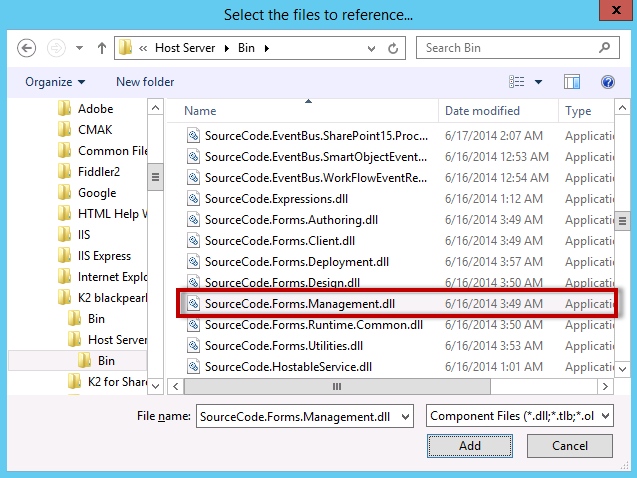
- Click on the Browse tab and navigate to %PROGRAMFILES%\K2\Host Server\bin\
-
Select the SourceCode.Forms.Management.dll and click OK.
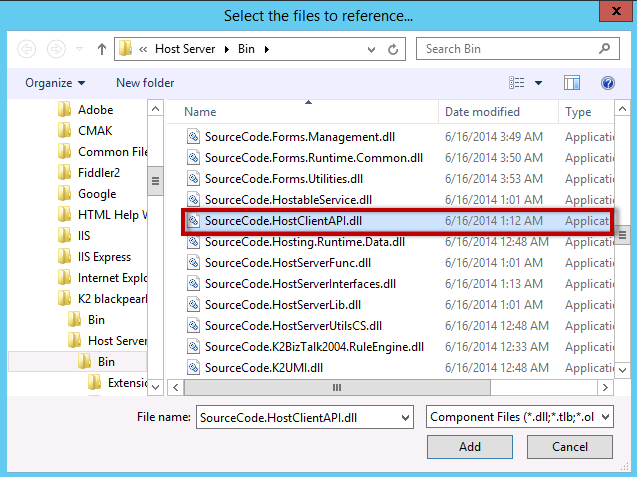
- Add another reference and Browse to %PROGRAMFILES%\K2\bin\
-
Select the SourceCode.HostClientAPI.dll and click
OK.
- Save the Project.
-
Open the Program.cs file and add the following codeCopy
Add the following code
using System;
using System.Collections.Generic;
using System.Text;
// SourceCode name
using SourceCode.Forms.Management;
using SourceCode.Hosting.Client.BaseAPI;
namespace CustomFontsExamples
{
public class CustomFontsExamples
{
public static void Main(string[] args)
{
//Call this method to create a new font
CreateFontExample();
//Call this method to update an existing font
//UpdateFontExample();
//Call this method to delete an existing font
//DeleteFontExample();
}
public static void CreateFontExample()
{
//Create a new font instance
Font font = new Font()
{
Name = "MyCorporateFont",
FontFamily = "wingdings",
};
// Open connection to host server
FormsManager manager = new FormsManager("localhost", 5555);
// Save new font instance
manager.SetFont(font);
}
public static void UpdateFontExample()
{
// Open connection to host server
FormsManager manager = new FormsManager("localhost", 5555);
// Get existing fonts explorer
FontExplorer fonts = manager.GetFonts();
// Get specific font instance
Font font = fonts.Fonts["MyCorporateFont"];
// Update font instance
font.Name = "My Corporate Font";
font.FontFamily = "arial";
// Save modified font
manager.SetFont(font);
}
public static void DeleteFontExample()
{
// Open connection to host server
FormsManager manager = new FormsManager("localhost", 5555);
// Delete font by name
manager.DeleteFont("MyCorporateFont");
}
}
} -
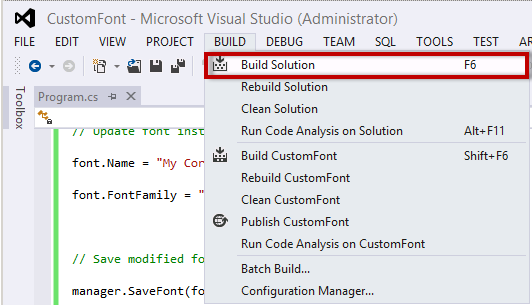
Select Build Solution from the Build tab at the top.
-
Click on the green arrow next to Debug. This will execute the application.

-
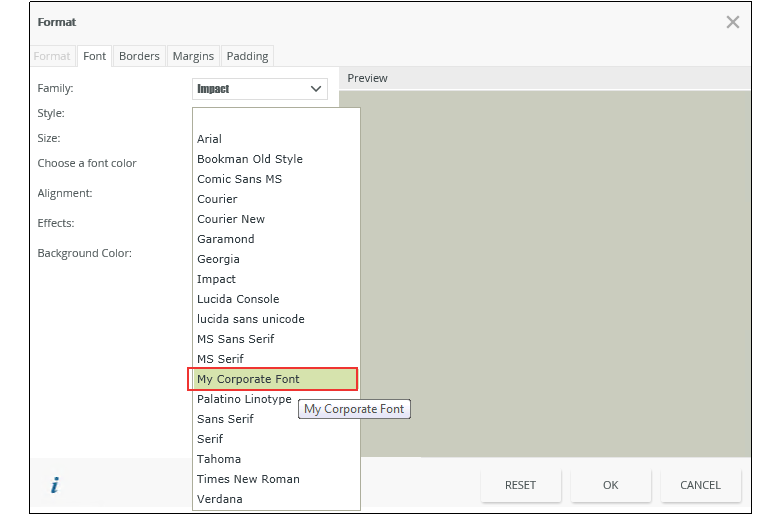
Open the Designer or refresh the browser if already open, open a View and select the Styles property of a control. Go to the Font tab and expand the Family. Note the new font that has been created.