Part 3: Design your first Nintex form in SharePoint 2019
Follow these steps in this page to design your first Nintex form in SharePoint 2019.
On this page, you'll find:
Step 1: Create a SharePoint list
Step 2: Open Nintex Form for SharePoint
Step 3: Configure the Employee People control
Step 1: Create a SharePoint list
- Log in to your SharePoint environment.
- Navigate to the site where you want to create a list.
- In the Home page, add an app. Do any of the following:
- From the top menu, click +New and then select App.
- From the toolbar, click
 (Settings) and then select Add an App.
- In the new page that appears, click Custom List.
- In the Name field, type “Travel Request Form” and then click Create.
Upon successful submission, a page appears to display site contents.
- Click the name of the list you created i.e. Travel Request Form. A new page appears.
- From the column, click + and then select Person. A panel on the right appears.
Tip: If a column type does not appear in the list, click More, and in the new page that appears, select the column type.
- Provide a Name for the column as “Employee”.
- Leave other fields blank or with their default values.
- Click Save.
- Repeat previous four steps to create the following columns:
Column type
Column name
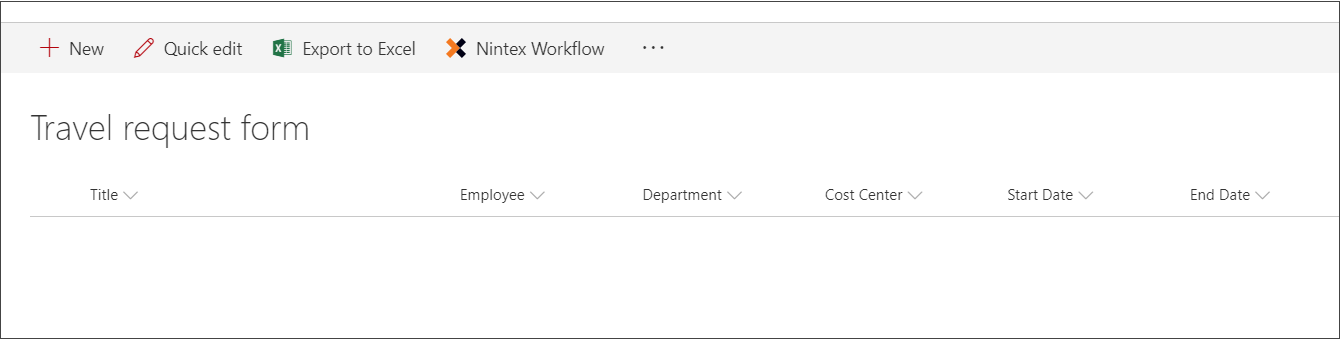
Lookup Department Lookup Cost Center Date Start Date Date End Date Your list should look like below:
Step 2: Open Nintex Form for SharePoint
- From the top menu, click Nintex Forms.
- In the page that appears, select the responsive designer by clicking the first selection. The form designer canvas appears to display a form arranged with fields, each of them corresponding to a column in your list.
- The first thing to do is remove the Title Label control and Attachments control since we don’t need them on this form.
- Click (Delete) each on the Title and Attachment control.
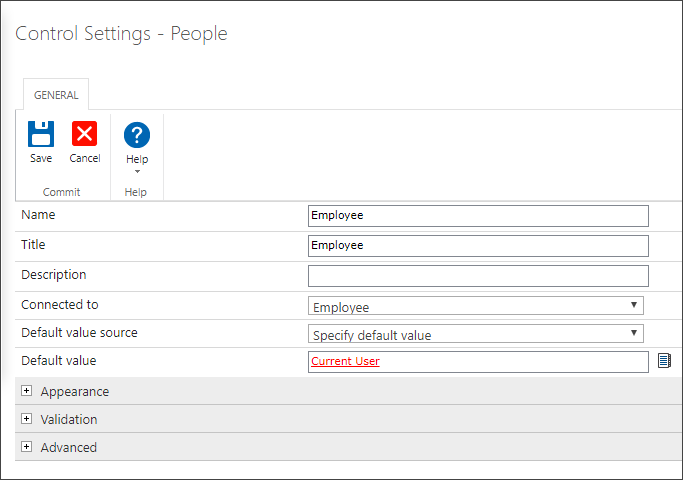
Step 3: Configure the Employee People control
Now we will configure the “Employee” People control so that the form automatically recognizes the user logged on to the SharePoint site and not require to fill in the Employee field.
- Double-click the Employee field to open the configuration dialog.
- For Default value source, click the drop-down arrow and select Specify default value.
- Click
 Browser next to the Default Value field.
 - In the Common tab, select Current User, and then click OK.
Your configuration should look like below:

- Click Save.
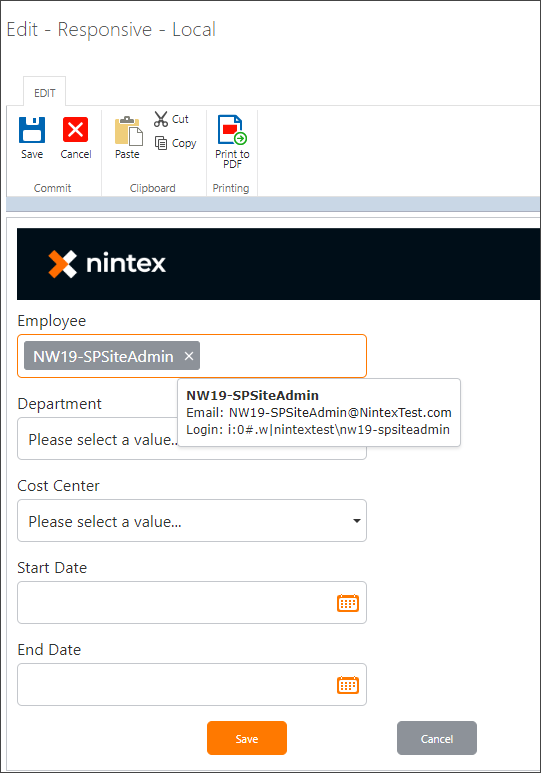
Step 4: Preview the form
You can preview the form to see how the form actually looks like.
- On the ribbon, click the Nintex Forms 2019 tab.
- Click Preview.
- Click Generate Preview.
A preview of the form then appears. You can see that the Employee field has already been populated. When you hover over the name, it contains all their information too.
Step 5: Publish the form
Now you can save and publish your first form.
- In the Nintex Forms 2019 tab, click Publish.
- In the dialog that appears, you can keep the default values.
- Click Publish.
Congratulations! You have successfully designed your first Nintex form for SharePoint 2019.
That's it!
Learn more about Nintex for SharePoint 2019 with Further Reading