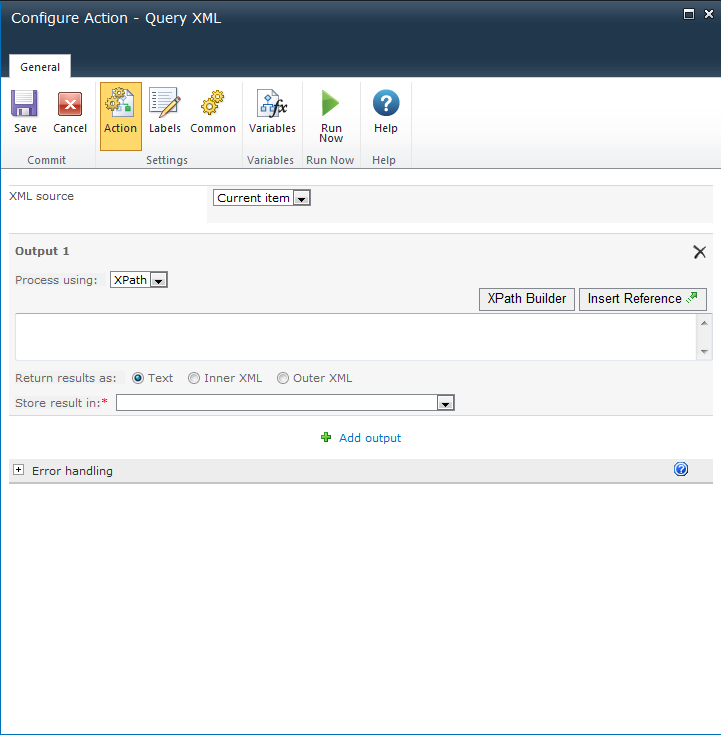
The Query XML action allows the reading, transforming or querying of XML Data.
To use the workflow action:
-
Locate the action in Workflow Actions Toolbox (located on the left hand-side);
-
Select the action, drag it onto the design canvas and drop it onto a design pearl.
Alternatively
To change the settings used by the action:
For more information on the other options in the drop-down, please refer to the Getting started with the Nintex Workflow designer.

Action Settings
XML Source
The XML source can be selected from these three options:
- Current item: The item in the list or library to which this workflow is associated. This option is only available if this action is being applied to a library.
- URL: A URL to the XML source to be processed. A username and password can be specified when accessing the URL. If no credentials are specified, the request will be made anonymously.
- XML: Direct XML entered in the configuration dialog.
Process using
- None: The resulting XML will not be processed. This allows the reading of the XML file or source without processing.
- XPath: Allows querying of XML to retrieve data from a node or node set. Click on the XPath Builder button to use the XML browser to navigate the XML structure and select an element from the XML data. Note: If the XML source specified for the action is available and all tokens and references are replaced with actual run time values, then the XPath Builder will use the XML source to display the XML structure within the XML browser. Otherwise, sample XML data will need to be provided in order to select the node using the XML browser. Note: The expression must return a node set. If the XML includes an explicit default namespace, then 'defaultNS' must be used as the prefix when selecting nodes in that namespace.
- XSLT: Allows the transformation of XML.
Return results as
Return the results of the query as text, Inner XML or Outer XML.
Store Result
Use the drop-down to specify where the resulting text should be stored. More than one output value may be entered. To specify additional output select Add output and fill in the required information.


