Configurations
The Configurations page allows you to customize the RPA server settings for optimal performance. You can customize general settings, choose a deployment type (attended or unattended), set security preferences, and specify port settings to tailor the setup to your requirements.
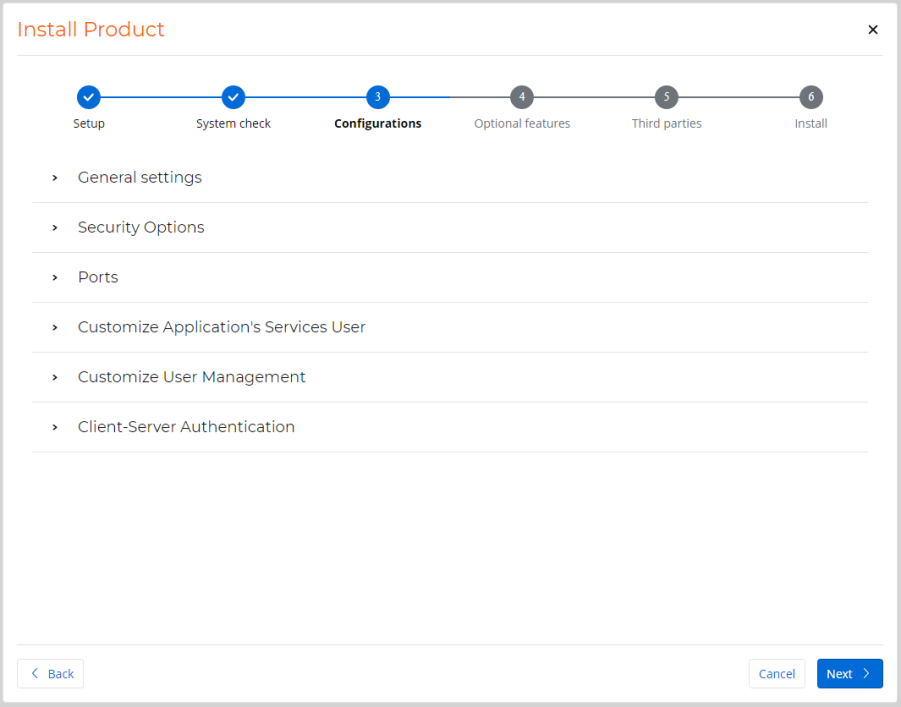
What to do on this page
Follow the instructions below to configure each of these sections according to your specific requirements.
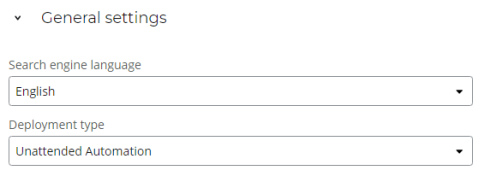
- Select the Search engine language, which determines the language used by the Studio and Robot when searching for wizards:
- English (default)
- Hebrew and English
- Russian and English
- Select the Automation type:
- Unattended (default option): With this automation type, the unattended robot, indicated by the Nintex Robot icon, is installed on a virtual machine and is connected to the RPA server. It can execute a predefined sequence of actions on a preset schedule or in response to triggers, operating independently without requiring human intervention.
- Attended : With this automation type, the attended robot, represented by the Nintex Assistant icon, is installed on the employee's desktop and connected to the RPA server. It remains idle until activated by an employee or a specific action. This mode resembles virtual assistants and relies on human intervention.If you initially selected the Unattended automation type during installation, you can switch to Attended automation without reinstalling by modifying the configuration file. Navigate to
C:\nintex\RPA clients\RPA_Robot_Installation_Paremeterand change the Deployment Type toAttended, then save the changes.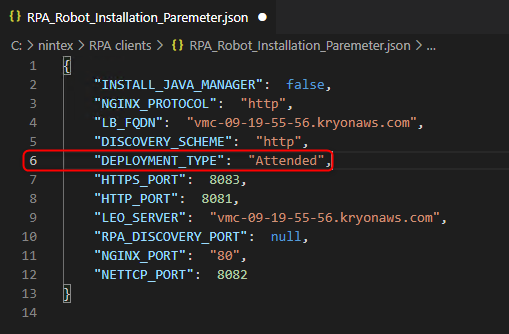
- Select the Security protocols:
- Without SSL/TLS: Select this option if you do not require secure communication and do not want to use SSL/TLS encryption for your connection. This option is suitable for non-secure environments or when SSL/TLS encryption is not necessary.

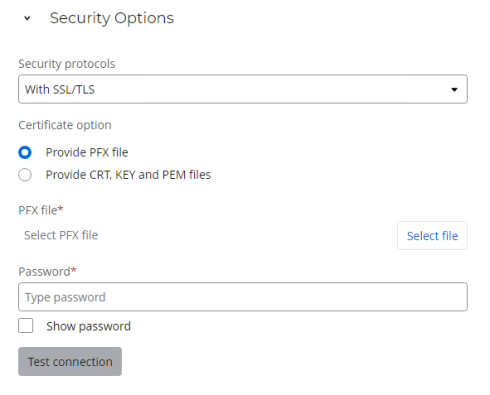
- With SSL/TLS: Select this option if you need a secure connection for your setup and intend to use an existing PFX file, or CRT, KEY, and PEM certificate files to enable SSL/TLS encryption. This is suitable for ensuring secure communication in environments where valid certificates are already available.
- Make sure that the certificates (PFX, PEM, CRT, and PEM) are trusted on the client machines (Robot and Studio).
- Your files must meet the following requirements:
- They must be signed by the organization's certificate authority (CA).
- The Subject field should contain the RPA server FQDN (for example, CN=prodserver.mycompany.com).
- The Subject Alternative Names field should also include the RPA server FQDN (for example, DNS=prodserver.mycompany.co).
- Without SSL/TLS: Select this option if you do not require secure communication and do not want to use SSL/TLS encryption for your connection. This option is suitable for non-secure environments or when SSL/TLS encryption is not necessary.
- If you selected With SSL/TLS, you must provide either a PFX file or CRT, KEY, and PEM files:
- Complete the following required fields to provide a PFX file (this is the default option):
- PFX file: Click Select file to locate and choose the PFX file that contains your valid certificate.
- Password: Enter the password associated with the selected PFX file. This password is required to access and use the certificate. Double-check for accuracy and avoid any typing errors, as incorrect passwords can result in installation failures.
- Test connection: Validate the SSL/TLS connection using the PFX file.
OR
- Complete the following required fields to provide CRT, KEY, and PEM files:
- CRT file: Click Select file to locate and choose the CRT file that contains your valid certificate.
- KEY file: Click Select file to locate and choose the KEY file that contains your private key.
- KEY file password: Enter the password associated with the selected Key (KEY) file; this password is necessary to access and use the certificate. Double-check for accuracy and avoid any typing errors, as incorrect passwords can result in installation failures.
- PEM file: Click Select file to locate and choose the PEM file that contains your valid certificate in PEM format.
- PEM file password: Enter the password associated with the selected PEM (PEM) file; this password is necessary to access and use the certificate. Double-check for accuracy and avoid any typing errors, as incorrect passwords can result in installation failures.
- Test connection: Validate the SSL/TLS connection using the CRT, KEY, and PEM files.
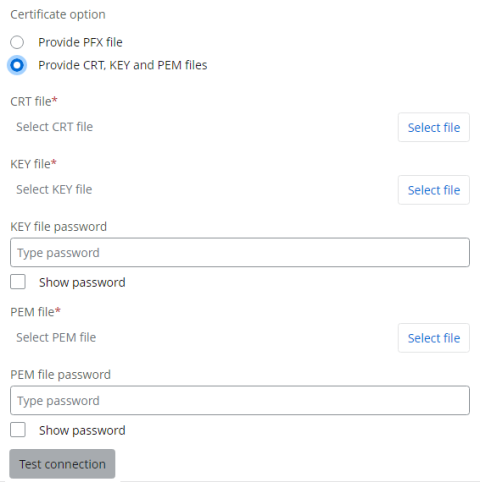
- Complete the following required fields to provide a PFX file (this is the default option):
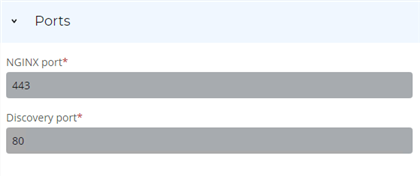
- Configure the ports as needed. Note that default values are provided, so check that these default ports are not currently in use on the server. If any of the default ports are already in use, modify them to available ports.
- (Optional) To set up the necessary firewall rules for the application, go to Windows Settings > Update & Security > Windows Security > Firewall & network protection > Advanced settings and select Open all ports in Windows Firewall. (The exact location may vary depending on your Windows version.)
The Application Services User is a Windows user account that will be responsible for running and managing various Nintex RPA and related services on your server. This account controls the permissions and access rights for these services within Windows.
In Windows, these user accounts are important for making sure services run with the right permissions and stay secure. Managing these accounts well is key for keeping your Windows environment safe and stable.
- Select the user account that you want to use for running Nintex RPA and related services on your server. If you have unique security requirements or restrictions to customizing service access, choose Specific user account. With both options, you can click Test connection to ensure that you can successfully connect using the selected Application's services user.
- Local system account: Select this option to use the built-in Local System account, which typically has extensive permissions on the local machine. However, it may not have network or domain access rights.
(Optional) Click Test connection to validate the local system account .If you select the Local system account option, the option to select Use application services credentials in the Active Directory configuration section will be disabled.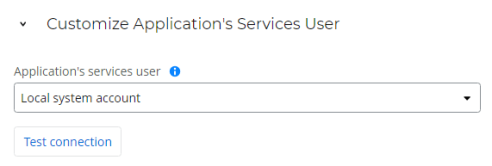
- Specific user account: Select this option to specify a custom Windows user account. This allows you to control the precise permissions and access rights assigned to the Nintex RPA services. You can define which folders, resources, and network locations the services can interact with, providing a higher degree of security and control.This must be an existing user account; you cannot create a new user for this purpose.

- If you select Specific user account, click Select user to choose a different account.
- Begin typing the name in Enter the object name to select.
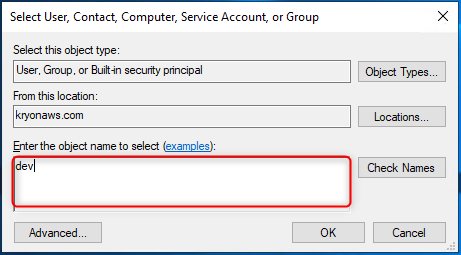
- Click Check Names.
- Select a name from the list of Matching names.Make sure that you select a user account for which you have the matching password. The user account must have local admin and log on as a service privileges and is able to execute the setspan command on the RPA server.
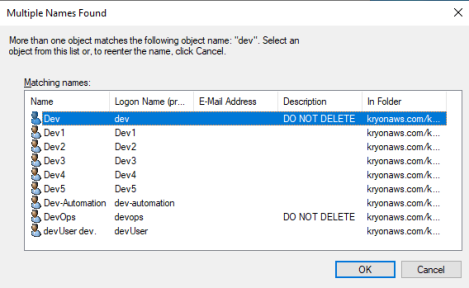
- Click OK on the Multiple Names Found window.
- Click OK on the Select User, Content, Computer, Service Account, or Group window.
- Enter the password for the previously chosen user account in the Password for the application services Authentication field. Double-check for accuracy and avoid any typing errors, as incorrect passwords can result in installation failures.
- (Optional) Click Test connection to validate the specific user account .
- Begin typing the name in Enter the object name to select.
- Select an option for user management:
- Don't use Active Directory
- Use Active Directory
- If you selected Use Active Directory, you have the option to select Use application services credentials. If you do not select it, select a user for the Active Directory Authentication and enter the Active Directory logon password. The selected user must meet the following requirements:
- The user needs to have local administrator rights on the server where RPA is being installed.
- This must be an existing user account; you cannot create a new user for this purpose.
- The user must have the credentials to run LDAP queries with the Active Directory.
If you selected the Local system account option as your application services user, the Use application services credentials option will be unavailable.
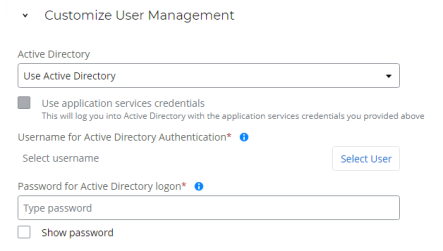
For passwords, these special characters aren't supported:
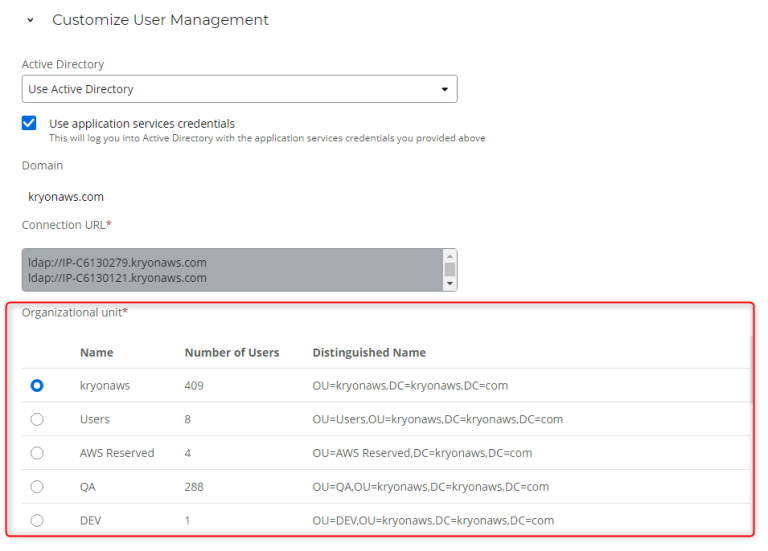
Special Character Description Special Character Description ' Apostrophe \t Tab " Double quotation mark \n Line feed & Ampersand \v Vertical tab ⎵ Space \r Caret return ; Semi-colon \ Backslash - (Optional) If you select Use application services credentials, this option will log you into the Active Directory using the application service credentials you configured in the Customize Application Services User section. You will need to configure your authentication further:
- Take note of the value for Domain and compare this value with the one specified in Keycloak at User Federation > [ID] > Required Settings > Console Display Name. If they are not the same, update the one in Keycloak to be the same as the one specified here.
- Select one organizational unit from the list, which is automatically populated with the available units in that domain (this can take some time).
- Select whether you want an additional permission level:
- Do not use Active Directory groups to authenticate.
- Use Active Directory groups to authenticate.
If you select this option, choose one or multiple objects from the list of Active Directory objects represented by CN (Common Name) values.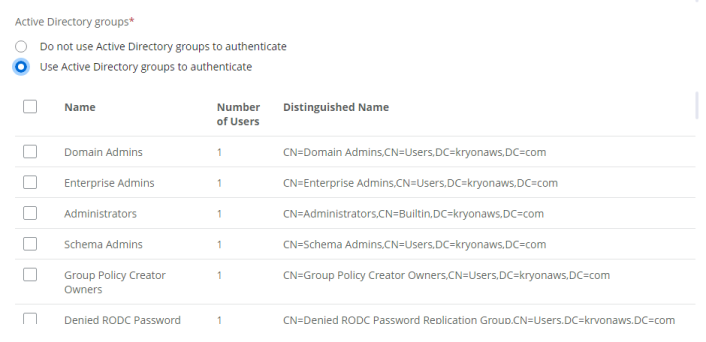
- Select the Authentication method:
- Username and password (default option)
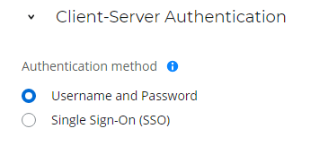
- Single sign-on (SSO): This option is only available when a Specific user is selected for Application Service Credentials and when Active Directory is enabled.
- Username and password (default option)
- If you select the Single sign-on (SSO) option, you can choose to either provide a KEYTAB file (that contains your authentication keys) now or after the installation/upgrade/repair:
The account used to create the KEYTAB file must be different from the account that is used to access RPA to avoid complications during the installation/upgrade process.
You can generate a KEYTAB file if you don't already have one. For more information, see Generating a KEYTAB file (Kerberos). When you have a KEYTAB file that contains your authentication keys, you can retrieve its location by referring to the Aerobase console at Aerobase > User Federation > [Federation Name] > Kerberos Integration > KeyTab field. If the location indicated here is currently at C:\nintex, you are advised to move the KEYTAB file to a separate folder outside of C:\nintex because this folder and its contents will be removed during the installation/upgrade/repair process.
- Provide the KEYTAB file post installation.
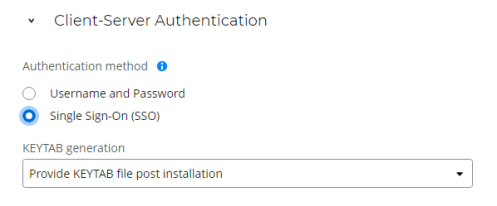
- Use an existing KEYTAB file: Click Select file to locate and choose the relevant KEYTAB file.

- Provide the KEYTAB file post installation.
Once you have finished configuring your settings, proceed with the installation by clicking Next >.
< Previous step: System Check
> Next step: Optional Features