Adding another LDAP user federation (Kerberos)
There are 2 primary steps when configuring Kerberos (Domain Authentication) as your authentication method:
-
Sync users to Nintex Admin Tool (i.e., the Nintex database)
Consider the following, very likely scenario:
-
Your Windows Active Directory contains thousands of users
-
Your Nintex license covers 100 users, including Console users, Studio users, and robots
As explained above, the final result of configuring your Nintex deployment to work with Kerberos will be to import users into the Nintex database. In accordance with your Nintex license, only 100 users will be imported as active users. All remaining users will be imported as inactive. The active users would be the first 100 randomly imported users (which may or may not be the actual users you wish to be active in Nintex).
To avoid filling the Nintex database with inactive users and the need to search through them to activate the correct ones, it is highly recommended to create a container containing only Nintex users within your Active Directory, then sync only that container. Depending on the structure of your Active Directory, this container will often be a CN ("common name") within an OU ("organizational unit").
Connect to Windows Active Directory
To connect Nintex to your Windows Active Directory:
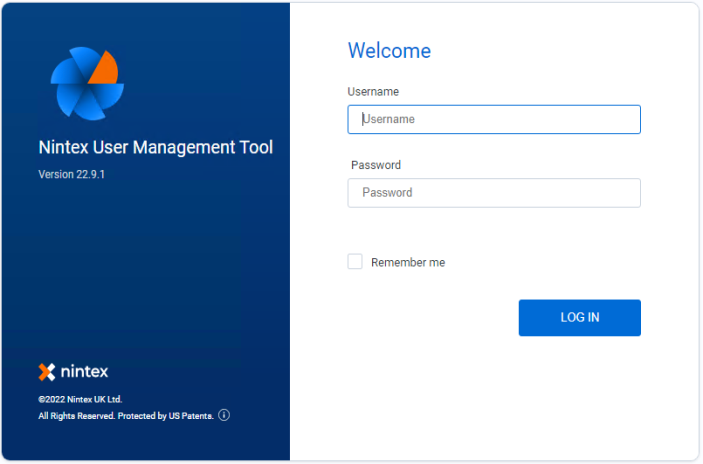
Access the Nintex User Management Tool
To access the Nintex User Management Tool:
-
Open an incognito window in Chrome.
-
Enter the following URL:
http://{FQDN_RPA_SERVER}/auth/admin/kryon/console/#/realms/kryon-
Use
https://in the URL if you installed with SSL/TLS
The following screen opens:
If you receive a Chrome message asking you to sign in, just click Cancel.
/Installation and Upgrade_108.png)
-
-
Log in to the Nintex User Management Tool with these credentials:
-
Username: authadmin
-
Temporary password: Nintex123!
-
You will be prompted to change the temporary password upon first login.
-
-
-
The following screen opens:

Configure a Users Federation
Add the User Federation to a Company in Nintex Admin Tool:
-
From the left menu, click
/Installation and Upgrade_110.png) .
. -
From the page that opens, click kryon-ldap (the default federation installed with Nintex).
/Installation and Upgrade_111.png)
The page for defining the user federation settings opens.
There's no need to be intimidated by the long list of settings. Domain Administrators and other IT personnel who are experienced in working with Windows Active Directory are generally familiar with settings of this type. If you have questions about connecting to your Active Directory, consult with the Active Directory expert in your organization. If he or she can't answer your questions, get in touch with the Nintex Support team.
Required Settings section
/Installation and Upgrade_112.png)
In the Required Settings section, these are the settings that need to be addressed. The other settings in this section can be left "as is" unless you are instructed otherwise:
-
Enabled: Turn this switch ON to enable this user federation to connect with your Active Directory.
-
Connection URL:
ldap://followed by the fully qualified domain address (FQDN) of the domain controller.-
After entering the value in this field, click the Test connection button to confirm that the Nintex RPA server can connect to your Active Directory.
-
-
Users DN: A name that describes the path in the Active Directory where the users to sync are located. This could begin with an organizational unit (OU) or a common name (CN) and ends with one or more DCs (domain components). Learn more about the best practice of separating your Nintex users into a CN container for easier management.
-
Example: If your Nintex users are in an Active Directory container (CN) called
users, and your Active Directory domain isgalaxyfaraway.com, the entry in this field would be: -
cn=users,dc=galaxyfaraway,dc=com
-
-
Bind DN: The domain\username of the user with rights to run Nintex services on the Nintex RPA server.
-
Bind Credential: The password of the user with rights to run Nintex services on the Nintex RPA server.
-
After entering the Bind DN and the Bind Credential, click the Test authentication button to confirm that the Nintex RPA server can log in to your Active Directory.
-
-
Custom User LDAP Filter: (Optional) If you want to sync only specific users (by name or other attribute) from all users contained in the Users DN, you can set up a Custom User LDAP Filter (see this Microsoft article for examples of LDAP filters and syntax).
-
Search Scope: If your Users DN includes containers within it, set this value as follows:
-
One level → sync users from only the top level defined by the DN.
-
Subtree → sync users from the top level defined by the DN and all its sub-levels.
-
Kerberos Integration section
/Installation and Upgrade_113.png)
In the Required Settings section, these are the settings that need to be addressed. The other settings in this section can be left "as is" unless you are instructed otherwise:
-
Allow Kerberos authentication: Turn this switch ON.
-
Kerberos Realm: The domain name of your Active Directory.
-
Server Principal:
HTTP/followed by theRPA_Server_FQDN@RPA_SERVER_DOMAIN(exactly as defined; FQDN should be exactly as it appears in the Control Panel).-
General format: HTTP/ComputerFullName@DomainName@DOMAIN
-
Example: HTTP/KSChrisLabT490.KSL.Local@ArvesSys.local@ARVESSYSLOCAL
-
-
KeyTab: The full path of the KEYTAB file on the Nintex RPA server. Following Nintex RPA server installation, the location should be as follows:
{InstallFolder}\Kryon\IDP\Aerobase\Configuration\{filename}.keytab-
If the KEYTAB file was provided or generated during Nintex RPA server installation, the installation package will have copied the file to this location.
-
If you generated the KEYTAB file following Nintex RPA server installation, you should have moved the file to this location as the final step in the process. See Generating a KEYTAB file.
-
-
Debug: Turn this switch ON to allow logging (enabling you to troubleshoot queries to the Active Directory).
Sync Settings & Cache Settings section
The settings in this section can be left "as is" unless you are instructed otherwise.
Sync users to the Users Federation in Aerobase:
-
After completing all the federation settings, click the Save button. You should receive the following notification:
/Installation and Upgrade_114.png)
-
You will be presented with additional buttons, allowing you to sync the users from your Active Directory to the user federation:
/Installation and Upgrade_115.png)
-
Click the Synchronize all users button. You should receive a notification, letting you know the results of the sync:
/Installation and Upgrade_116.png)
Sync users to Nintex Admin Tool
Now that your Active Directory users have been synced to the user federation, you can complete the Kerberos configuration process by syncing users to Nintex Admin Tool (i.e., the Nintex database).
-
For complete instructions, see Syncing from a User Federation.
Be sure to follow the steps in the Nintex Admin Tool User Guide for creating a company and activating its license prior to syncing users to Nintex Admin Tool.
If your license hasn't been activated prior to syncing, all users will come into the system in Inactive status.