Exchange Online Feature Activation
K2 integrates with Microsoft Exchange through SmartObjects. To enable integration between K2 and Exchange, activate an instance of the Exchange Online feature.
- The Exchange Online feature activation allows you to integrate with Microsoft Exchange Online or a Microsoft Exchange on-premises server.
- The Exchange instance created by this feature is not linked to any K2 wizards. All Exchange wizards use the Exchange service types configured at time of installation.
- Refer to the Product Compatibility, Integration and Support sheet to determine which versions of Exchange you can use with this feature.
- The EWS URL of the Exchange Server must be discoverable by the Feature Activation page.
You create a new Exchange service instance by using the Exchange Online feature activation.
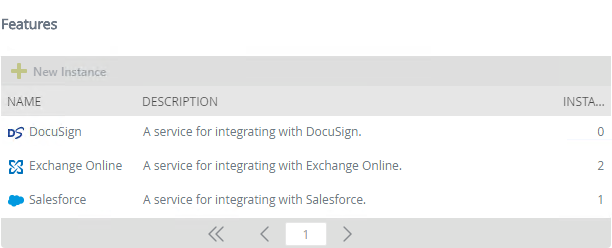
- Browse to the Features page in K2 Management.
- Select the Exchange Online feature and click New Instance.
- Specify a name and description for your new Exchange instance.

- Enter the EWS URL. The default EWS URL shown is universal for all Exchange Online tenants. Contact your Exchange administrator if you don't know your EWS URL.
- Select which authentication to use when authenticating users with Exchange.
Authentication Instructions OAuth Use this setting to connect to Exchange Online.
Nintex K2 Five (5.x) requires OAuth to connect to Exchange Online and you need to be an O365 Global Administrator to activate the feature.Your browser must allow popups when using OAuth to activate this feature.Domain Enter the domain name.
Your domain name is the server system name that hosts your business on your network, such as denallix.com. You can use the words based name or the Internet Protocol (IP) address. For Exchange Online and Office 365 this is typically [yourcompanyname].onmicrosoft.com. If you don't know your domain name, speak with your IT administrator.
The Configuring Exchange page shows the configuration steps.

For the Relying Parties step, a new window opens that allows you to sign into Azure Active Directory. Use the username and password of an AAD account with tenant global administrator rights to login. The AAD account needs to be part of the Global Administrator role in O365. More info here: https://support.office.com/en-us/article/about-office-365-admin-roles-da585eea-f576-4f55-a1e0-87090b6aaa9d. After the login you will be asked to trust the Exchange Online for K2 app. Click Accept to allow the app to access the necessary resources and services. After permission is granted, K2 adds the relying parties and redirects you to an Authorization Successful page. Return to the feature activation page and click Continue. Use the Reopen Tab button if you need to make changes.
For the OAuth Token step, a new window opens asking you to login and trust the Exchange Online for K2 app again. Use the username and password of an AAD account with tenant global administrator rights to login. The AAD account needs to be part of the Global Administrator role in O365. Click Accept. After permission is granted, K2 will obtain your token and redirects you to an Authorization Successful page. Return to the feature activation page and click Continue.
Use the Retry button to re-start the Configure Exchange page from the beginning.
Once you've completed all four steps, click Done to complete activation of the Exchange instance.
Email Address Enter the email address and click Add.
The
The email address must be a valid email account on the Exchange service.
Ensure the domain name and domain in the email address match.
By default, the Email Address field is pre-populated with the email address of the person who is activating the feature. K2 recommends you set up or use a generic common mailbox rather than an individual mailbox.
If the Email Address field is left empty and the feature is configured with OAuth authentication, a workflow executing an Exchange online method will fail with an “Exchange Impersonation SOAP header must be present for this type of OAuth token” error.
Integrated Use this setting to connect to your Exchange On-Premises Server.
Selecting this option passes Windows credentials of the current identity to Exchange, using the Impersonate mode. See Authentication Modes for more information.
Static Use this setting to connect to your Exchange On-Premises Server.
Specify the user name and password that this instance uses to communicate with Exchange. See Authentication Modes for more information.
- Your new Exchange service instance is created once the Exchange Online feature is activated. Exchange SmartObjects are auto-generated when the service instance is created. See the Exchange Online Service Type and Exchange SmartObject Reference topics for more on the SmartObjects that are generated.
Please keep in mind the following considerations:
- Integration with Microsoft Exchange requires either Active Directory (AD) or Azure Active Directory (AAD).
- The Exchange instance created by this feature is not linked to any K2 wizards. You can use the Exchange SmartObject methods of the service in workflows you design in the K2 Designer. All Exchange wizards use the Exchange Online service brokers configured at time of installation.
-
If you send invalid data to the Sensitivity property of the Task SmartObject list method, the method returns every entry in the SmartObject.
- Any folder created to contain Task items cannot be renamed. In Outlook go to the Tasks tab. Expand My Tasks and then Tasks. These folders can’t be renamed using the Exchange REST API.
- Always use the Exchange feature activation page to register new instances and edit existing service instances.
- Your workflow will go into an error state if you reach any of the Microsoft Exchange limits, the error thrown by the Exchange Server will be displayed in the workflow's error message.
- Using the OAuth authentication mode and executing the Exchange Online SmartObjects from a workflow uses the
- When using OAuth, Impersonate, or Static authentication modes and executing the Exchange Online SmartObjects from a SmartForm, the form uses the logged on person's mailbox.