12. Create a View for Comments
In this step, you create an item view to capture comments and questions from the approver and finance processor. The Approve Expense Claim and Finance Processing workflow tasks both use the Display Expense Claim Form. In a later step, you add this view to the display form.
- Add a new item view with the following general settings:
Field Value Name Task Comments Description Editable view for capturing task comments. Category (leave default value unchanged) View Type Item View Data Source (leave the default value unchanged) - From the K2 Application elements page, click New, then View.
- Configure the GENERAL settings page for the new view as follows, then click CREATE.
Field Value Name Task Comments Description Editable view for capturing task comments. Category (leave default value unchanged) View Type Item View Data Source (leave the default value unchanged)
- Add a one row, one column layout table (only).
- Select Create Layout Table Only. Configure the table with one column and one row. Click OK.
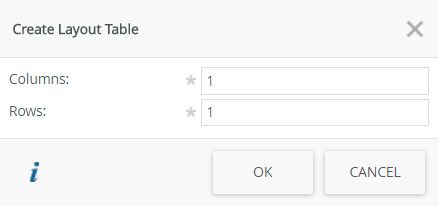
- Select Create Layout Table Only. Configure the table with one column and one row. Click OK.
- Add a Text Area control to the layout table, then name the control
Task Comments Text Area
then finish the view and check it in.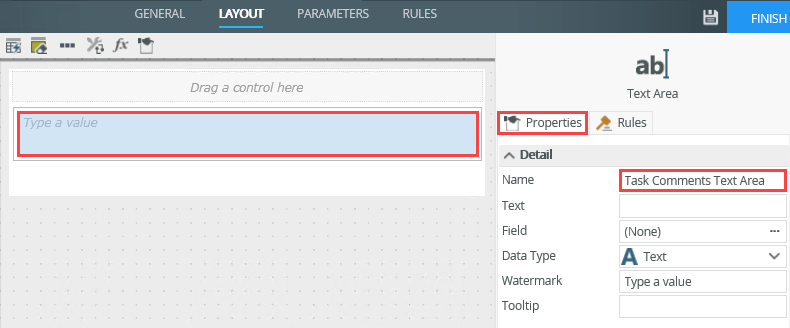
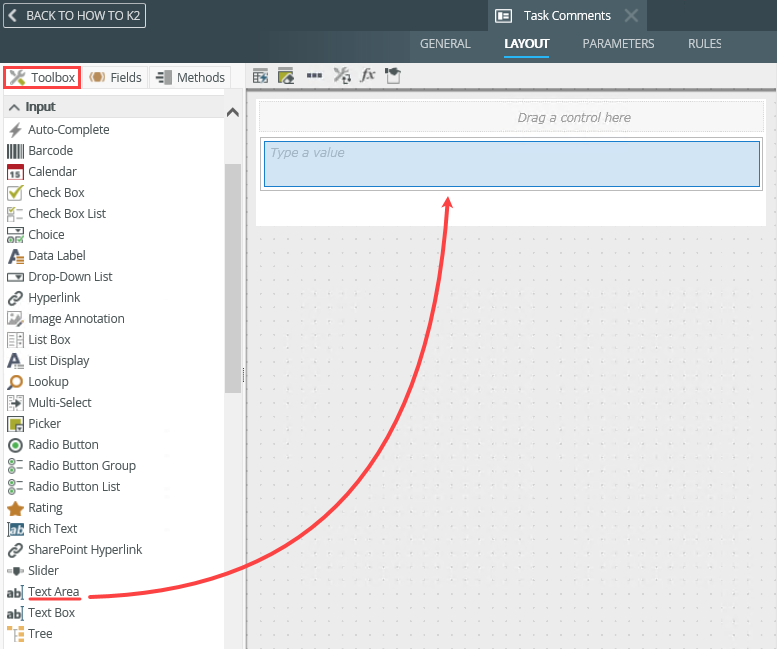
- From the Toolbox pane, drag a Text Area control into the layout table.
- Select the text area box. In the Properties pane, change the Name of the control to
Task Comments Text Area
then click FINISH to save and exit the view. Check in the view.
- From the Toolbox pane, drag a Text Area control into the layout table.
Review
In this step, you created an item view that captures comments entered by the approver and finance processor. In a later step, you add this view to the display form used for both tasks (claim approval and finance processing). Next, you begin editing forms, beginning with the form used to submit new expense claims.