Contact Management: Application Design
This application is essentially an "address book" where you can capture and retrieve information about contacts. The Contact Management application contains the following K2 components: data (SmartObjects) and forms (SmartForms). This application does not contain workflow or reporting components.
Data
This application uses two SmartObjects to store contact data. Both SmartObjects will use K2 SmartBox as the underlying data store. SmartBox is a K2-provided and managed storage area within the K2 database, and is often used when you do not already have an underlying system to store the data
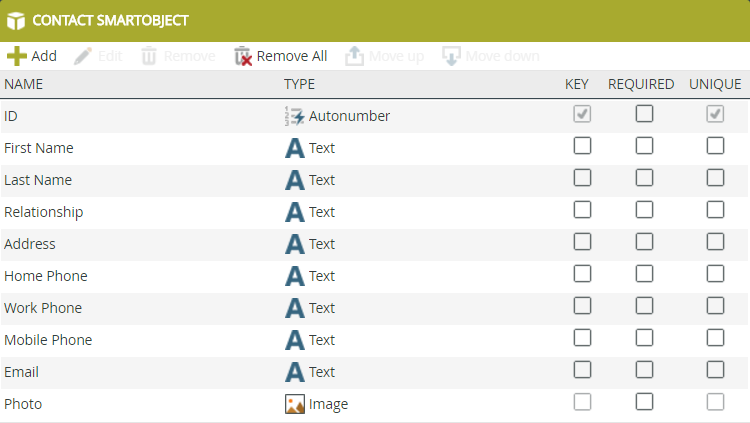
The Contact (SmartBox) SmartObject stores the basic information about a contact, such as first and last name, phone numbers and photo.
The Contact (SmartBox) SmartObject
The second data source, the Contact Notes and Attachments (SmartBox) SmartObject stores the additional information for the contact, such as notes and documents.
The Contact Notes and Attachments (SmartBox) SmartObject

The Contact and Contact Notes and Attachments SmartObjects are essentially "parent" with "children" (this is also sometimes called Primary-Detail or Header-Details). There is a single parent/header record for each contact, but there could be zero or more children/detail Notes and Attachments for a contact. You will learn how to define this relationship between the SmartObjects and how to configure the Forms to display and capture data appropriately.
Forms
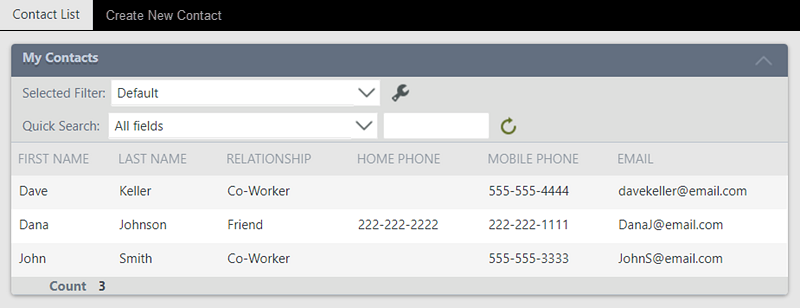
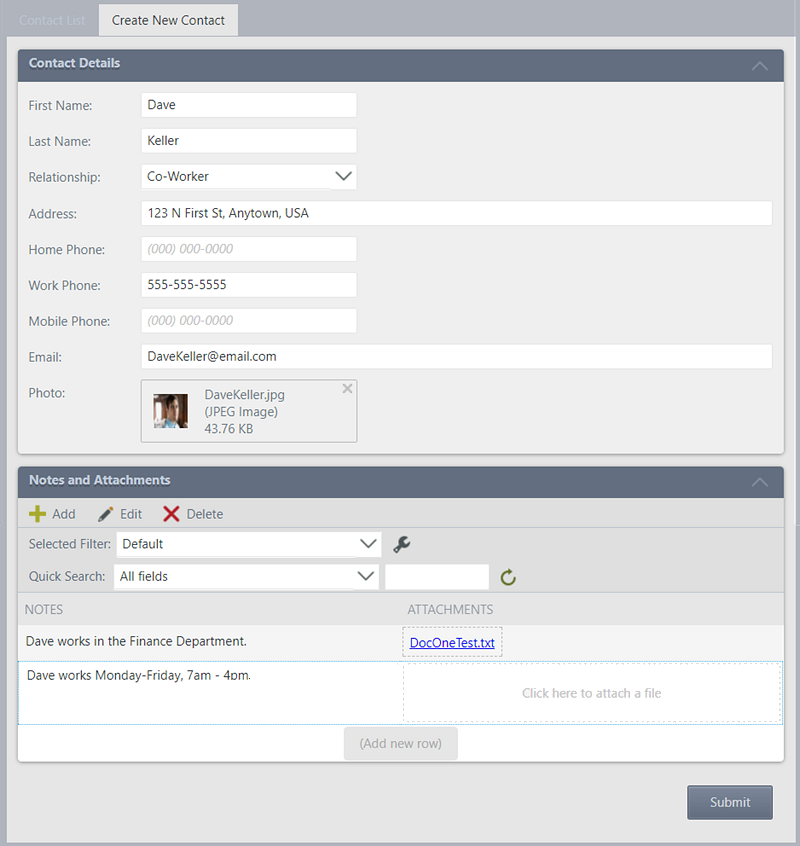
This application contains three forms. The first form, Contact List Form, displays a read-only list of contacts. The second form, Contact Details Form, displays the Contact Item View (containing the parent/header information) and the Contact Notes and Attachments List View (containing the children/details information). You will use the Contact Details Form in two ways: for entering new contacts, and editing existing contacts.
The Contact List Form
The Contact Details Form
Using the Application
To use the Contact Management application, begin by launching the Contact List Form. This form contains a read-only list of saved contacts. Clicking a list row launches the Contact Details Form that displays all the properties for the contact record. You have the ability to add a contact photo, as well as multiple notes and file attachments. From the Contact Details Form, you can save changes or delete the contact entirely. From the Contact List Form, click the Create New Contact tab to launch a clean version of the Contact Details Form. From here, you can enter and save new contacts.