DocuSign - Send Envelope step
Use the Send Envelope step to send a DocuSign envelope containing documents to sign.
Knowledge of how DocuSign works is required to use the DocuSign integration provided by K2. You may learn more about DocuSign from the DocuSign website at https://www.docusign.com.
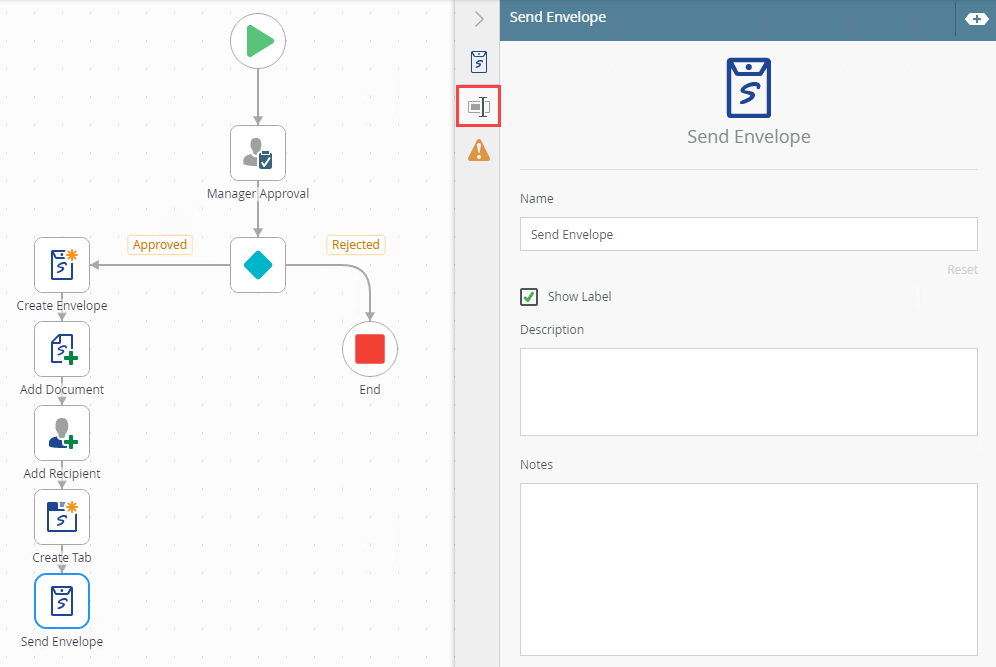
You can, for example, use the Send Envelope step in an Employee Onboarding workflow to notify the new employee that their contract documents are ready for signing.
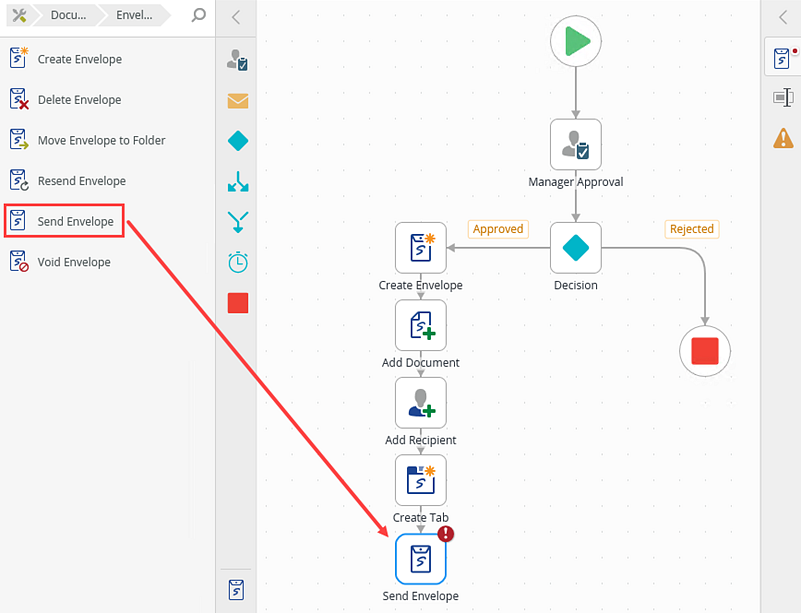
Drag the Send Envelope step from the DocuSign category, Favorites bar, or the Recent category onto the canvas.
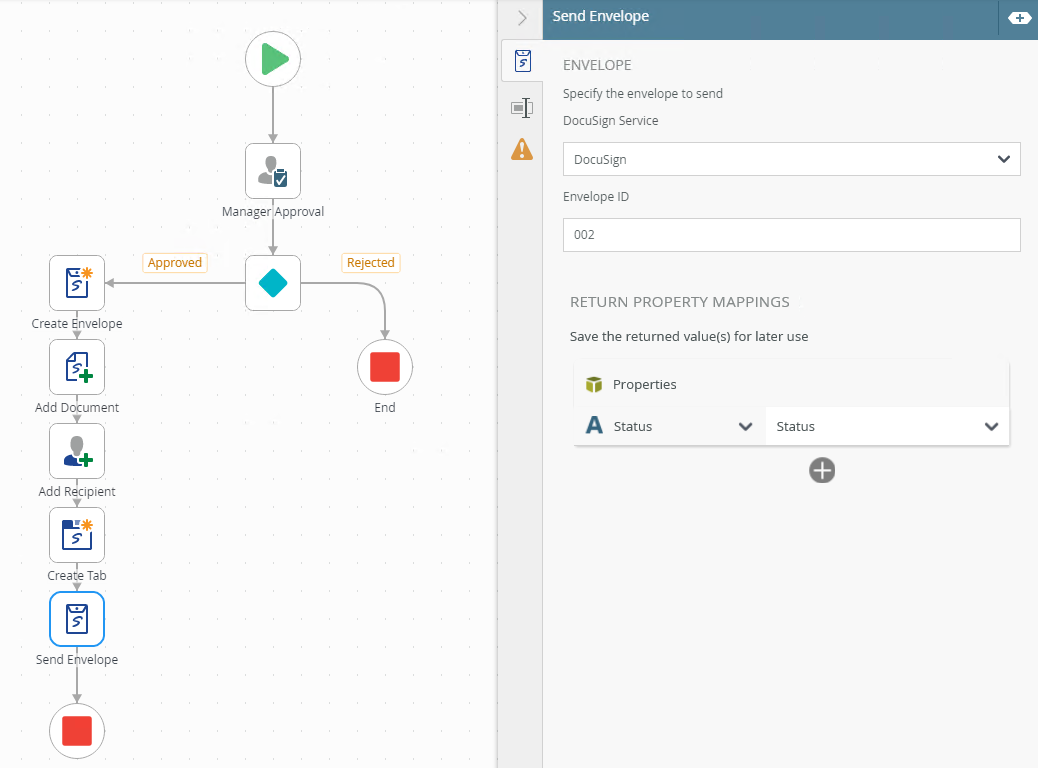
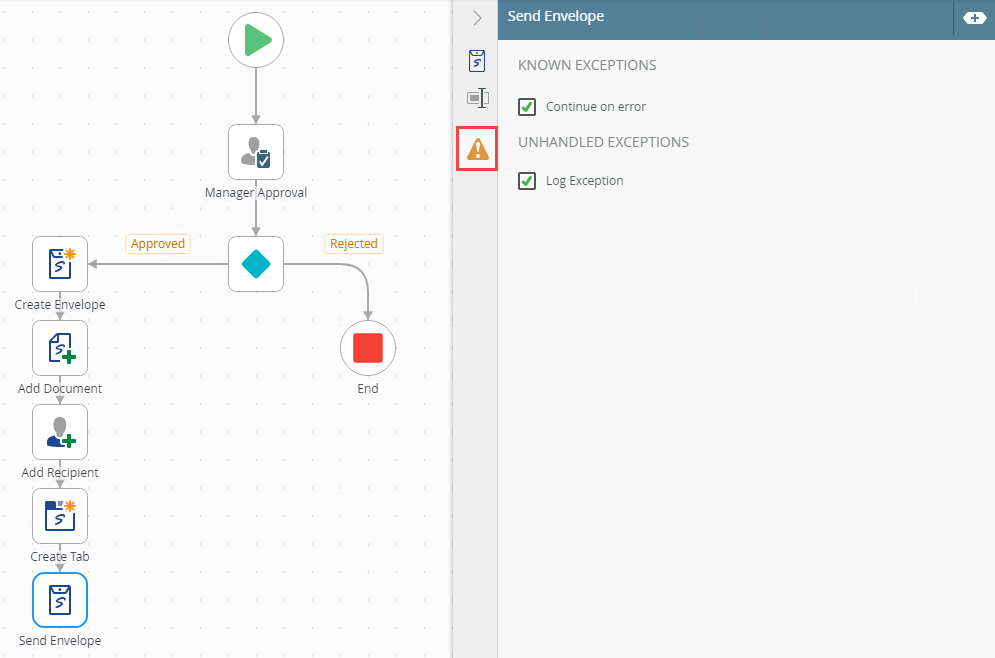
Example of a Send Envelope step in a workflow
- From the Toolbox click the DocuSign category, the Envelope category and then drag the Send Envelope step onto the canvas.
 For more information on how to use the error console, see the Error Console topic.
 - Select the added step and click the expand / collapse toggle to expand the Configuration Panel. You can also double click the step to expand the panel.
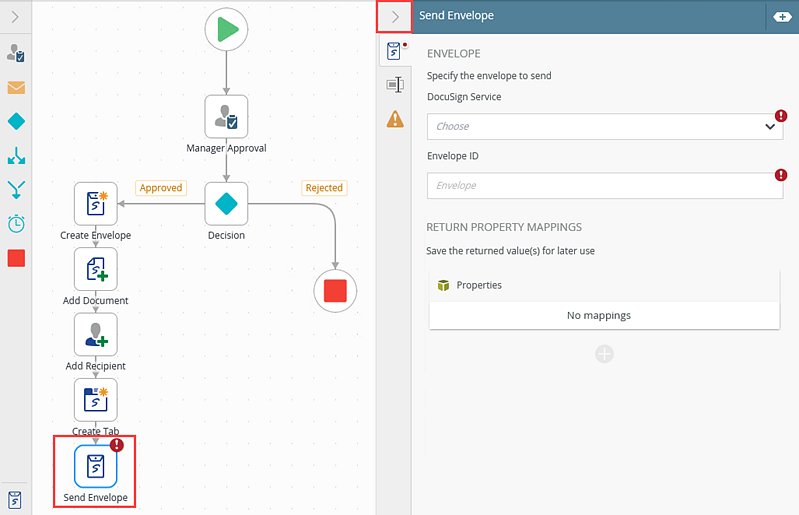
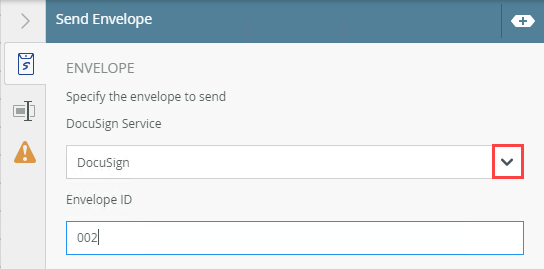
- Select the Send Envelope tab. Use this tab to configure the DocuSign service instance, envelope ID, and the return property mappings.
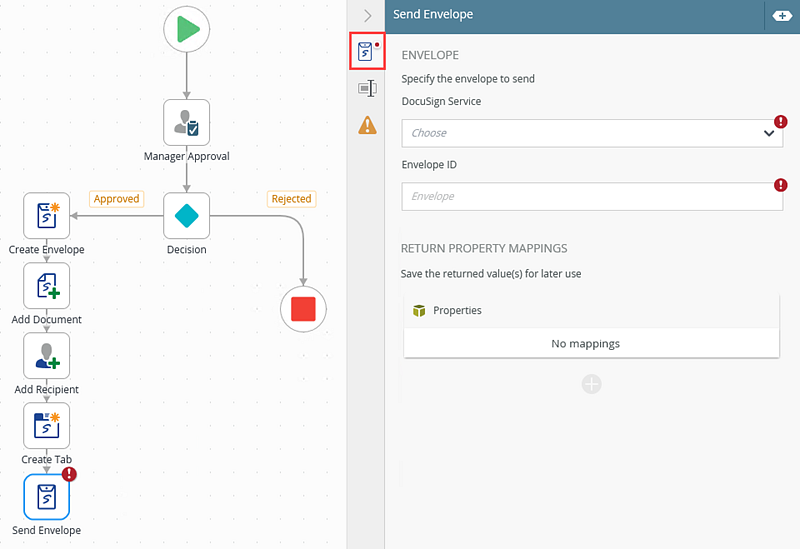
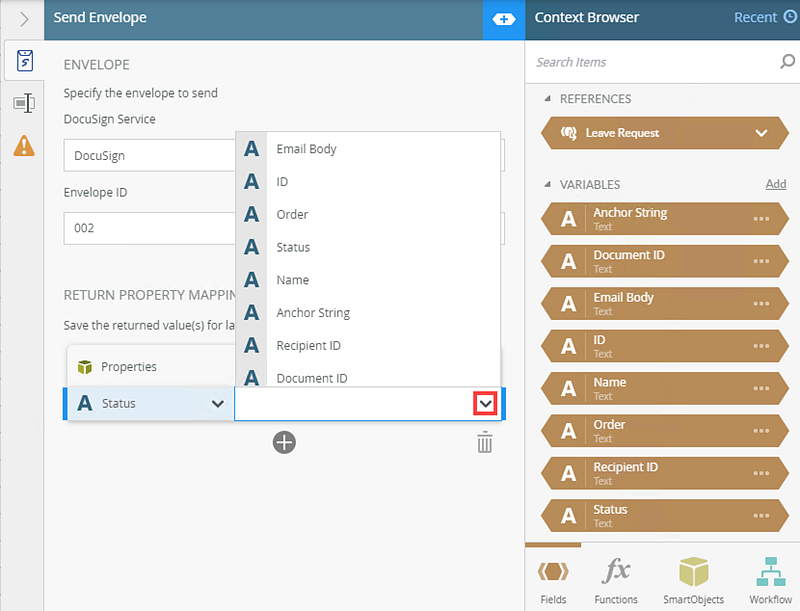
- From the DocuSign Service menu, select the service instance. Add the Envelope ID and type a value, use inline functions, or use dynamic fields by clicking the expand or collapse toggle to expand the Context Browser. Within the Context Browser, select inline functions from the Functions, Fields, SmartObjects or the Workflow categories to define your function. Click and drag the function on to the field.
This section is optional. Configure the Return Properties Mappings. Click Add to add properties. Select a value from the property menu.
- To add additional properties, click Add.
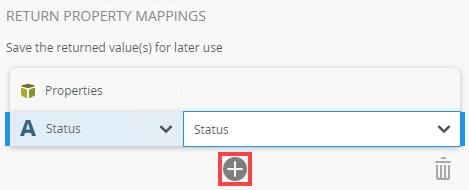
- To delete properties, select them and click the Trash bin.

- With the step selected, select the Properties tab.
- Click the Errors tab.
Your changes are automatically saved.
The following table explains the options available on this tab:
| Option | Explanation | How to Use |
|---|---|---|
DocuSign Service | This is the service instance you registered to integrate with K2. You can register multiple service instances when needed, but only one is required. In the case where you have multiple service instances, and you have templates in another service instance, make sure the templates created in DocuSign are shared if you need them available for all service instances. | Select the service instance from the menu. |
| Envelope ID | The Envelope ID is a common identifier that is required to perform the functions for this step at runtime. The Envelope ID is returned creating a new envelope or is retrieved by executing the List method of the envelope service object. It is recommended that you store the Envelope ID in a variable and use it within the step to retrieve the correct Envelope ID. Use this variable in any of the DocuSign steps, in the same workflow, where the Envelope ID is required. | Type values or create dynamic values by dragging Functions, Fields, SmartObjects and Workflow-related items from the Context Browser into the fields. When a SmartObject Load method property is used, an input property is required for the correct data to load. |
| Return Property Mappings | Return properties listed here are mapped to variables. This allows you to make use of these values in other steps in the workflow. Create a field and drag it from the Context Browser to the return property. The value of this property is stored in the variable for each workflow instance. | Select properties and supply return values. Type values or create dynamic values by dragging Functions, Fields, SmartObjects and Workflow-related items from the Context Browser into the fields.When a SmartObject Load method property is used, an input property is required for the correct data to load. Click Add to add additional property fields. |
The following table explains the options available on this tab:
| Option | Explanation | How to Use |
|---|---|---|
| Title / Name | By default, each step on the canvas has a step title. You can change this title to suit your workflow logic and show it on the canvas by checking the Show Label box. | Enter a value into the Title/Name field. |
| Reset link | Use the link to reset any changes to the title. | Click the Reset link to reset the Title/Name field to default value. |
| Show Label | Allows you to see the step label on the canvas. The label shows the value of the title. | Check the check box to display step label on the canvas. |
| Description | Allows you to add a detailed description for the step. | Enter a value into the Create New field. |
| Notes | Allows you to add additional notes for the step. | Enter a value into the Notes field. |
Different types of exceptions can occur on a step, such as:
| Type | Description |
|---|---|
| Known exceptions | Any SmartWizard or standard wizard that has Boolean options for handling known exceptions have these options displayed as check boxes in the Known exceptions section of the Exceptions tab. |
| Unhandled exceptions | Any unknown runtime exceptions. |
The tab contains the following known exceptions:
| Exception | Explanation | How to Use |
|---|---|---|
| Continue on error | On step execution and an error occurs, continue to the next step in the workflow. | Check the check box to continue if an error occurs. Uncheck the check box to stop workflow execution if an error occurs. |
The tab contains the following unhandled exceptions:
| Exception | Explanation |
|---|---|
| Log Exception | Logs the exception to the error log. |
| Force error when required SmartObject inputs are missing | Will forcefully throw an error if a SmartObject method has input missing. |
| Continue on error | Will force the workflow to continue running the SmartObject method, even if it runs into an error. |
When working with the Send Envelope step keep in mind the following consideration:
- The DocuSign Service Instance must be registered before using this wizard. For information on how to do this, see DocuSign feature activation.
- Use the Create Envelope step first, which is typically the starting point when building a workflow containing DocuSign steps