How To: Create a SmartObject Association
A SmartObject association creates a relationship between two data sources, similar to a join statement in SQL. For example, you associate a list of employees with a list of departments, or a list of customers with a list of regions. You can then use associated SmartObjects with certain SmartForm controls and in reports to automatically show data from different SmartObjects.
For more detailed information on SmartObject associations, see Add a SmartObject Association.
Configuring a SmartObject association

Scenario
You work in Human Resources where you have created several forms that employees submit online. To keep content consistent across employee records, you add drop-down list controls that have preset values. You store and maintain the list control values in associated SmartObjects.
Steps
For this scenario, you create a SmartObject that stores employee details (from which you design a view). A second SmartObject stores department names. You associate the Employee Details SmartObject with the Departments SmartObject. Because of the association, a drop-down list control on the view retrieves its values from the Departments SmartObject.
Setup Steps
The following steps set up the scenario from start to finish. If you want to skip the setup steps and view the topic step, go to Associate the Employee Details SmartObject with the Department SmartObject.
- From K2 Designer, create a new SmartBox SmartObject called Departments. Add one property, Department Name. Keep the default Text data type. Finish the SmartObject to save your settings. (Optional: create categories to keep your work organized. All Items > How To > SmartObject Associations)
- Launch K2 Designer. On the landing page, click Browse.If you do not know how to access K2 Designer, see Accessing K2 Sites.
- Create new categories to keep your work organized. Expand the All Items node. To add the first category, right-click All Items and select New Category. For the category name, enter
How To
then right-click How To and select New Category. Name the new category
SmartObject Associations.Categories are folders you create to keep your work organized. If you are working in a shared environment, consider adding your initials or some other unique identifier to separate your work from others.
- Next, create the SmartObject that stores the department values. Right-click the SmartObject Associations category and select New SmartObject. For the Name, enter
Departments
and confirm the SmartBox type is the default. Click Create.You have two options for the SmartObject type. A SmartBox SmartObject allows you to create the data source from scratch, defining the properties (think columns in a table) and methods (methods for interacting with data such as create, update, delete) that you need. K2 creates your SmartBox as a table within the K2 database on SQL Server. The Advanced SmartObject option allows to you use properties and methods from existing service objects, such as connectors to Active Directory, Azure SQL Databases, CRM, and SharePoint to name a few.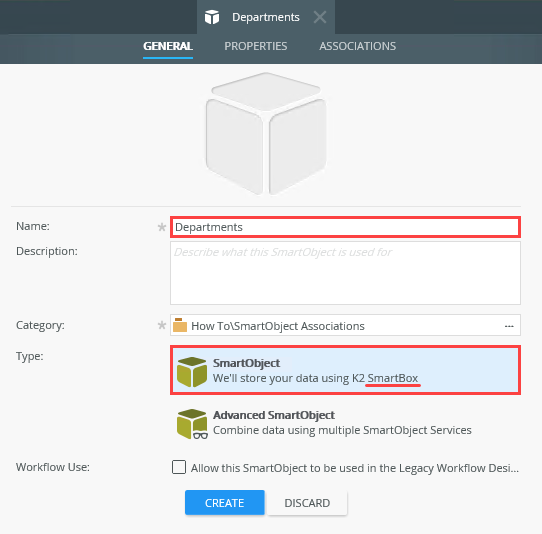
- Properties are like the columns in a table. You define the property name and type. Add one property called
Department Name
(Text data type) and click OK.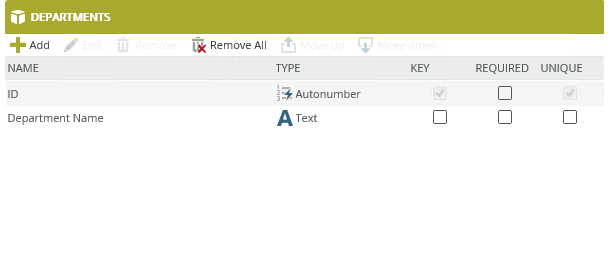
- Click Finish (near the upper right corner of your screen) to save and exit.
You have created the properties for this SmartObject, and you may be wondering now about methods. K2 provides default methods for every SmartBox SmartObject: Create, Delete, Get List, Load, and Save. You can define methods as well, such as a method that performs a calculation. For this demonstration, the standard methods are sufficient.
- Launch K2 Designer. On the landing page, click Browse.
- Create another SmartBox SmartObject called Employee Details. This is the data source that stores form content after the employee submits the form. You associate this SmartObject with the Departments SmartObject. Use the table below as a guide for adding properties.
Property Type Notes First Name Text Last Name Text Email Text Department Number You associate this property with the Departments SmartObject > ID property. At runtime, K2 populates the control with department values. - Right-click the SmartObject Associations category and select New SmartObject. Name the SmartObject
Employee Details
then confirm the SmartBox option is the Type. Click Create. - Next, add the properties. Click the Add button. For the Name, enter
First Name
then confirm the Type is Text. - Click Add property to add another property. Use the table below as a guide for adding the remaining properties. There is an image below the table for reference. Click OK to save the properties. Do not exit the SmartObject just yet.
Property Type Notes Last Name Text Email Text Department Number You associate this property with the Departments SmartObject > ID property. At runtime, K2 populates the control with department values. 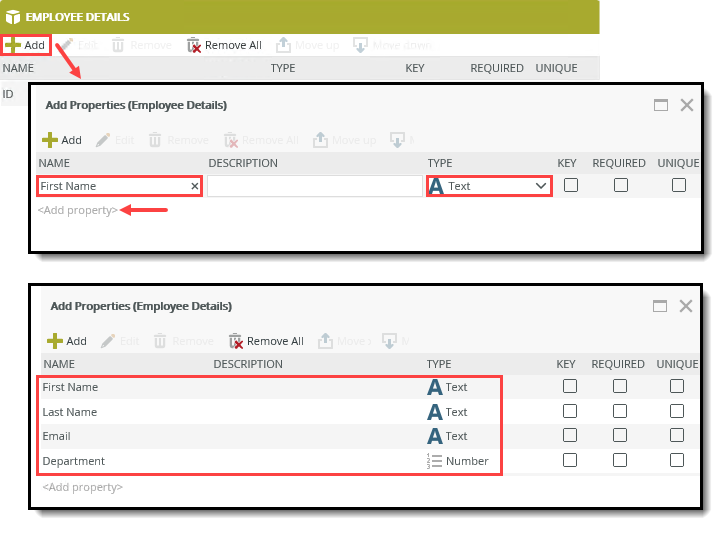
- Right-click the SmartObject Associations category and select New SmartObject. Name the SmartObject
Associate the Employee Details SmartObject with the Departments SmartObject
In this step, you create a relationship between the Employee Details SmartObject and the Departments SmartObject. The result is a departments control that gets its values from the Departments SmartObject when the form loads.
- Create an association between the Employee Details SmartObject and the Departments SmartObject where the Departments > ID property is mapped to the Employee Details > Department property. This represents a one-to-many relationship where many employees have one department and one department has many employees. Before continuing to the next step, open the K2 Management site and use the create method to add at least three entries to the Departments SmartObject.
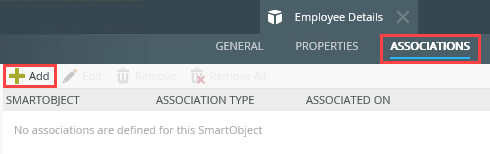
- Click the Associations tab. Click Add.
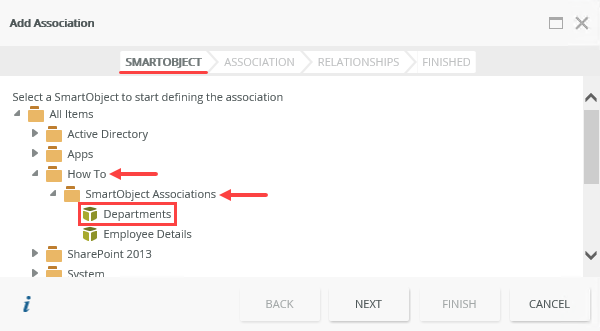
- Remember, you are editing the Employee Details SmartObject. You want to associate this SmartObject with the Departments SmartObject. On the SmartObject screen, navigate to the How To > SmartObject Associations category (or category where you saved the SmartObject). Select Departments and click Next.
- On the Association screen, select the relationship type: one-to-one, one-to-many, many-to-one, and many-to-many. For this demonstration, select Each Employee Details has a single Departments and Departments can have many Employee Details SmartObjects. What you are saying is many employees have one department and one department has many employees, a one-to-many relationship. Click Next.

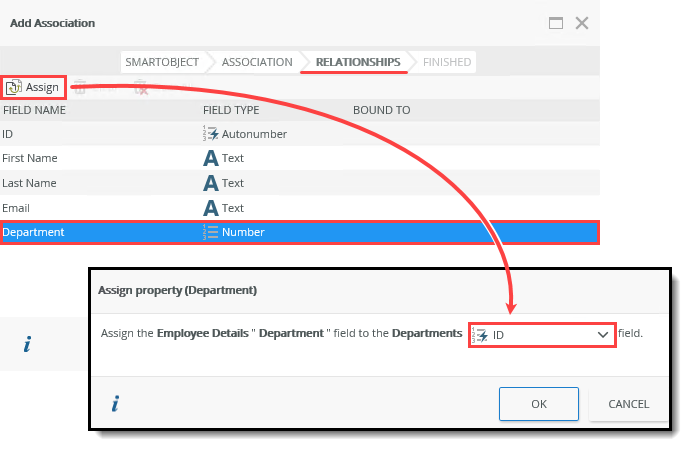
- On the Relationships screen, select the Department property and click Assign. You see a pop-up, Assign property (Department). From the drop-down list, select ID. You are binding the Employee Details SmartObject > Department property to the Departments SmartObject > ID property. Click OK. Click Finish.
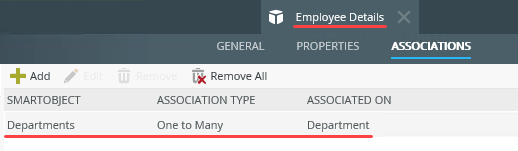
- Your SmartObject association should look like the image below. Click Finish to save and exit.
- Open a new browser tab. Launch the K2 Management site.If you do not know how to access the K2 Management site, see Accessing K2 Sites.
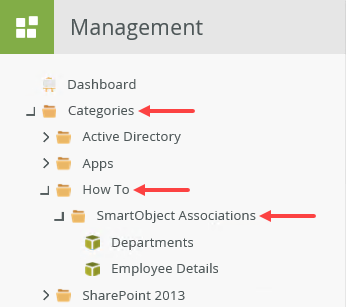
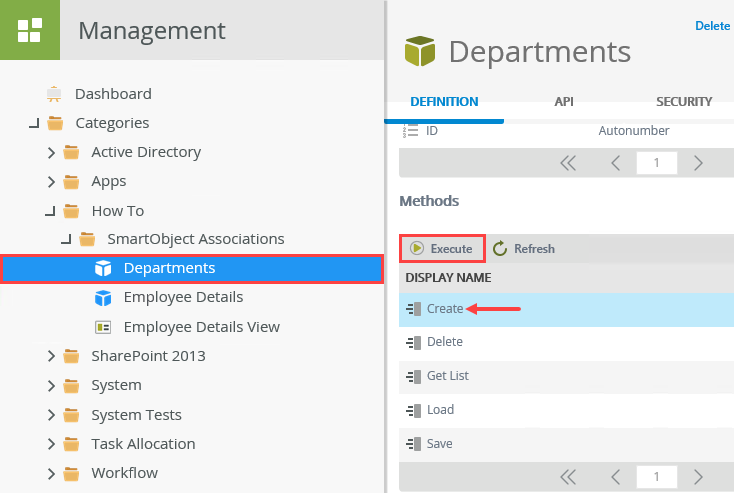
- From the Management menu, expand the Categories > How To > SmartObject Associations node. If you are working in your own environment or created different categories, your screen may not match the image.
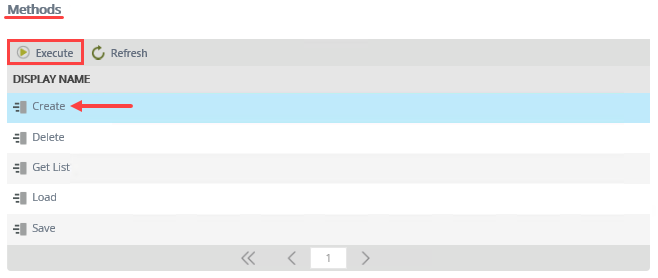
- Select the Departments SmartObject. The SmartObject details open in the central pane. Scroll down to find the Methods section. To add departments to this data source, you create new records. Click the Create method and click Execute.
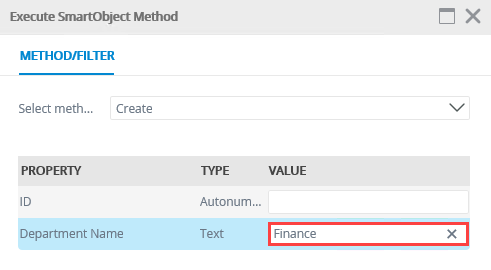
- Notice the properties, ID and Department Name. ID is an autonumber which means the data source creates a unique number for each record. You can ignore this property. For the Department Name, enter
Human Resources
and click Execute. K2 creates the record. Click Done to close the results screen.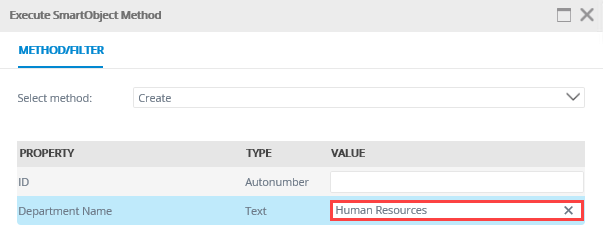
- Repeat the step above two more times and add the following departments:
IT
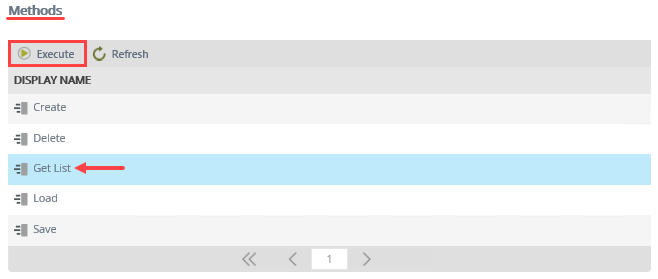
Legal - To confirm your new entries, click the Get List method and click Execute.
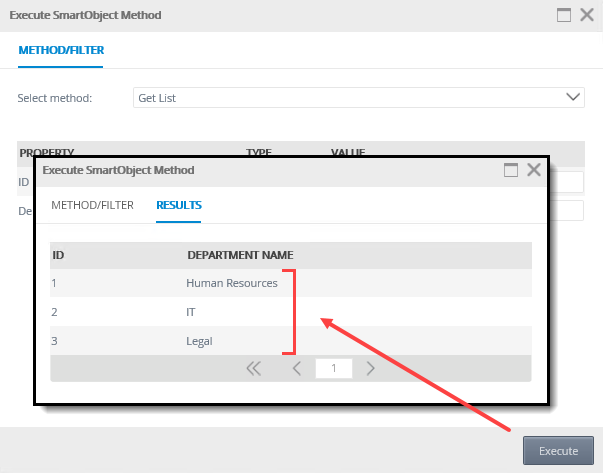
- Click Execute once again to return all records. You see the three departments previously entered. Click Done to close the method screen. Switch back to the K2 Designer tab. (Do not close the K2 Management site tab just yet.)
Before continuing with testing, add three departments to the data source. You can perform this step at any time so long as you have departments to display before taking your form live. Since this is a demonstration, you can add them now using the K2 Management site.
- Click the Associations tab. Click Add.
- To see how the association works, design a view from the Employee Details SmartObject. Run the view. Notice the Department drop-down list contains the SmartObject values you entered.
- Right-click the Employee Details SmartObject and select Design View.
- Name the view
Employee Details View
then confirm Item View is active for the View Type. Click Create.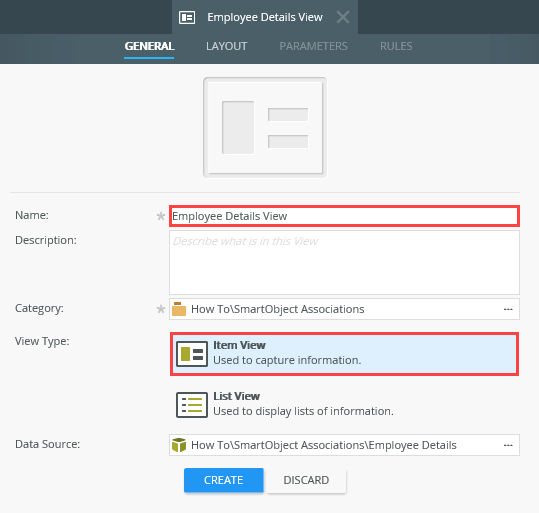
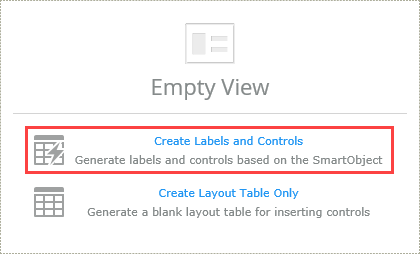
- On the Layout screen, click the Create Labels and Controls link. With this option, K2 creates a basic layout table for you, with controls that you specify on the next screen.
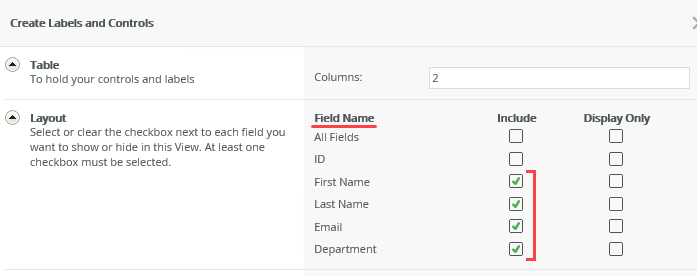
- On the Create Labels and Controls screen, select all the Fields except the ID. There are no other settings, so click OK.
- K2 creates a basic layout table with the controls you selected. Click Finish to save and exit.
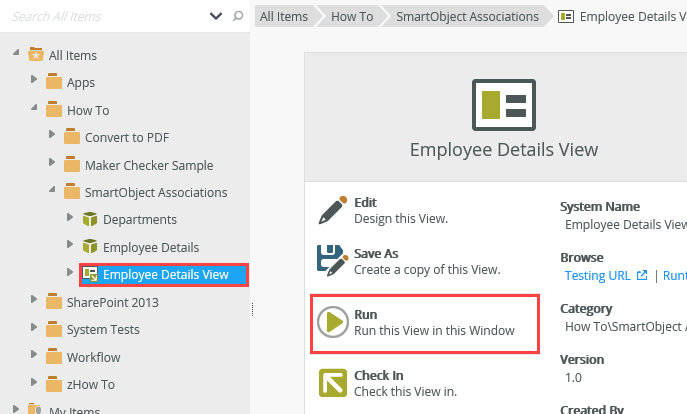
- Finally, you want to run the view from the K2 server. With the Employee Details View selected, click Run.
- Notice the Department control is a drop-down list that displays the records from the Departments SmartObject. Click the Employee Details View title to close the run screen.
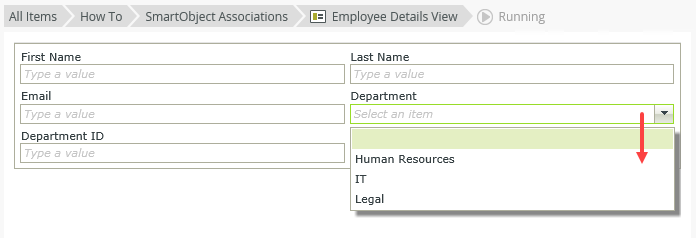
Behind the scenes, K2 converts the Department control from a text box to a drop-down list, then populates the list with values found in the Departments SmartObject. Through the association, K2 creates the rules necessary to load the list values when the view loads.
- (Optional) Return to the K2 Management site and execute the Create method for the Departments SmartObject. Add another department. Run the Employee Details View and review the contents of the Department drop-down list.
- Return to the K2 Management site. (It should be open in another browser tab.)
- Execute the Create method once again for the Departments SmartObject.
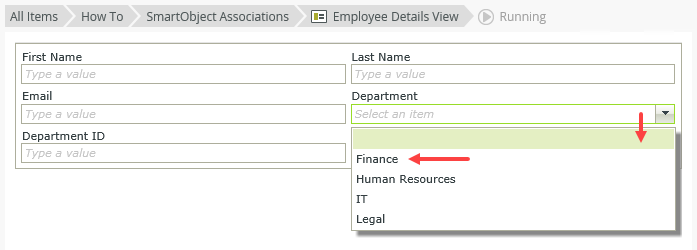
- Enter a new department name, in this case Finance, and click Execute. Click Done to close the results window.
- In K2 Designer, Run the Employee Details View. Notice the Departments drop-down list values reflect the new department.
One advantage to using a SmartObject association for list values is the ability to update the list in real time. Suppose you have the Departments SmartObject association configured in several other views. When you need to update the department's list, you simply update the SmartObject and K2 updates all associations in real time.
Review
SmartObject associations create a relationship between two or more data sources, similar to a join statement in SQL. Use associations to provide content for view controls or combine data from two or more sources into one. SmartObject associations enhance the user experience without any interaction from the user. In this demonstration, you created the two data sources used in the association. You can, however, use existing data sources such as Active Directory, SQL tables, and SharePoint lists. You are not limited to using SmartBox SmartObjects.