How To: Use a Parameter to Transfer Data from a SmartForm to a SmartObject
This article illustrates how to save parameter data to a SmartObject. In this demonstration, you have a view with three parameters. One parameter contains a static value and you enter the other two values. You configure a rule to execute a SmartObject's create method, which saves the values of all three parameters in the SmartObject.
You may want to use this approach when you have a view based on one SmartObject but you need to update data in a secondary SmartObject that is not bound to the view.
Transferring view parameter data to a SmartObject
Scenario
In this scenario, you need to save parameter values to a SmartObject for future use. The SmartObject is unbound from the view, meaning there is no relationship or link between the view and SmartObject. This is typically not the case as you normally create views based on SmartObjects, but in this scenario, you are using the view to simply display and gather data. Keep in mind that you can use this approach in a bound view to save data in a SmartObject other than the one used as the data source for the view.
Steps
Begin by building a SmartBox SmartObject to store the parameter values. Next, build a view but do not link it to the SmartObject. The SmartObject remains unbound. Add data label controls to the view along with a button control. Add three parameters. Finally, add a rule that executes when you click the button. You have two rule actions: the first transfers the parameter values to the data label controls, giving you immediate feedback of the rule execution. Second, execute the create method of the SmartObject to add a new item based on the parameter values. You test this scenario by running the view with parameters.
Setup Steps
The following steps walk you through the demonstration from start to finish. If you want to skip the setup steps and view the topic step, go to Configure a Rule to Transfer and Save Parameter Data.
- In K2 Designer, create a SmartBox SmartObject called Parameter Values. Add the following properties: Name (Text), Date (Date), and Shift (Text). (Optional) Create categories first to keep your work organized.
- Launch K2 Designer.If you do not know how to access K2 Designer, see Accessing K2 Sites.
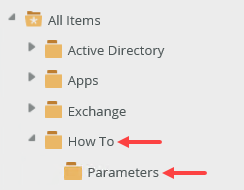
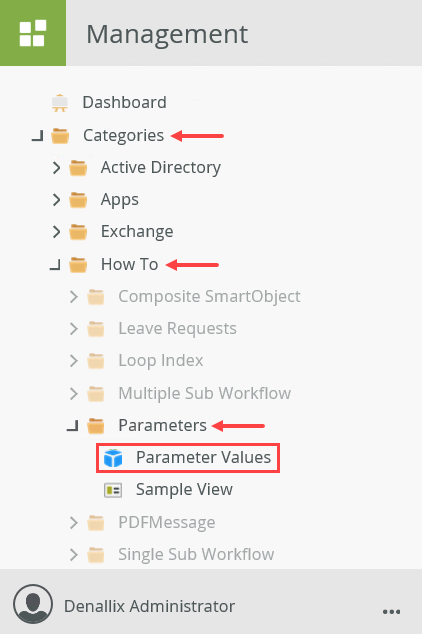
- Create categories to keep your work organized. Right-click All Items and select New Category. Use the image below for an example of category names.
- Right-click the Parameters category and select New SmartObject. Name the SmartObject
Parameter Values
and confirm the type is set as SmartBox. Click Create.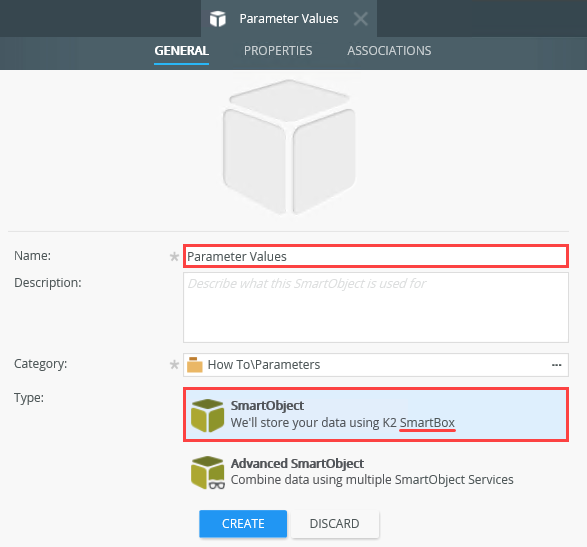
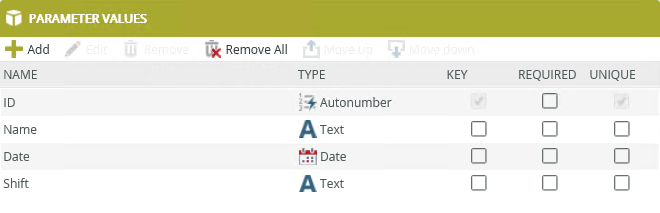
- Add three properties: Name (Text), Date (Date), and Shift (Text). Click OK. Click Finish to save and exit.
- Launch K2 Designer.
- Create a view called Sample View. Create the layout table with one column and four rows. Add three data labels to the first three rows. Add a button control to the fourth row. Add three parameters using the table below as a guide for the name, date, and default values.
Name Data Type Default Value Name Text Date Date Shift Text Days - Right-click the Parameters category and select New View. Name the view
Sample View
and confirm the type is set to Item View. Click Create.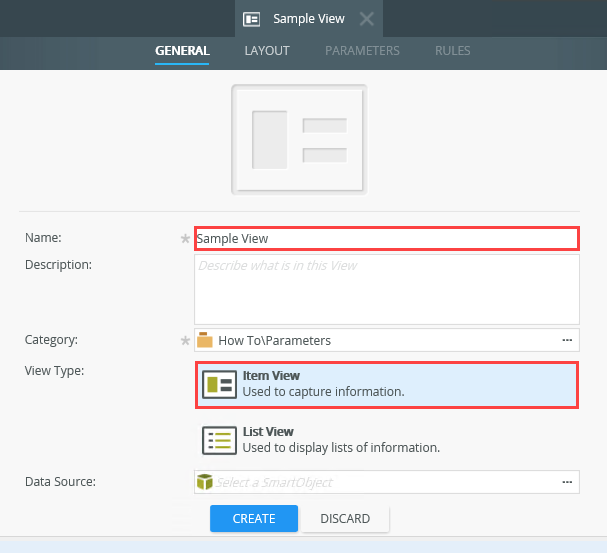
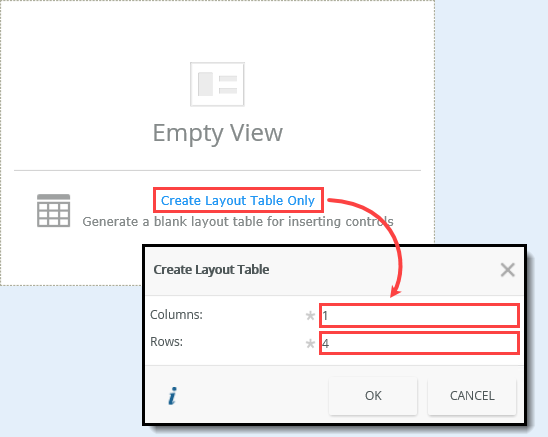
- Click Create Layout Table Only. Set it for one column and four rows. Click OK.
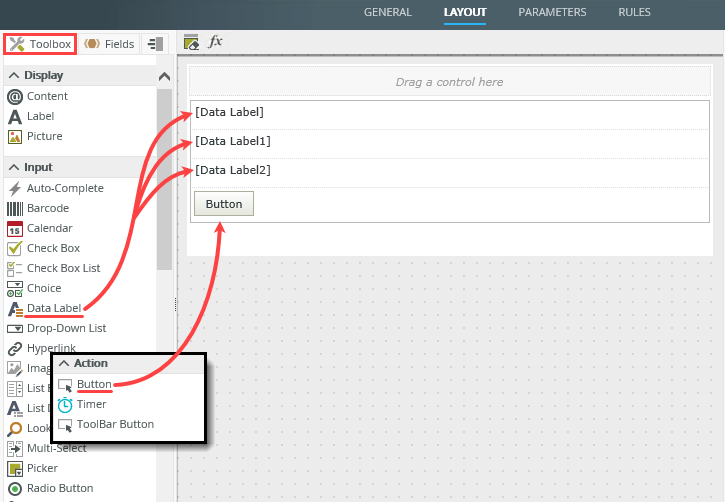
- From the Toolbox (on the left side of your screen), drag a Data Label control into the first three rows. Drag a Button control into the fourth row.
- Next, add three parameters. Click the Parameters tab. Click Add Parameter. Use the table below as a guide for the name, data type, and default values. The Shift parameter has a static value, Days. You add the other two parameter values when you run the view.
Name Data Type Default Value Name Text Date Date Shift Text Days 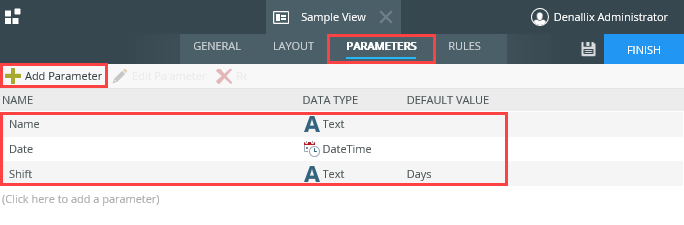
- Right-click the Parameters category and select New View. Name the view
Configure a Rule to Transfer and Save Parameter Data
In the next step, you add a rule that contains two actions: transfer parameter values to data labels and save the values to a SmartObject.
- Add a rule with two actions: the first transfers parameter values to the data label controls, and the second creates a list item in the Parameter Values SmartObject. The rule executes when you click the button on the view.
- Click the Rules tab. Click Add Rule.
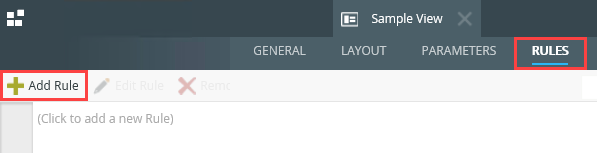 Rules consist of events, conditions, and actions. A valid rule contains at least one action.
- Events define when the rule should run, such as when a button is clicked, or when the form loads. (Events are optional, you can define "event-less" rules that you can call from other rules.)
- Conditions define whether the rule should run. If the criteria are true, continue the rule, and if the criteria are not met, stop the rule. For example, a condition might evaluate a form to confirm that required fields have content. (Conditions are optional - not all rules will require conditions.)
- Actions define what the rule should do. For example, show a message, start a workflow, or enable a form field. Rules can contain multiple actions that are run in sequence or in parallel.
- With the Events tab active, click When a control on the View raises an event to add it to the rule definition pane. (Note that you can search for events or scroll through them.) Click select control and select Button. The event changes to Clicked (since you click buttons!).

- There are no conditions for this rule so click the Actions tab. The first action transfers the parameter values to the data labels. This action is a confirmation to you that the rule executed. Search for
transfer
then click Transfer data to add it to the rule definition pane. Click (configure).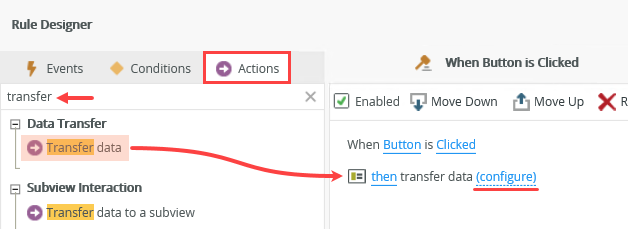
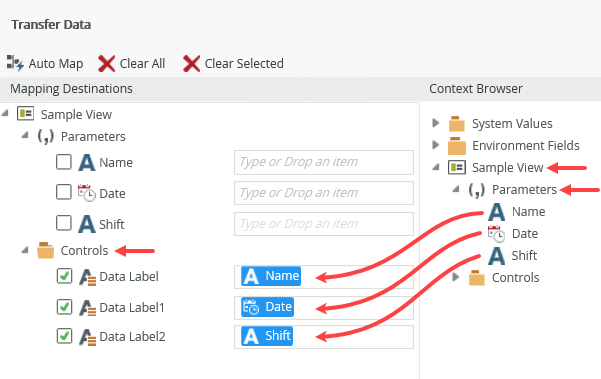
- You are transferring the parameter values to the data labels. Expand the Context Browser > Sample View > Parameters node. Map the Name parameter to the Data Label control. Map Date to Data Label1. Map Shift to Data Label2. Click OK. After you click the button, the data labels show the parameter values. This gives you a visual indication the rule executed.
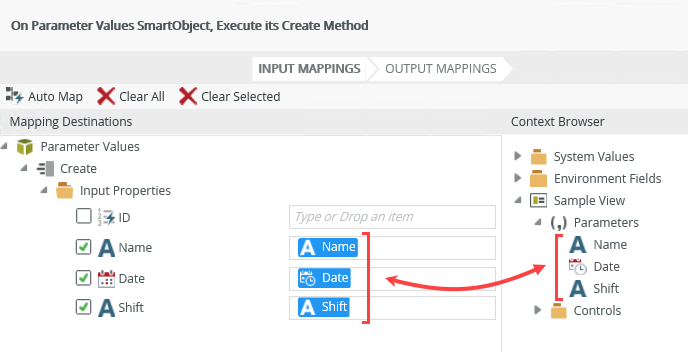
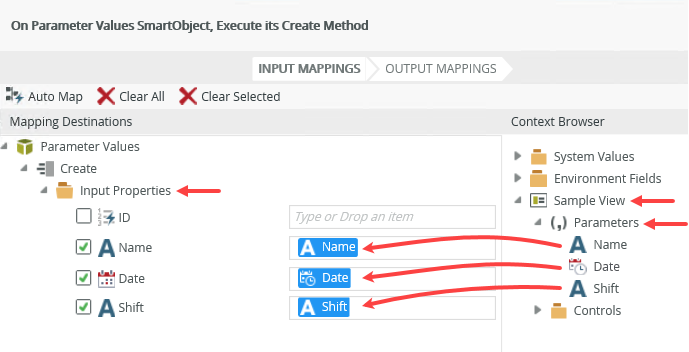
- With the Actions tab active, click Execute a SmartObject method to add it to the rule definition pane. Click select SmartObject. Navigate to and select the Parameter Views SmartObject. Click select method and select Create. Click (configure).
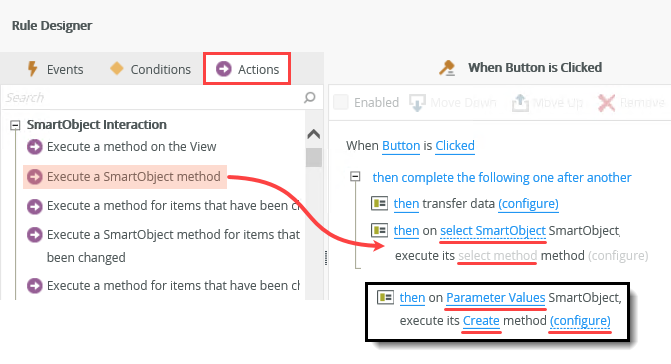
- Map the Context Browser > Sample View > Parameters > Name property to the Input Properties > Name text box. Map the Date and Shift parameters to their corresponding input properties. (K2 creates the ID when it adds the new item.) Click Finish to save the action. Click OK to save the rule. Click Finish to save and exit the view.
When you click the button control, you want K2 to populate the three data labels with the three parameter values. (Remember, one value is static and you enter the other two values when you run the view.) Therefore, the event for this rule is the button click.
Next, you save the parameter values to your SmartObject. A key point in this action is the SmartObject is unbound from the view; there is no relationship between the view and the SmartObject data source.
- Click the Rules tab. Click Add Rule.
- Test the data transfers by running the view from K2 Designer. Run the view with parameters. Enter a value for the Name parameter and enter a Date. Do not enter a value for the Shift parameter as it has a default value of Days. Click the button. The data labels on the view show the date, time, and shift values. This is a visual confirmation the rule is executing. From the K2 Management site, execute the Get List method for the Parameter Values SmartObject. You should see a list item with all three parameter values.
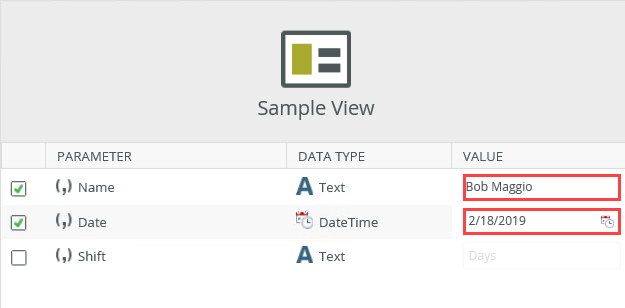
- Right-click Sample View and select Run with Parameters.
- Enter values for the Name and Date parameters. Remember, the Shift parameter has a default value, so you can leave it blank. Click Run.
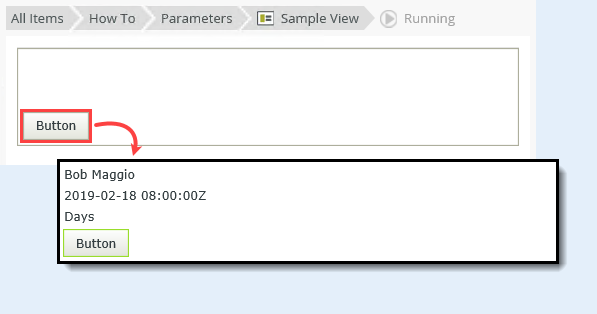
- Click the Button. The data labels show the parameter values.
- Open the K2 Management site in a new browser tab.
- From the Categories menu, navigate to and select the Parameter Values SmartObject.
- You see the SmartObject details in the central pane. Locate the Methods section. Click the Get List method and click Execute.
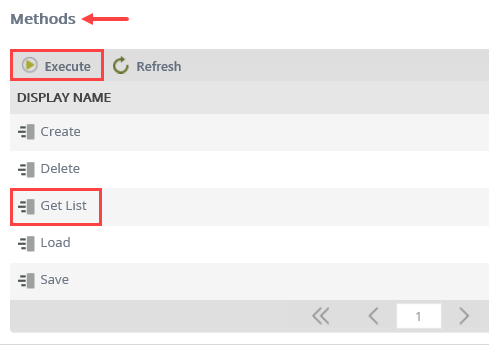
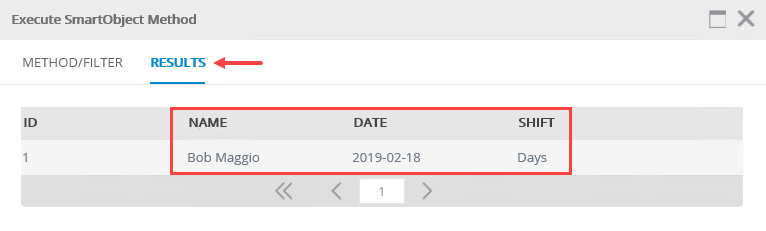
- Click Execute once again. You want to return all records, so you don't need to apply a filter. On the Results screen, you should see a list item containing the three parameter values. Click Done to exit.
Review
Use parameters like variables to store data within a view or form. Parameter values can be static, dynamic, or entered at runtime. You can transfer parameter data to SmartObjects by executing a SmartObject method such as create or save. SmartObjects do not have to be bound to the view. In most cases, you use rules to integrate with parameter data, for example, to set or transfer values.