How To: Save a Screenshot to PDF and Attach it to an Email
This article illustrates how to use the Save As PDF control on a form to attach a PDF snapshot of the form to an email in a workflow. The PDF includes any values entered into your form. Use this control, for example, to provide an offline copy of a form such as a receipt.
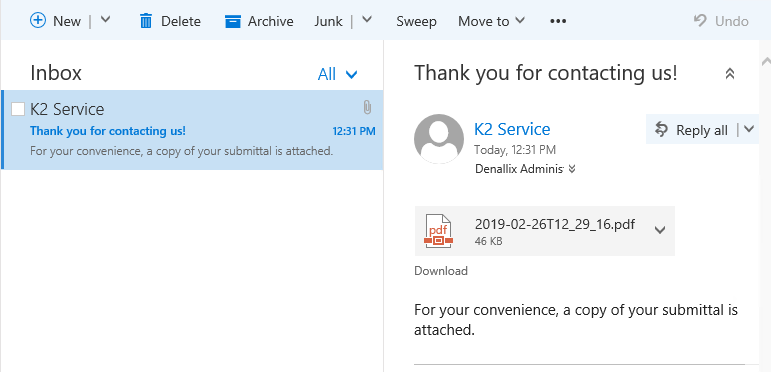
A email sent by a workflow with a PDF file attached
Scenario
You work in Customer Service where you maintain an online form for customers to submit questions or comments. For customer convenience, a workflow generates and sends an email with a copy of the form attached as a PDF.
Steps
You begin by creating a SmartObject to store customer details. You generate a view and form from the SmartObject. You add a Save As PDF control to the view, then add a parameter to store the ID of the PDF record once it is generated in the background. You use the parameter to attach the correct PDF file to an email.
Setup Steps
The following steps set up the scenario from start to finish. If you want to skip the setup steps and view the topic step, go to Add the Save As PDF control.
- Create a SmartBox SmartObject called Customers. Add two properties: Name (Text) and Email (Text). (Optional) Create categories first to keep your work organized.
- Launch K2 Designer.If you do not know how to access K2 Designer, see Accessing K2 Sites.
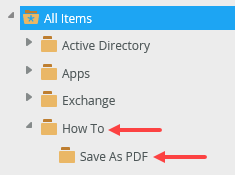
- Create categories to keep your work organized. Right-click All Items and select New Category. Use the image below as an example for category names if necessary.
- Right-click the Save As PDF category and select New SmartObject. Name the SmartObject
Customers
and confirm the default SmartBox option. Click Create.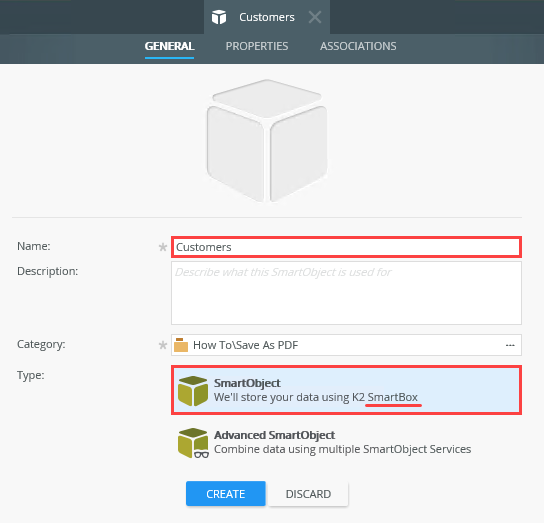
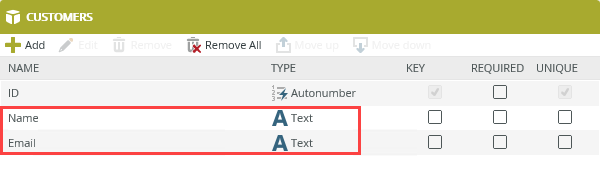
- Add two properties: Name (Text) and Email (Text). Click OK. Click Finish to save and exit.
- Launch K2 Designer.
- Generate an item view and a form from the Customers SmartObject. Keep the default names.
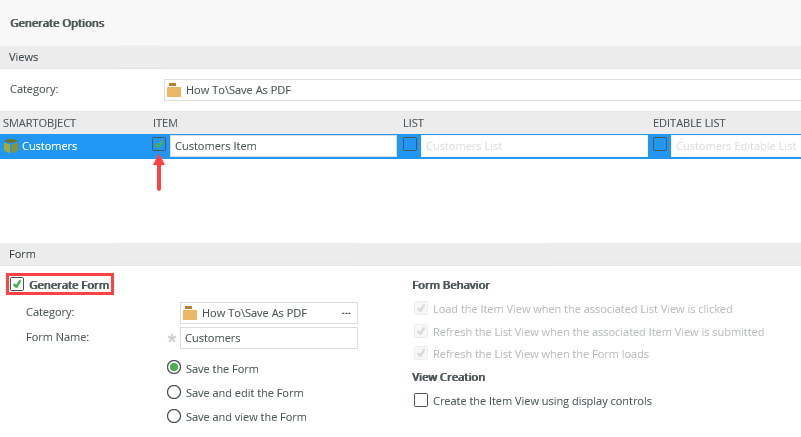
- Right-click the Customers SmartObject and select Generate Views.
- Select the Item view option. Select the Generate Form option. Keep the default name for both view and form. Click OK.
- Edit the Customers Item view. Hide the Delete, Save, and Load buttons. This demonstration only uses the Create button.
Next, you hide three buttons so you don't see them during testing.
- Right-click the Customers Item view and select Edit.
- Select the Delete button. In the Properties pane on the left side of your screen, uncheck the Visible box. At runtime, the button is not visible.
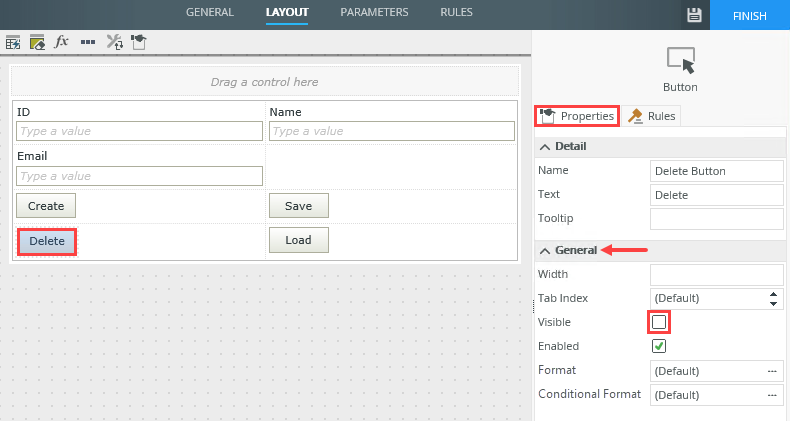
- Repeat the step above for the Save and Load buttons. You want only the Create button visible at runtime.
Add the Save As PDF control
In the next step, you add the Save As PDF control, then configure an action that executes the control method after you click the Create button. You create a parameter that stores the ID of the generated PDF file. You use this ID to attach the correct file to an email.
- Edit the Customers Item view and add the Save As PDF control to the top of the design canvas. Add a parameter called PDF ID with a number data type. Edit the rule, When Create Button is Clicked. Add an action that executes the Save As PDF control's Save PDF method (there are no other configurations to this action). Add an action to Transfer data. Map the Save As PDF control to the PDF ID parameter. Show a message to let your customers know they will receive a copy of the form in their email.
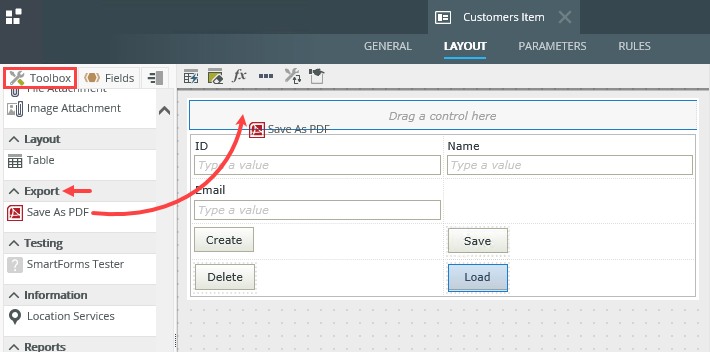
- From the Toolbox on the left side of your screen, drag the Save As PDF control to the top of the design canvas.
- Click the Parameters tab. Click Add Parameter. Enter
PDF ID
for the name and change the data type to Number.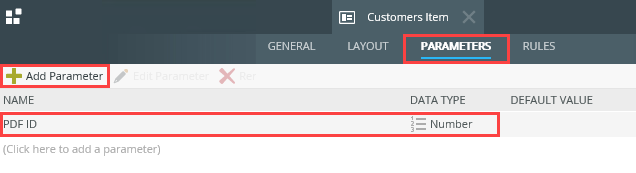
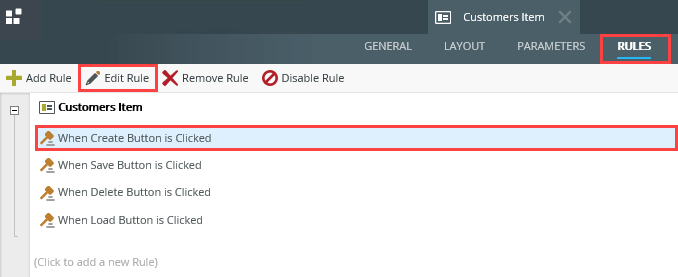
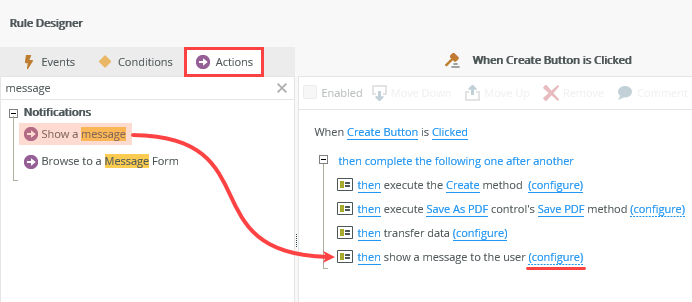
- Click the Rules tab. You want the control method to execute when you click the Create button. Since there is already a rule for when you click the button, you can edit that rule and add the action to execute the control's method. Select the When Create Button is Clicked rule and click Edit Rule.
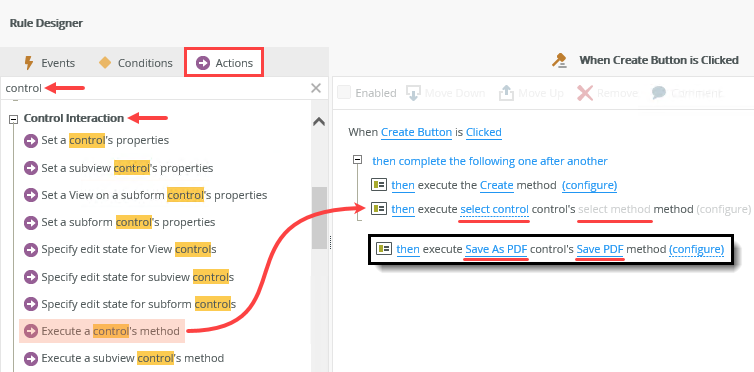
- With the Actions tab active, search for
control
and click Execute a Control's method to add it to the rule definition pane. Click select control and select Save As PDF. Click select method and select Save PDF.The Save As PDF control has two methods: Save PDF and Save PDF Async.Save PDF: This option runs synchronously or in a linear fashion during which the view or form controls become locked while the action runs.
Save PDF Async. This option runs asynchronously, otherwise known as fire-and-forget. You can edit view controls while the action runs.
For more information and considerations, see Save As PDF Control in the User Guide.
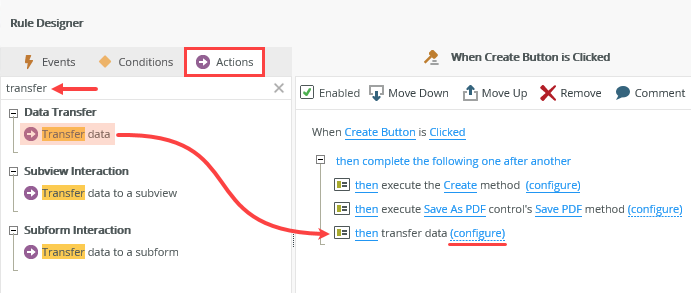
- With the Actions tab still active, click Transfer data to add it to the rule definition pane. Click (configure).
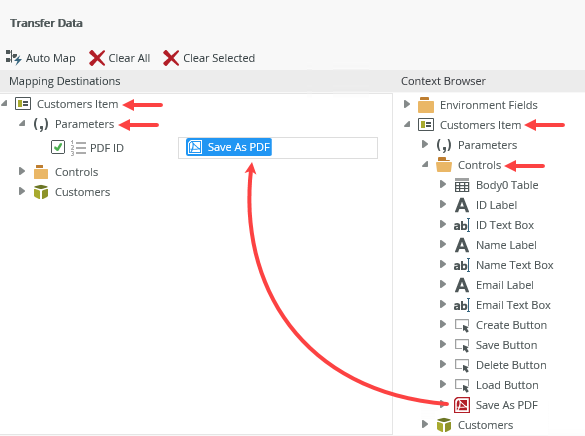
- Expand the Context Browser > Customers Item (view) > Controls node. Drag the Save As PDF control into the Customers Item > Parameters > PDF ID text box. Click OK.
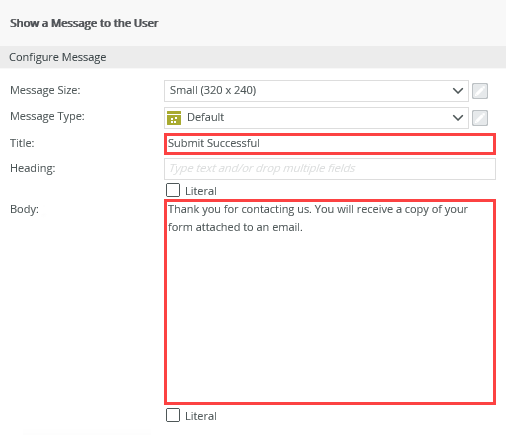
- With the Actions tab still active, click Show a message to add it to the rule definition pane. Click (configure).
- Enter values for the title and message body that lets your customers know they will receive a copy of the form in an email. Use the image below as an example. Click OK. Click OK to save the rule. Click Finish to save and exit the view.
Next, add a parameter. You use the parameter to store the ID of the PDF file. In a later step, you pass the parameter value to a variable in the workflow. You use the variable to identify which PDF file to attach to the email.
Next, you add a rule action to execute the Save As PDF control method that creates the screenshot and saves it as a PDF file.
Next, you save the ID of the PDF file to the parameter.
Finally, you show a message that lets your customers know they will receive a copy of the form in an email.
- From the Toolbox on the left side of your screen, drag the Save As PDF control to the top of the design canvas.
- Create a workflow called Customer Contact. Edit the Start step and change the button that starts the workflow to the Create button. Add a variable called Attached PDF ID with a number data type. Add a Send Email step. Keep the default To value, Originator. Add your own content for the subject line and message body. Add an Attachment and point it to the SmartObjects > System > Controls > Save As PDF > PDF File > Load > PDF property. Map the variable Attached PDF ID to the Smartfield ID. Add an End step. Deploy the workflow.
- Right-click the Customers form and select Design Workflow. Name the workflow
Customer Contact
then click Create.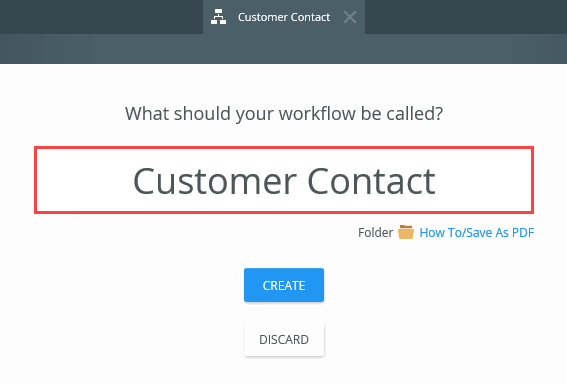
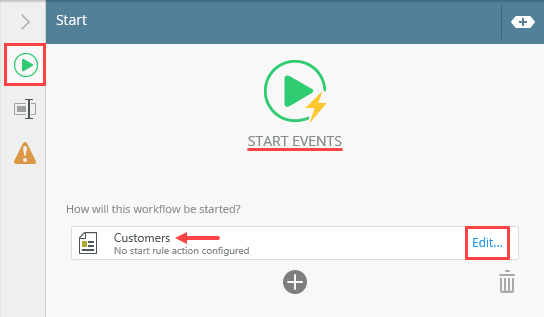
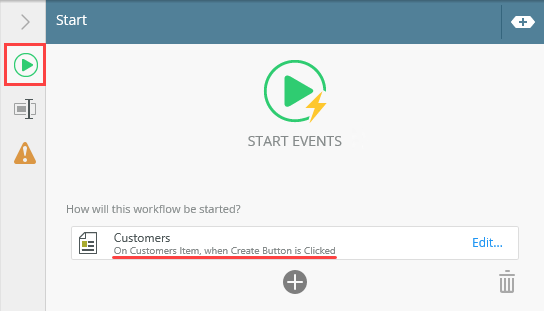
- Select the Start button and expand the Configuration Panel. Under the Start Events heading, you see the Customers form, but no start rule action. Click Edit.
- On the References screen, you see the Customers SmartObject reference. Recall that you created the workflow from the Customers form. The form contains the Customers Item view and you based the view on the Customers SmartObject. K2 created a reference to the SmartObject which allows you to use its properties and methods throughout the workflow. Click Next.

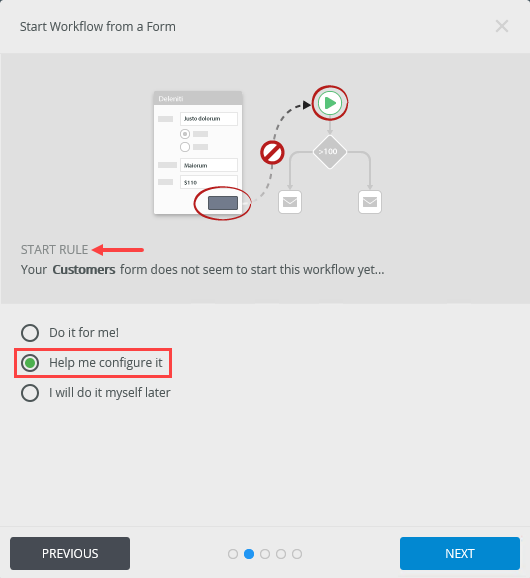
- On the Start Rule screen, select Help me configure it. Click Next.
- On the Form State screen, there are no changes. Click Next.
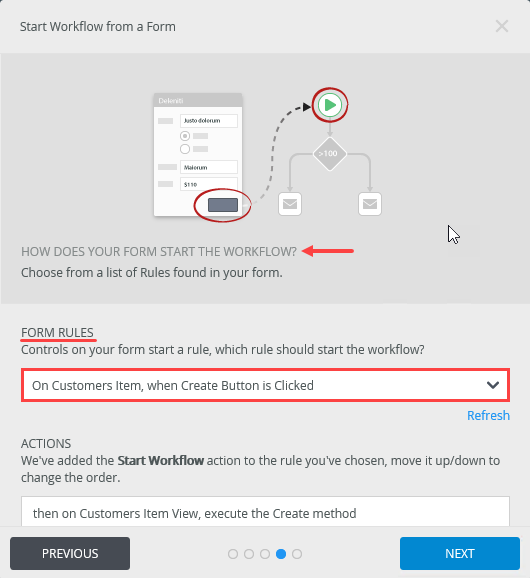
- On the How does your form start the workflow screen, change the Form Rules to On Customers Item, when Create Button is Clicked. Remember, the Save button is not visible on the view, so you change the rule to the Create Button. Click Next.
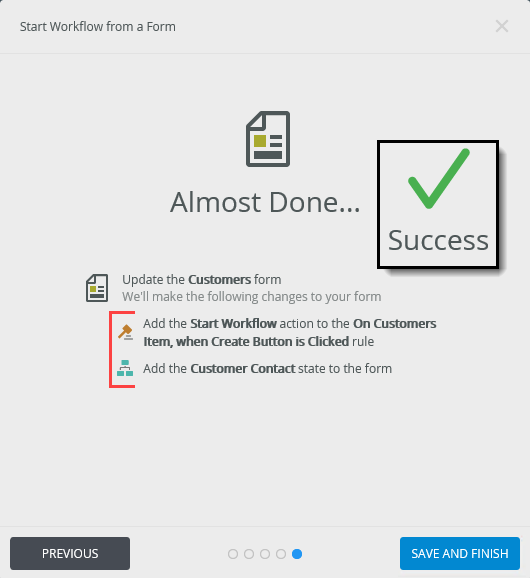
- On the summary screen, review the changes K2 makes to the Customers form. Click Save and Finish. When you see the success check, click OK.
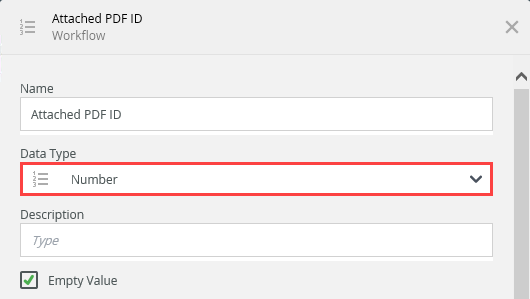
- Before you exit the Configuration Panel, create a variable. Expand the Context Browser. Under the Variables heading, click Add. Name the variable
Attached PDF ID
and open the Settings by clicking the ellipses to the right of the variable name.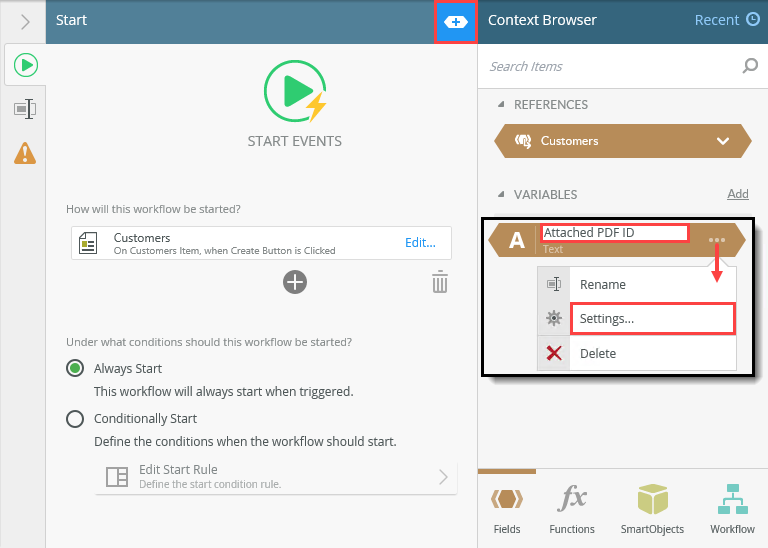
- Change the data type to number. Click OK. The ID of the PDF record is a number. You must have matching data types in your parameter and variable to avoid errors. Collapse the Context Browser and Configuration Panel.
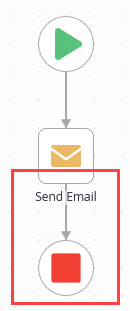
- From the Toolbox > Basic node, drag a Send Email step into the empty placeholder below the Start step.

- Select the Send Email step and expand the Configuration Panel.
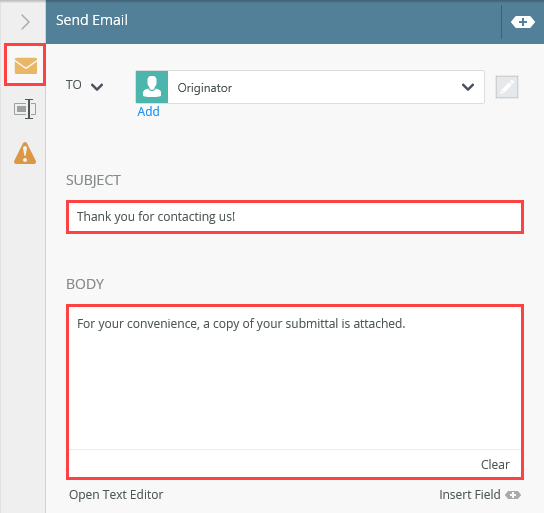
- Select the Send Email tab if it is not already active. Keep the default To value, Originator. This sends the email to the person who submitted the form. Enter your own content for the subject line and message body. Use the image below as a guide if necessary.
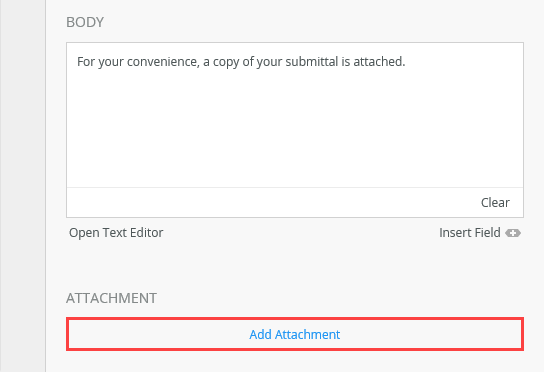
- Scroll down to the Attachment section. Click Add Attachment.
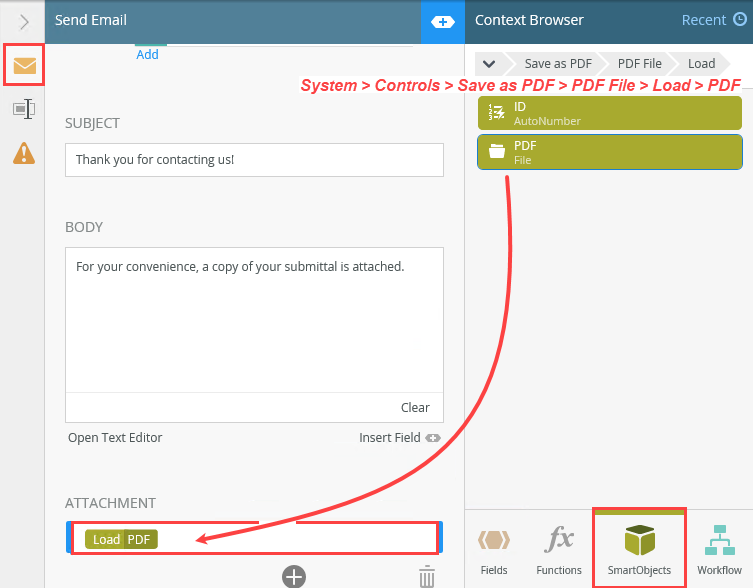
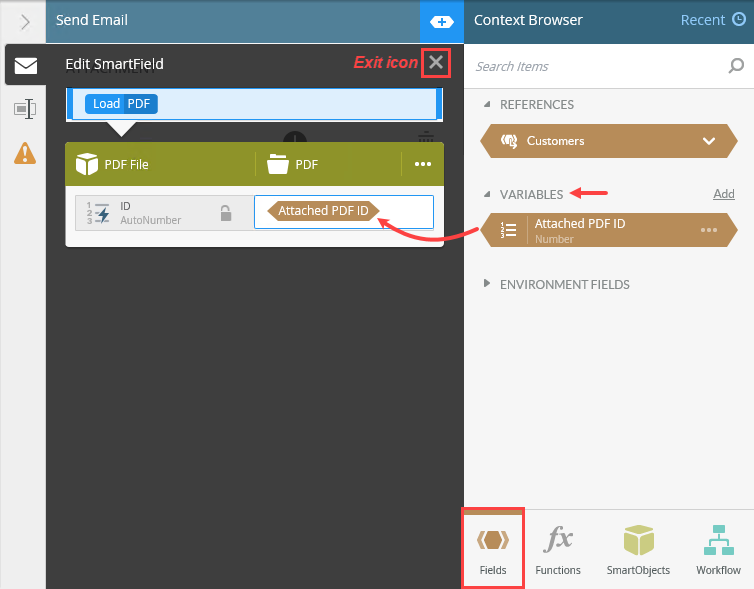
- When K2 creates the PDF file, it saves the file to a system SmartObject. You can reference this SmartObject as your file attachment. Expand the Context Browser. Select the SmartObjects tab. Navigate to the SmartObject property as follows: SmartObjects (tab) > System > Controls > Save as PDF > PDF File > Load > PDF. Drag the PDF property into the Attachment text box. The Smartfield Composer opens.
- You must map a value for the ID. (K2 needs to know which record to attach.) Click the Fields tab. Drag the Attached PDF ID variable into the ID text box. Close the Smartfield composer by clicking the exit icon. Collapse the Configuration Panel. In a later step, you pass the PDF file ID from the view parameter to this variable. In this way, the variable contains the ID of the correct file to attach.
- From the Toolbox > Logic node, add an End step below the Send Email step. Connect the two steps.Use End steps to complete workflow paths. You can configure End steps to terminate the workflow or use them as visual indicators that there are no more steps to follow. In this demonstration, the End step provides a clean end to the workflow path.
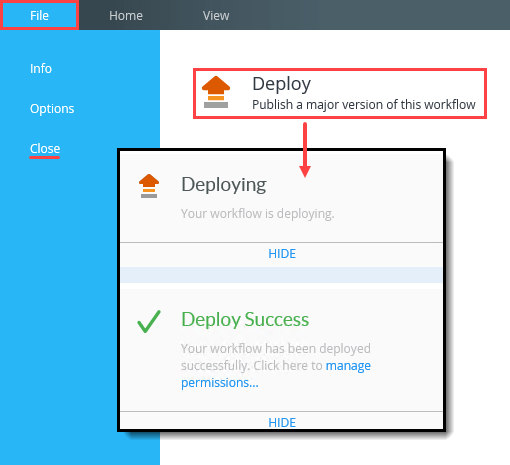
- Deploy the workflow. Deploying a workflow publishes it to the K2 server and makes it available for use. If you make any changes to the workflow, you must deploy it again so that K2 has the latest version. Click File > Deploy. When you see the deployment success dialog, click File > Close to return to K2 Designer.
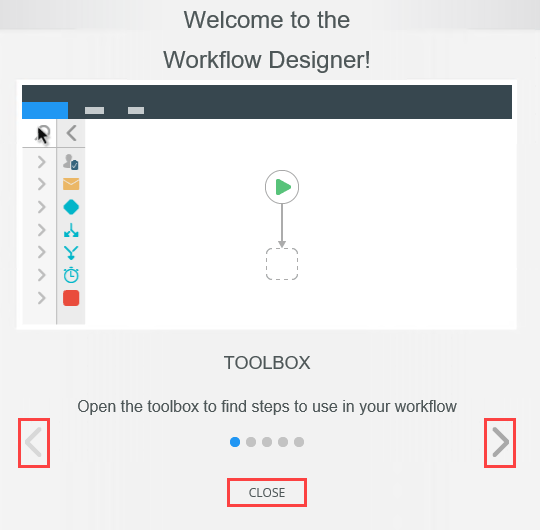
You see a Welcome screen with an interactive panel. You can click the right and left arrows to learn more about the workflow designer. Click Close to proceed to the design canvas.
First, edit the Start step. By default, the workflow starts when you click the Save button. Remember, you hid all the buttons except Create. You need to change the start button setting. To do this, you step through a wizard that configures the workflow start rule.
Notice now that the Start Events show the button click action that starts the workflow.
Next, you add a Send Email step and configure it to attach the PDF file.
- Right-click the Customers form and select Design Workflow. Name the workflow
- Edit the Create Button is Clicked rule on the Customers form. Make sure you are editing the Customer Contact (Default) state and not the base state. Locate the action that starts the workflow. Configure this action and map the Context Browser > Customers Item (view) > Parameters > PDF ID to the Data Fields > Attached PDF ID variable. Check in the view and form.
Last, you edit a rule on the Customers form and map the Customers Item view parameter to the variable you created in the workflow. The following is a breakdown of actions after you click the Create button:
- K2 saves a screenshot of the browser window to a system SmartObject as a PDF file.
- The PDF file record ID is saved to the view parameter called PDF ID.
- The workflow starts.
- The PDF ID value is passed to the (workflow) variable called Attached PDF ID.
- The workflow sends an email with the PDF file attached using the Attached PDF ID value to retrieve the correct PDF file.
- The workflow ends.
- Edit the Customers form. (Be sure you edit the form and not the view.)
- Click the Rules tab. Select the Customer Contact (Default) state. Select the On Customers Item, when Create Button is Clicked rule. Click Edit Rule.
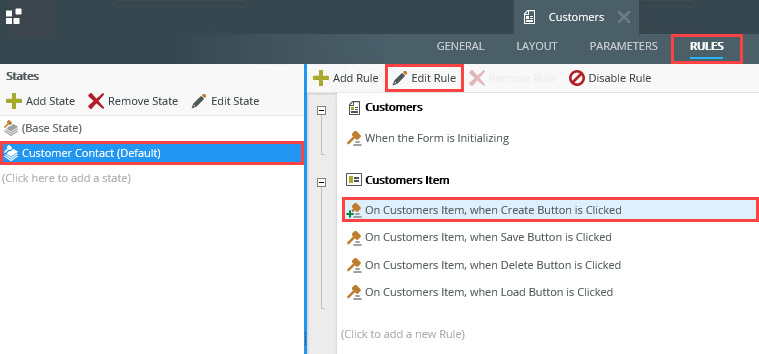
- Locate the then start the Customer Contact Workflow action. Click (configure). K2 added this action when you configured the Start step to use the Create button click as the event that starts the workflow.

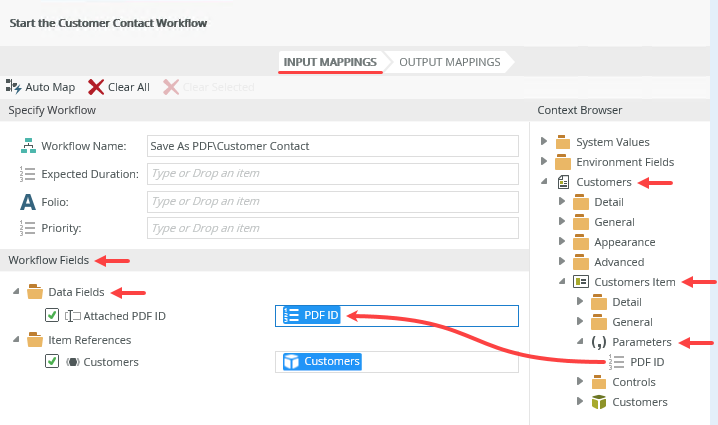
- Map the Context Browser > Customers (form) > Customers Item (view) > Parameters > PDF ID to the Workflow Fields > Data Fields > Attached PDF ID text box. In this step you pass the PDF record ID from the view to the workflow to use in the Send Email step. Click Finish. Click OK to save the rule. Click Finish to save and exit the form.
- Check in the Customers form and Customers Item view so that K2 has the latest version.
- Run the Customers form. Enter your name and email and click Create. Click OK to close the confirmation message. Open your email client. You should see an email with a PDF file attachment. Open the attachment. You should see a copy of the form with the values you entered.
- Right-click the Customers form and select Run.
- Enter your name and email. (Leave ID empty. K2 creates the record ID.) Click Create.
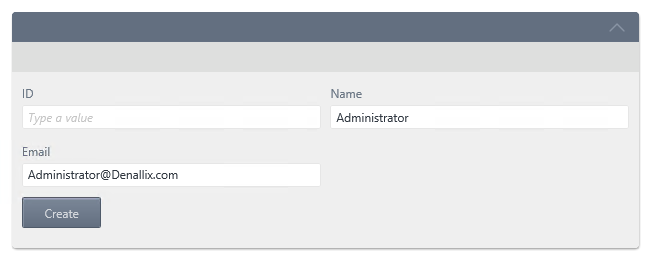
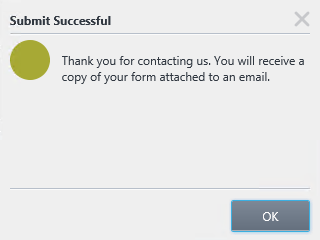
- You should see the message you configured as a confirmation. Click OK.
- Open your email client. On a K2-provided VM, open a new browser tab and click OWA found in the Favorites bar. Sign in with the following credentials:
User name: Denallix\Administrator
Password: K2pass!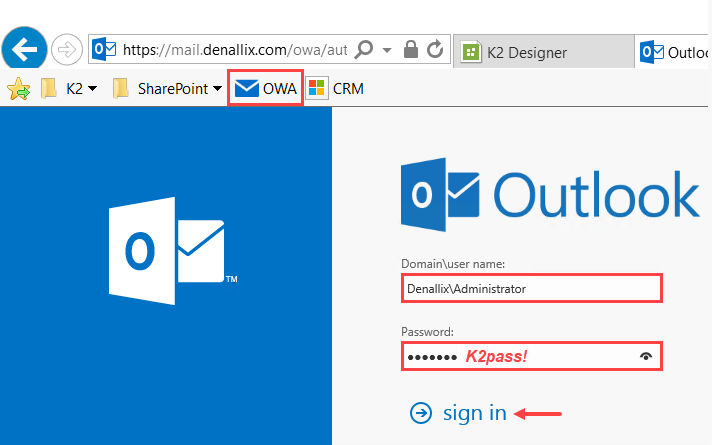
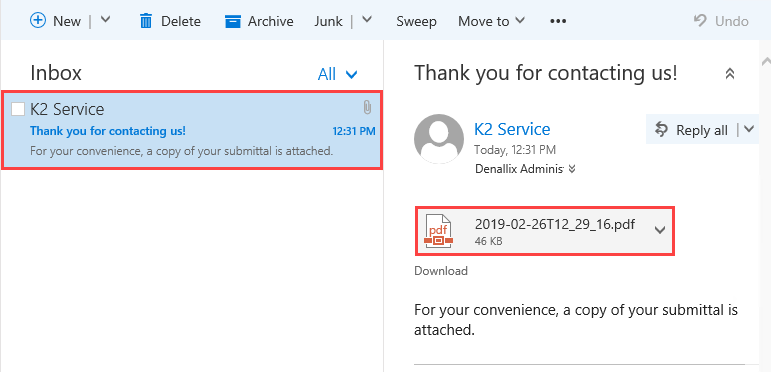
- You should see an email with the PDF attachment. Open the attachment.
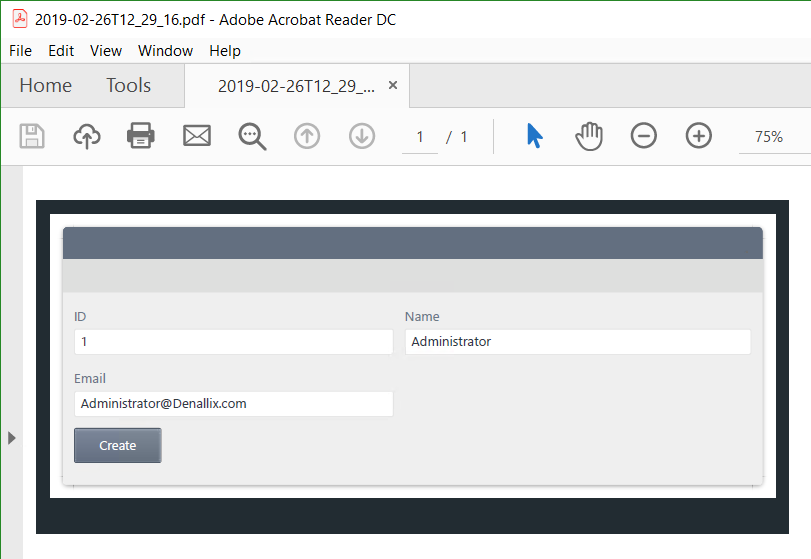
You should the form with your entries in the name and email boxes. (Notice K2 added the ID of the record.)
Review
The Save As PDF control takes a snapshot of your browser and saves it to a system SmartObject. You can use the ID of the file in order to attach it to an email, for example, or perform some other operation with the file. To reference the PDF file in other elements such as workflows, use parameters and variables to store and retrieve the ID of the file.