How To: Create a Workflow
This article illustrates how to create a basic workflow using the K2 Workflow Designer. Workflows consist of a series of system steps and task steps. User steps require human interaction of some kind, such as making a decision (like approve or reject). System steps include sending an email or updating content and happen without human interaction.
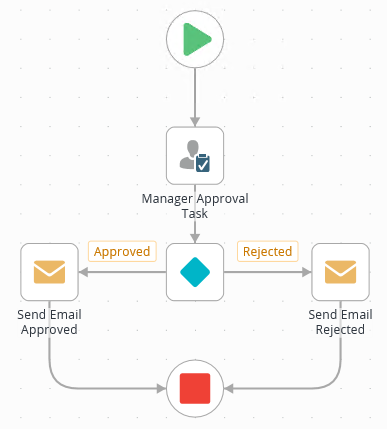
The Leave Request Workflow you create
Scenario
For your Leave Request application, you need a workflow to process the request. The workflow has a single task step, assigned to the leave requester's manager. The manager decides whether to approve or reject the request. After the manager actions the task (makes their decision and submits the form), the workflow sends an email to the requester with the result.
Steps
Create a new workflow. Add a Task step and two Send Email steps (one for each task outcome).
- From K2 Designer, create a new workflow called Leave Request Workflow.
- In K2 Designer, right-click the category you are working in and select New Workflow.
- Name the workflow
Leave Request Workflow,
then click Create.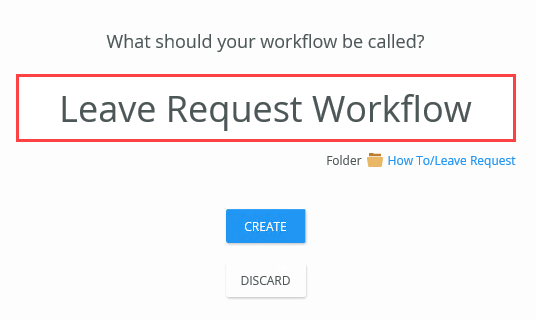
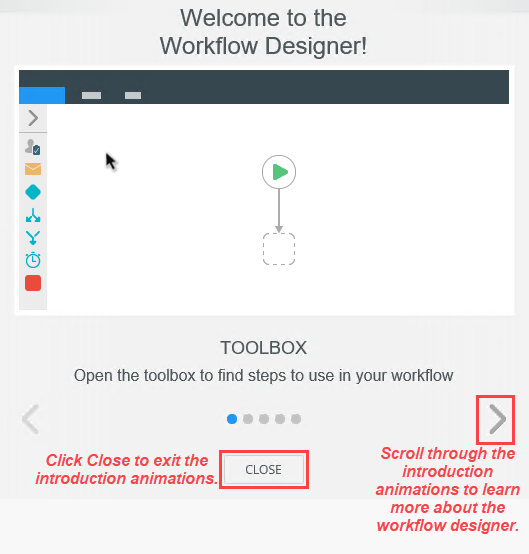
- The workflow designer opens with a series of introduction animations. If time allows, scroll through the animations to learn more about designer features. Otherwise, click Close to continue.
-
From the Start step, configure the Leave Request Form as the form that starts the workflow. With this configuration, K2 knows that this specific form starts this specific workflow.
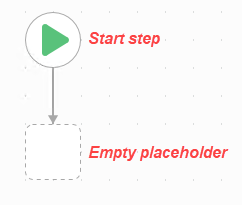
Your workflow canvas already has a Start step (look for the green triangle) that connects to an empty step placeholder.
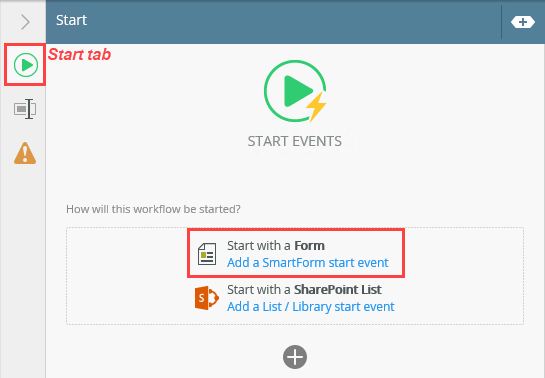
- Select the Start step, then expand the Configuration Panel. (Selected steps have a blue border.)
- Make sure the Start tab is active. Then, under the Start Events heading, click the Add a SmartForm start event link.
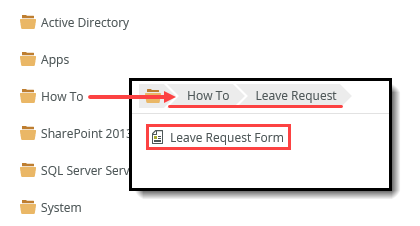
- Locate and select the Leave Request Form that you built by following the steps in How To: Create an Item View and a List View. (Your navigation tree may not match the image below exactly. Look for the How To category you created earlier, then expand it.) Click OK.
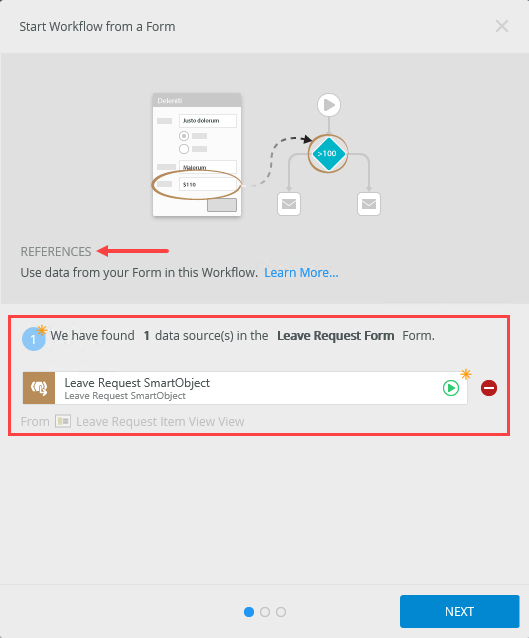
- On the References screen, notice K2 discovered the Leave Request SmartObject. This is because you created a view using the SmartObject, so K2 makes this data source available if you want to reference it in your workflow. There are no changes to make on this screen, so click Next.
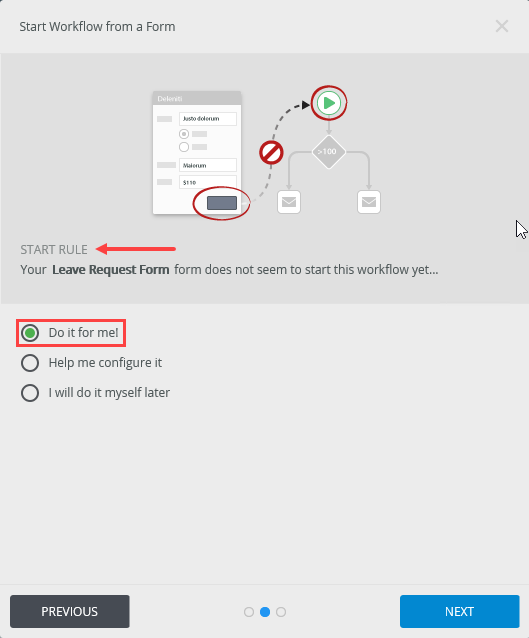
- On the Start Rule screen, keep the default Do it for me! setting, then click Next. With this option, K2 creates the rules and other settings for you. (The Help me configure it option walks you through the wizard where you can set each configuration individually. Since this is a very simple workflow, we'll let K2 handle the settings!)
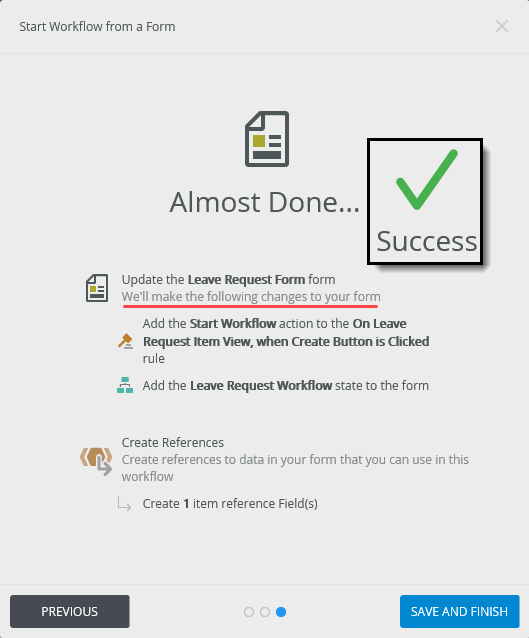
- On the summary screen, review the changes K2 makes to the form, then click Save and Finish. When you see the success check, click OK to exit the wizard.
The Start Workflow from a Form wizard launches.
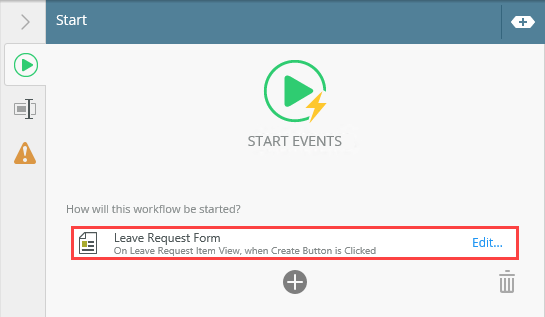
Notice now, the workflow start event displays the rule that starts this workflow - On Leave Request Item View, when Create Button is Clicked. K2 creates this rule on the Leave Request Form as part of this wizard.
- Select the Start step, then expand the Configuration Panel. (Selected steps have a blue border.)
- Next, add a Task step to the empty placeholder with the following configurations:
Configuration Panel Tab Setting Notes Task Instructions: Enter any instructions you like that informs the requester's manager they have a leave request approval task assigned to them.
Actions: Approved, Rejected
These are the instructions and task actions the recipient sees when they open the form. Form Form Type: SmartForm
Form: Leave Request FormYou are using the Leave Request Form for the manager's approval task. Recipients Recipient: Originator Manager* The leave requester's manager in the task recipient, or person assigned the task.
*If you are working in your own environment, consider making the recipient a co-worker and not your manager. This way, you can test the application with your co-worker.
Properties Name: Manager Approval Task Renaming the step updates the label on the workflow design canvas, making it easier to tell what the step does. The label also appears in reports, so the more descriptive, the better! - Now, you start building the workflow. Begin by adding a Task step. Expand the Toolbox, then expand the Basic node. Click and drag a Task step into the empty placeholder. A Task step is a user step that requires human interaction. In this case, this is the leave request approval step, assigned to the requester's manager.
- Select the Task step (it has a blue border when selected) then expand the Configuration Panel.
- With the Task tab active, enter the following instructions: (The task recipient sees the instructions when the open their approval task form.)
A leave request requires your approval. Select either Approved or Rejected, then click the Submit button to send your decision.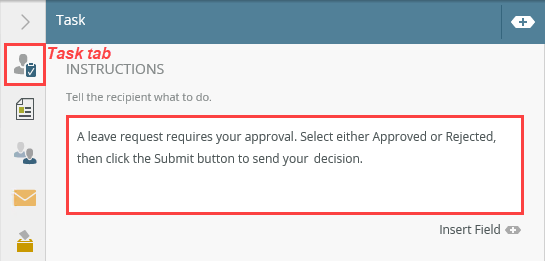
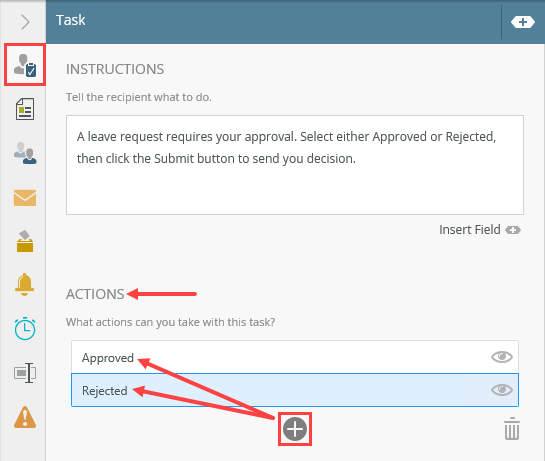
- Next, you add actions. Actions are the decision options the recipient chooses from. Under the Actions heading, Click the Add(+) icon and enter Approved for the first action. Click the Add(+) icon once again and add Rejected for the second action.
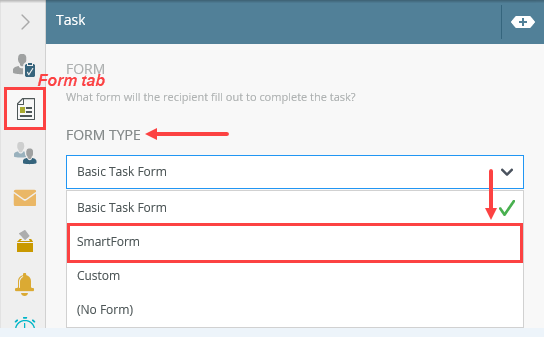
- Select the Form tab. Under the Form Type heading, select SmartForm.
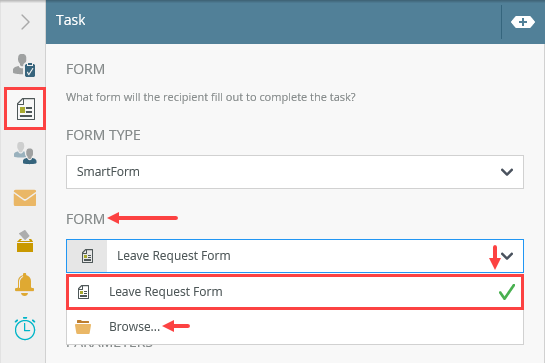
- Next, you need to bind your Leave Request Form with the task step. Under the Form heading, click the drop-down arrow and select Leave Request Form. The form appears because you've associated it with the workflow in the Start step. K2 assumes you want to use the same form for task steps. Click OK.If you do not see the Leave Request Form displayed, select the Browse link. Locate and select the form in the same manner as you did in the Start step.
- There are no changes to the References screen, so click Next.
- On the Open Task screen, select Do it for me!, then click Next.
- On the summary screen, review the changes K2 makes to the form, then click Save and Finish. Click OK to exit the wizard when you see the success check.
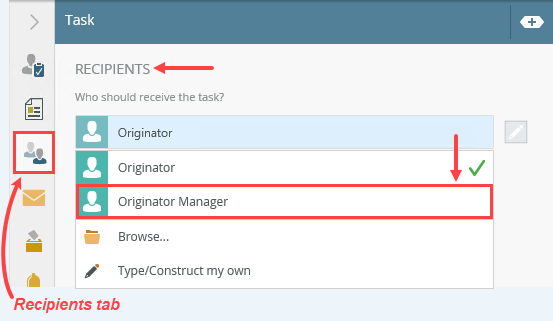
- Select the Recipients tab. By default, K2 assigns the task to Originator, who is actually the leave requester (you!). You want the requester's manager to make this decision. Click the blue Originator block, then select Originator Manager from the drop-down. It is very common to assign approval tasks to a person's manager, so K2 makes this option available. You can also search for another user or group if you need to by selecting Browse...If you are working in your own environment, consider making the recipient a co-worker that can help you test the application. Use the Browse option to search for someone you know can help you test.
- The last configuration for the Task step is to rename it so that it is clear what the step does. Click the Properties tab. Change the Name to
Manager Approval Task.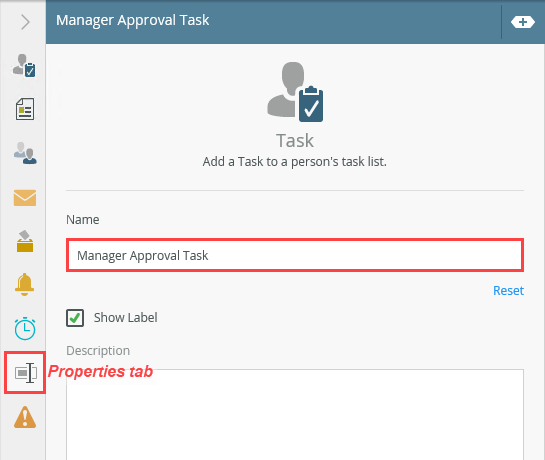
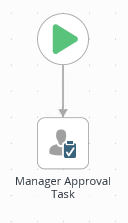
- Click the Configuration Panel slider (<) to collapse it. Your workflow should look like the image below at this point.
Next, you configure the step by adding the actions, binding the Leave Request Form, and assigning the task recipient.
Now you need to bind the Leave Request Form with the Task step. Behind the scenes, K2 generates the rules that associate the form with this step. You already associated the form with the workflow (through configuring the Start step), so it's the same concept. K2 needs to know which form the recipient uses to take action on their task. You may have noticed, you can use the same form for more than one step!
The Open Task on a Form wizard launches.
Next, you configure the task recipient. The recipient is a person or group assigned the task of either approving or rejecting the leave request.
- Now, you start building the workflow. Begin by adding a Task step. Expand the Toolbox, then expand the Basic node. Click and drag a Task step into the empty placeholder. A Task step is a user step that requires human interaction. In this case, this is the leave request approval step, assigned to the requester's manager.
-
Add a Decision step below the Manager Approval Task step, then connect the two steps.
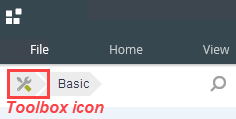
- Expand the Toolbox > Logic node, then drag a Decision step onto the design canvas, below the Manager Approval Task step.To return to the Toolbox main menu, click the Toolbox icon in the breadcrumb bar.
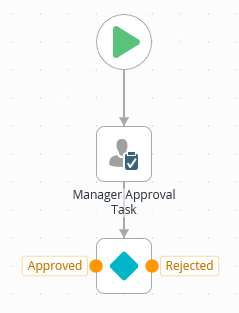
- Connect the two steps. After you connect the steps, you see the two outcome lines (Approved and Rejected) extending from the Decision step. Decision steps generate outcome lines and also allow you to apply additional rules for following outcome lines. For example, if you have a group of users as the task recipients, you might apply a rule that states all recipients must select Approved for the workflow to follow the Approved path.
To connect steps, hover over the border of the first step to expose its handles. Click and drag the handle into the connecting step. Click anywhere on the design canvas to set the line.
Recall that you added two actions to the Manager Approval Task step: Approved and Rejected. You want the workflow to display outcomes (or decision lines) for each of the actions. This way, you can configure the workflow paths depending on the action selected. You generate outcome lines via a Decision step.
Your workflow should look like the image below.
- Expand the Toolbox > Logic node, then drag a Decision step onto the design canvas, below the Manager Approval Task step.
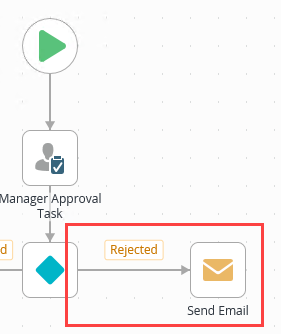
- Next, add a Send Email step to each of the outcomes (Approved and Rejected), then configure the steps to send an email to the Originator with the manager's decision.
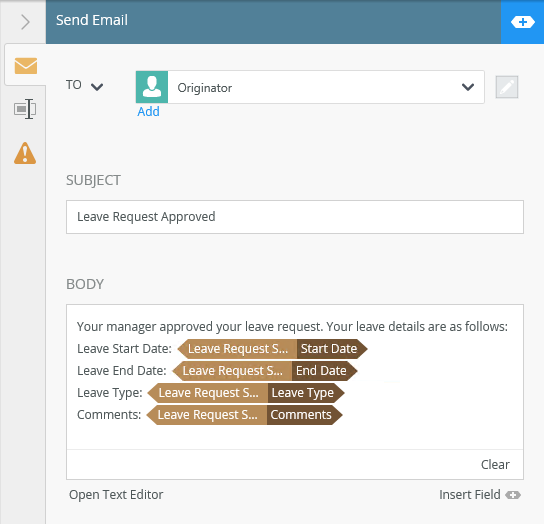
Enter your own content for the subject line and the message body. Use references from the Context Browser to personalize your message. The image below is a sample email you might send for the Approved outcome.
You send an email to the leave requester letting them know the manager's decision. In the real world, your workflow may be much more complex, such as adding an additional HR task step to process the leave request, or perhaps updating a data source with the leave dates to update the employee's leave balance. For this application, we'll just send an email to keep things simple.
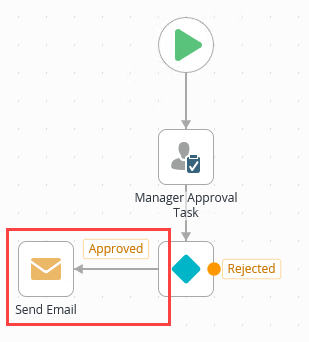
- From the Toolbox > Basic node, drag a Send Email step onto the design canvas, left of the Approved outcome. Connect the Approved outcome to the new step.
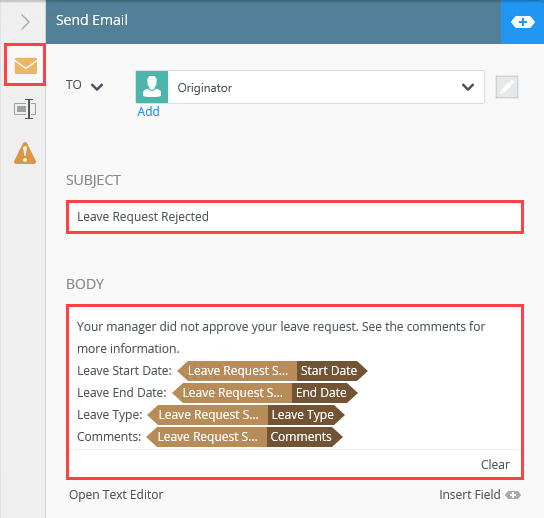
- Select the Send Email step, then expand the Configuration Panel. Make sure the Send Email tab is active. For the To setting, keep the default Originator. This is the leave requester. For the Subject line, enter the following:
Leave Request Approved.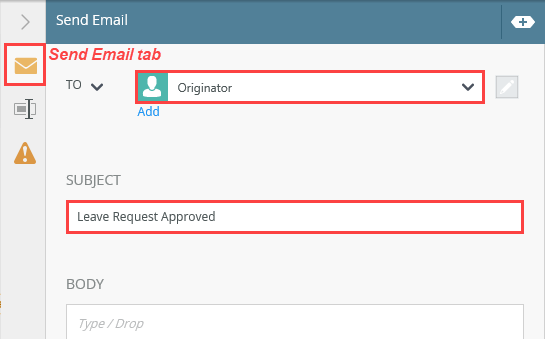
- For the message Body, enter the following (without the [bracket] placeholders):
Your manager approved your leave request. Your leave details are as follows:
Leave Start Date: [Leave Start Date]
Leave End Date: [Leave End Date]
Leave Type: [Leave Type]
Comments: [Comments]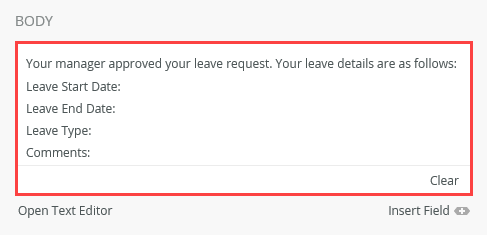
- Expand the Context Browser, then expand the Leave Request SmartObject reference. Drag the appropriate references into the email body, replacing the [bracketed] placeholders.
- Click the Properties tab. Change the name of the step to
Send Email Approved. Collapse the Configuration Panel.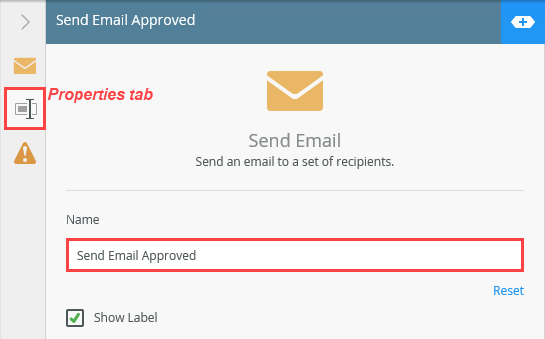
- Next, you add and configure a Send Email step for the Rejected outcome. From the Toolbox > Basic node, drag a Send Email step to the right of the Rejected outcome, then connect the outcome to the step.
- Select the Send Email step, then expand the Configuration Panel. Enter any content you like for the Subject line and message Body. Use references from the Context Browser to personalize your email.
- Rename the step
Send Email Rejected
then collapse the Configuration Panel.
For the body, you use references from the Context Browser to personalize your message. Recall when stepping through the form wizards, K2 created references to the Leave Request SmartObject. References are like links to items in the current record. At runtime, K2 replaces the these placeholder links with live data. For example, on the Leave Request Form, you enter a start date. K2 creates a reference to this start date that you can use throughout your workflow. At runtime, K2 replaces the start date reference with the actual value entered on the form for the instance of the workflow request.
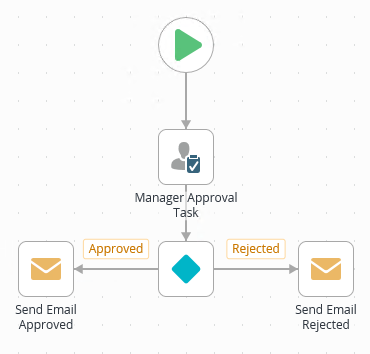
Your workflow should look like the image below.
- From the Toolbox > Basic node, drag a Send Email step onto the design canvas, left of the Approved outcome. Connect the Approved outcome to the new step.
- Complete your workflow with an End step. Add an End step, then connect both email steps to the End step.
- The last configuration to your workflow is optional. You add an End step that provides a visual indication the workflow paths are complete. (You can configure an End step to terminate a workflow, however, in this case you are just using it to provide a clean ending to each outcome.)
From the Toolbox > Logic node, drag an End step below the Decision step. Connect the Send Email Approved and Send Email Rejected steps to the End step.
- The last configuration to your workflow is optional. You add an End step that provides a visual indication the workflow paths are complete. (You can configure an End step to terminate a workflow, however, in this case you are just using it to provide a clean ending to each outcome.)
- Deploy the workflow. You do not need to manage permissions at this time since you are the only one starting the workflow.
- Before you can use any workflow, you must deploy it to the K2 server. Deploying the workflow publishes it to the K2 server and makes it available for use. If you make any changes to your workflow, you must publish it again so that the K2 server registers the changes.
Click File > Deploy. You see a deploy-in-progress pop-up. When you see the Deploy Success pop-up, you can click File > Close to return to K2 Designer. (You won't manage permissions at this time. Since you are the only one starting this test workflow, you don't need to add any other users to this workflow's permissions.)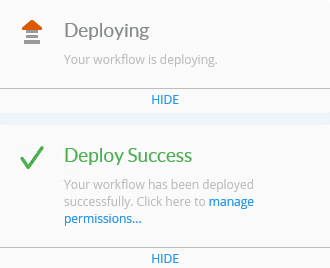
- Before you can use any workflow, you must deploy it to the K2 server. Deploying the workflow publishes it to the K2 server and makes it available for use. If you make any changes to your workflow, you must publish it again so that the K2 server registers the changes.
Review
K2 workflows consist of a series of user (task) steps and system steps that flow from one to another to automate a business process of some kind. User, or task steps, require human interaction such as making a decision to approve or reject a request. The K2 server performs system steps such as sending emails or updating content. Before you can use your workflow, you must deploy it to the K2 server. Deploying the workflow publishes it and makes it available for other people to use.