How To: Attach Multiple Files to a form using the Attachment Control
This topic describes how you can attach multiple files to a form by using the File Attachment control in conjunction with an editable list view.
Attach multiple files to form using the File Attachment control in an editable list view

Scenario
In this example you build a form called Employee Onboarding which contains an item view and an editable list view with a File Attachment control. You use the Employee Onboarding form to capture a new employee and associated documents using the file attachment control. You configure a Submit button that saves all the attached files in the file attachment control on the editable list view.
Steps
You will build two SmartObjects, one called Employee Details, to capture the employee's details, and another called Documents to capture the employee's files. You then create an item view based on the Employee Details SmartObject and an editable list view based on the Documents SmartObject. You then add the views to a form and configure a Save button rule to save the employee's details and files on the form.
Setup Steps
The following steps set up the scenario from start to finish. If you want to skip the setup steps and view the topic step, go to Configure the Rules for the Submit Button.
-
Create the SmartObjects.
- Launch K2 Designer and create a new category folder called Employee Onboarding.
- Create two SmartObjects in the Employee Onboarding category, called Employee Details and Documents.
Employee Details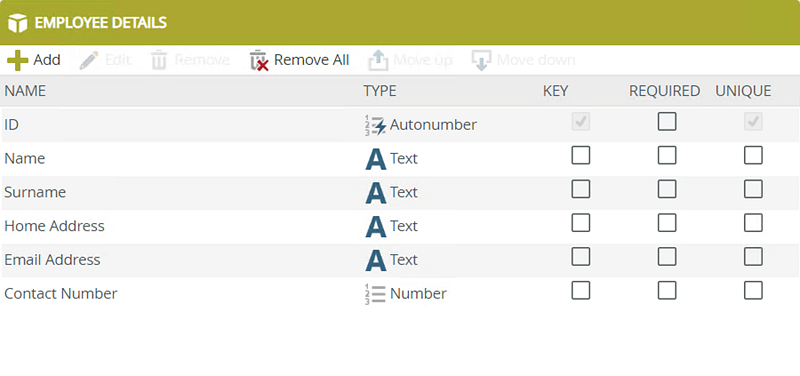
Properties Type Key Required Unique ID Autonumber Yes No Yes Name Text No No No Surname Text No No No Home Address Text No No No Email Address Text No No No Contact Number Number No No No
Documents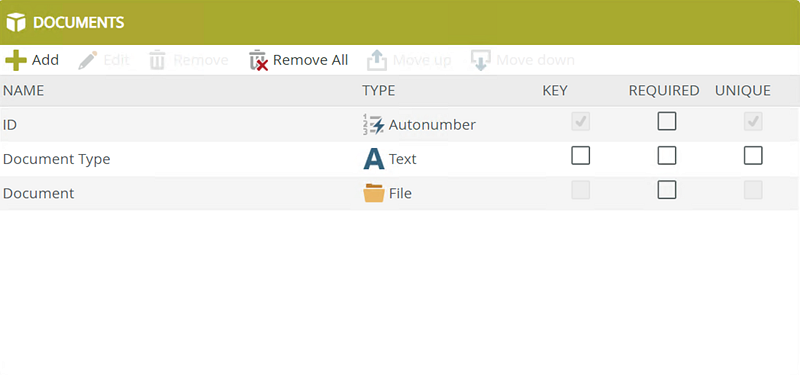
Properties Type Key Required Unique ID Autonumber Yes No Yes Document Type Text No No No Document File No No No - Open the Employee Details SmartObject and navigate to the Associations tab.
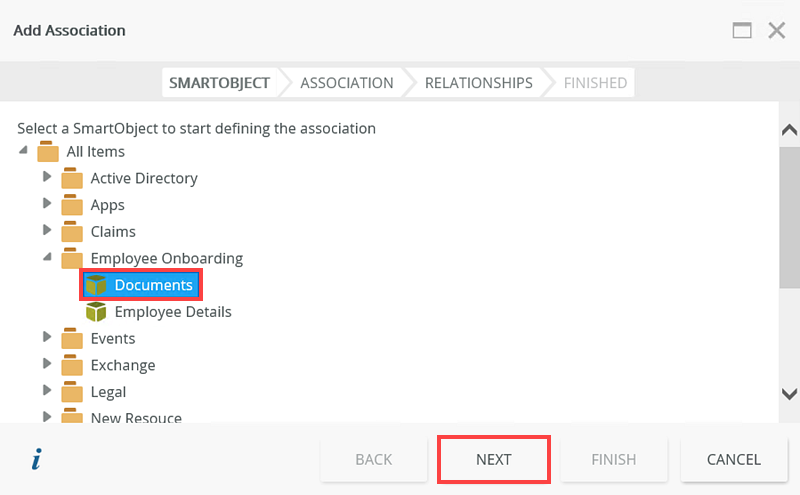
- Click Add and on the Add Association page, select the Documents SmartObject. Click Next.
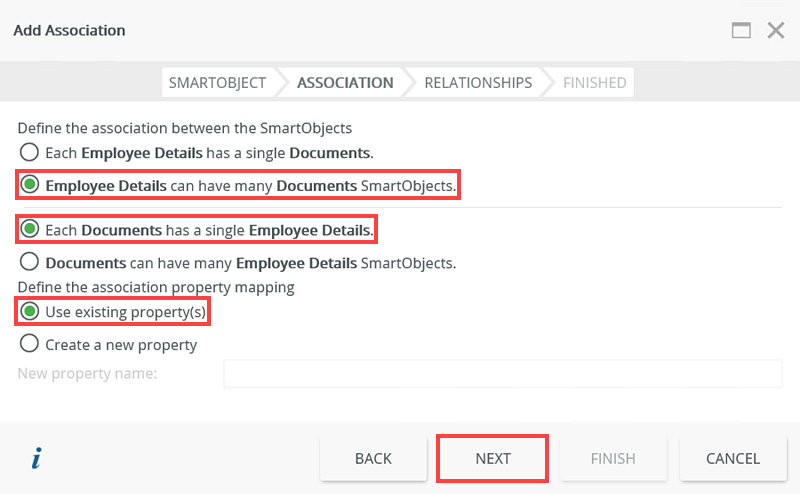
- On the Add Association page select Employee Details can have many Documents SmartObjects and Each Documents has a single Employee Details. Ensure the Use Existing property(s) option is selected. Click Next. The Many to One association allows you to associate multiple rows on the Documents editable list view (that contain multiple file attachments) to the ID field of the Employee Details list view.
- On the Add Association page select the ID field name and click Assign.
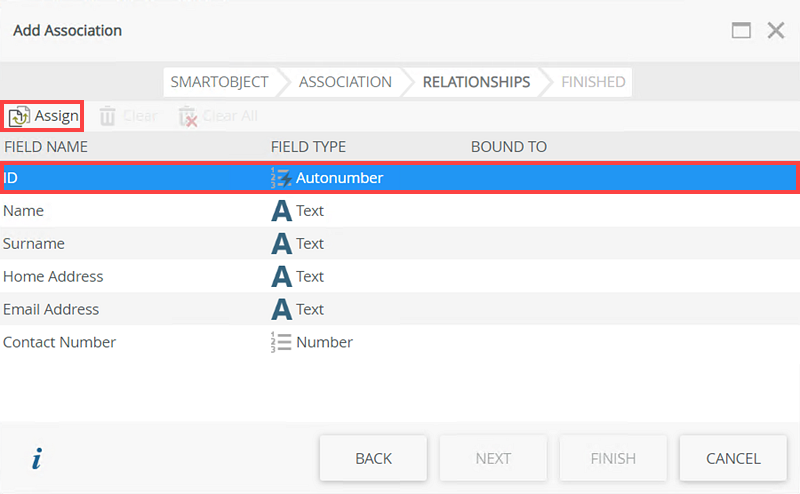
- On the Assign property (ID) page, select the ID field from the Documents editable list view. Click OK.

- Click Finish to complete the Association configuration. Click Finish again to complete the SmartObject configuration.
-
Create and Configure the Employee Details and Documents views.
- Select the Employee Details SmartObject and click Design a new View.

- Add Employee Details in the Name field. Ensure the view is in the Employee Onboarding category folder. Select Item View option in the View Type field. Click Create.

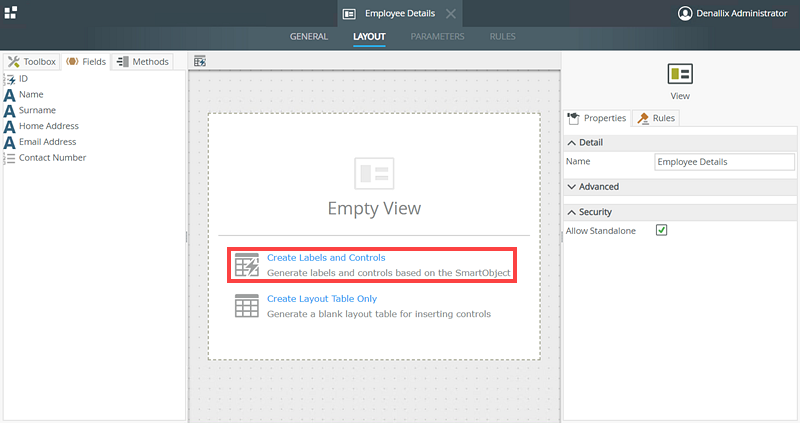
- On the Layout tab, select Create Labels and Controls.
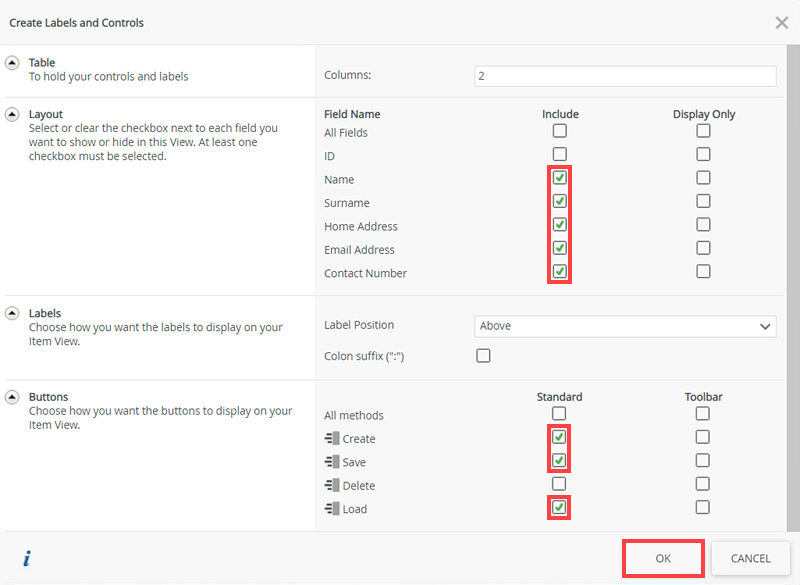
- On the Create Labels and Controls page select the Name, Surname, Home Address, Email Address and Contact Number options in the Layout section. On the Buttons section check the Create, Save and Load check-boxes and click OK.
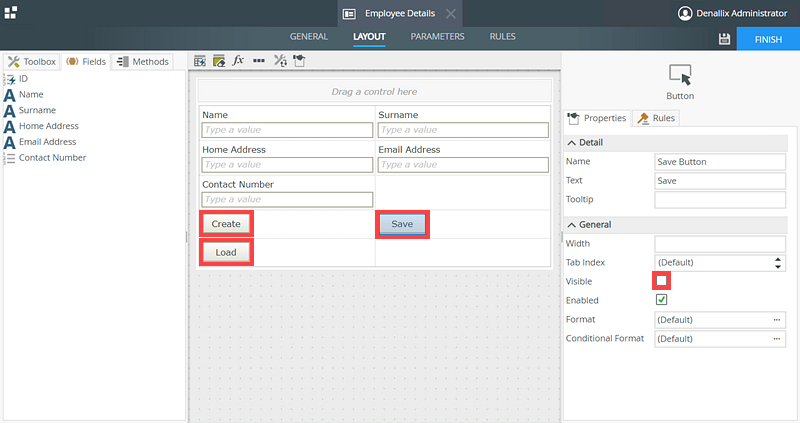
- On the Create, Save and Load buttons, uncheck the Visible option in General section. You don’t want users to use these buttons as a custom Submit button will be configured in a later step.
- Select the Contact Number text box control and click the ellipsis in the Format option.
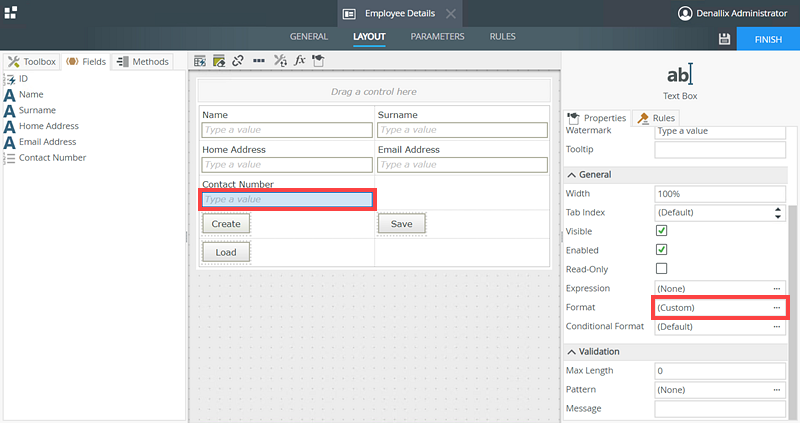
- On the Format page, select the Special option, select Phone Number and click OK.

- Click Finish to complete the Employee Details Item View.
- Select the Documents SmartObject and click Design a new View.

- Add Documents in the Name field. Ensure the view is in the Employee Onboarding category folder. Select List View option in the View Type field. Ensure the correct data source is selected: Employee Onboarding\ Documents. Select Get List in the List Method section. Uncheck the Call this method when the form loads check-box and click Create.

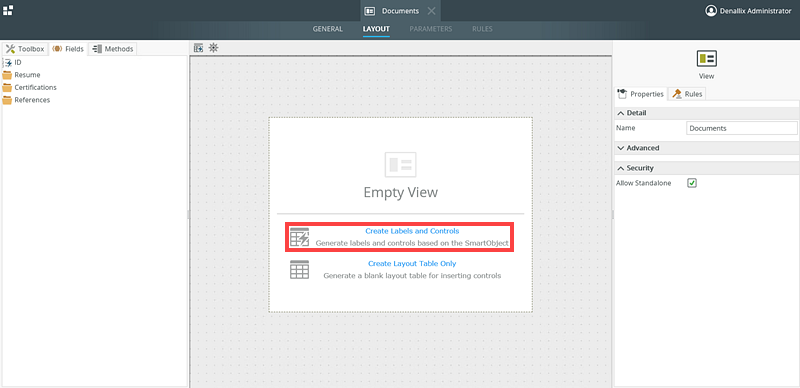
- On the Layout tab, select Create Labels and Controls.
- On the Create Labels and Controls page select the Document Type and Documents options in the Layout section. In the Edit Options section check the Enable list editing check-box and select the Edit all rows option. Check the Allow the user to add new rows check-box and ensure the Create method is selected. Check the Allow the user to edit existing rows check-box and ensure the Save method is selected. Check the Enable Add new row link check-box. Check the Allow the user to manually refresh list check-box and click OK.

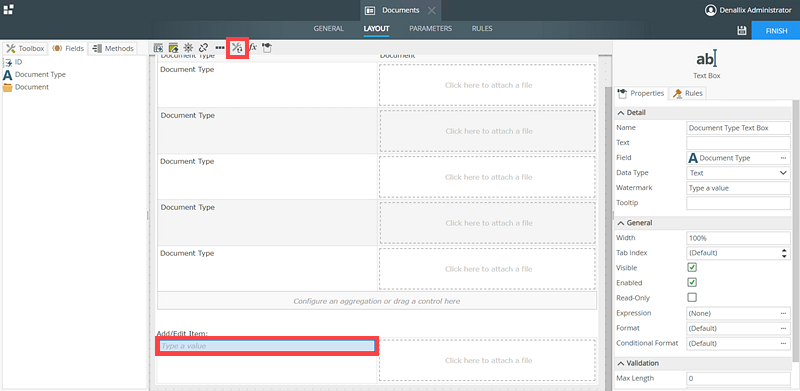
- On the Documents view, select the Document Type Text Box control and click Change Control. You change the control to a drop down control so when you add a document you can specify the type of document from a static list of options.
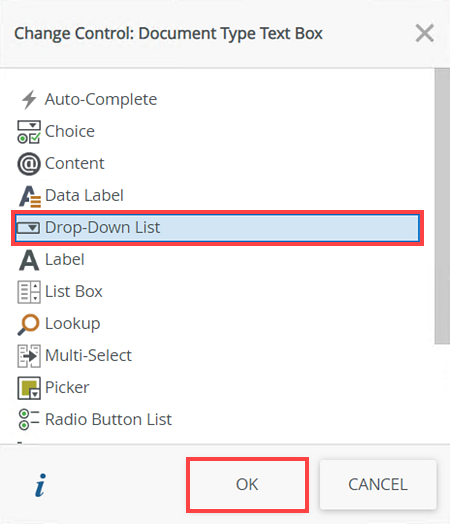
- On the Change Control: Document Type Text Box page, select Drop-Down List and click OK.
- Select the Document Type drop-down list control and on the Data Source section, click the ... on the Type option.

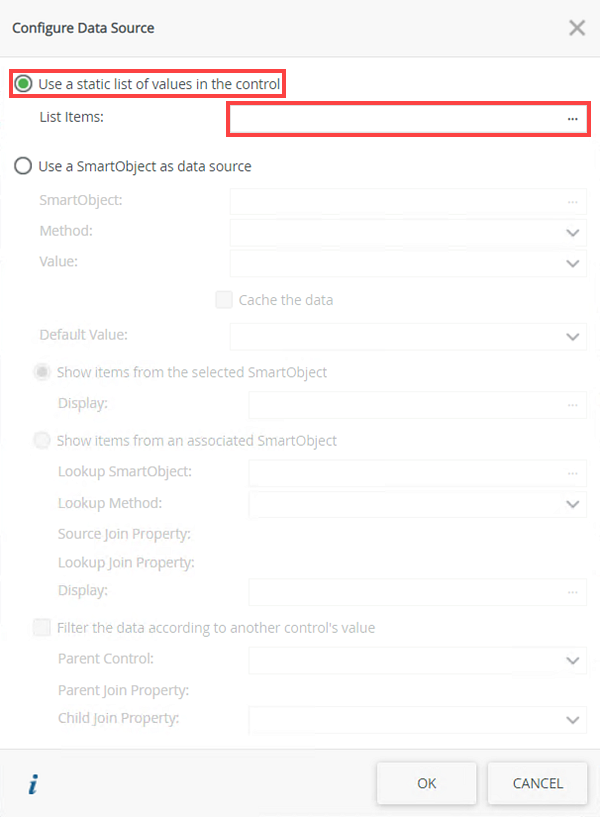
- On the Configure Data Source page, select Use a static list of values in the control option and click the ... on the List Items option.
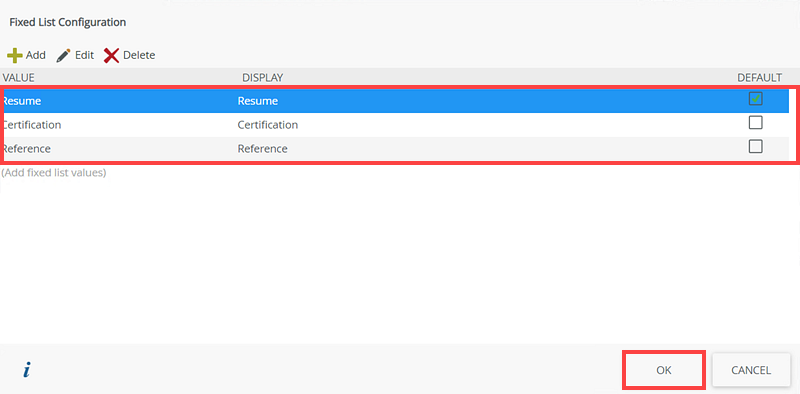
- On the Fixed List Configuration page, add Resume (set as default), Certification, and Reference and click OK.
- Click OK and click Finish.
- Select the Employee Details SmartObject and click Design a new View.
-
Create the Employee Onboarding Form and add the Employee Details and Documents views to the form.
- In the Employee Onboarding category, create a new form called Employee Onboarding.
- Select the Views tab and add the Employee Details and Documents views to the form.

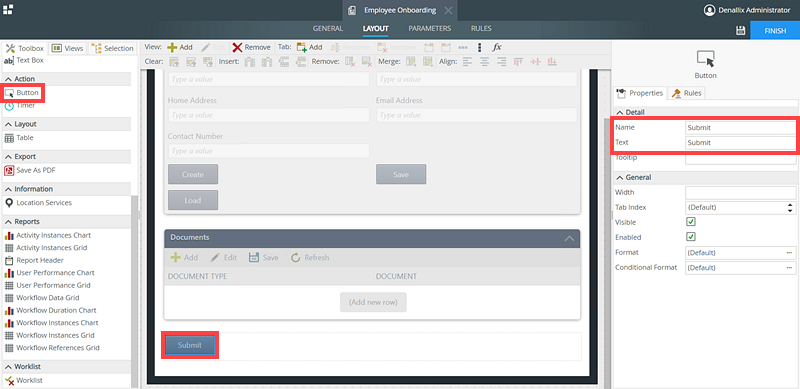
- Add a button control to the form. Change the Name and Text fields to Submit. Click Finish.
- In the Employee Onboarding category, create a new form called Employee Onboarding.
- Configure the Rules for the Submit Button
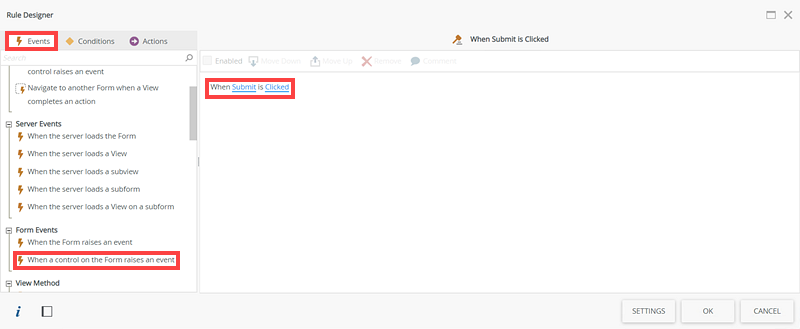
- Open the Rules tab of the Employee Onboarding form and click Add Rule.
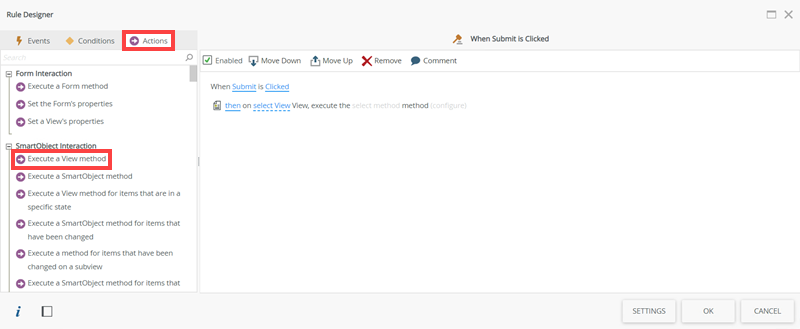
- On the Rule Designer page, select the When a Control on a form raises an event action. The When Submit is Clicked action is automatically added.
- Select the Actions tab and add the Execute a View method action.
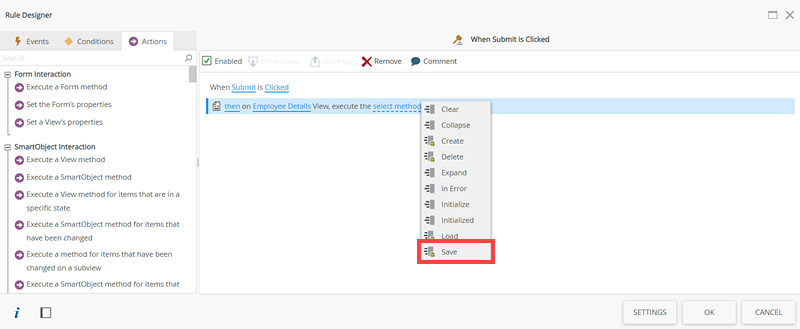
- Click select View and select the Employee Details view.

- Click select Method and select the Save method. Click configure.
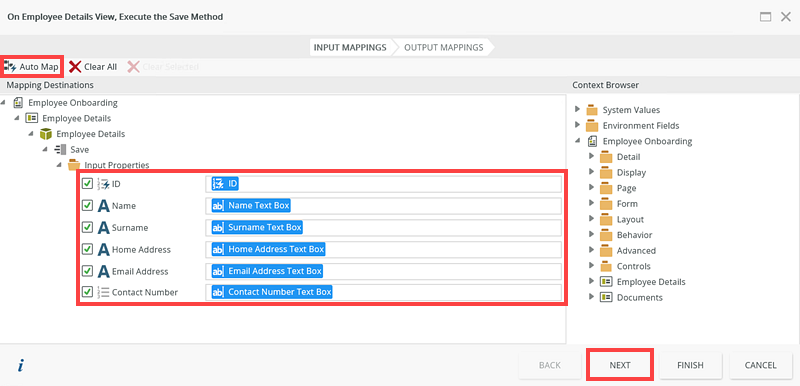
- On the Employee Details View, Execute the Save Method page, click Auto Map for the Input Mappings and click Next.
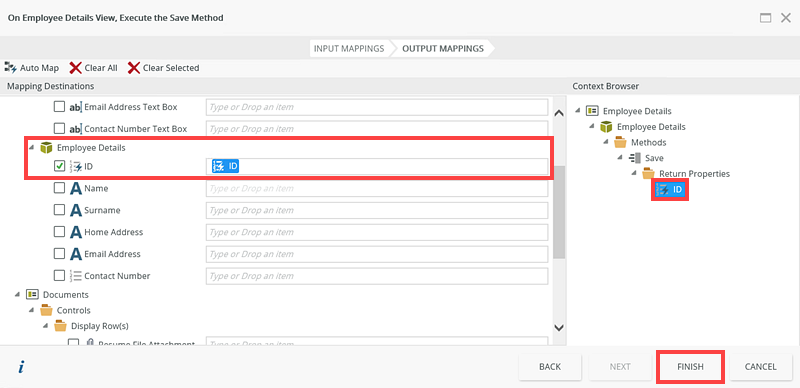
- On the Output Mappings section add the ID return property from the Context Browser to the ID field for the Employee Details SmartObject in the Mapping Destinations section. Click Finish.
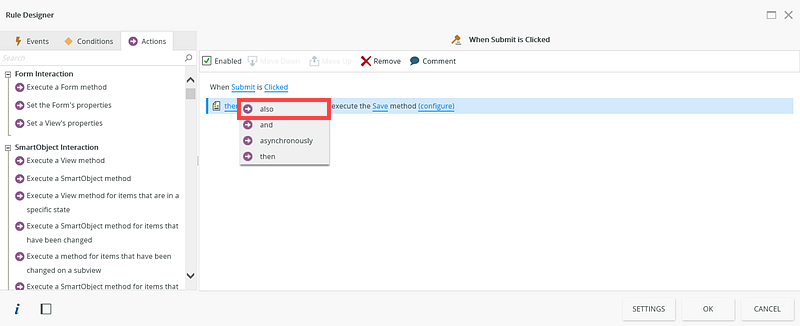
- Click the Then option and select also.
- Now you will add the action that saves each of the documents attached to the new employee record. Select the Actions tab and add the Execute a View method for items that are in a specific state action.
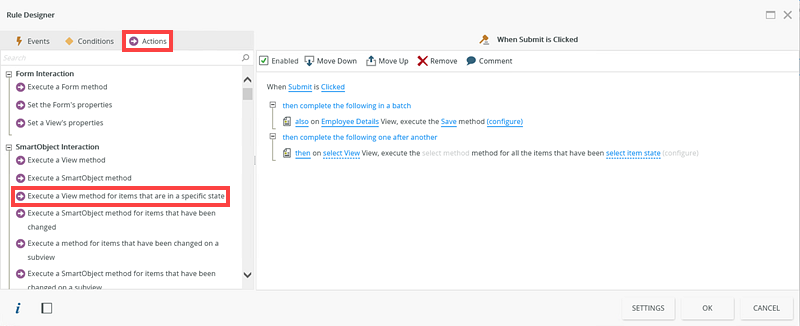
- Click select View and select the Documents view.

- Click select Method and select the Save method.
- Click select item state and click Added. Click Configure.

- On the On Documents View, Execute the Save Method for all items that have been Added page, click Auto Map for the Input Mappings.
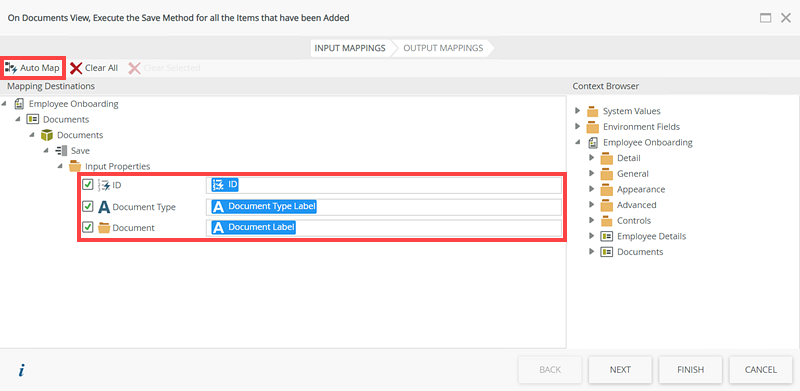
- Because this is a header-detail form, we need to map the ID of the 'parent' record to the 'child' records. Remove the ID field.

Add the ID field from Employee Details SmartObject to the ID Input Properties field. There are no Output Mappings, click Finish.
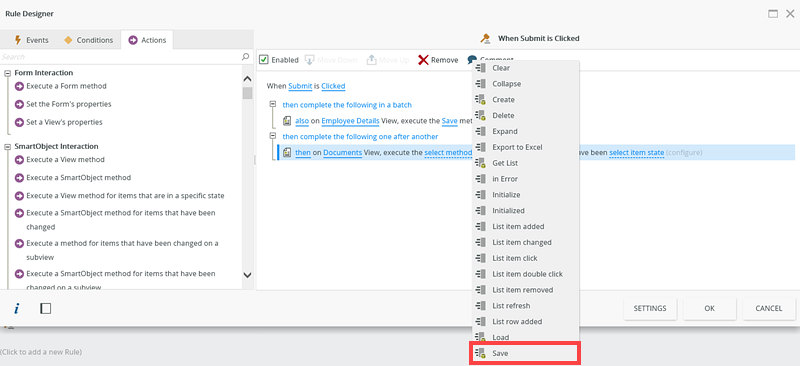
- For the scenario to work the rules need to execute in a batch. Click then on the then on Documents View, execute the Save method for all the items that have been Added(configure) rule and select also. Click OK then Finish and check in the form.
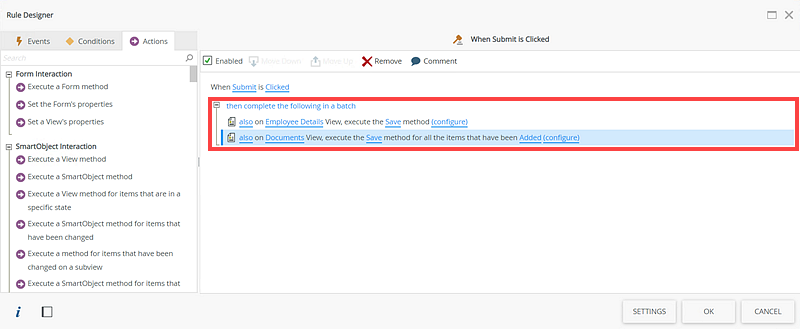
Configure Rules for the Submit Button
The steps below show you how to configure the rules for the Submit button.
-
Test the Scenario
- Run the Employee Onboarding form.
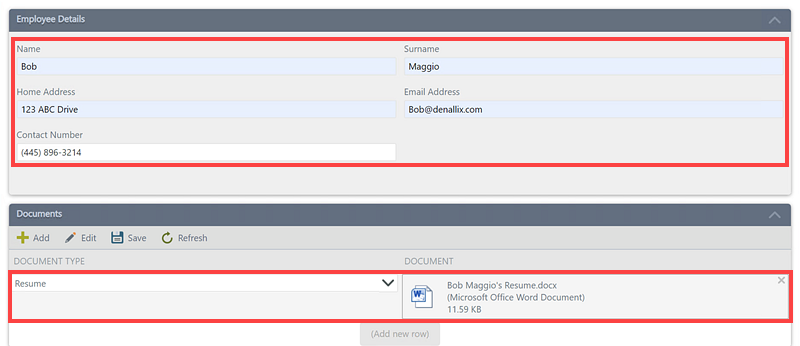
- Enter the employee's details on the Employee Details view of the form.
- On the Documents view of the form, click Add or Add new row. Select the Resume option from the Document Type drop-down list control and then add a Resume document in the Document file attachment control.
- Click Add or Add new row and add the certification and reference documents. Select the correct document type when adding the documents. Click Submit.
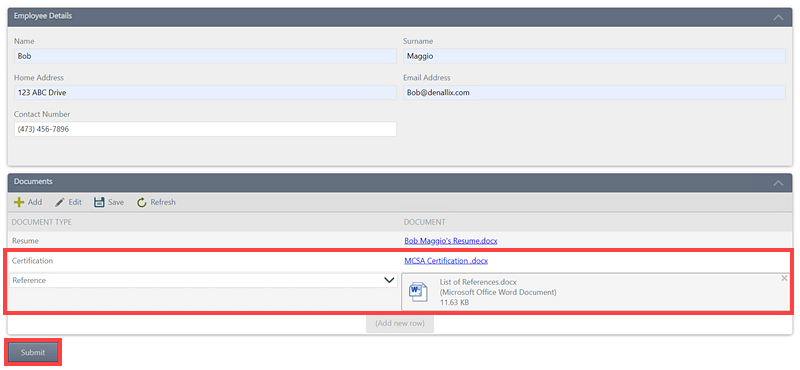
- The files are added to new rows on the Documents editable list view.
Review
This how-to explained using an editable list view and attachment control to save multiple documents, associated to one record. You created two SmartObjects, Employee Details and Documents to capture user details and files. You created two list views and a form, configured rules to capture the employees details and files and added a Submit button, when clicked all the employees details and files saved. You then added new files to the form and saved them, which displayed how you can add multiple files using the file attachment control and an editable list view.