Working Hours
Working hours can be defined on the K2 environment to store the working hours for the organization, or to create different zones for different departments and offices in the organization.
Working Hours are most typically used to evaluate escalations in K2 workflows. K2 administrators must define working hours before these working hours can be used in K2 escalations. If no working hours are selected in the Escalation rule, escalations will not take these hours into consideration. This may result in unexpected escalations, since offices may be closed at the time the escalation is fired. Check with the workflow developers and designers how the escalation logic should behave and what zones and configurations are required to support the desired escalation functionality.
Working hours are defined in terms of zones, and each zone can have its own working hours, special hours and exception dates. If your organization has offices worldwide, you may choose to define zones for each Office, and separately maintain the list of special days and exception days for each zone. Another use case is that you may define zones for the different functional areas of your organization: perhaps one zone for the IT Help Desk, which operates 12 hours a day, 6 days a week and another zone for the Finance department, which operates 8 hours a day, 5 days a week.
The Working Hours node allows you to configure Working Hours zones. You can add, edit, delete Working Hour zones, and select a zone as the default zone.
When configuring Working Hours zones, the configuration includes three tabs:
- Settings: The Settings tab is the main configuration for Working Hours zones.
- Exception Dates: Exception Dates are days where all working hours are ignored, for example holidays.
- Special Hours: Special Hours are used to define specific dates where alternate working hours apply.
Adding Working Hour zones
- Click Add from the Working Hours view.

- This will open the Configure Working Hour Zone page, starting with the Settings tab.
The Settings tab is the main configuration section for Working Hours zones.
| Field | Description |
|---|---|
| Name | The name for the configured Working Hour zone. Type a value in the field provided. |
| Description | Describe the zone being created. Type a value in the field provided. |
| GMT | Select the Greenwich Mean Timezone hours offset for this zone from the drop down. |
| Day | Select the day of the week that will be added to the zone configuration. Use the drop down provided. |
| Start Time | Set the Start Time for the day selected. You can type the time value or use the clock button provided. When using the clock button, note that the up and down arrows applies to the section (hour, minutes, AM) of the time selected. Make sure to select the section of the time you want to set before using the arrows. Click OK to set the Start Time. |
| End Time | Set the End Time for the day selected. You can type the time value or use the clock button provided. When using the clock button, note that the up and down arrows applies to the section (hour, minutes, AM) of the time selected. Make sure to select the section of the time you want to set before using the arrows. Click OK to set the End Time. |
| Add Button | The Add button adds the selected day and times to the Configured Days and Times list. Click the Add button after each day and times are set. This allows for multiple days to be added to the Working Hour zone configuration. |
| Delete Button | Use the Delete button to remove one or more of the Configured Days and Times from the list. Select an item or items and click Delete. |
| Set Default Week | The Set Default Week button will override the Configured Days and Times list with a standard working hour week configuration. Click Set Default Week and click OK on the confirmation message. |
| Finish | This will complete the Working Hour zone configuration. Click Finish if you want to complete the configuration or select the Exception Dates or Special Hours tabs if you need to make further configurations to this Working Hour zone. |
| Cancel | Click Cancel if you do not want to save the Working Hour zone configuration. |
Click Finish after configuring the Settings or click the Exception Dates tab to configure more options for the Working Hour zone.
Exception Dates are days where all working hours are ignored, for example holidays
| Field Name | Description |
|---|---|
| Description | Describe the Exception Date being created. Type a value in the field provided. |
| Day | Select the day for the Exception Date. Use the Calendar button provided. |
| Add Button | The Add button adds the Exception Date to the Configured Dates list. Click the Add button after each day is set. This allows for multiple days to be added to the Configured Dates configuration. |
| Delete Button | Use the Delete button to remove one or more of the Configured Dates from the list. Select an item or items and click Delete. |
| Finish | This will complete the Working Hour zone configuration. Click Finish if you want to complete the configuration or select the Special Hours tab if you need to make further configurations to this Working Hour zone. |
| Cancel | Click Cancel if you do not want to save the Working Hour zone configuration. |
Click Finish after configuring the Exception Dates or click the Special Hours tab to configure more options for the Working Hours zone.
Special Hours are used to define specific dates where alternate working hours apply
| Field Name | Description |
|---|---|
| Description | Describe the Special Hour being created. Type a value in the field provided. |
| Day | Select the day that the Special Hour will be created for. Use the Calendar button provided. |
| Start Time | Set the Start Time for the day selected. You can type the time value or use the clock button provided. When using the clock button, note that the up and down arrows applies to the section (hour, minutes, AM) of the time selected. Make sure to select the section of the time you want to set before using the arrows. Click OK to set the Start Time. |
| End Time | Set the End Time for the day selected. You can type the time value or use the clock button provided. When using the clock button, note that the up and down arrows applies to the section (hour, minutes, AM) of the time selected. Make sure to select the section of the time you want to set before using the arrows. Click OK to set the End Time. |
| Add Button | The Add button adds the Special Hours to the Configured Dates list which will be included in the configured Working Hour zone. Click Add after each day is set. This allows for multiple days to be added to the Configured Dates configuration. |
| Delete Button | Use the Delete button to remove one or more of the Configured Dates from the list. Select an item or items and click Delete. |
| Finish | This will complete the Working Hour zone configuration. Click Finish if you want to complete the configuration or select one of the other tabs if you want to configure this Working Hour zone further. |
| Cancel | Click Cancel if you do not want to save the Working Hour zone configuration. |
Click Finish after configuring the Special Hours.
After creating a Working Hour zone you can add user accounts to the configured zone. This will be the Working Hour zone membership.
The selected zone will then apply to the specified users. Follow these steps to add users to the zone:
- Select the Working Hour zone you want to add the user account to. The Membership configuration becomes available.

- Click Add. The Add Zone Members page opens.

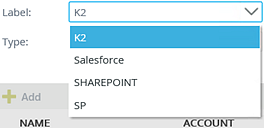
- Click the Label drop-down and select the Security Provider label you want to search on.

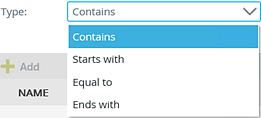
- Click the Type drop-down and select the type of search that will be performed.

- Type a value in the text box provided and click Search.

- The matching users are returned in the first view. Select a user and click Add.
- The user will now be listed in the second view. You can add multiple users by doing a new search and clicking Add again.
- Click Finish.
- The user will now be listed under Membership.

- To remove a user, select the one you want to remove and click Remove. Click OK on the confirmation message.
Follow these steps to edit Working Hour zones:
- Select the Working Hour zone you want to edit. Click Edit.

- Edit the configuration as required. (Refer to the tables provided in Settings, Exception Dates and Special Hours for each tab in the configuration).
- Click Finish to save the changes.
Follow these steps to delete a Working Hour zone:
- Select the Working Hour zone you want to delete. Click the Delete button.

- Click OK on the confirmation message to delete the zone.
Follow these steps to set a Working Hour zone as the Default zone, which means that this zone will be automatically applied unless the workflow designer selects a different zone while building the workflow:
- Select the Working Hour zone you want to set as the Default. Click Set As Default.
- Click OK on the confirmation message.
- The Working Hour zone will display in bold, indicating that it is currently the Default zone.
 When you set your Working Hour to default, the Working Hour becomes the default for all users on your K2 server, unless users are added to a different Working Hour.