How To: Specify a default value for a Drop-Down control, and Filter Data by Another Control
Use the steps and scenarios in this topic to 1) set a default value for a drop-down control, and then 2) use another drop-down control to filter the first one with the default value.
For these scenarios, you create the SmartObjects (City and Country) and set a default value for the City. The second scenario shows you how to use the two SmartObjects with two cascading drop-down list controls.
Example of configured property
Runtime example
Scenario
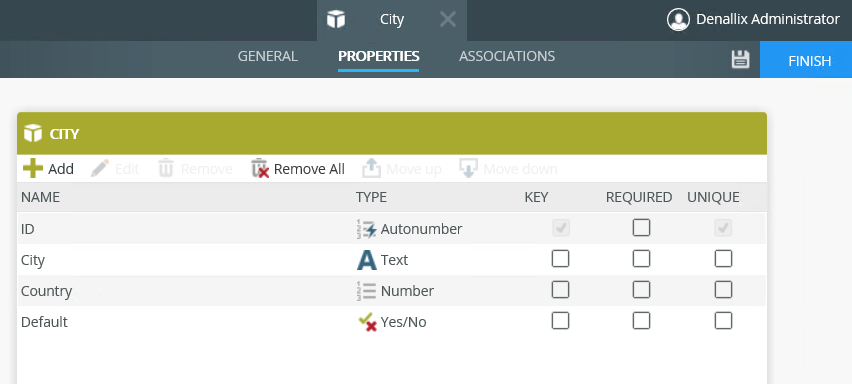
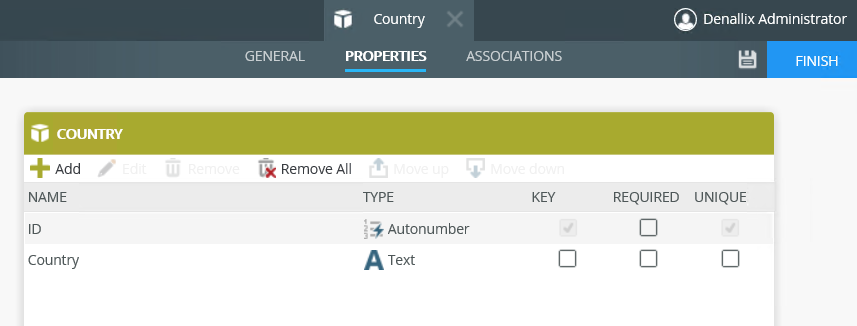
This scenario uses two SmartObjects called Country and City. Each country (example USA) has two cities (example Austin, New York) and one of the cities is set as the default city (New York). You define an association, assign a relationship between the two SmartObjects and then generate views. Use the Editable list to add data to the SmartObjects.
In this scenario, you create an item view and add a drop-down list control to it. You configure the data source to use the City SmartObject and you select the city property as the default value. At runtime, the city drop-down list control returns all cities in the SmartObject and selects the first default city.
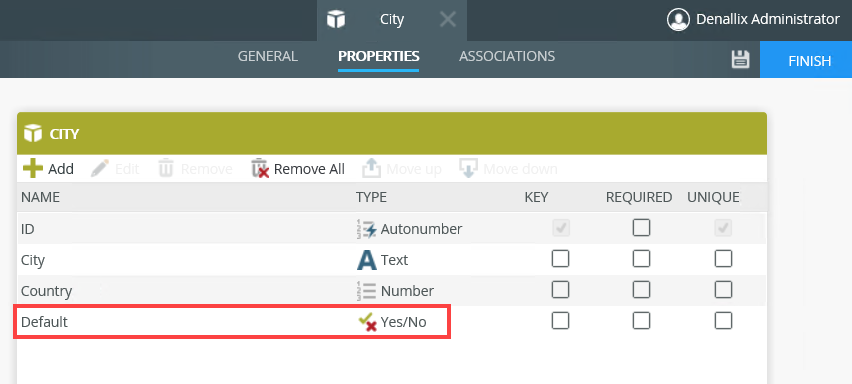
- Create two SmartObjects called City and Country. These SmartObjects store city and country data.
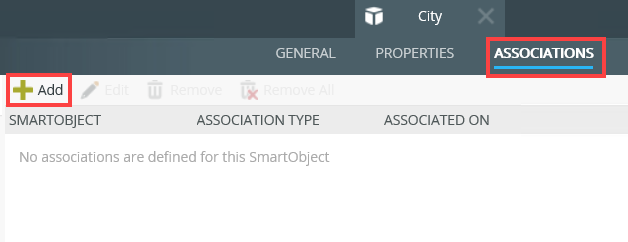
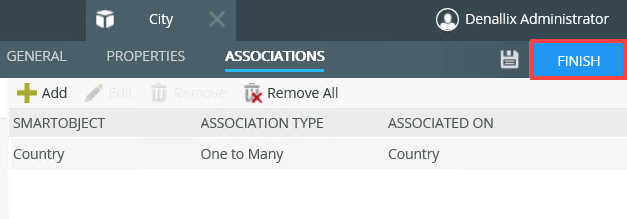
- On the City SmartObject, select the Associations tab and then click Add to create and configure an association.
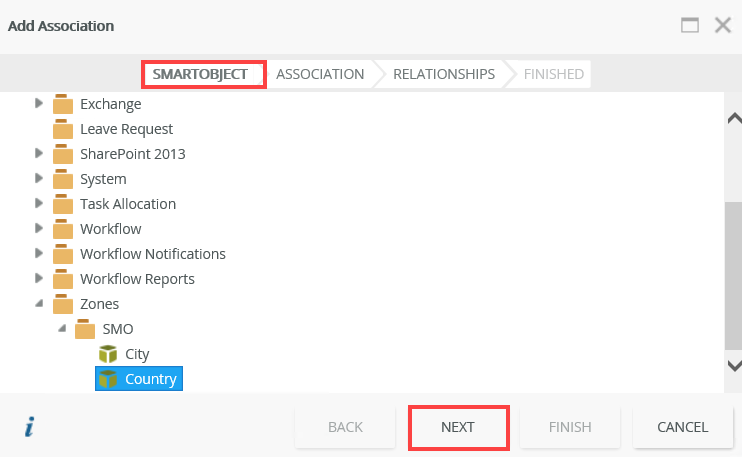
- On the SmartObject tab, select the Country SmartObject and then click Next.
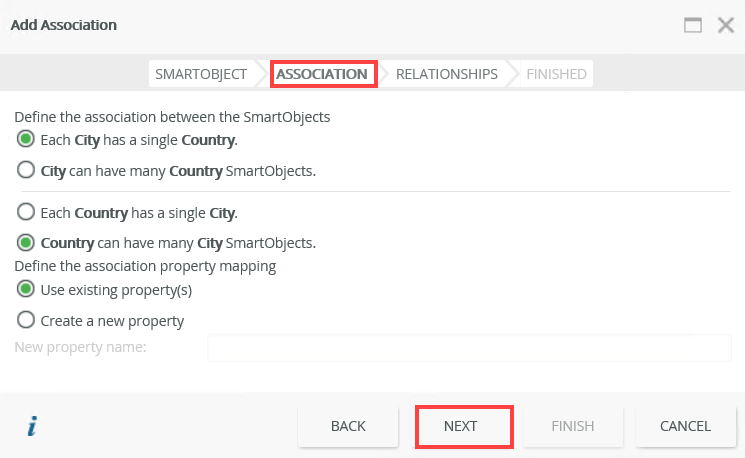
- On the Association tab, ensure the associations are defined as shown below. Click Next.
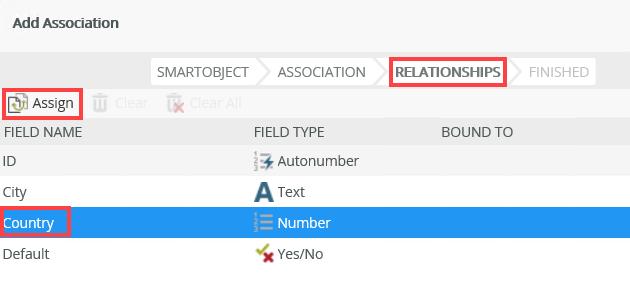
- On the Relationships tab, select Country and click Assign.
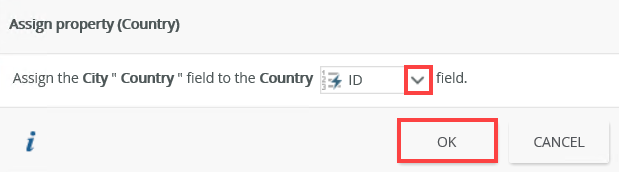
- Assign the City SmartObject's Country field to the Country ID field. Click OK.
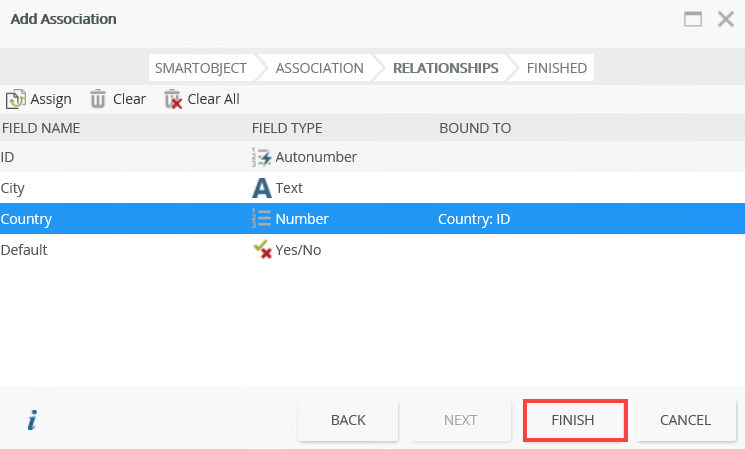
- Click Finish to complete the association between the City and the Country SmartObjects.
- Click Finish to complete configuration to the City SmartObject.
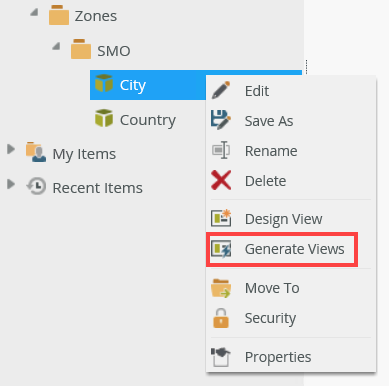
- Create an Edible List View for the City SmartObject. From the K2 Designer, right click the SmartObject and select Generate Views.
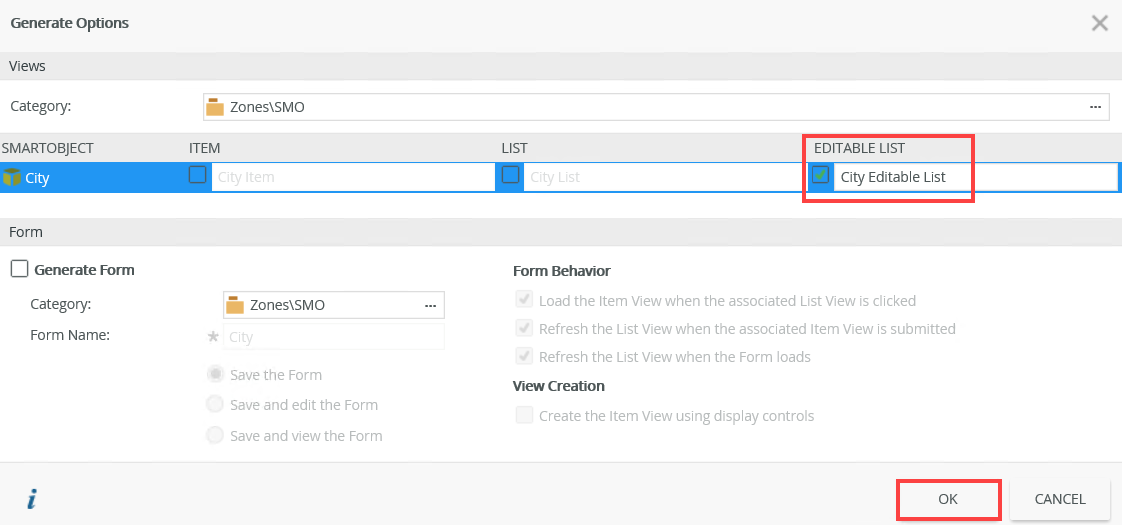
- On the Generate Options page, select the Editable List option and click OK.
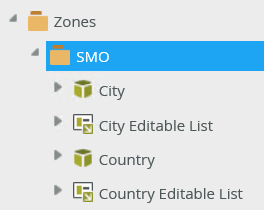
- Follow the same steps to generate an editable list view for the Country SmartObject. The views shows as below.
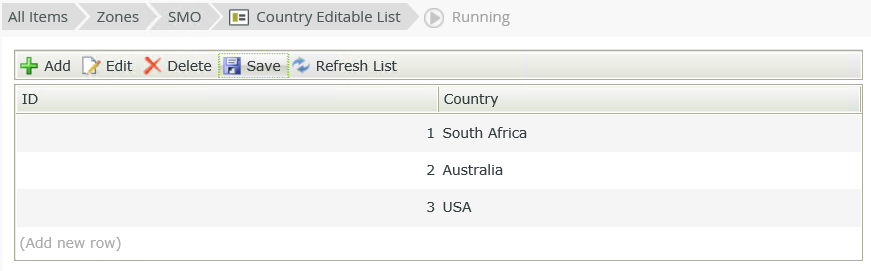
- Right click the Country Editable List and select Run. Add data to the Country SmartObject.
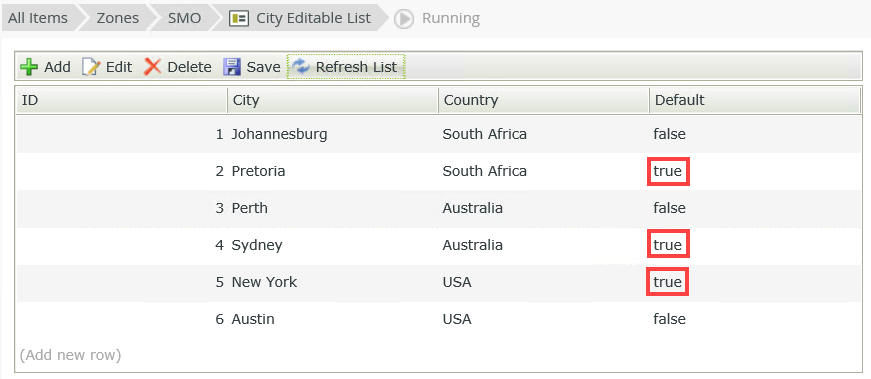
- Follow the same steps to add data to the City SmartObject. You need to set one default city for each country.
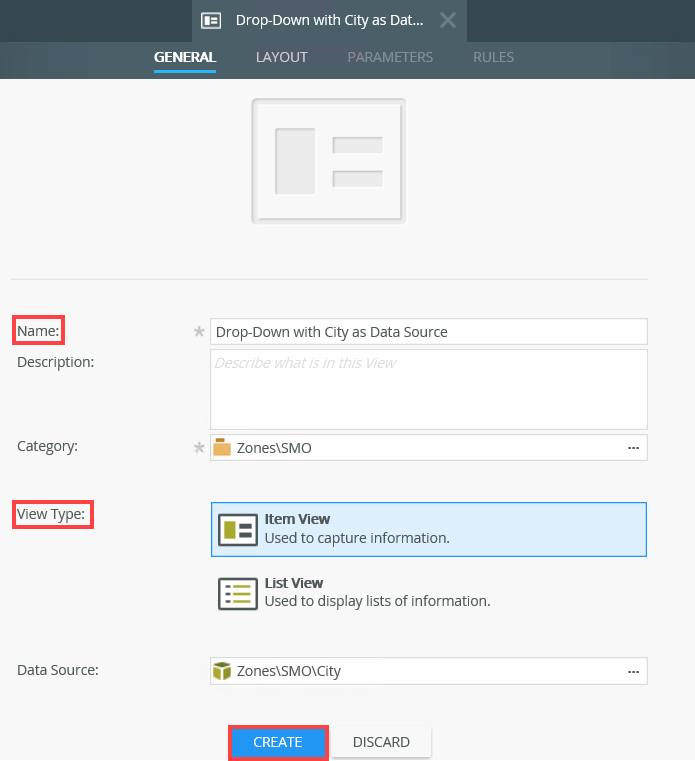
- From the K2 Designer, right click the City SmartObject and select Design a View. Name this view Drop-Down with City as Data Source. Make sure you select the Item View option and click Create.
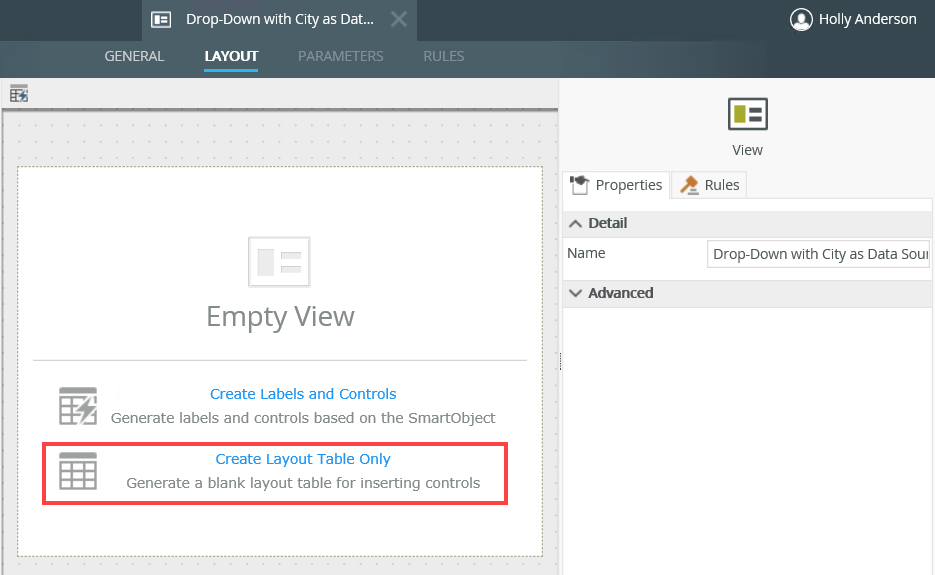
- On the Layout tab, select Create Layout Table Only and select three columns and rows. Click OK.
- From the Toolbox, drag a Drop-Down List control onto the canvas. Add a data source to your control. To do this, click the Type ellipsis under the Data Source of the Properties section.
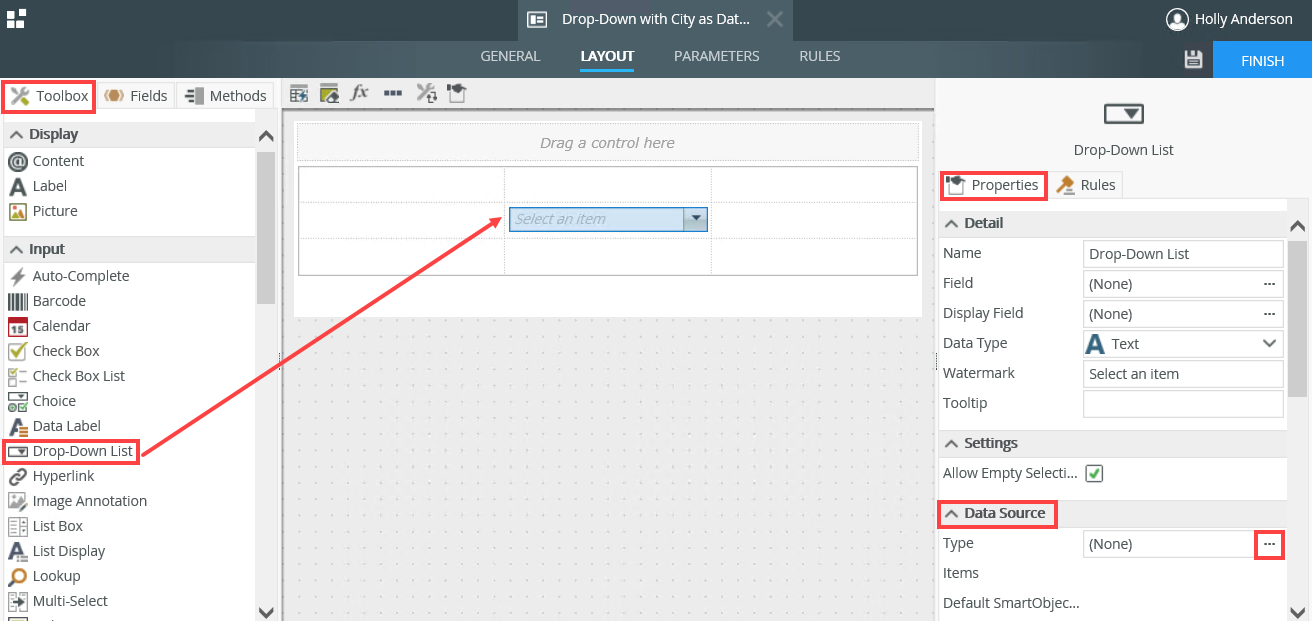
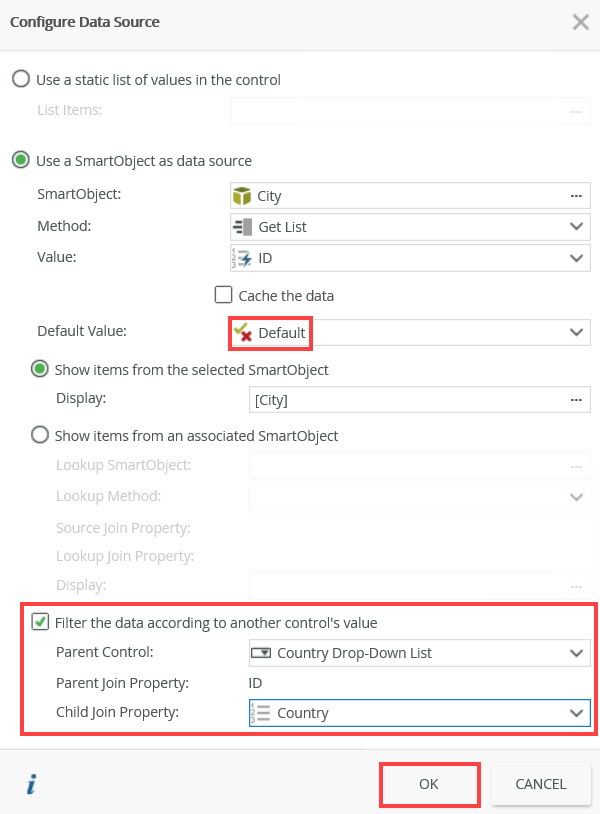
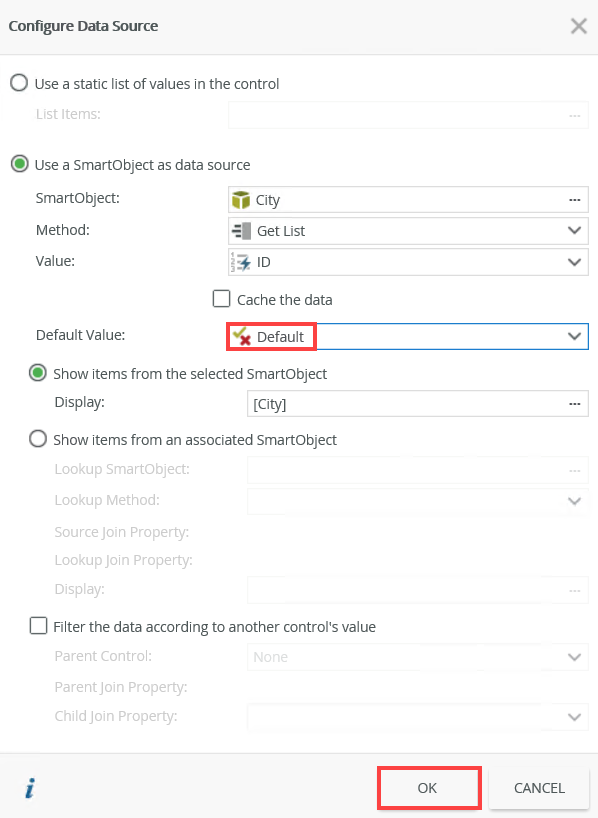
- On the Configure Data Source page, select the Use a SmartObject as data source option. Select the City as the SmartObject, Get List as the Method, and ID as the Value. Select Default from the drop down and City as the Display. Click OK.
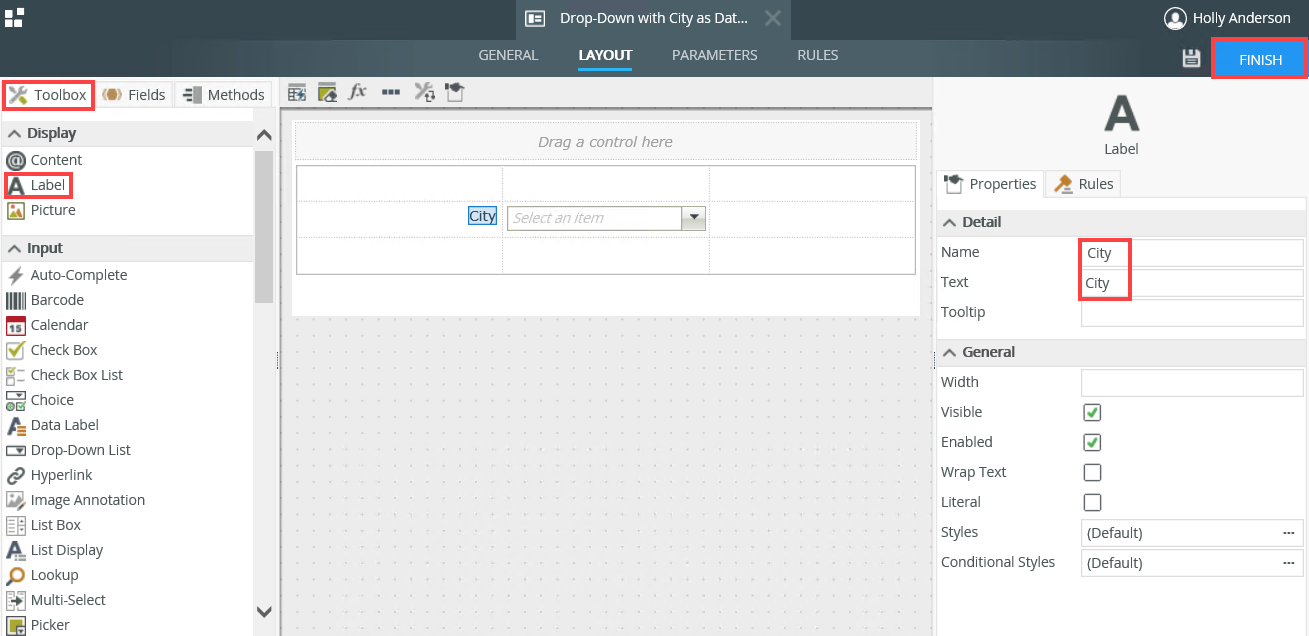
- From the Toolbox, drag a Label control onto the canvas. In the Details section, change the Name and Text fields to City. Click Finish to save changes made to the view.
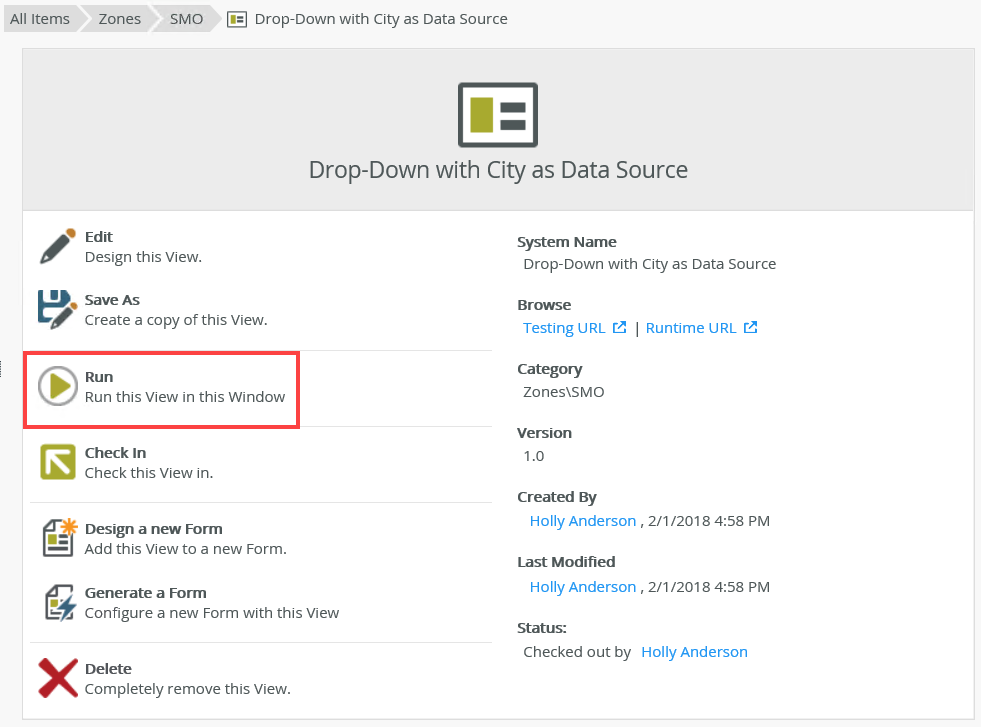
- From the K2 Designer, select the Drop-Down with City as Data Source view and click Run.
- The City drop down defaults to New York. At runtime the list returns the first default value, in alphabetical order.
In this example, the default cities are Pretoria (South Africa), Sydney (Australia) and New York (USA) which means when the default cities are ordered alphabetically, New York is the first.

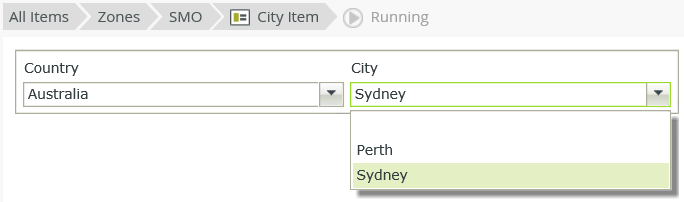
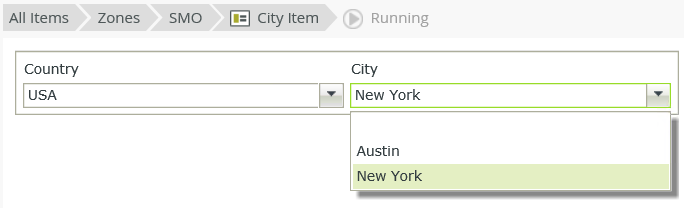
In this scenario, you create an item view and add both the City and Country properties as drop-down list controls to it. You configure the data source to use the City SmartObject and you select the city property as the default value. You also select to filter the data according to another control's value, in this case the Country drop-down control. At runtime, the City drop-down is filtered based on the value you select from the Country drop-down with the default city selected.
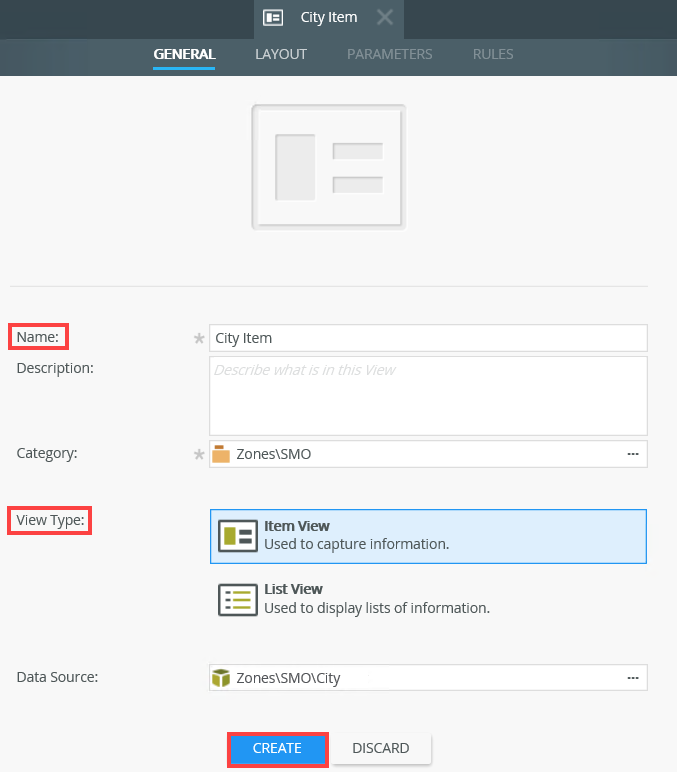
- From the K2 Designer, right click the City SmartObject and select Design a View. Name this view City Item. Make sure you select the Item View option and click Create.
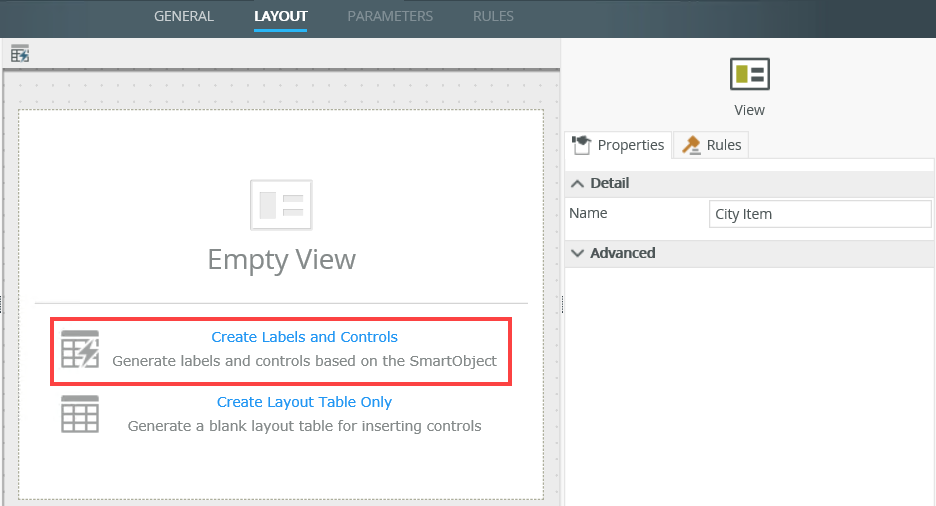
- On the Layout tab, select Create Labels and Controls and click OK.
- On the Create Labels and Controls page select the City and Country fields. Click OK.
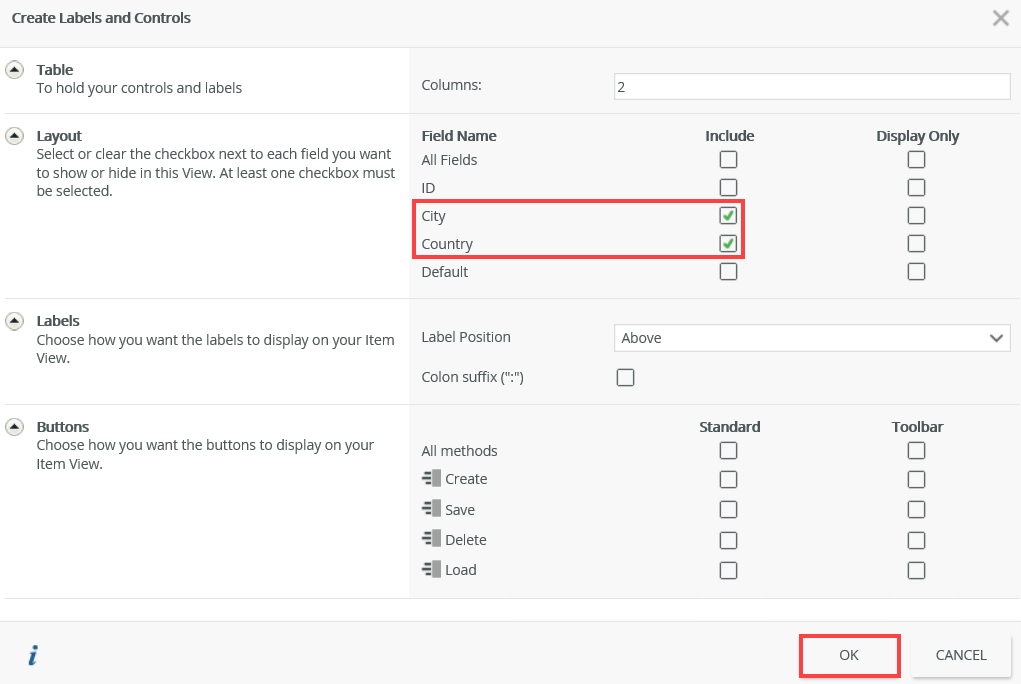
- The City field displays to the left on the layout and the Country to the right.
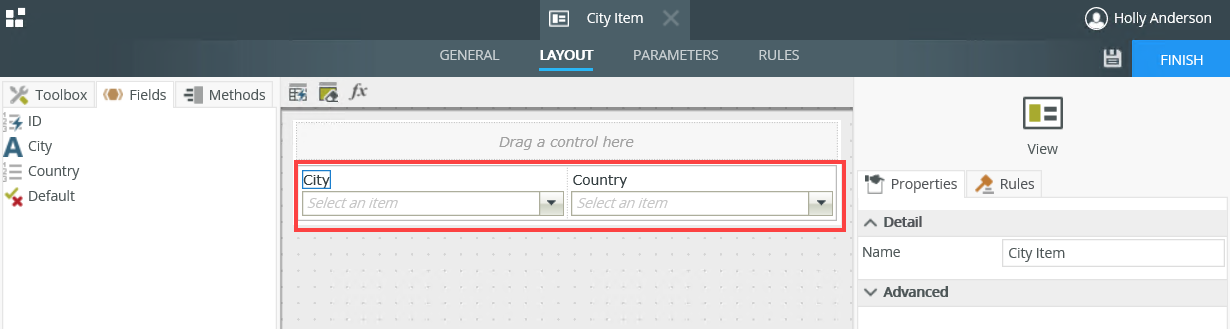
- In this example, it makes more sense to swap the fields around. You select the Country first and then the City defaults accordingly.

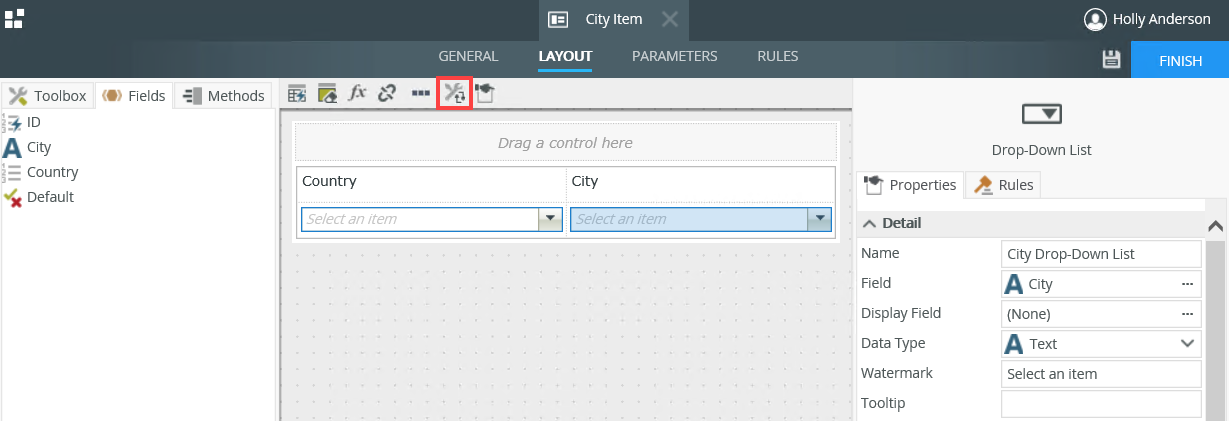
- You need to change the control properties for the City field from text to a drop-down. Select the City text box control and click the Change Control button.
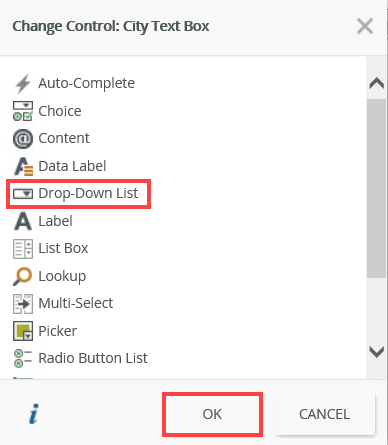
- On the Change Control: City Text Box page, select Drop-Down List and click OK.
- Select the City Drop-Down List and add a data source to it. To do this, click the Type ellipsis under the Data Source located in the Properties section.
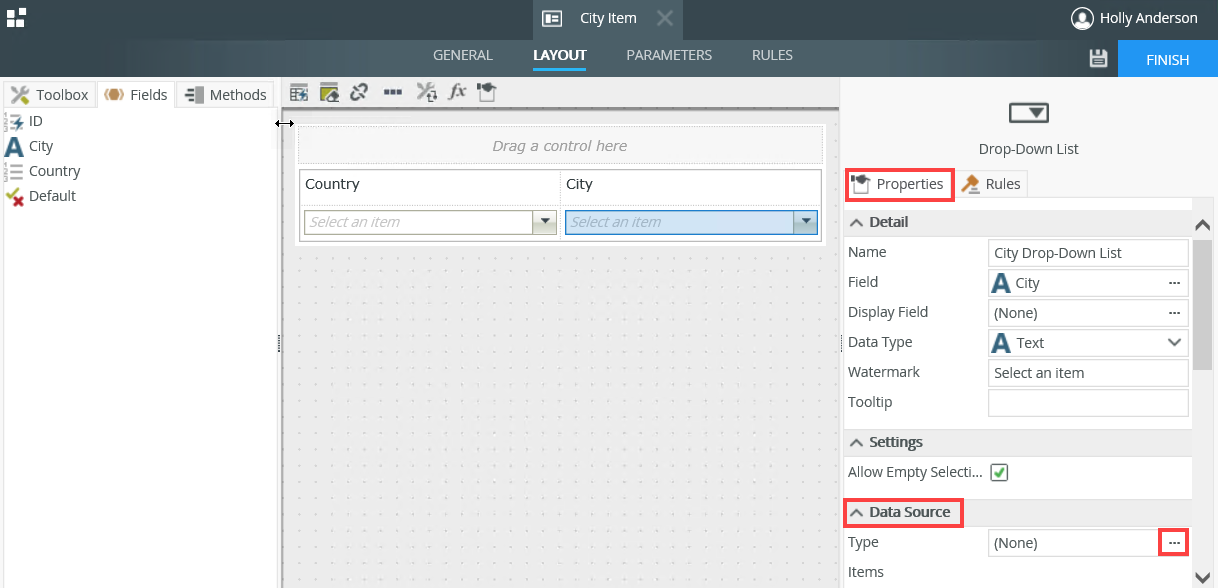
- On the Configure Data Source page, select the Use a SmartObject as data source option. Select the City as the SmartObject, Get List as the Method, and ID as the Value. Select Default from the drop down and City as the Display. Select the Filter the data according to another control's value option. Set the Parent Control to Country Drop-Down List, Parent Join Property as ID, and Child Join Property as Country as shown below. Click OK.
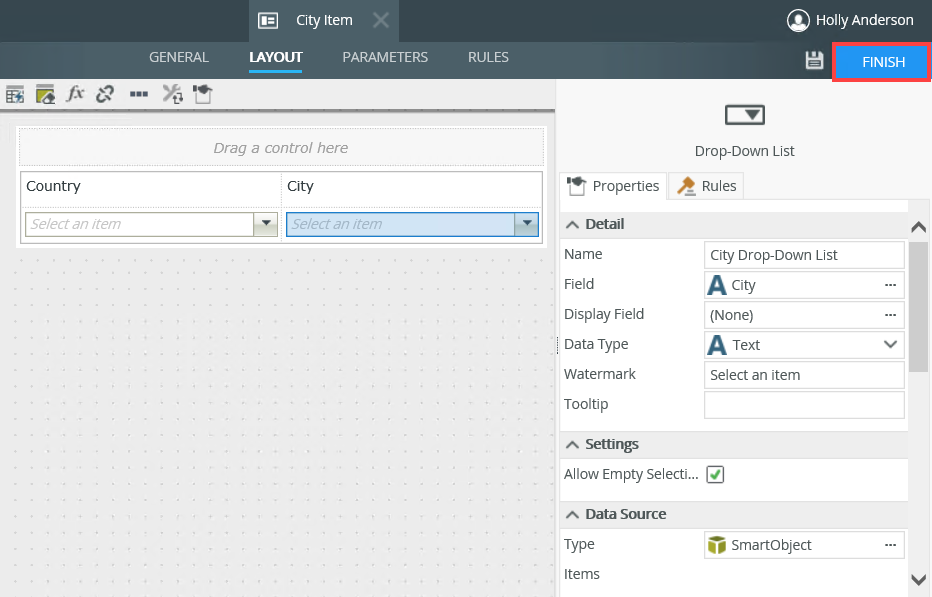
- Click Finish to save changes made to the view.
- From the K2 Designer, select the City List view and click Run.
- From the Country drop down select USA. Notice the City drop down defaults to New York when you select USA as the country. At runtime the list returns the default city value of the selected country.
- From the Country drop down select Australia. Notice the City drop down defaults to Sydney when you select Australia as the country.