How to: Use the K2 Workflow REST Feed with Microsoft Flow to Start a Workflow
This is preview functionality. For more information see the Preview topic.
Exposing K2 workflow data through the Workflow REST API provides powerful integration with third party tools like Microsoft Flow. This topic shows you how to configure the service in Microsoft Flow, use the service to start a workflow from SharePoint and Outlook.
These links take you directly to the scenarios. Make sure to read the Before you Begin section before following the steps in the scenarios:
Scenario 1 - How to start a K2 workflow in Microsoft Flow using SharePoint
Scenario 2 - How to start a K2 workflow in Microsoft Flow using Outlook
Before You Begin
If you have not done so already,
- enable the Workflow REST API in the K2 Management site
- download the Swagger file that you'll use in the connector configuration (see Workspace REST API for more information)
Then create a custom connector in Microsoft Flow using these steps:
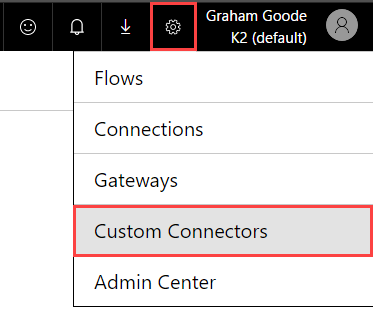
- In Microsoft Flow, click on the settings icon and select Custom Connectors.
-
Upload the swagger file saved from the K2 Workflow REST API page, and then add a description for this connector.
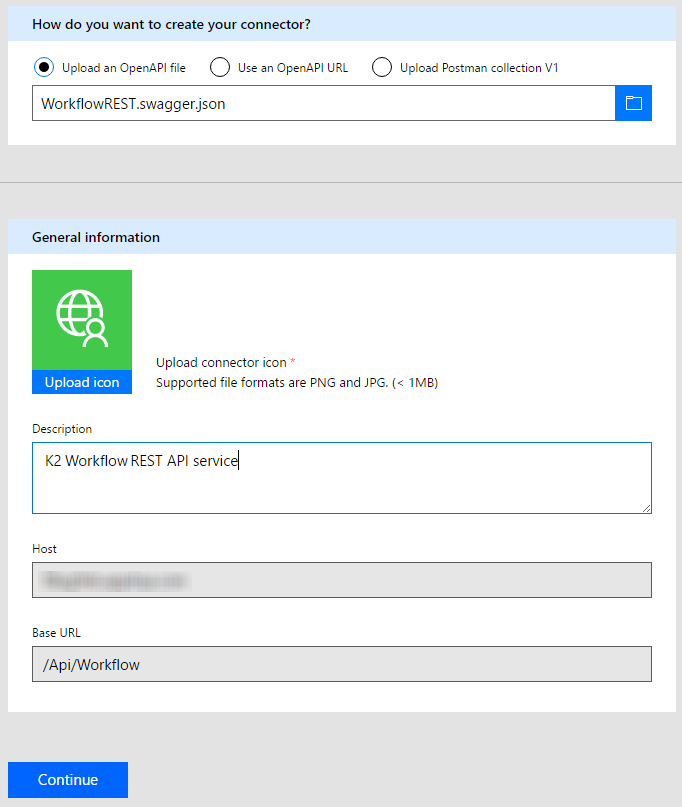
- Click on Continue.
- The Authentication type needed is Basic authentication. The swagger file pre-configures these settings. You can leave the authentication labels as they are.

- Click on Continue.
- The Definition tab loads information from the swagger file, so you can leave these values as they are.
- Click on Create Connector at the top of the Microsoft Flow page.
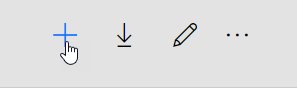
- Click on the plus sign of the K2 Workflow API custom connector.
- Enter the username and password configured for the K2 Workflow REST API service.
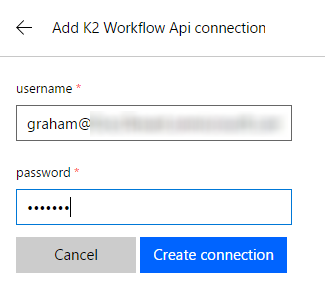
- Click on Create connection.
- The K2 Workflow REST API endpoint is now configured to be used in Microsoft Flow

Scenario 1 - How to start a K2 workflow in Microsoft Flow using SharePoint
In this scenario, you configure Microsoft Flow to start a K2 workflow when a SharePoint list item is created. You create the flow using the Flow/SharePoint integration template. The K2 workflow used in this example has a data field configured in the process definition.
High-level steps
- Create a flow from SharePoint
- Select an action and then select and configure the K2 Workflow API - Start Workflow.
- Save your flow.
- Create a new item in the SharePoint list.
Detailed steps
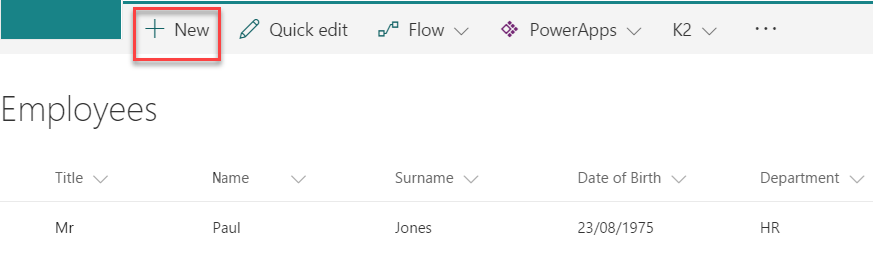
- Open your SharePoint List or Library.
- Click on the drown-down arrow next to Flow in the menu bar.
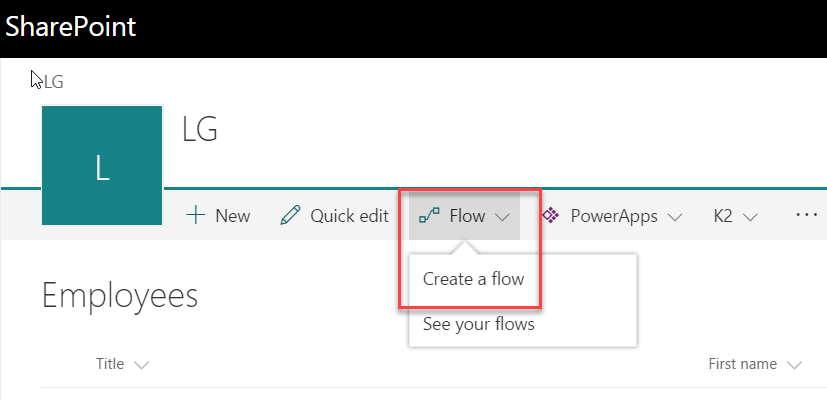
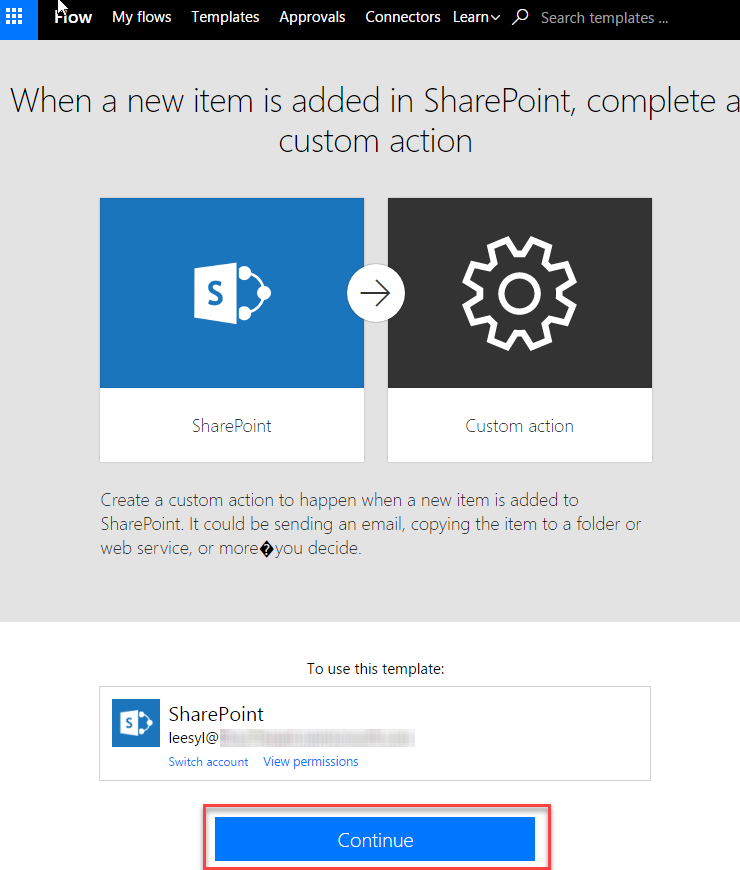
- Under Create a flow select When a new item is added in SharePoint, complete a custom action.

- Flow displays the template you have selected and the permissions required to use the template. Click Continue.
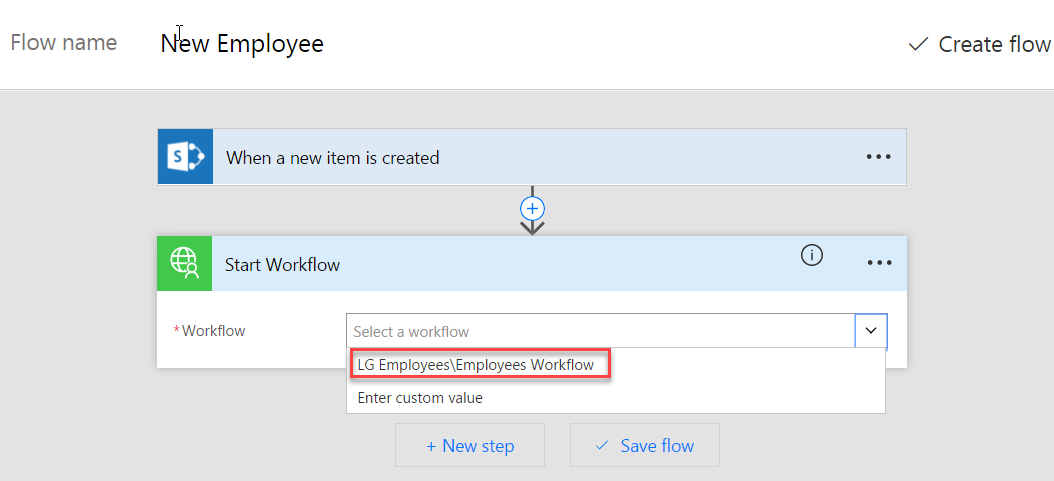
- Give your flow a name, for example, New Employee, and then select New step.
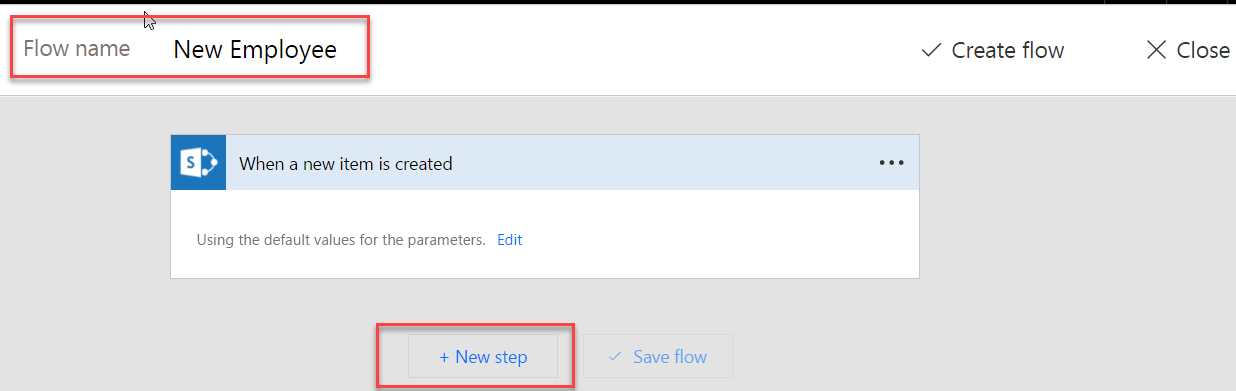
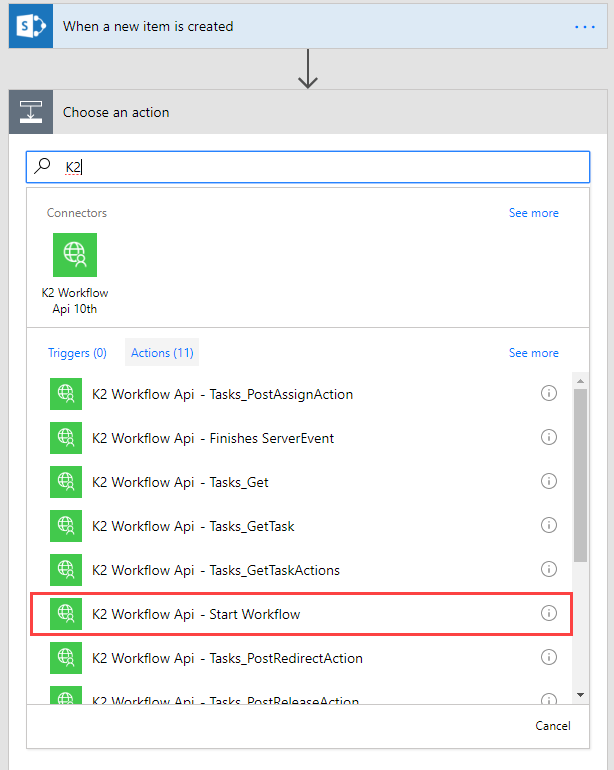
- Click Add an action.
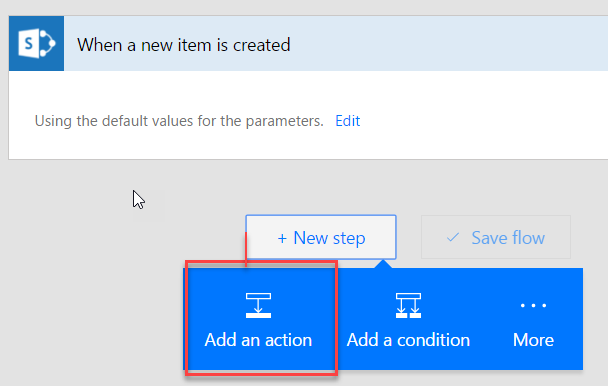
- Search for the K2 custom connector you created. Click K2 Workflow Api – Start Workflow action.
- Click the Workflow drop-down and choose the workflow to start when an item is added to the list.
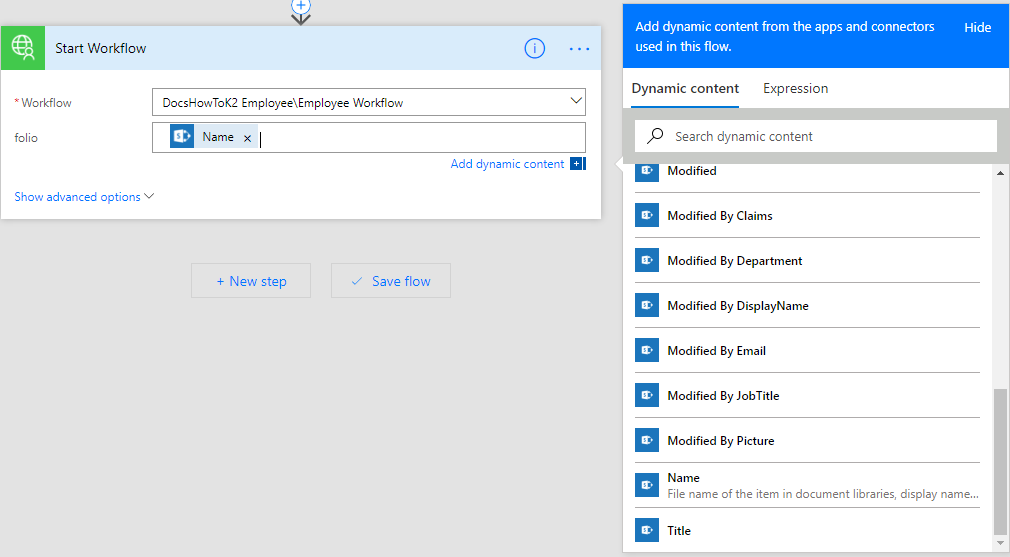
- Click on Add dynamic content and drag the Name property from the Dynamic content fields into the folio text box.
-
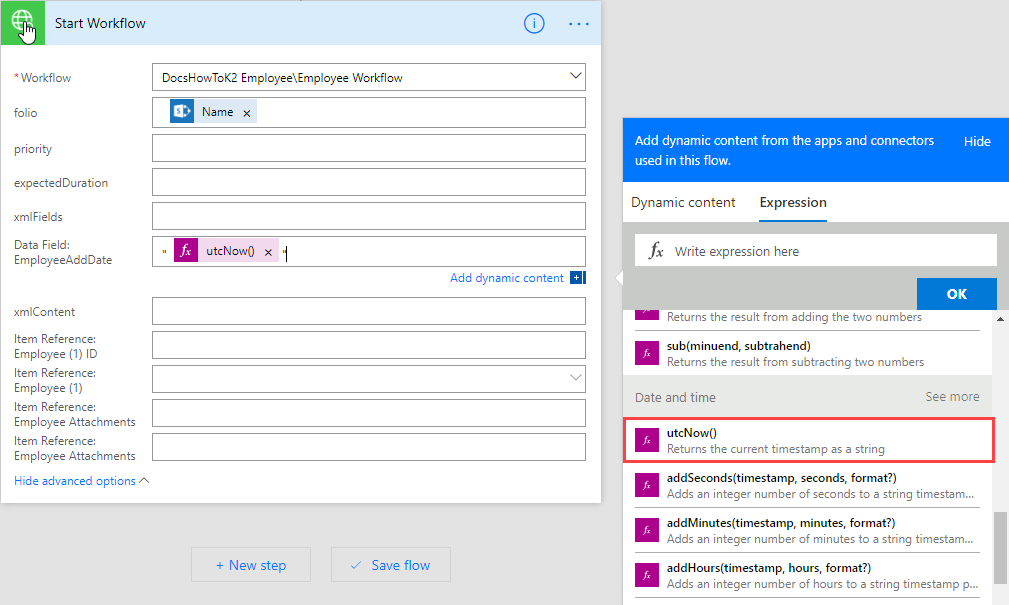
- Click on Show advanced options and choose the Data Field property (in this example our Data Field is EmployeeAddDate). Enter opening and closing quotes (" ") and select the space in the middle of the quotes then click Add dynamic content. Select the Expression tab, locate and choose the utcNow() expression and click OK. This sets the content of the Data Field to the current time that this workflow gets started.
- Click Save flow and you see a message stating your flow was created.

- Open your SharePoint List or Library, and add a new item.
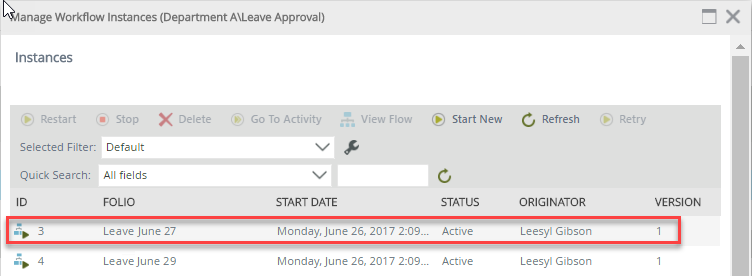
- Open the K2 Workflow > Instance tab in K2 Management to confirm that the workflow started.

Or check your worklist for the workflow item.
Scenario 2 - How to start a K2 workflow in Microsoft Flow using Outlook
In this scenario, you create a blank Microsoft Flow and configure it to start a K2 workflow when an email is sent to a folder in Outlook, in this case a leave request email gets routed to the Leave Request folder in the HR inbox using an Outlook rule. The K2 workflow used in this example has a Data Field configured in the process definition.
High level steps
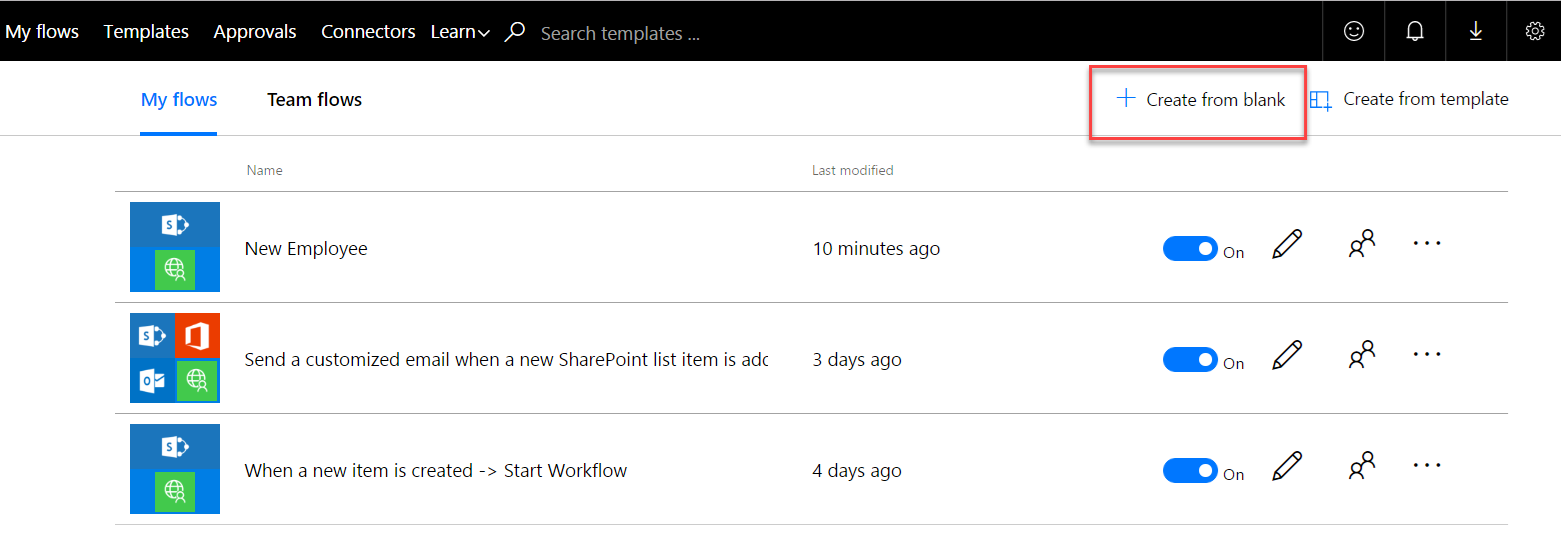
- Create a blank flow.
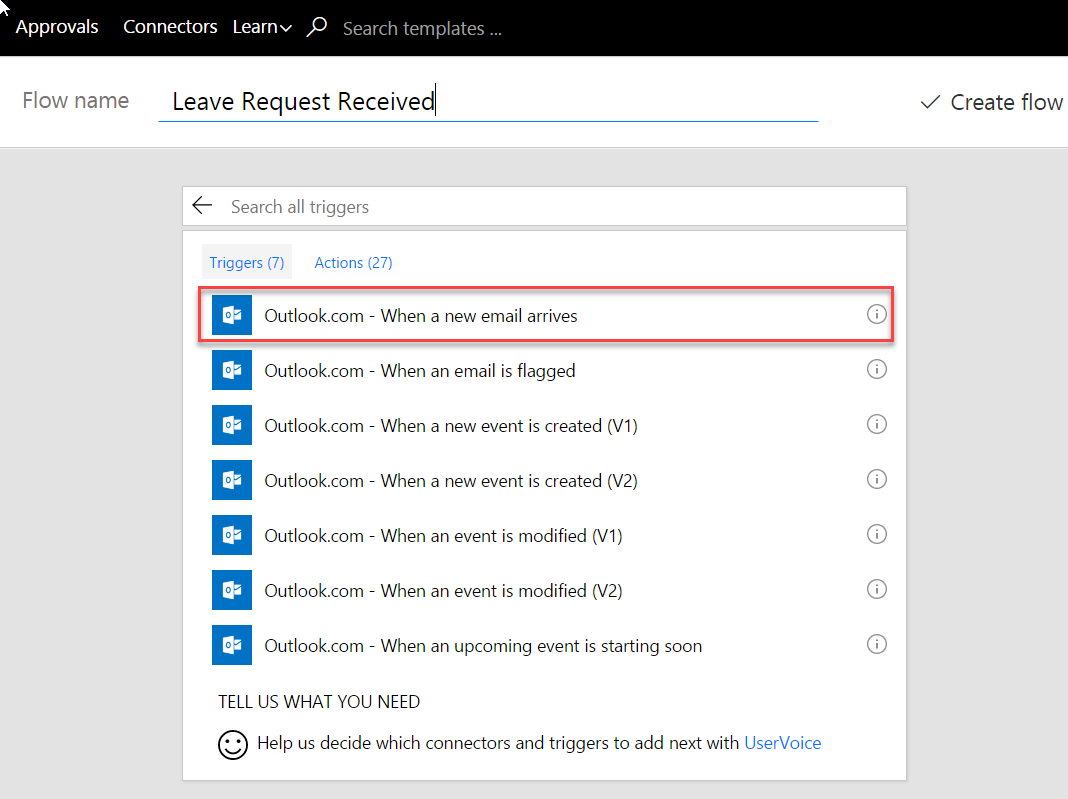
- Use the Outlook.com – When a new email arrives trigger.
- Select and configure the K2 Workflow API - Start Workflow as the action.
- Save your flow.
- Run your flow.
Detailed steps
- Open Microsoft Flow.
- Click Create from blank.
- Click Outlook.com and select When a new email arrives.
- If prompted, sign in to Outlook.com.
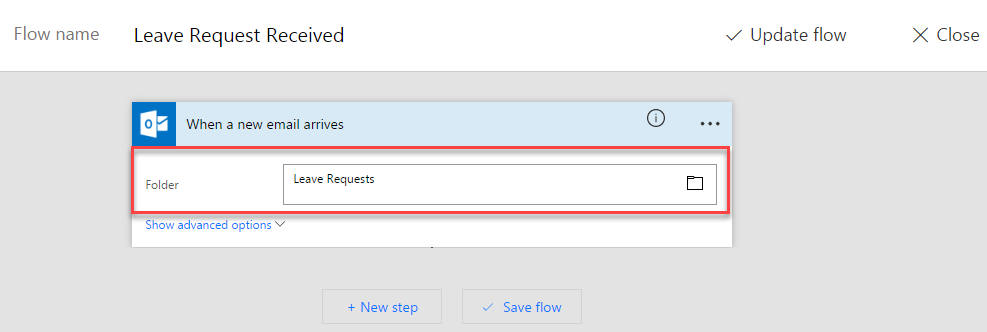
- Select the folder.
- Click Add an action.
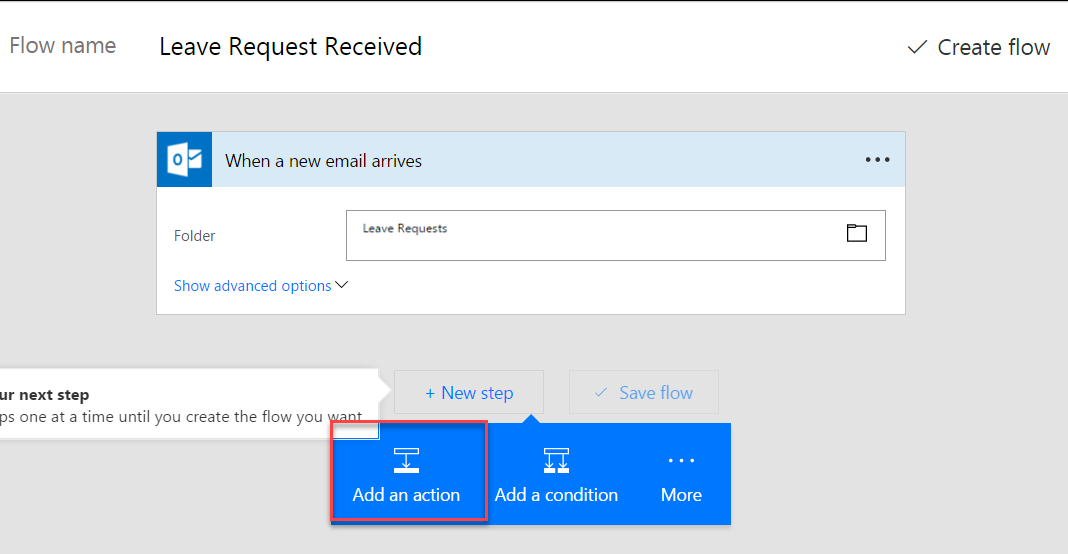
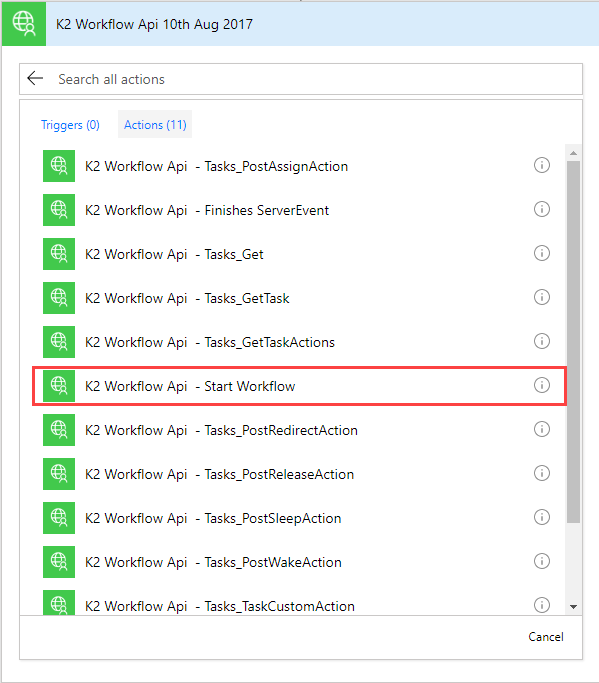
- Search for the K2 custom connector you created. Click K2 Workflow Api – Start Workflow action.
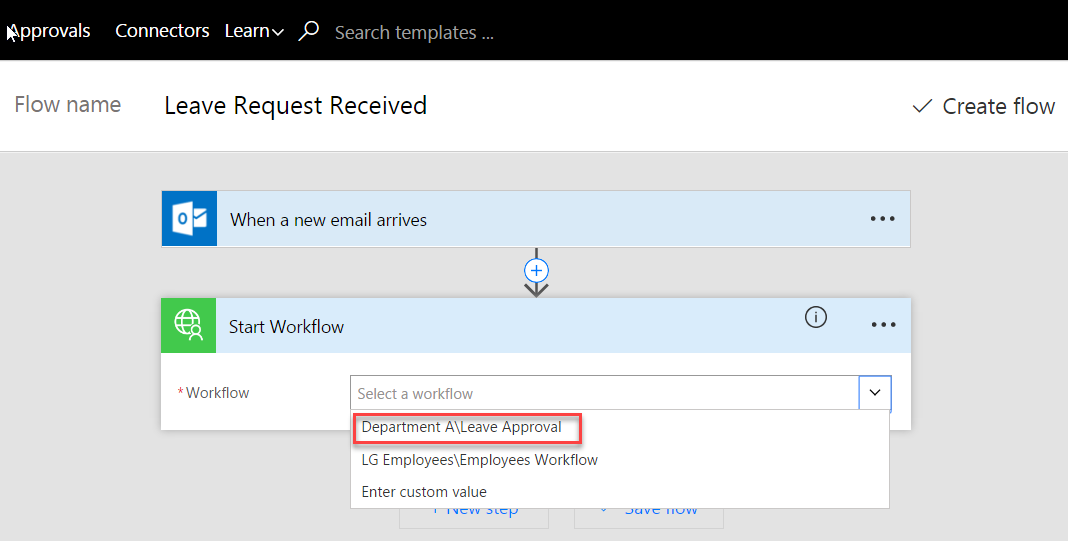
- Click the Workflow drop-down and choose the workflow to start when a new email arrives.
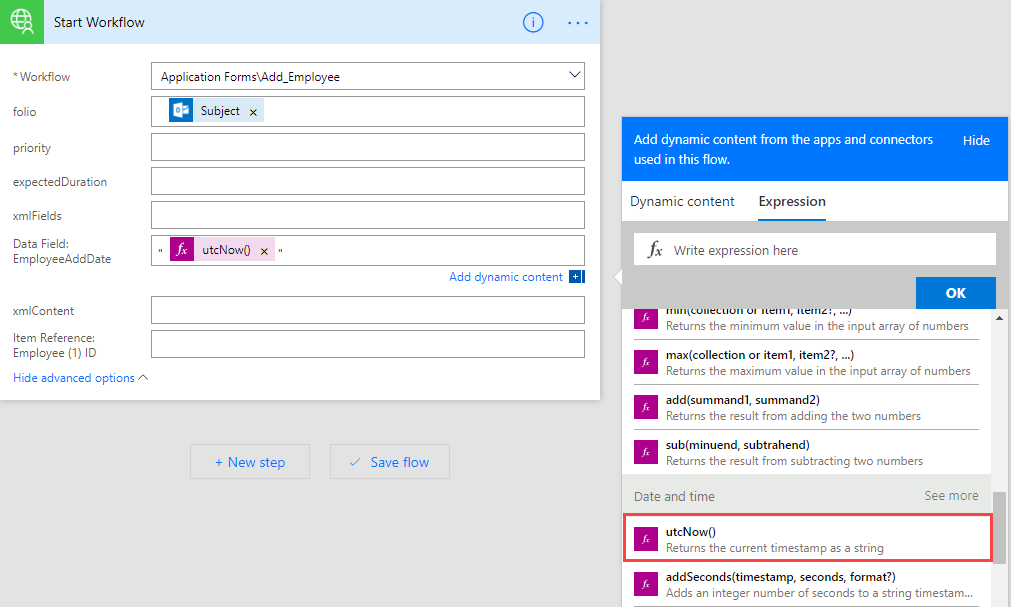
- Click on Add dynamic content and drag the Subject property from the Dynamic content fields into the folio text box.

- Click on Show advanced options and choose the Data Field property (in this example our Data Field is EmployeeAddDate). Enter opening and closing quotes (" ") and select the space in the middle of the quotes then click Add dynamic content. Select the Expression tab, locate and choose the utcNow() expression and click OK. This sets the content of the Data Field to the current time that this workflow gets started.
- Click Save flow and you see a message stating your flow was created.
- Test the flow you created by sending a leave request email to the HR inbox.
- Open the K2 Workflow > Instance tab in K2 Management Site to confirm that the workflow started.
Or check your worklist for the workflow item.