Configure SmartForms for SQL Server User Manager (SQLUM)
Use this topic to configure the SQL Server User Manager (SQLUM) for K2 smartforms sites. An example of why you would do this is where public users, such as internet users who don't belong to your company's Active Directory, need access to SmartForms. For information on configuring a secondary runtime site, see Configuring a Secondary SmartForms Runtime Site.
High Level Configuration Steps
If you are familiar with configuring claims integration, these are the high-level steps you need to follow. Otherwise, see the Detailed Steps section below.
- SSL-enable the web site that hosts the K2 smartforms virtual directories (optional)
- Configure the K2 Forms STS issuer for login
- Configure the Claims Mappings in K2
- Configure the Realm to Issuer Mappings in K2
Detailed Steps
You do not need to SSL-enable your SmartForms site but it is recommended.
- Open Internet Information Services (IIS) Manager.
- Right-click the K2 site and select Edit Bindings.
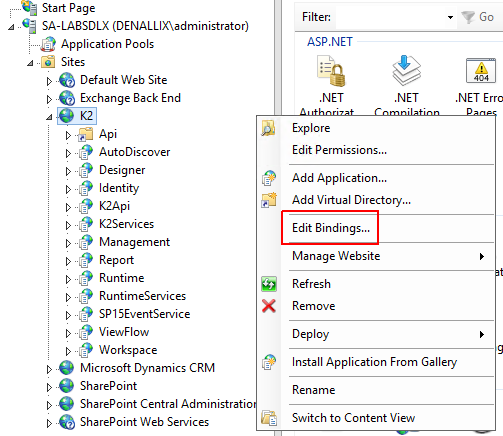
- Click Add.
- Select https from the Type drop-down list and type a new number into the Port field, typically 443.
- Select the certificate to use for your site. (In this example from the Denallix VM it is the *.denallix.com April 2016 Certificate, purchased from a valid Certificate Authority)When working with internal systems, self-signed and domain certificates can work instead of purchased certificates. If you plan to also integrate with an online system like Azure Active Directory, you must use a purchased certificate from a root authority.
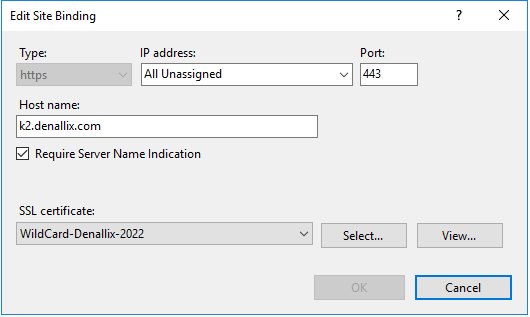
- Rerun the K2 Setup Manager to confirm the new binding.
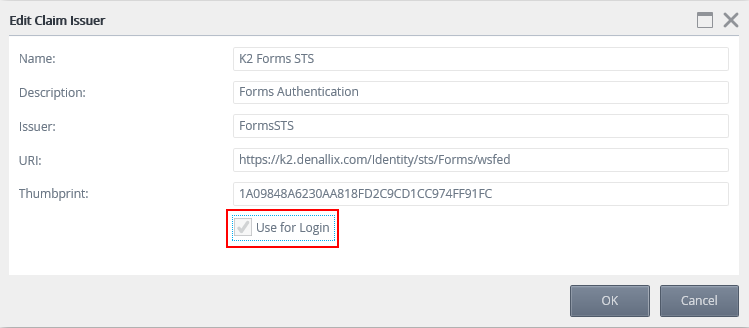
To be able to use the K2 Forms STS for login, check the Use for Login setting box. This enables you to select this issuer on the SmartForms login page.
- Open the K2 Management site and browse to Authentication > Claims > Issuers.
- Select the K2 Forms STS and click Edit.
- Check the Use for Login check box and click OK.
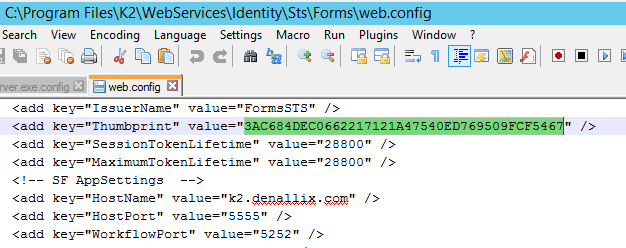
 Find the thumbprint in the web.config file at the following location: <install drive>:\Program Files\K2\WebServices\Identity\Sts\Forms\web.config
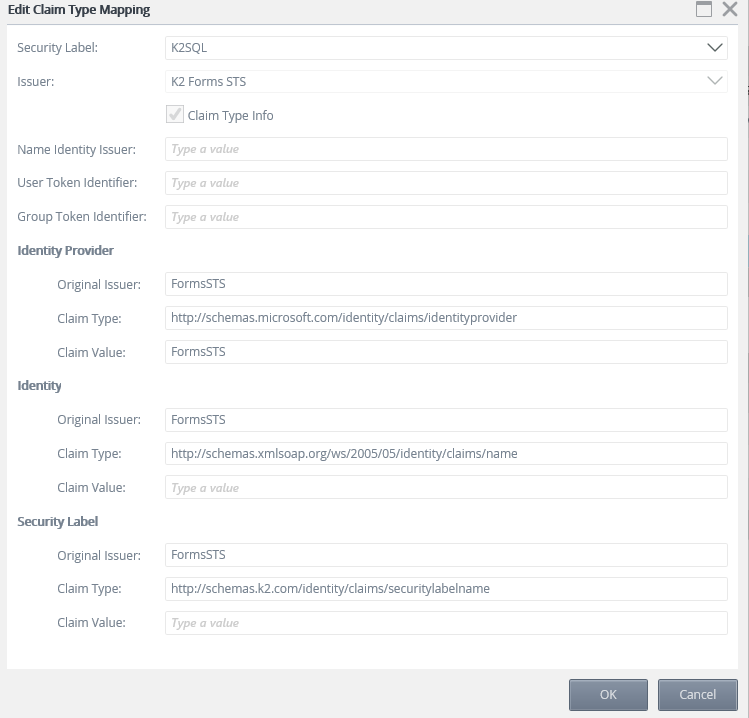
Use claim mappings to identify the incoming claims and map them to the appropriate K2 security label.
- Open the K2 Management site and browse to Authentication > Claims > Claims.
- Click New on the Security Label section and the New Claim Mapping page opens.
- Select the K2SQL label in the Security Label drop down.
- You do not need to check the Claim Type Info check box unless the SQL users are also used in SharePoint.
- Select K2 Forms STS from the Issuer drop down.
- For Identity Provider Original Issuer field enter FormsSTS.
- For Identity Provider Claim Type enter http://schemas.microsoft.com/identity/claims/identityprovider
- For Identity Provider Claim Value enter FormsSTS.
- For Identity Original Issuer field enter FormsSTS.
- For Identity Claim Type enter http://schemas.xmlsoap.org/ws/2005/05/identity/claims/name
- Leave Identity Claim Value empty as this claim is different for each user.
- For Security Label Original Issuer enter FormsSTS.
- For Security Label Claim Type enter http://schemas.k2.com/identity/claims/securitylabelname
- Click OK to add the mapping.
The Realm is the unique value that associates the SmartForms site with the claims authentication options. Audience URIs are the actual URLs used to access the site. You can specify additional Audience URIs for a single Realm. For example, if you use https://k2.denallix.com/Runtime and http://dlx:81/Runtime to access the SmartForms site, you must add both URLs as Audience URIs.
- Open the K2 Management site and browse to Authentication > Claims > Realms.
- The list of realms should be preconfigured with your Runtime, Designer, Identity, and View Flow realms as well as Audience URIs. Follow these steps for each realm needing SQLUM authentication:
- Select the Realm and click Edit.
- In the Edit Realm dialog use the check box list to select the issuers to map to the realm. For SQLUM, select the K2 Forms STS.

- Click OK.

If K2 Forms STS is the only authentication configured in the realm to issuer mapping you are redirected to a login page. If you have configured other authentication modes, you see a page that lets you select the Login method to use as shown below. Note that after making these changes, you may need to clear your browser cache to reset cached credentials.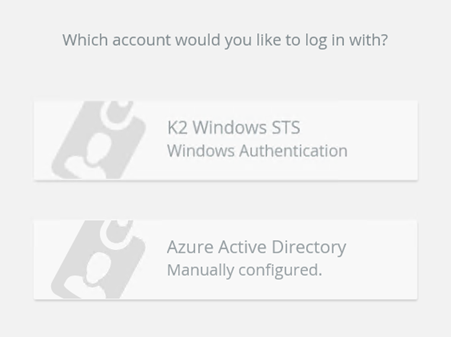
See the following topics for more information about SQLUM:
- Planning for SQL User Manager in K2: Overview and getting started with SQLUM
- Non-Active Directory / Workgroup Installation: Similar to a standard K2 installation, but SQLUM is the only User Manager available.
- Configuring a Secondary SmartForms Runtime Site: Configure a secondary SmartForms runtime site for SQL-based or anonymous users.
- Configuring the SQL User Manager: Configuring SQLUM as a primary or secondary identity provider.
- Adding, Editing and Deleting SQL User Information: Maintaining SQLUM identities using available stored procedures.