Database Configuration
The Database Configurations page lists the K2 Database. At this point, if the Setup Manager has not created the database, the Status column will show 'Create'. Change the connection details by clicking on the Change link in the connection column (which also allows you to rename the database).
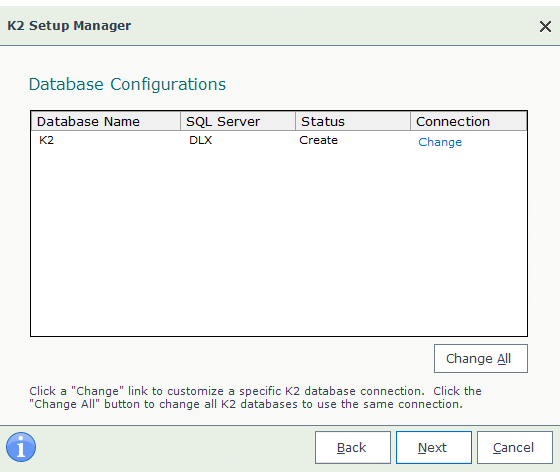
What to do on this page
To configure the database connections:
- Click on the Change link or the Change All button.
- To change the SQL Server to install the K2 Database to, enter the name of the SQL Server.
- To change a database name, enter the name for the database.
- To configure SQL Authentication, select the SQL Authentication option and enter the Account Name and Password.
- Click the Test Database Connection button.
- If all details are correct, click Next to proceed.
Change / Change All
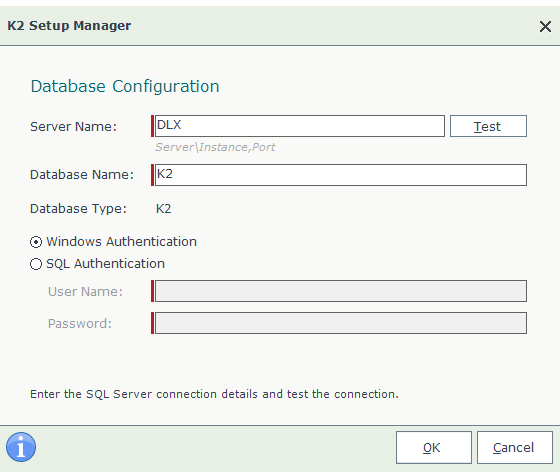
The Setup Manager shows the next database configuration screen if you chose to change the database connection. Type in the name of the SQL Server where the K2 database is installed (or if the database does not exist yet, where the database should be created), provide the database name and select the authentication mechanism K2 will use to connect to the SQL database.
| Field | Description |
|---|---|
| Server Name | Enter the name of the SQL Server where the database will be installed. If using a SQL Named Instance, provide the Named Instance here i.e. Sqlserver\Instance,Port |
| Database Name | The default name of the K2 Host Server Database is pre-populated here, you can alter the default name if this is a new database installation. K2 recommends the default name for ease of identification. If you are pointing to an existing K2 database, the database name appears here, but you may need to enter the database name manually if your database was installed under a different, non-standard name. |
What to do on this page
- Enter the name (or Named Instance) for the Database server where the K2 database is located into the field labeled SQL Server.
- Provide and verify the name of the new or existing K2 database.
- Authentication: select Windows or SQL Authentication.
- If you select Windows Authentication, K2 uses the credentials of the K2 Service Account to establish the connection to the SQL Server.
- If SQL Authentication is selected, provide a username and password that K2 uses to connect to the SQL Server.
- For SQL Authentication Only:
- Enter the User Name and Password.
- Click Test to verify the connection to the database.
- If the test passes, proceed to the next step.
- If not, you must correct the User Name and Password before the Setup Manager will allow the installation to proceed.
- Click Next to continue.
Considerations
- If you make use of SQL Server AlwaysOn, be sure to point to the correct SQL Server Always on Listener/Instance.
-
If there are any Database Triggers defined for K2 tables in the K2 database, ensure that the triggers are dropped when performing upgrades. If they are not dropped (or only disabled) during the upgrade process, errors occur. For example, you can use the following command:
DROP TRIGGER [Identity].[TG_Identity_PreventDeletion] GOYou can query triggers in the database with the following script:
CopyQuery triggers against the databaseSELECT
sysobjects.name AS trigger_name
,USER_NAME(sysobjects.uid) AS trigger_owner
,s.name AS table_schema
,OBJECT_NAME(parent_obj) AS table_name
,OBJECTPROPERTY( id, 'ExecIsUpdateTrigger') AS isupdate
,OBJECTPROPERTY( id, 'ExecIsDeleteTrigger') AS isdelete
,OBJECTPROPERTY( id, 'ExecIsInsertTrigger') AS isinsert
,OBJECTPROPERTY( id, 'ExecIsAfterTrigger') AS isafter
,OBJECTPROPERTY( id, 'ExecIsInsteadOfTrigger') AS isinsteadof
,OBJECTPROPERTY(id, 'ExecIsTriggerDisabled') AS [disabled]
FROM sysobjects
INNER JOIN sysusers
ON sysobjects.uid = sysusers.uid
INNER JOIN sys.tables t
ON sysobjects.parent_obj = t.object_id
INNER JOIN sys.schemas s
ON t.schema_id = s.schema_id
WHERE sysobjects.type = 'TR'
Azure SQL Database
Installing K2 on Virtual Machines that you host in Azure and that connect to a K2 database hosted in Azure SQL follows the same basic installation approach as when the K2 database is in a on-premises SQL Database. During installation, you will point the installer to the database in Azure SQL to allow the K2 installer to perform the necessary configuration for the database.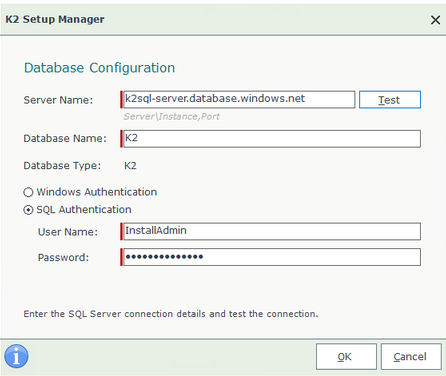
For information on installing K2 in such an environment, see the topic Non-AD workgroup installation.
Remember to use the database name, server name, user name and password used when you created the database.