Configure SmartForms for Active Directory Federation Services (AD FS)
This document outlines the configuration steps necessary for enabling Active Directory Federation Services (AD FS) for K2 smartforms sites.
Prerequisites
The following prerequisites are required for configuring SmartForms for AD FS:
- K2
- Token signing certificate from your Identity Provider
- Active Directory Federation Service (AD FS) installed and configured
- SSL-enable the web site that hosts the K2 smartforms virtual directories
High Level Configuration Steps
These high-level steps are provided for those familiar with configuring claims integration. For a detailed guide, see the Detailed Steps section below.
- SSL-enable the web site that hosts the K2 smartforms virtual directories
- Install the Identity Provider Certificate on the K2 server
- Configure the K2 Security Provider
- Configure the Claim Issuer in K2
- Configure the Claim Mappings in K2
- Configure the Realm to Issuer Mappings in K2
- Configure K2 as a Relying Party Trust in AD FS for each K2 smartforms site
Detailed Steps
Configuring SmartForms to work with AD FS requires that your SmartForms site is enabled for SSL.
- Open Internet Information Services (IIS) Manager.
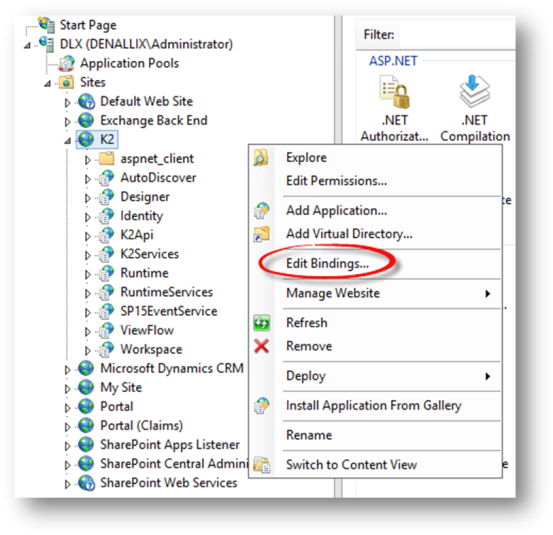
- In this example the K2 site is used. Right - click the K2 site and select Edit Bindings.
- Click Add.
- Select https from the Type drop down list and type a new number into the Port field.
- Select the certificate used for your site. In this example it is the *.denallix.com April 2015 Certificate, which was purchased from a valid Certificate Authority.
When working with systems like AD FS that are internal to the organization, Self-signed and Domain Certificates can work in place of purchased certificates. If you plan to also integrate with an online system like Azure Active Directory you will need to use a purchased certificate.


- To make sure that the new HTTPS configuration is updated properly in the K2 configuration, rerun the K2 Setup Manager.
The Token-signing certificate from AD FS must be installed in the Trusted Root Certification Authorities location on the K2 server.
- Open the AD FS Management Console.
- Expand the Service Node.
- Select the Certificates Node.
- Right-click the Token-signing certificate and select View Certificate.

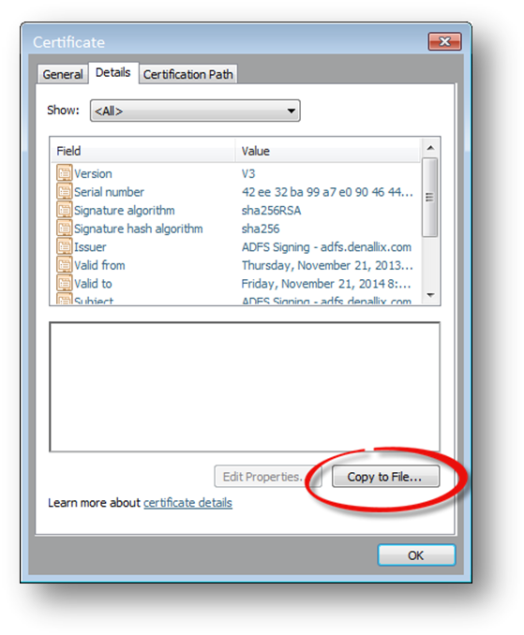
- Select the Details tab and click Copy to File.
- Walk through the Certificate Export Wizard, creating a DER encoded binary X.509 certificate file.
- Copy the .CER file to the K2 server.
- On the K2 server double-click the .CER file and click Install Certificate on the General Tab.

- Select Place all certificates in the following store on the Certificate Import Wizard and choose the Trusted Root Certificate Authorities store.

- Click OK, Next and then Finish to complete the wizard.
In order for K2 to authenticate the users from Active Directory Foundation Services, you must configure a Trusted LDAP Security Provider against a custom security label, for example, ADFS. You can configure the Trusted LDAP Security Provider by following the steps in the Configuring the K2 LDAP User Manager.
A Claim Issuer is required for K2 to map the STS signing certificate with the security tokens.
- Open the K2 Management site and browse to Authentication > Claims > Issuers.
- Click New.
- Enter a Name and Description for the AD FS Issuer.
- Enter the Token Issuer endpoint for AD FS in the Issuer textbox (Example: http://adfs.denallix.com/adfs/services/trust).
- Enter the Login URL for AD FS in the URI textbox (Example: https://adfs.denallix.com/adfs/ls/).
- Enter the Thumbprint of the Token-signing certificate for AD FS.A system administrator can use the following Powershell command to print the thumbprint to screen. Copy and paste the result into the Thumbprint field of the New Claim Issuer dialog.
Get-AdfsCertificate "Token-Signing" | Select-Object CertificateType, Thumbprint - Check the Use for Login check box and click OK to add the AD FS issuer.

Claim mappings are used to identify the incoming claims and map them to the appropriate K2 security label.
- Open the K2 Management site and browse to Authentication > Claims > Claims.
- Click New on the Security Label section, the New Claim Mapping page opens.
- Select the Security Provider you configured in Step 3 from the Security Label drop down.
- Select the Issuer you configured in Step 4 from the Issuer drop down.
- For the Identity Provider Original Issuer textbox enter the Original Issuer value for AD FS (Example: http://adfs.denallix.com/adfs/services/trust)
- For the Identity Provider Claim Type textbox enter the Claim Type value for AD FS. The recommended approach is to create a static claim using the following: http://schemas.microsoft.com/identity/claims/identityprovider
- For the Identity Provider Claim Value textbox enter the Authentication Method Claim Value for AD FS (Example: urn:oasis:names:tc:SAML:2.0:ac:classes:PasswordProtectedTransport
- For the Identity Original Issuer textbox enter the Original Issuer value for AD FS (Example: http://adfs.denallix.com/adfs/services/trust)
- For the Identity Claim Type textbox enter the Claim Type value for AD FS (Example: http://schemas.xmlsoap.org/ws/2005/05/identity/claims/name)
- Leave the Identity Claim Value textbox empty as this claim will be different for each user that logs in at runtime.
- Click OK to add the mapping.

The Realm is the unique value that associates the SmartForms site with the claims authentication options. Audience URIs are the actual URLs that will be used to access the SmartForms site. Additional Audience URIs can be specified for a single Realm. For example if you use https://k2.denallix.com/Runtime and http://dlx:81/Runtime to access the SmartForms site you will need both URLs registered as Audience URIs.
- Open the K2 Management site and browse to Authentication > Claims > Realms.
- The list of Realms should be pre-configured with your Runtime, Designer, and View Flow realms and Audience URIs. For each realm that you want to enable AD FS authentication for follow the steps below:
- Select the desired Realm and click Edit.
- In the Edit Realm dialog use the check box to select the desired issuers to map to the realm.
- Click OK.

The following steps are required to add a relying party trust to the token issuer. This must be done for each site that was configured above.
- Launch the AD FS Management console.
- Expand the Trust Relationships node.
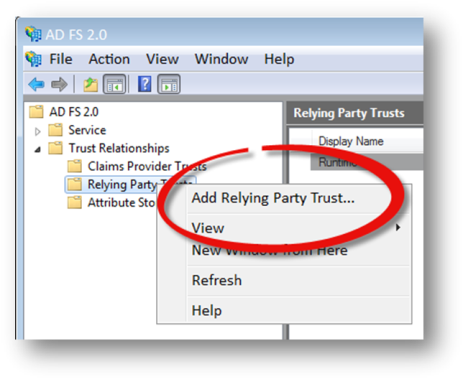
- Right-click on the Relying Party Trusts node and select Add Relying Party Trust…
- Click Start.
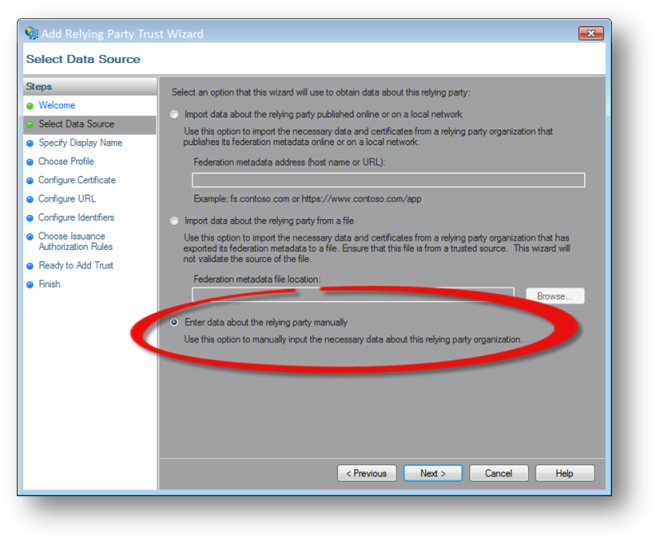
- Select Enter data about the relying party manually and click Next.
- Enter a display name and description and click Next.
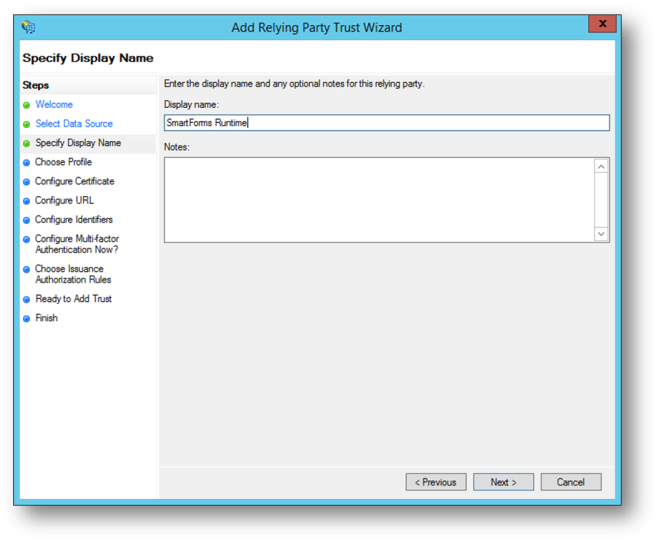
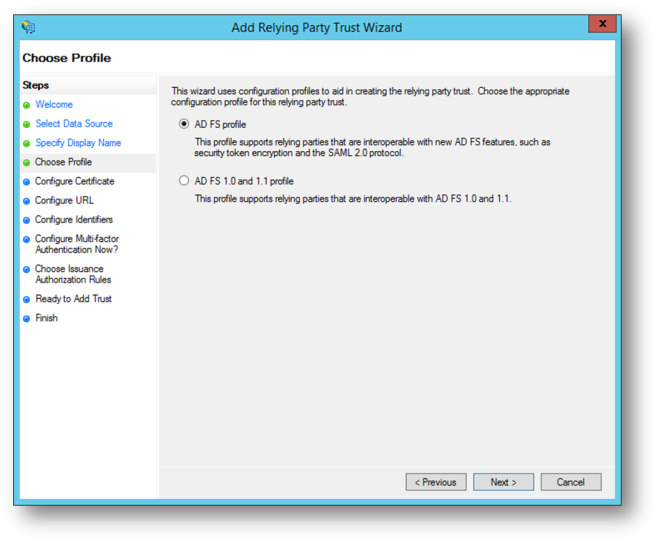
- Select AD FS profile and click Next.
- Optionally specify a token encryption certificate. Since SSL is being used for the site it is not necessary to also encrypt the token unless desired. Click Next.
- Check Enable support for the WS-Federation Passive protocol.
- Enter the SmartForms site URL (Example: https://k2.denallix.com/Runtime/) for the site for which you are configuring the Relying Party Trust, and click Next.
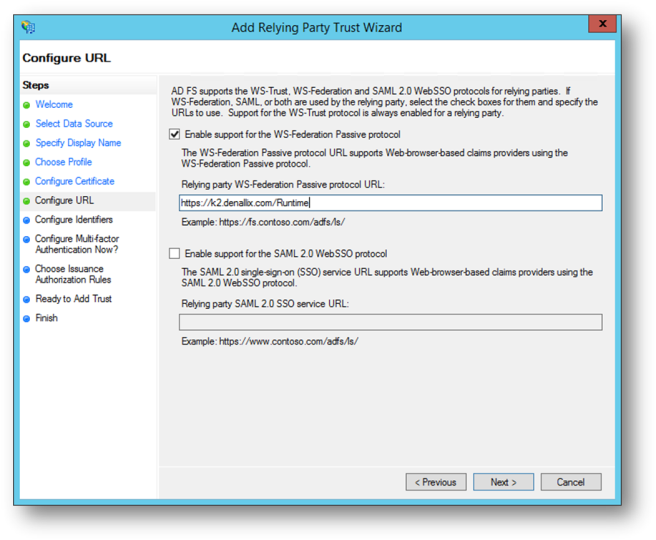 You must configure K2 as a Relying Party in AD FS for each SmartForms site, especially when you have multiple design and runtime sites. The URL you specify here is carried forward to the Configure Identifiers page and must be unique. If you do not enter a URL on this page the Next button on the Configure Identifiers page is disabled.
 - Click Next on the Configure Identifiers page.
- Click Next on the Multi-Factor authentication page.
- Select the desired Issuance authorization rules option and click Next.
- Click Next and Close.
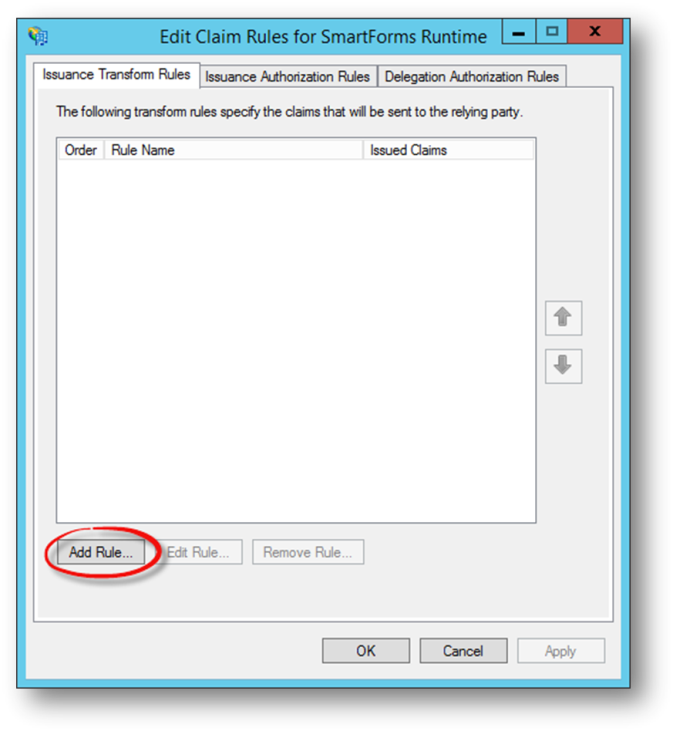
- The Edit Claim Rules dialog will open.
- On the Issuance Transform Rules tab, click Add Rule…
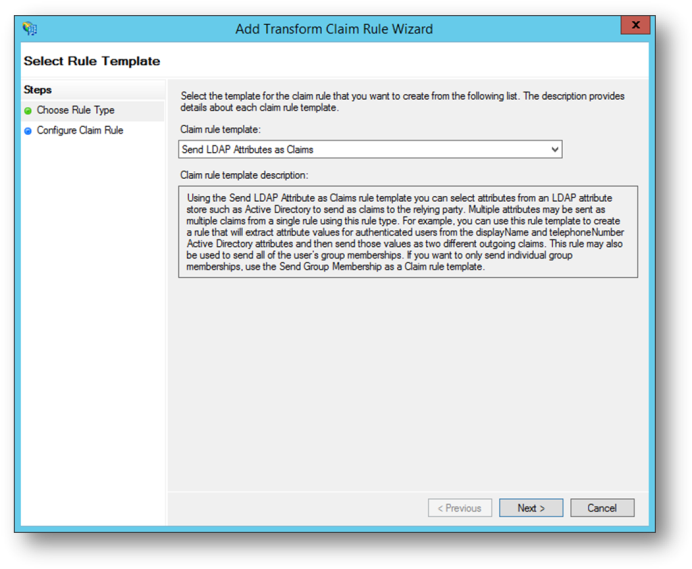
- Select Send LDAP Attributes as Claims and click Next.
- Supply a name for the rule and select Active Directory as the Attribute store.
- Configure the required and optional claim mappings:
LDAP Attribute
Outgoing Claim Type
SAM-Account-Name
Name
Token-Groups – Unqualified Names
Role
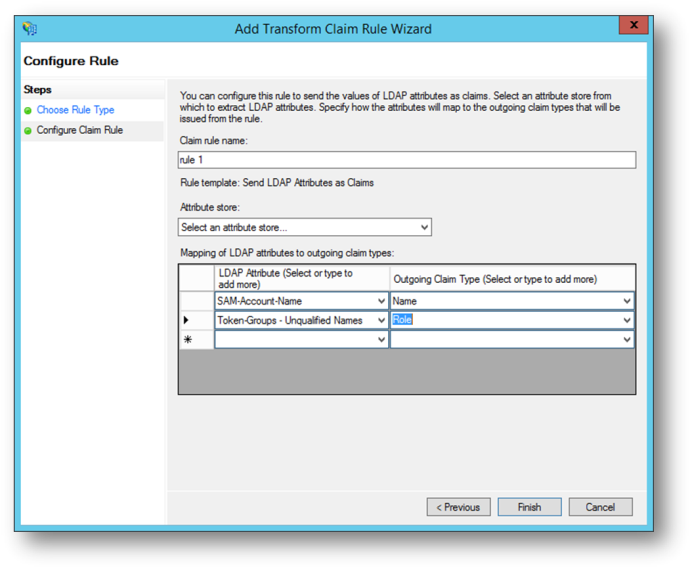
- Click Finish.
- Click OK to complete the Claim Rule mappings.
- Restart the K2 Host Server and navigate to a site that you configured for ADFS authentication. You may also need to clear your browser cache in order to clear any cached authentication.
If AD FS is the only authentication configured in the Realm to Issuer mapping then you should be redirected to the AD FS log in screen. If there are other authentication modes configured then you will see a page with a drop down that lets you select the authentication method that you want to use. Authentication that you have previously been using to access your K2 smartforms sites will likely be cached by your browser. To enable you to login using AD FS you will first need to clear your browser cache.