5. Add and Configure Email Steps for the Manager Outcomes
In this step you will expand the Leave Request Workflow by adding email steps. You will add a Send Email step to the approved and denied outcomes and direct them to the leave requester. This will let the requester know the manager's decision.
- Edit the Leave Request Workflow. Begin by deleting the End step. The two outcome lines will still connect to an empty placeholder. You will add email steps, then reroute the outcomes to the new steps.
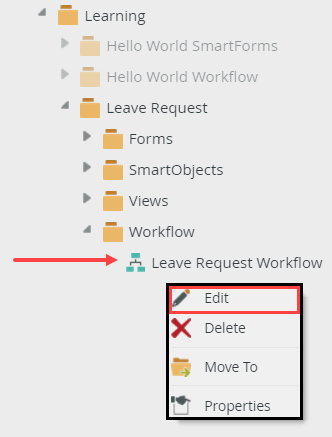
- In the Designer, edit the Leave Request Workflow. Right-click the workflow name in the explorer, then select Edit. When you see the helpful tips dialog, click CLOSE.
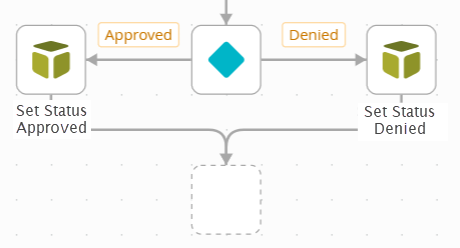
- Select the End step, then click <DELETE> on your keyboard. The outcomes still connect to an empty placeholder. You will delete the placeholder in a later step.
- In the Designer, edit the Leave Request Workflow. Right-click the workflow name in the explorer, then select Edit. When you see the helpful tips dialog, click CLOSE.
-
Add a Send Email step and align it with the Approved outcome. Connect the Approved outcome to the email step.
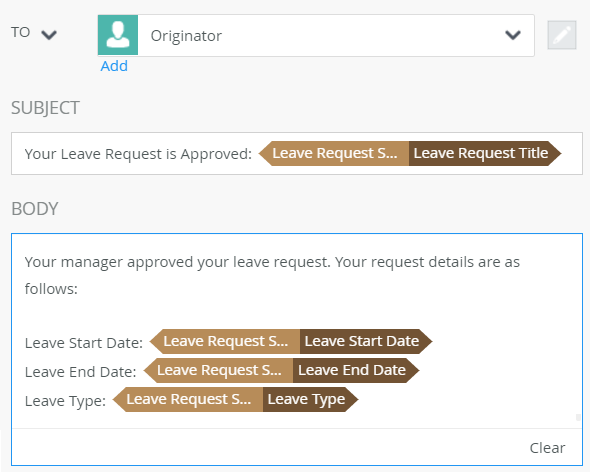
- In the Configuration Panel, configure the email recipient as the Originator. Customize the SUBJECT line and message BODY using references from the Leave Request SmartObject. Use the image below for reference, if needed. To access SmartObject properties, expand the Context Browser. Under the REFERENCE heading, expand the Leave Request SmartObject. Drag the SmartObject references into the message body.
- Change the Send Email step name to
Email Originator Approved
- Next you will add and configure the email step for the approved outcome. You will send the email to the workflow originator and let them know the decision from their manager. You will use variables from the Context Browser in your message body. At runtime, the variables are replaced with "live" data, which personalizes the email message for the leave requester.
Expand the Toolbox > Basic nodes. Drag a Send Email step just below the Set Status Approved step. Add a Send Email step just below the Set Status Denied step. You can add as many steps as you need to map out your workflow, then connect them later. You do not have to connect a step before adding another step.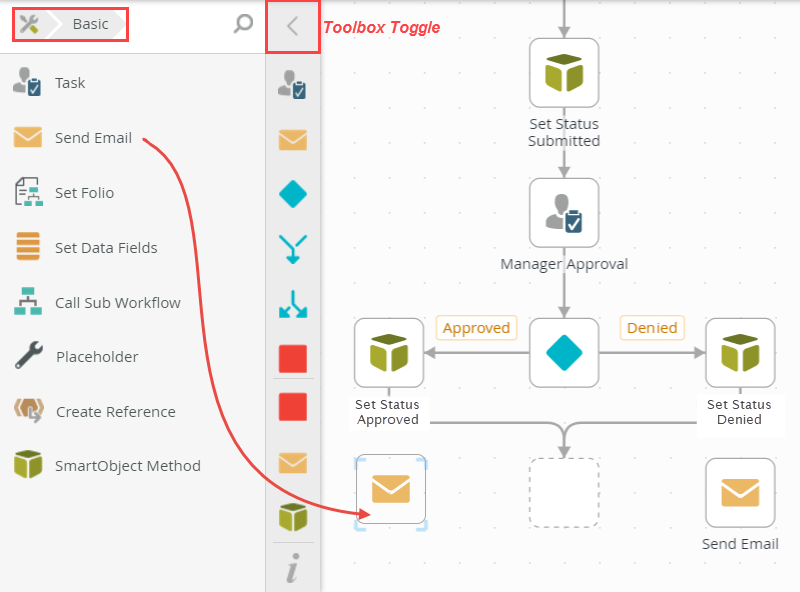
- Click the Set Status Approved outcome line to expose its handles. Drag the handle from the empty step (green triangle) to the Send Email step. Repeat this to connect the Set Status Denied step to its corresponding Send Email step.
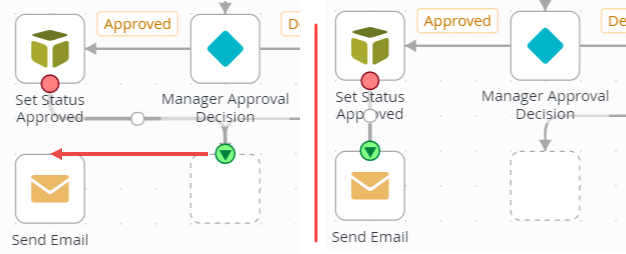
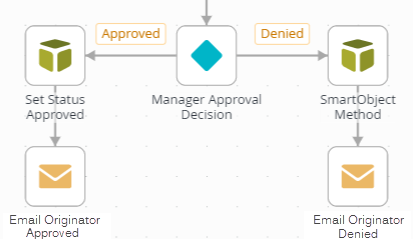
- The empty placeholder will still remain. Click to highlight it, then click <DELETE> from your keyboard. Your workflow should look like the image below at this point.
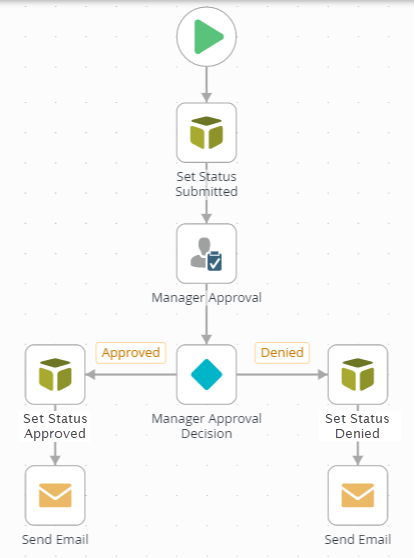
- Next, you will edit both the Send Email steps and configure them for the appropriate outcome (approved and denied). You will use properties from the Context Browser to add dynamic content to your email subject line and message body.
Click to highlight the Send Email step for the approved outcome. Expand the Configuration Panel. Click the Notification tab (if it isn't already active). Confirm the TO value is set to the default, Originator.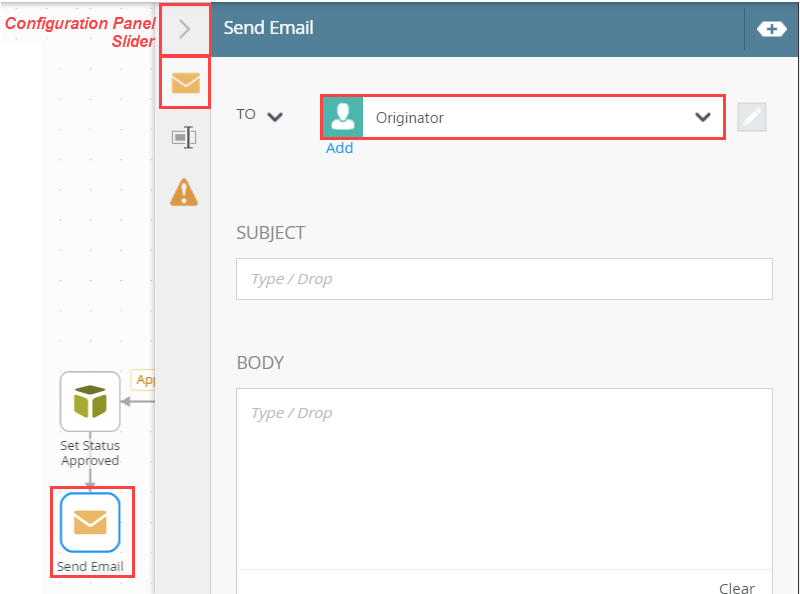
- Expand the Context Browser, then expand the Leave Request SmartObject under REFERENCES. For the SUBJECT line, enter
Your Leave Request is Approved:
then drag the Title property from the reference and append it to the subject line. Once again, at runtime, this variable is replaced with "live" content. In this case, the Title text box entry from the leave requester.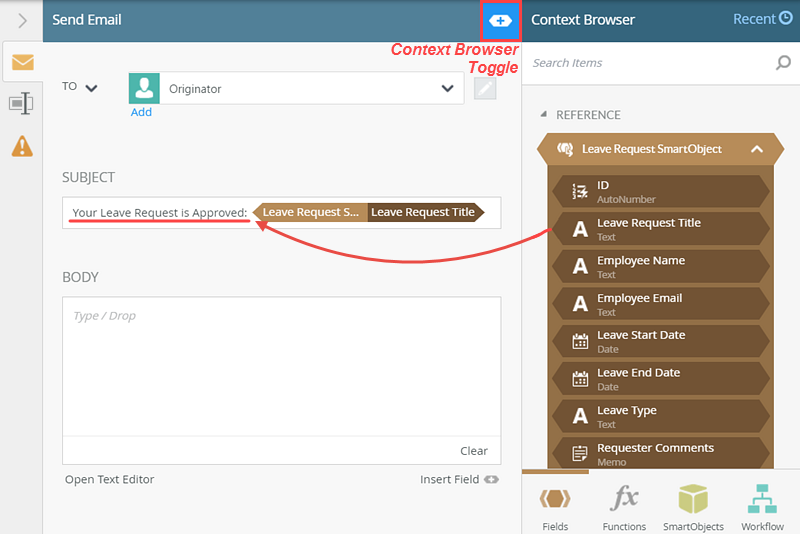
- Fields: This section contains references to SharePoint lists, SmartForms, and SmartObjects. You can also create variables to hold and use data within the workflow itself, such as to store record IDs.
- Functions: This section contains tools for transforming data. Some examples include performing calculations, formatting text, and working with date and time values.
- SmartObjects: This section contains system and custom SmartObject references.
- Workflow: This section contains process variables. Examples include the originator's name, email, manager, and folio.
- Using the same approach as above, enter the following into the BODY. Replace the bracketed text with the appropriate Leave Request SmartObject references.
Your manager approved your leave request. Your request details are as follows:
Leave Start Date: [Leave Start Date]
Leave End Date: [Leave End Date]
Leave Type: [Leave Type]
- Click the General Properties tab. Change the step Name to
Email Originator Approved
then collapse the Context Browser and the Configuration Panel. Renaming a step makes it easier for you to tell at a glance what the step does.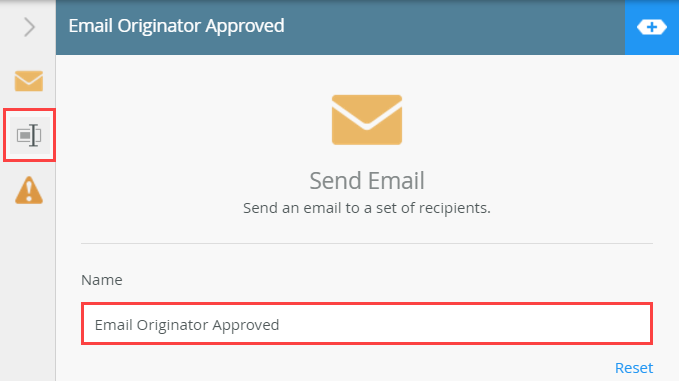
The Context Browser provides access to data about the current user and process, as well as functions and SmartObject data. You can use variables dragged from the Context Browser throughout the configuration of workflow steps. At runtime, the variables are replaced with "live" data. There are four tabs: - In the Configuration Panel, configure the email recipient as the Originator. Customize the SUBJECT line and message BODY using references from the Leave Request SmartObject. Use the image below for reference, if needed. To access SmartObject properties, expand the Context Browser. Under the REFERENCE heading, expand the Leave Request SmartObject. Drag the SmartObject references into the message body.
-
Repeat the steps above for the Denied outcome. Configure the email recipient as the originator, then customize the SUBJECT line and message BODY using variables from the Leave Request SmartObject reference. Don't forget to rename the step as well.
- Using the same steps as above, configure the email for the denied outcome. The recipient should be the originator. Expand the Context Browser and user Leave Request SmartObject references in your SUBJECT line and message BODY. The completed email should look similar to the image below. Be sure to change the step name as well to
Email Originator Denied.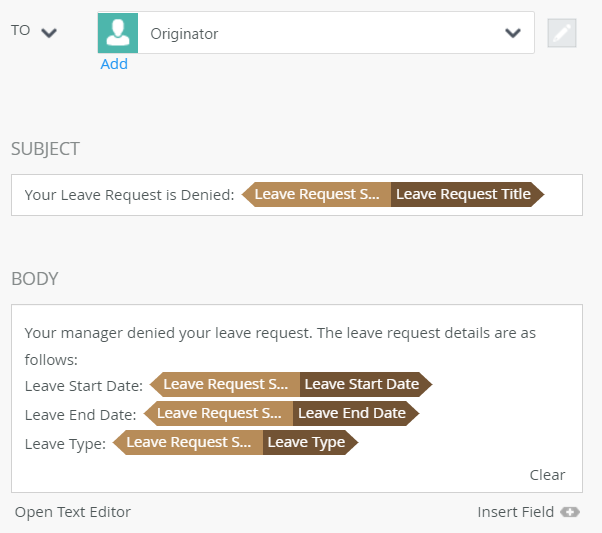
- Using the same steps as above, configure the email for the denied outcome. The recipient should be the originator. Expand the Context Browser and user Leave Request SmartObject references in your SUBJECT line and message BODY. The completed email should look similar to the image below. Be sure to change the step name as well to
Review
In this step, you added Send Email steps and customized the email using variables found in the Context Browser. The variables are replaced with "live" values at runtime. Using variables allows you to personalize workflow content. You also learned how to delete a step (the End step) and how to redirect outcome lines to another step.
In the next step, you will add a rework loop, which sends the workflow back to the leave requester to either rework and resubmit the request, or cancel the request entirely.