24. Submit Expense Claims
You have completed the Expense Claim application build and it is now time to test your work! In this step, you are working with the Originator State rules. The rules represent the form's configuration and behavior that the expense claim requester, or originator, experiences. In the next few steps, you will submit and test two new expense claims using the guidelines below:
| TEST ONE
Submit a new claim that is greater than $100 and less than $500. |
|---|
| Form Check |
|
| Workflow Check |
|
| What this demonstrates |
| At this point, you have not submitted the form yet, so the workflow has not started. You are looking at form configuration for the most part. |
| TEST TWO
Submit a claim that is less than $100. |
-
Before testing the Expense Claim application, check in all forms and views. This ensures that the latest version of each artifact is used. Check in the Expense Claim Form first. You see a dialog about checking in associated views. CHECK the box to check in views as well.
- Checking in forms and views publishes the latest version to the server. If you make any changes to a form or view, you must first check it out, make the changes, then check it back in for the changes to register on the server. Right-click the Expense Claim Form and select Check In.

- You will see a dialog about checking in associated views. CHECK the option to Check in associated Views, then click OK.

- Checking in forms and views publishes the latest version to the server. If you make any changes to a form or view, you must first check it out, make the changes, then check it back in for the changes to register on the server. Right-click the Expense Claim Form and select Check In.
- Launch the Expense Claim Form using the Runtime URL. When the form launches, confirm the following:
- Employee Name defaults to your display name
- Submit Date defaults to today's date
- Finance Processing View is not visible
- Finance Button Table is not visible
- Approval Date is read-only
- Approver Comments are read-only
- Finance Process Date is read-only
- Finance Processor Comments are read-only
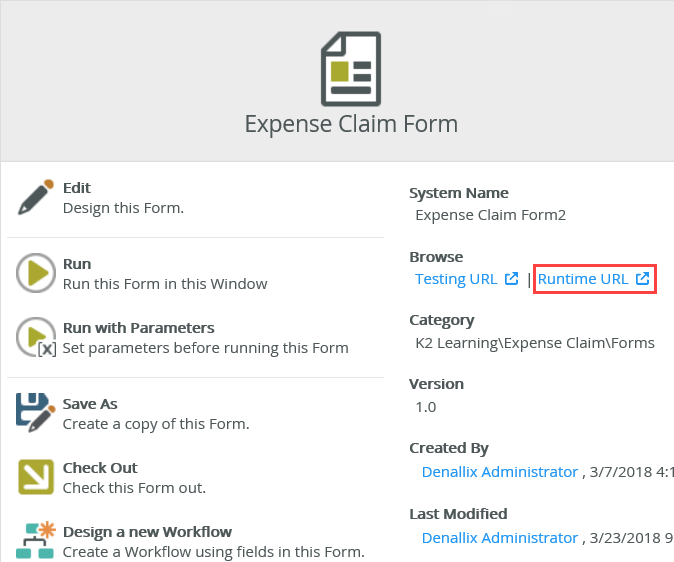
- Begin by launching the Expense Claim Form from the categories in the Designer. Select the Expense Claim Form, then click the Runtime URL from the central pane. The Runtime URL is the server address for this form. This is the URL you use to link to this form in emails and web pages. It is the URL your users need to launch the form.

- The Expense Claim Form opens in a new browser tab. First, you will confirm form initialing actions for the Originator State. Look over the form, then confirm the following:
- Employee Name defaults to the current user's display name
- Submit Date defaults to today's date
- Finance Processing View is not visible
- Finance Button Table is not visible
- Approval Date is read only
- Approver Comments are read-only
- Finance Process Date is read-only
- Finance Processor Comments are read-only

-
Complete the form fields and submit an expense claim. Make sure the total amount is greater than $100 and less than $500.
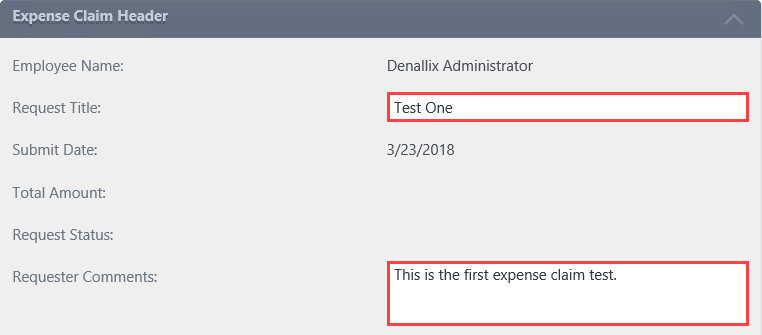
- Now you will complete the form fields, making sure that the total amount is greater than $100 and less than $500. You want to target the originator's manager in the Claim Approval step. Begin by entering the Request Title and Requester Comments.

- Scroll down to the Expense Claim Line Items view. Enter at least two rows of line items. Begin by clicking the Add button. Enter or select the following (at a minimum): CATEGORY, PAYEE, DATE, AMOUNT, CURRENCY CODE. Confirm the USD AMOUNT updates with the converted currency amount (if you selected another country code than USD).

- Click the (Add new row) link at the bottom of the line items. The Sum USD Amount Data Label updates with the current column total.

- Enter another row of line items, then click the (Add new row) link once again to update the Sum USD Amount Data Label. If you like, you can attach a receipt to the line items. The receipt must be an image format (such as png or jpg). Make sure your total amount is greater than $100 and less than $500. Click the (Add a row) link to get an accurate total.

- Click Submit to send your claim. You will see the confirmation message with the reference number. Click OK.

The form fields clear and you are ready to submit another claim.
- Now you will complete the form fields, making sure that the total amount is greater than $100 and less than $500. You want to target the originator's manager in the Claim Approval step. Begin by entering the Request Title and Requester Comments.
- Submit a second claim. Make sure the total amount is less than $100.
- Use the cleared form to submit another claim. Enter a Request Title and Requester Comments. Enter at least one line item, clicking the (Add new row) link to update the Sum USD Amount Data Label. This time, make sure the Sum USD Amount Data Label is less than $100. Click Submit. You want the workflow to skip the approval process and move directly to the Finance Processing step.

- When you see the confirmation message, click OK. Close the browser window.
- Use the cleared form to submit another claim. Enter a Request Title and Requester Comments. Enter at least one line item, clicking the (Add new row) link to update the Sum USD Amount Data Label. This time, make sure the Sum USD Amount Data Label is less than $100. Click Submit. You want the workflow to skip the approval process and move directly to the Finance Processing step.
Review
In this step, you began testing your Expense Claim application by submitting two new expense claims. One claim exceeds $100, so it requires approval. The other claim is less than $100, so it does not require approval and moves directly to the finance step. In the next step, you will send the first claim back for rework.