7. Add a SmartObject Method Step and a Task Step
In this step you will add a SmartObject Method step to update the Request Status property in the Leave Request SmartObject. In this application, you will add several SmartObject Method steps that update the status of the leave request at different points in the workflow. When you launch the Leave Request Form, you will see this value displayed on the Previous Leave Requests list view. This lets you and the approving manager know the status of each leave request you submitted.
After the SmartObject Method step, you will add a (user) Task step. This step assigns a task (to the requester's manager) where they must review your request and either approve it or deny it.
- Add a SmartObject Method step to the empty placeholder, and configure it to use the Save method that updates the request status property. (Save is the equivalent of update.) In the Configuration Panel, configure the step as follows:
Configuration Panel Tab Property Value SmartObject Method Details SMARTOBJECT Leave Request SmartObject SmartObject Method Details METHOD Save SmartObject Method Details INPUT MAPPINGS ID = Context Browser > REFERENCES > Leave Request SmartObject > ID SmartObject Method Details INPUT MAPPINGS Request Status = Submitted General Properties Name Set Status Submitted - Now, you will begin adding steps to the design canvas. You add, connect, and configure steps so that you eventually have a complete workflow from start to end. The first step updates the status property in the Leave Request SmartObject.
Expand the Toolbox > Basic node. Drag the SmartObject Method step into the empty placeholder on the design canvas.
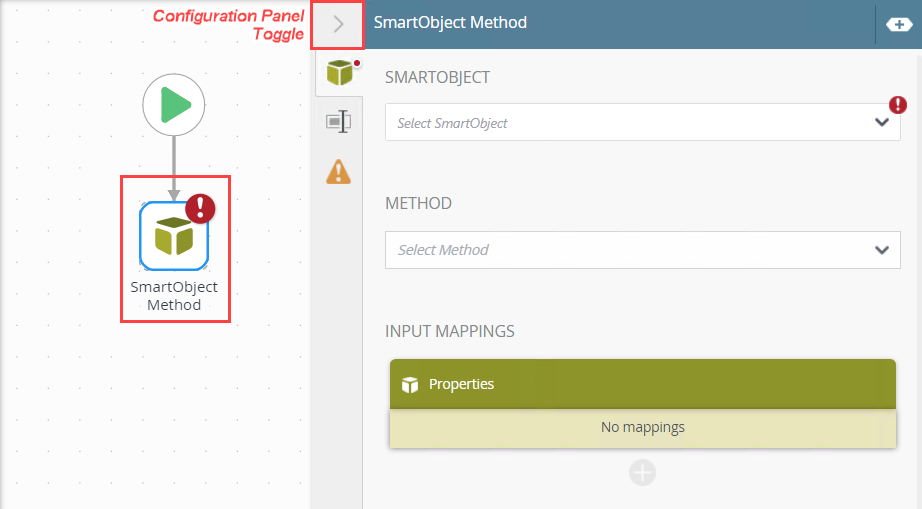
- Next, you will configure the SmartObject Method step properties. You want the Request Status property to show that you submitted the leave request and it is now waiting for review and approval. Click the SmartObject Method step to highlight it, then expand the Configuration Panel using the Configuration Panel toggle. When adding a step to the workflow design canvas, you may see a red warning badge. This badge simply indicates the step has required configurations. When you expand the Configuration Panel, the required configuration is also flagged.
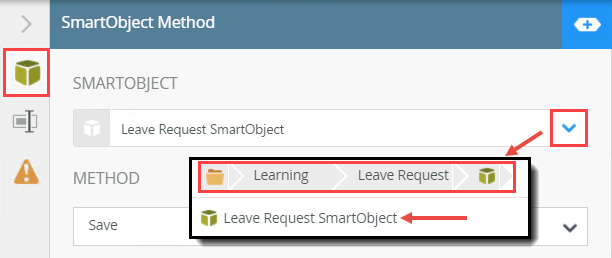
- First, you will select the Leave Request SmartObject to update. Select the Leave Request SmartObject. From the SmartObject tab, select Browse from the SMARTOBJECT drop-down. Navigate to and select the Leave Request SmartObject. (Learning > Leave Request > SmartObjects)
- Next, select the Save method from the METHOD drop-down. (Save is the equivalent of update.)

- Next, you will associate the current record for this workflow instance to the Leave Request SmartObject. This indicates which record to update.
Expand the Context Browser. Expand the REFERENCE drop-down if it isn't already. When you configured the Start Workflow wizard, the Leave Request SmartObject was detected and added as a reference in the workflow.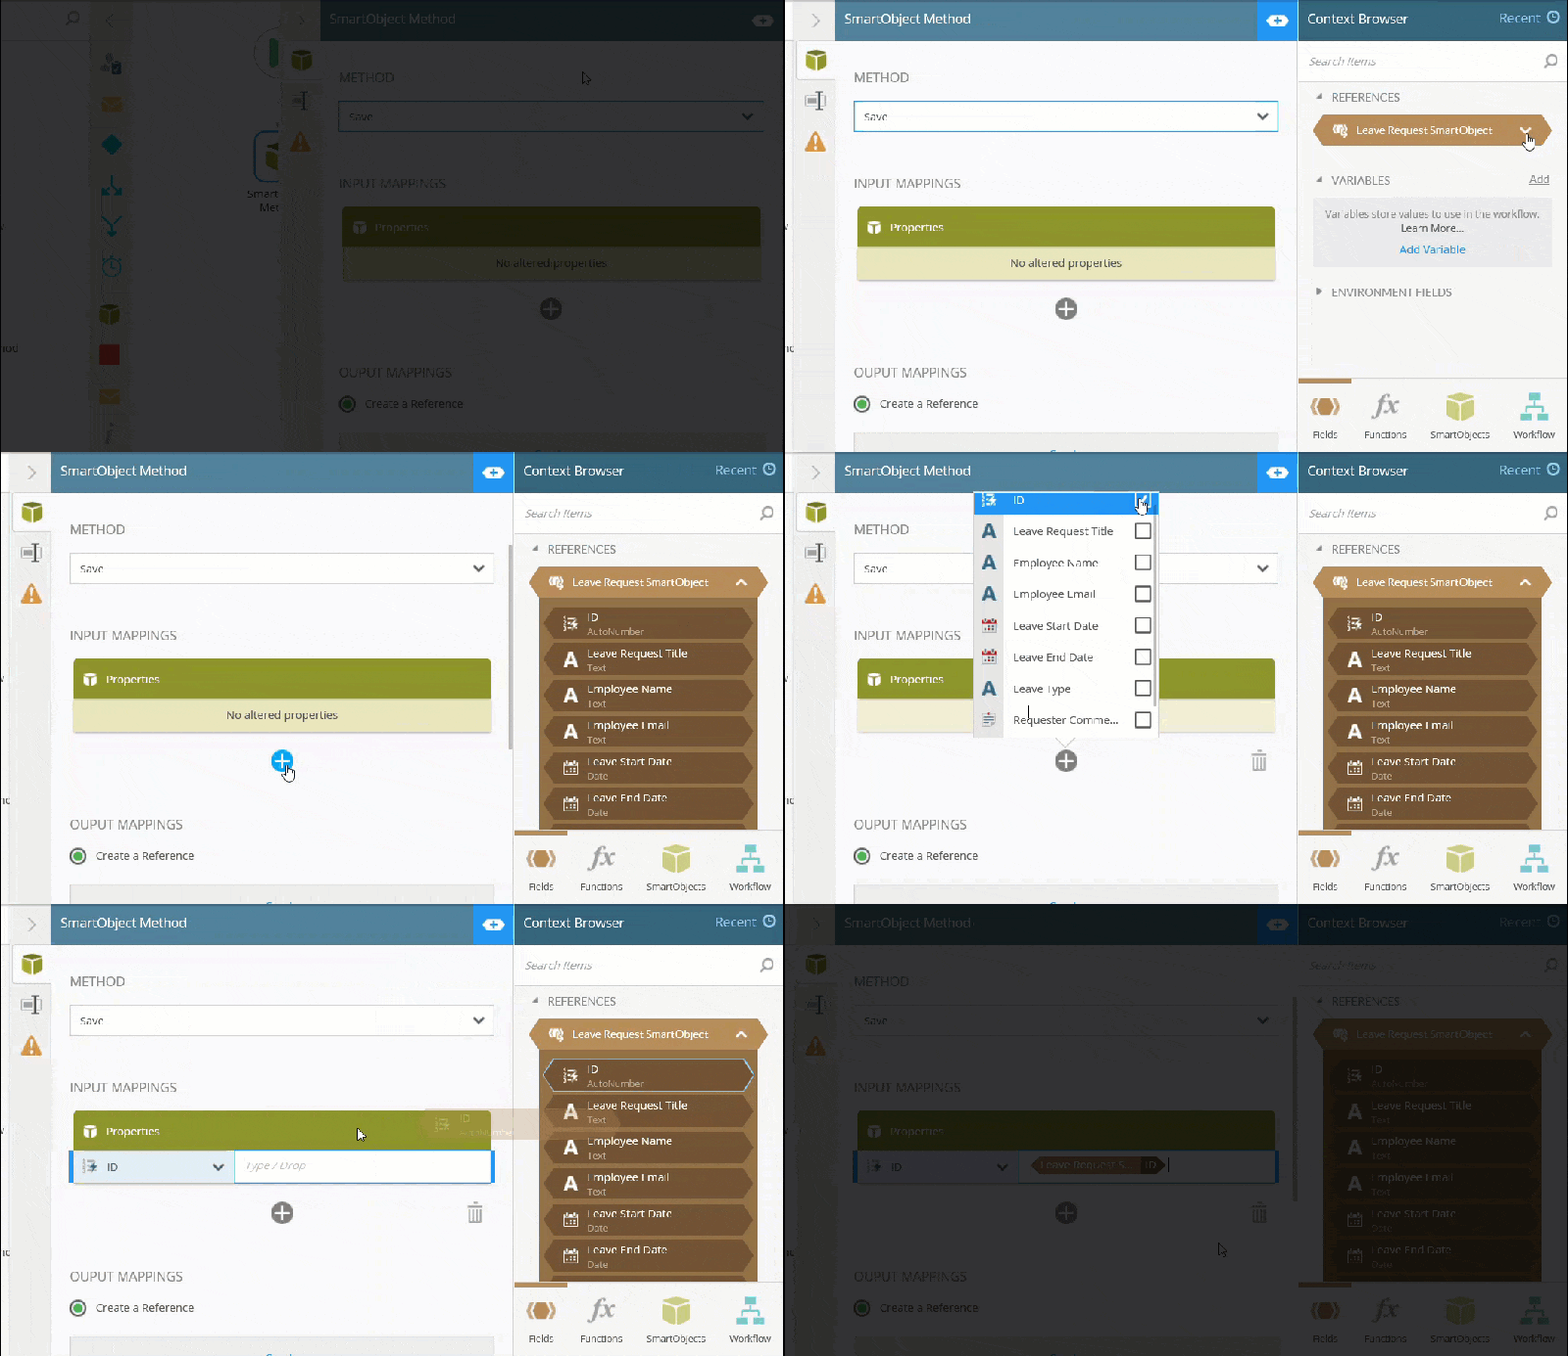
- Click the Add (+) icon for the INPUT MAPPINGS. Select the ID for the current record. Drag the Leave Request SmartObject reference ID into the box to the right of the current record ID. This binds the current, or new record ID to the SmartObject ID property, indicating which record to update. After you add the ID reference, collapse the Context Browser by clicking the toggle once again.
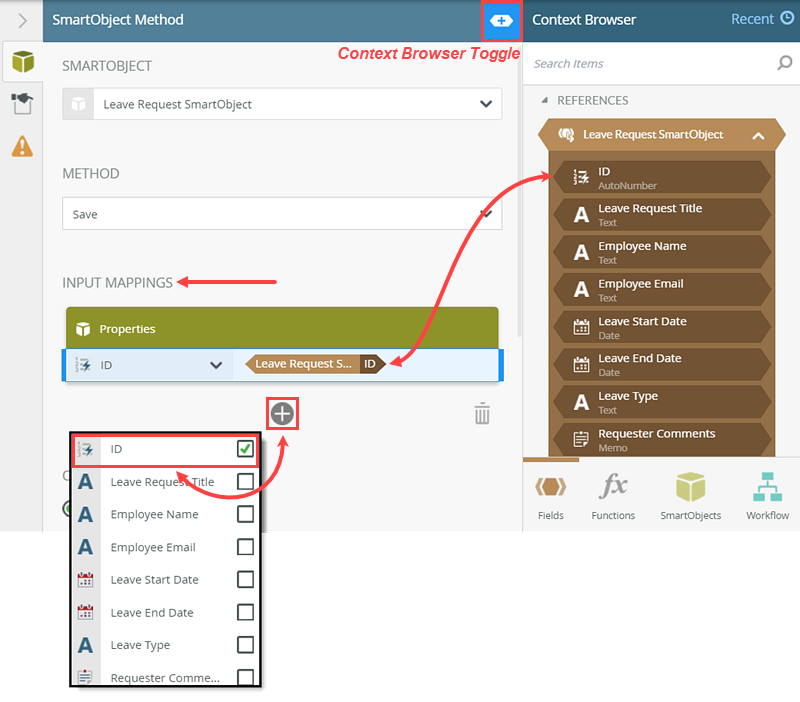
- Next, you will add the value for the request status. Click the Add (+) icon. Select Request Status. You may have to scroll down to see the status property. In the second mapping text box, type
Submitted
then click outside the box to set the value.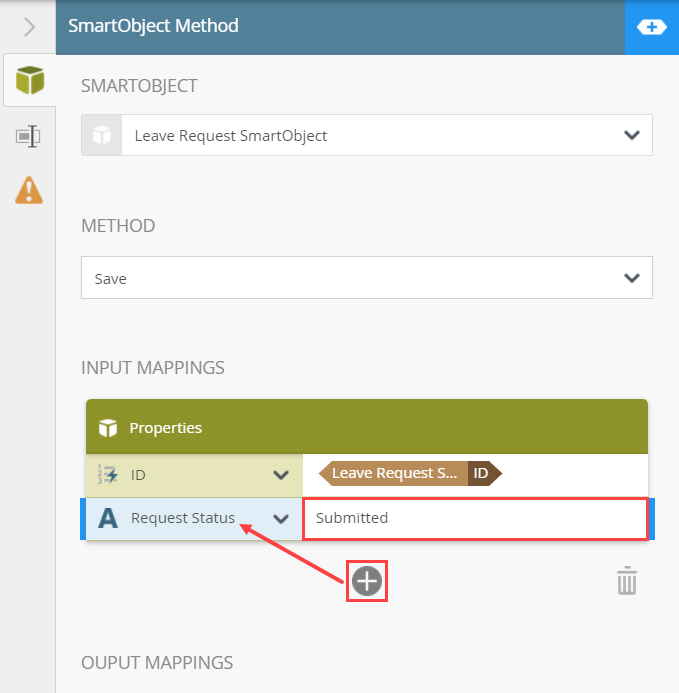
- To keep the design canvas organized, you can rename steps so that you know exactly what the step does.
Click the General Properties tab in the Configuration Panel. Change the Name to
Set Status Submitted
then click outside the box to set the value. Collapse the Configuration Panel by clicking the Configuration Panel toggle once again.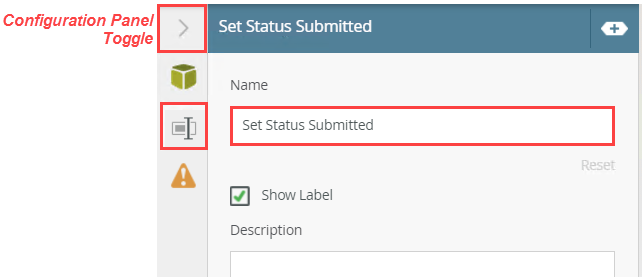
Your workflow should look like the image below.
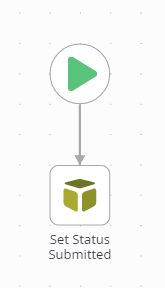
- Now, you will begin adding steps to the design canvas. You add, connect, and configure steps so that you eventually have a complete workflow from start to end. The first step updates the status property in the Leave Request SmartObject.
-
Next, you will add and configure the Task step for the requester's manager. The manager must decide to approve or deny the leave request. Add a Task step and connect it to the Set Status Submitted step. Expand the Configuration Panel and set the following:
SmartObject Method Step and Task StepProperty/Tab Value Instructions A leave request requires your approval. Select Approved or Denied, then click Submit to send your decision. Actions Approved
DeniedForm Form : SmartForm > Leave Request Form
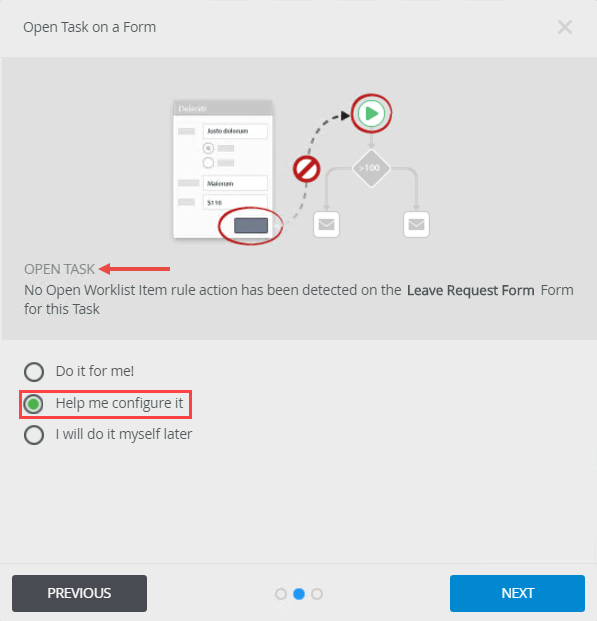
Select the option to- OPEN TASK: Help me configure it
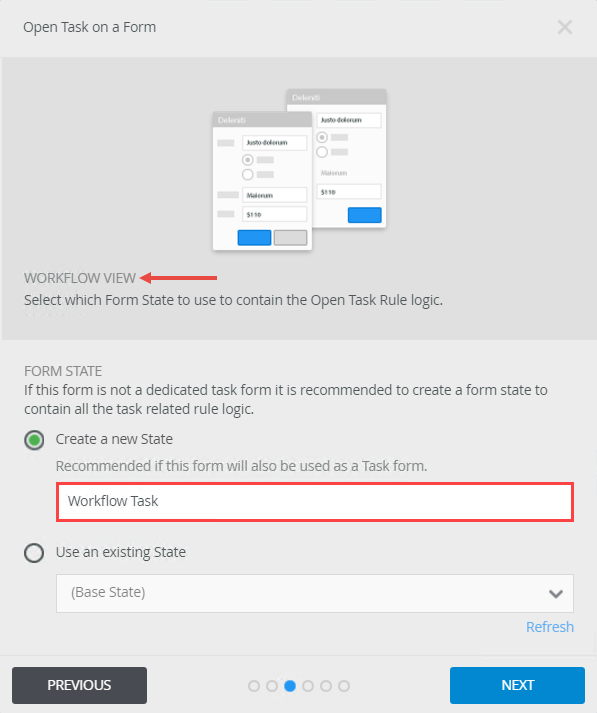
- FORM STATE: Create a new State: Workflow Task (this should be the default)
- Keep the remaining default wizard values
Recipient Originator
Originator ManagerYou will add both the Originator and Originator Manager as the task recipients. You will action a task as the manager. Having tasks assigned to the originator (you) will provide content for the Reporting hands-on tutorial.
Assign your own user account or a co-worker’s account, so that you or they can action the task when testing the application.Notification Select the default Send email task notification, do not customize. Step Name Manager Approval 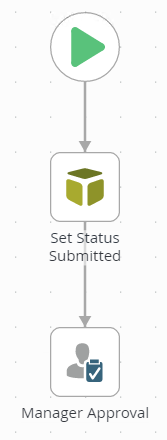
- Next, you will and configure the Task step for the requester's manager. After the workflow starts, the manager receives a task notification email. They must decide to approve or deny the leave request. In this step, you will add the Task step, configure the actions (such as Approved or Denied), then assign the task to a task recipient. In this case, the recipient is the workflow originator's manager.
Expand the Toolbox > Basic nodes. Drag a Task step onto the design canvas, below the Set Status Submitted step.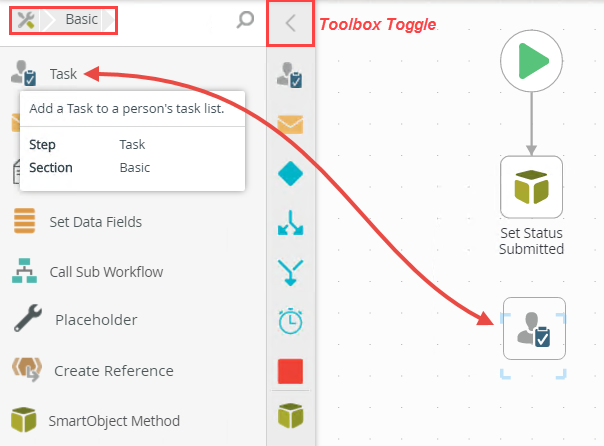
- To connect the two steps, hover your mouse over the bottom border of the Set Status Submitted step. You will see a handle appear. Click the handle and drag it into the new Task step. Click the canvas to set the line. (If you don't see a handle appear when you hover, click anywhere in the design canvas to refocus your mouse, then hover again.)
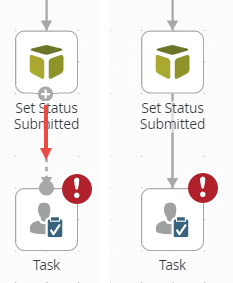
- Next, you will configure the Task step properties. Click the Task step to highlight it, then expand the Configuration Panel. Click the Task Detail tab (the first tab). Enter the following INSTRUCTIONS:
A leave request requires your approval. Select Approved or Denied, then click Submit to send your decision.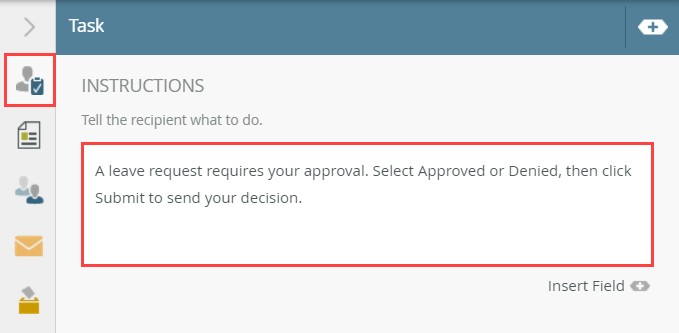
- Actions are the decision choices for the task-assigned user. In this task, there are two choices: Approved and Denied. Scroll down to the ACTIONS section, the click the Add (+) icon. Type over the default action and enter
Approved
then click the Add (+) icon once again. Type over the default action and enter
Denied
then click outside the box to set the action.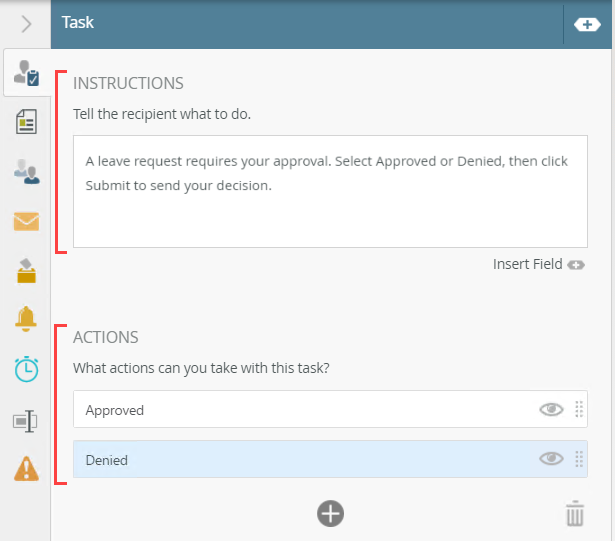
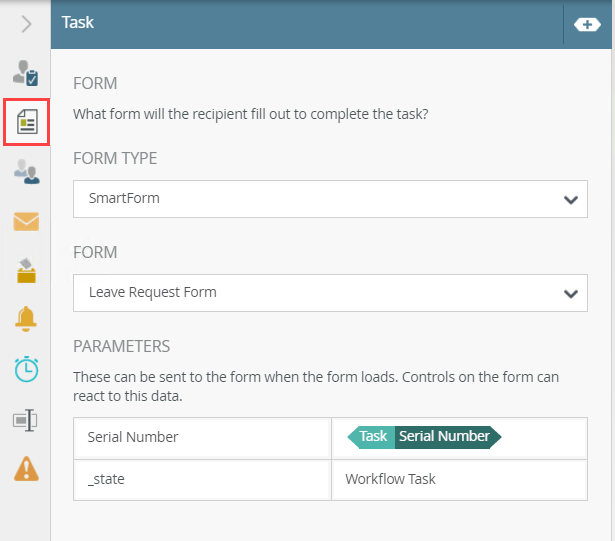
- Click the Forms tab. Here, you will configure the form you want the task recipient to use. In this case, you will use the same Leave Request Form that the requester used, only with a different state.
- Set the FORM TYPE to SmartForm.
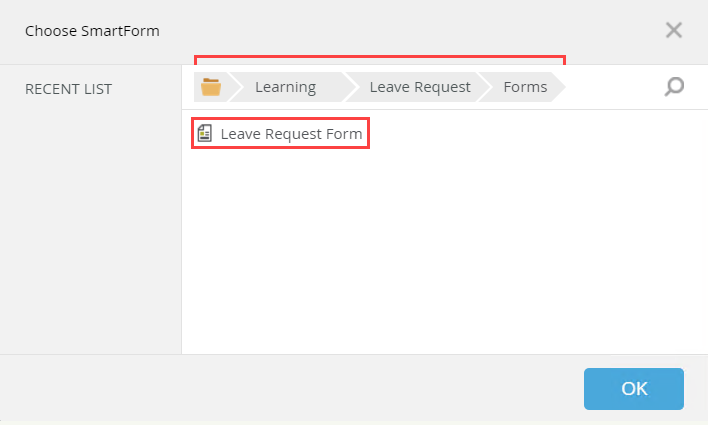
- For the FORM, click the drop-down arrow and select Browse. On the Choose SmartForm screen, click Learning, then Leave Request. Click Forms. Select the Leave Request Form, then click OK.In some cases, you may see Leave Request Form when you click the drop-down arrow for the FORM value. You can select the form if you like and skip browsing to it.

- There are no changes to the REFERENCES screen, so click NEXT. On the OPEN TASK screen, confirm (or select if necessary) the option to Help me configure it, then click Next.
- You will create a new state for the approval task. This state represents the form's configuration and behavior for the requester's manager. On the WORKFLOW VIEW screen, keep the default Workflow Task value for the FORM STATE. Click NEXT.
- There are no changes to the OPEN TASK RULE ACTION screen, so click NEXT.
- There are no changes to the AFTER SUBMIT ACTION screen, so click NEXT.
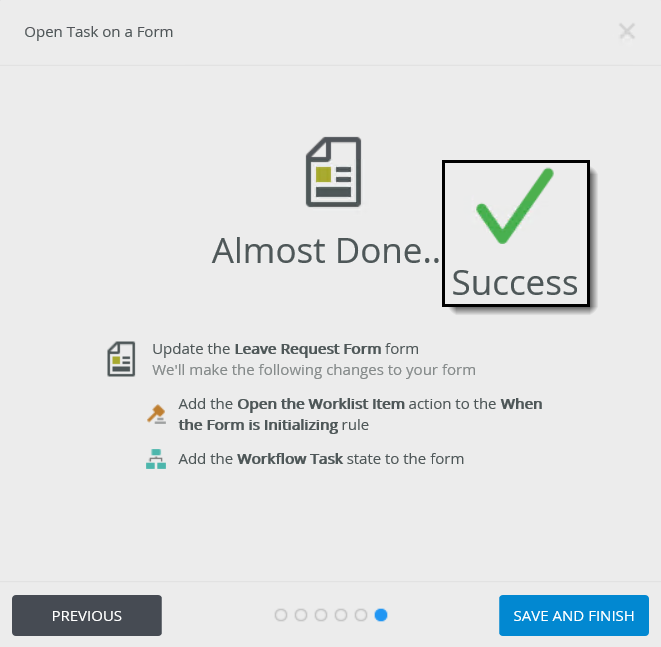
- The last screen is the summary. Review the settings, then click SAVE AND FINISH. When you see the Success check, click OK to close the wizard.
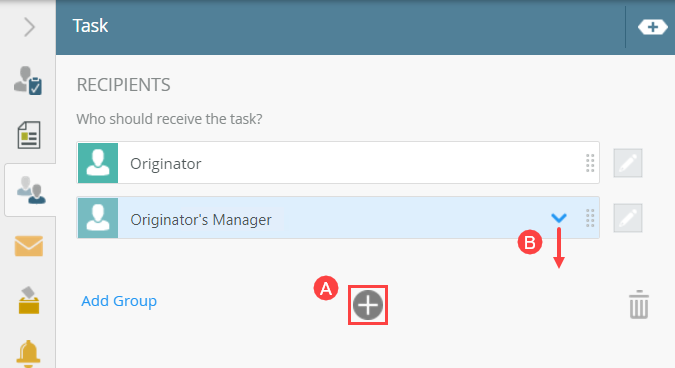
- Next, you will assign the users who will be the task recipients. For this tutorial, you will assign the user task to both the originator and the originator's manager. Click the Recipients tab. Originator should already be the default recipient. Click the Add(+) icon to add another user. A new recipient box appears. Click the drop-down arrow and select Originator's Manager.Assign your own user account or a co-worker’s account, so that you or they can action the task when testing the application.In most cases, you will only add the Originator's Manager as the task recipient. However, to provide content for the Reporting tutorial, there must be several tasks assigned to you. In this case, you will action a task as the manager, while still having tasks assigned to you for reporting content.
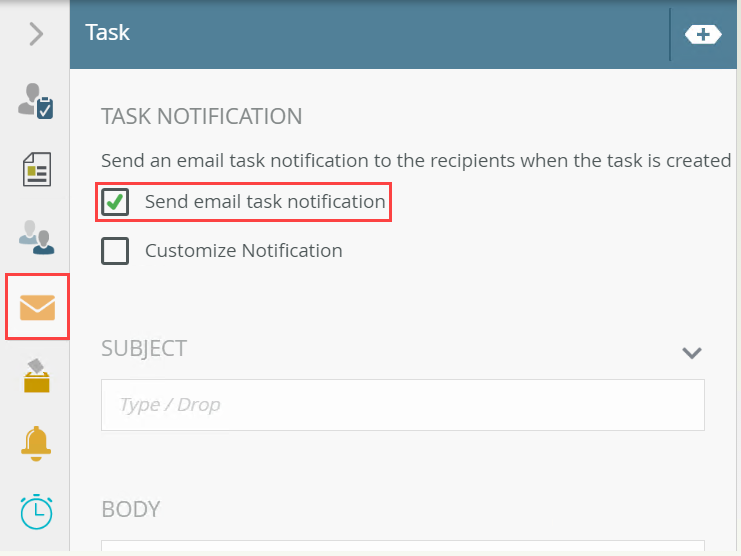
- Select the Notification tab. Confirm that the Send email task notification option is CHECKED. You will not customize the email message in this basic tutorial, so there are no edits to this screen. (In the Leave Request (Extended Version) tutorial, you learn how to customize an email using variables from the Context Browser.)
- The last step in the task configuration is to change the step name so that is clear what the step does. Click the General Properties tab. Change the Name to
Manager Approval
then collapse the Configuration Browser.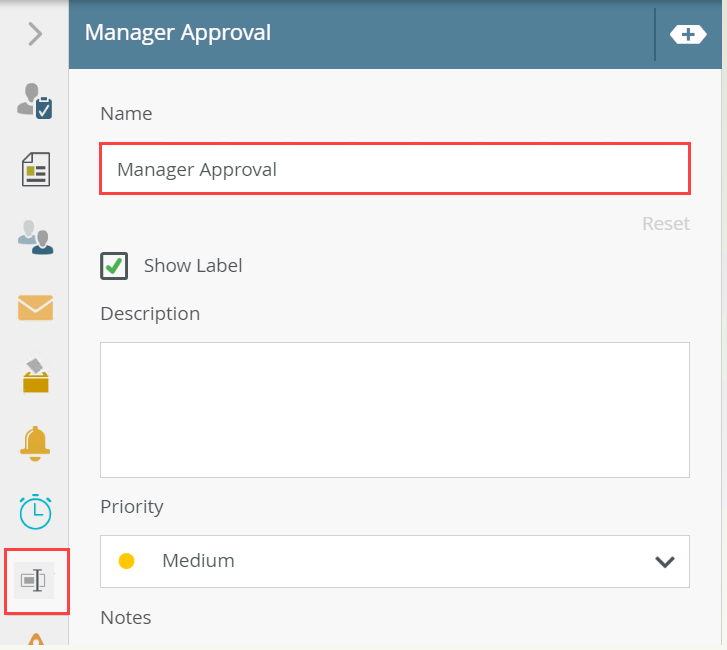
The completed Forms screen.
Your workflow should look like the image below.

Review
In this step, you added a SmartObject Method to the workflow. You configured the method to update the request status property. You bound the current record to the SmartObject by mapping the ID properties.
You then added a user task and assigned it to the approving manager. The manager must decide whether to approve or deny the leave request. When configuring the task form properties, you created a new state will control the look and behavior of the form that the approving manager sees. In the next step, you will add a Decision step that generates the outcomes for the Task step.