How To: Create views to capture data for associated SmartObjects
You can define Associations between SmartObjects, which is typically used to establish relationships between records in the associated SmartObjects. For example, you may have State, County, and City SmartObjects, where a State can have one or more Counties, and a County can have more than one City. When you define the SmartObject, you can define these associations, which can in turn be useful when you need to work with the data in a view.
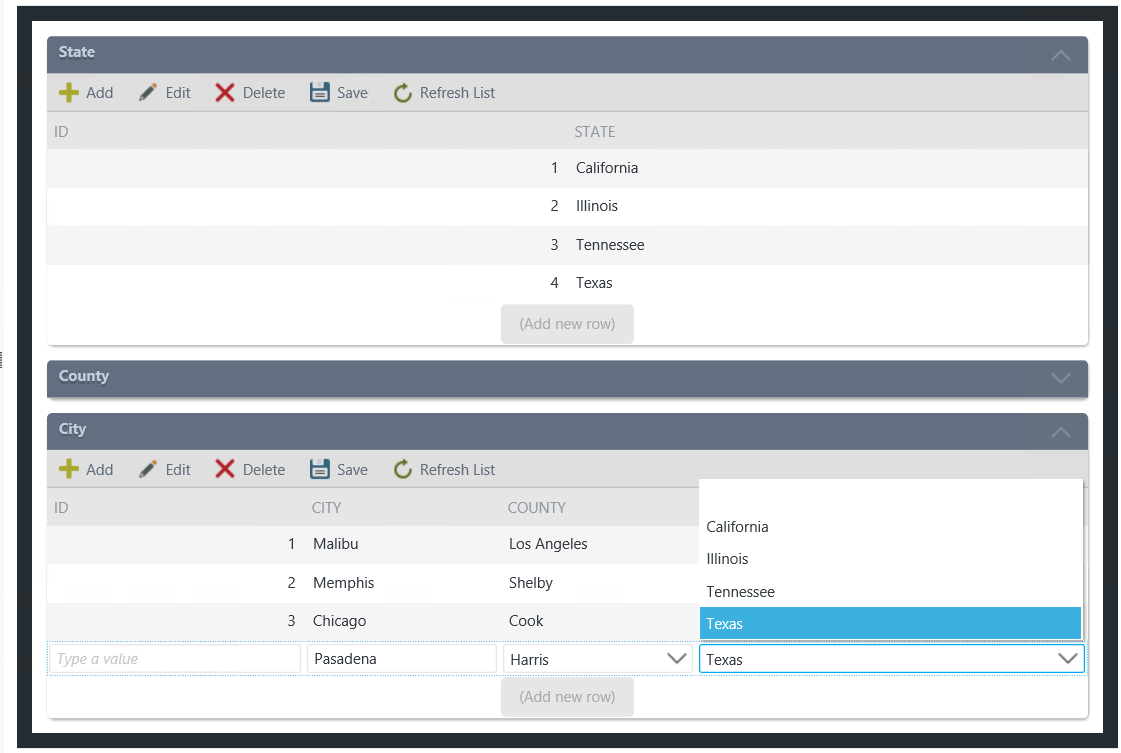
This how-to explains how to create user interfaces to easily capture data for to populate associated SmartObjects. The sample solution is a form with views for State, County, and City. The City editable list contains fields for ID, City, County, and State. On this view the City field is an editable field, which means you can type a value into it. County is a drop down with data from the County SmartObject, which is also how State is set up.
You use the City editable list view to add cities in the City field and then you select a County and State from the drop down menus. When you save your changes the new cities are added and linked to their county and state.
Capturing associated data on the sample form
Try it yourself!
Scenario
You want to build a user interface to capture data for Cities, Counties, and States. You add the city information by typing it into the City field and then select the county and state from those drop down menus. When you save the view, the city is added and linked to the county and the state because the SmartObjects have associations.
Steps
In this scenario you build three SmartObjects, City, County, and State, then create associations between them. You then create views based on the SmartObjects and a form that contains the three views.
Setup Steps
The following steps set up the scenario from start to finish. If you want to skip the setup steps and view the topic step, go to Create the Associations.
-
Create the City, County, and State SmartObjects.In this step, you create three SmartObjects - City, County and State.We're using a naming convention where _FK means 'Foreign Key'. This is the ID of the 'foreign' record associated with the current record. In the City SmartObject, for example, State_FK will contain the record ID of the State associated with the City.
- From the Designer, create the City SmartObject as shown below.
City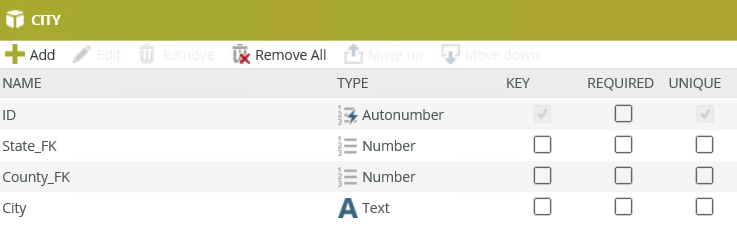
Properties Type Key Required Unique ID Autonumber Yes No Yes State_FK Number No No No County_FK Number No No No City Text No No No - From the Designer, create the County SmartObject as shown below.
County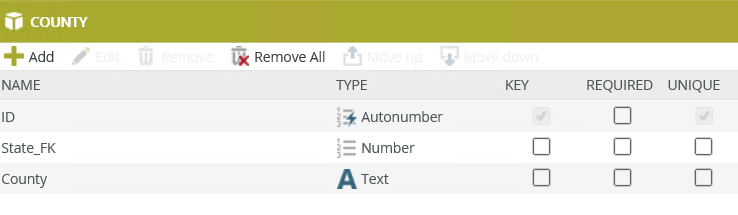
Properties Type Key Required Unique ID Autonumber Yes No Yes State_FK Number No No No County Text No No No - From the Designer, create the State SmartObject as shown below.
State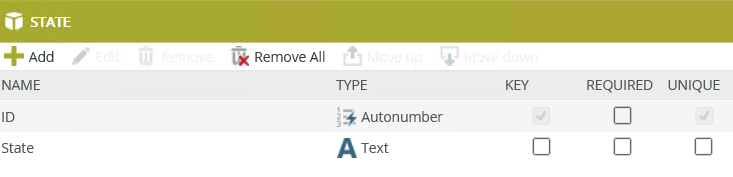
Properties Type Key Required Unique ID Autonumber Yes No Yes State Text No No No
- From the Designer, create the City SmartObject as shown below.
Create the Associations
In this step, you create the associations between the City and State SmartObjects and between the City and County SmartObjects.
-
Create the Associations
-
From the Designer, right-click the City SmartObject and select Edit.

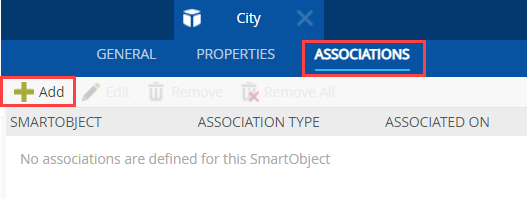
- Select the Associations tab and click the Add button.
-
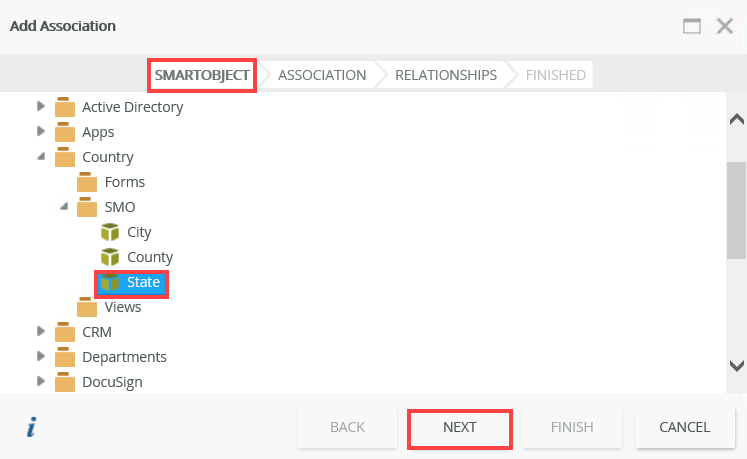
On the SmartObject tab of the Add Association page, browse to the State SmartObject. Select it and click Next.
-
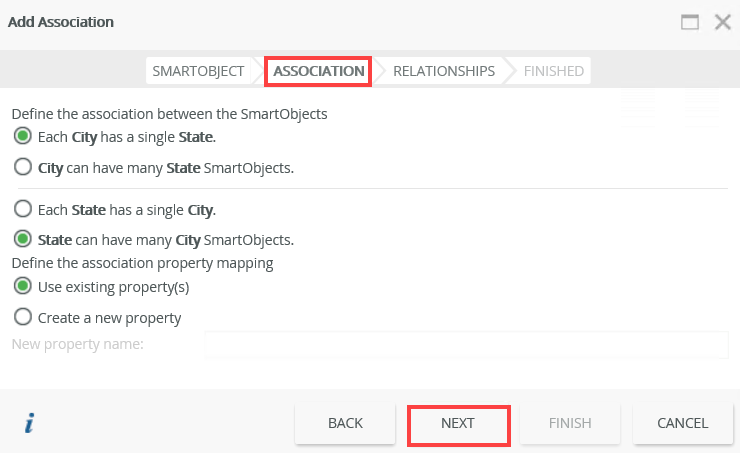
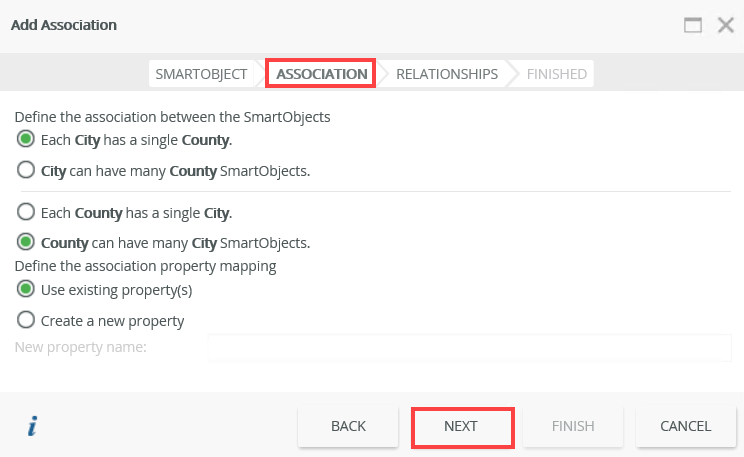
On the Association tab, make sure the associations are defined as shown below. Click Next.
-
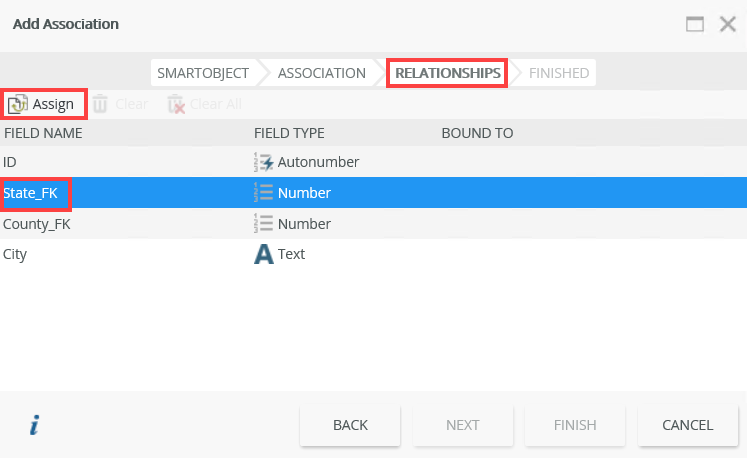
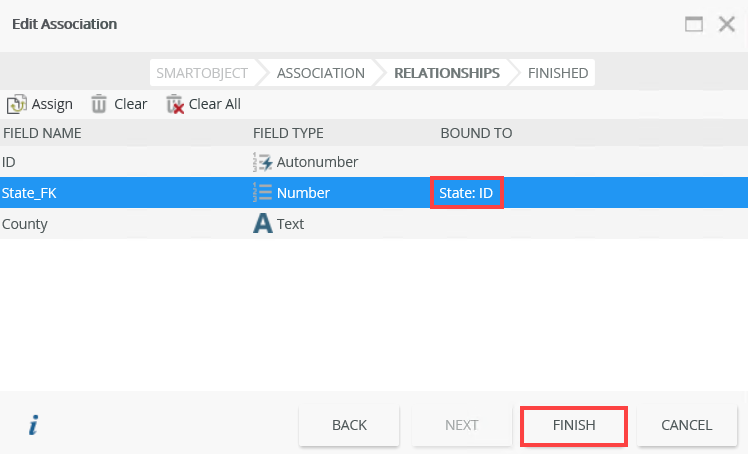
On the Relationships tab, select State_FK and click the Assign button.
-
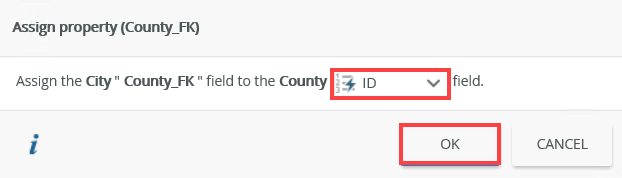
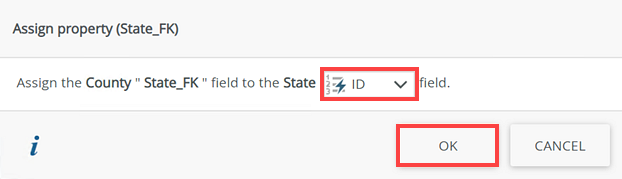
On the Assign property page, select ID from the drop down and click OK.
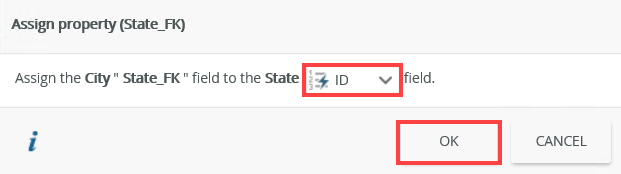
- The Bound To field shows the association between State_FK and State:ID. Click Finish.
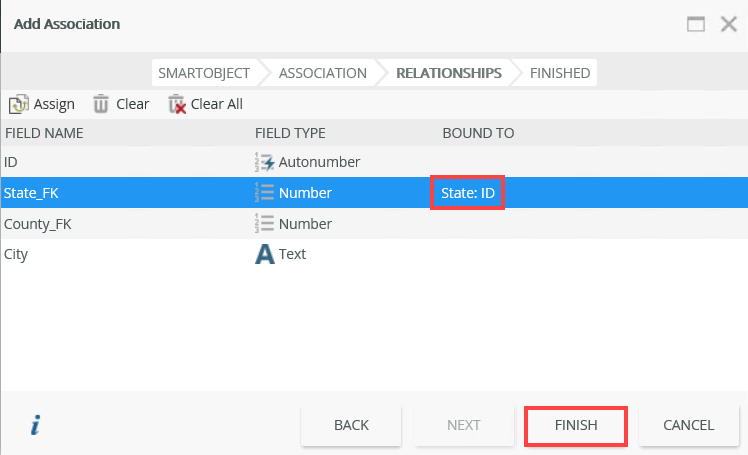
- Click Add to add another association to the City SmartObject.

- On the SmartObject tab of the Add Association page, browse to the County SmartObject. Select it and click Next. On the Association tab, make sure the associations are defined as shown below. Click Next.
-
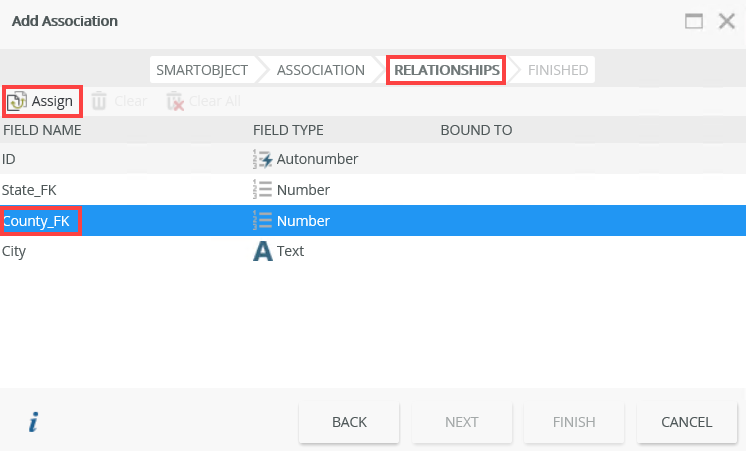
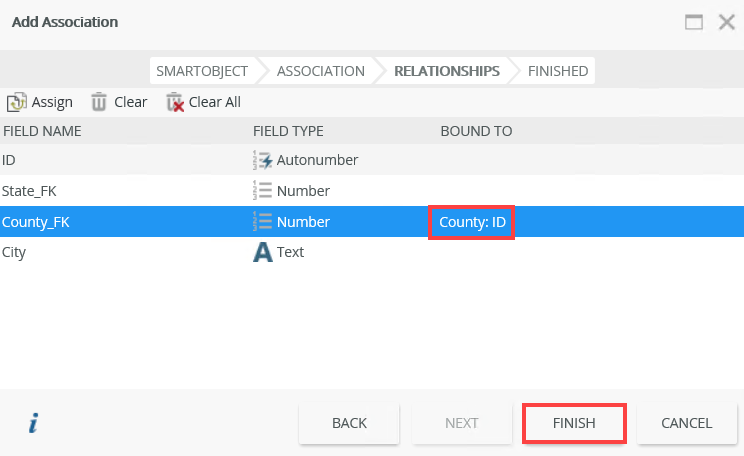
On the Relationships tab, select County_FK and click the Assign button.
-
On the Assign property page, select ID from the drop-down and click OK.
- The Bound To field shows the association between County_FK and County:ID. Click Finish.
- Click Finish to close the City SmartObject.
-
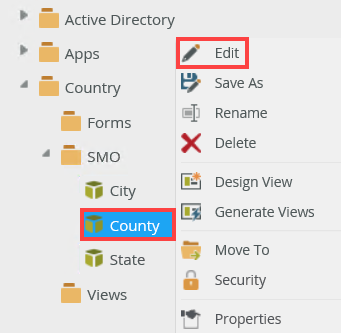
From the Designer, right-click the County SmartObject and select Edit.
- Select the Associations tab and click the Add button.
- On the SmartObject tab of the Add Association page, browse to the State SmartObject. Select it and click Next.
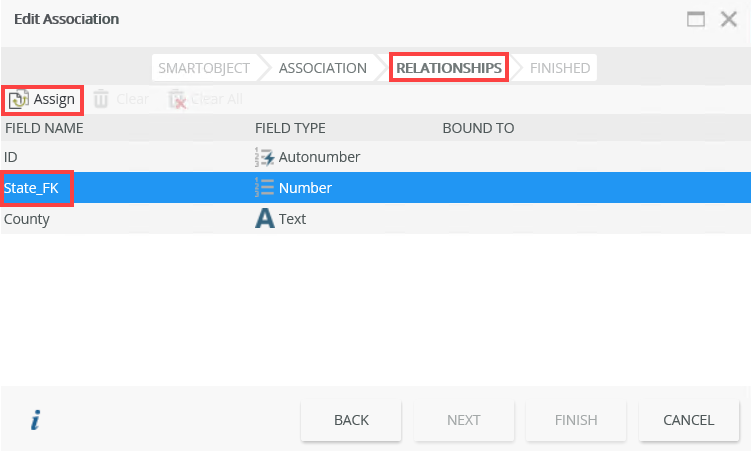
- On the Association tab, make sure the associations are defined as shown below. Click Next.

- On the Relationships tab, select State_FK and click the Assign button.
- On the Assign property page, select ID from the drop-down and click OK.
- The Bound To field shows the association between State_FK and State:ID. Click Finish.
- The associations for the County SmartObject are listed. Click Finish to save and close the County SmartObject.

Next you create an association between the County and State SmartObjects
-
From the Designer, right-click the City SmartObject and select Edit.
-
Generate Editable List views for all the SmartObjects.In this step, you generate editable list views for the State, County, and City SmartObjects.
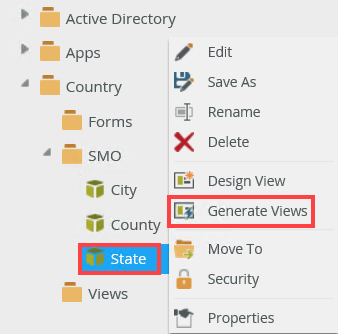
- From the Designer, right-click the State SmartObject and select Generate Views.
- On the Generate Options page, make sure that the editable list view is generated in the correct category. In this example, they are generated in the Views category. Check the Editable List check box and then click OK.

- The generated list view shows in the Views category.

- Use the same steps to generate an Editable List view for the County and City SmartObjects. The editable list views show in the Views category.

- From the Designer, right-click the State SmartObject and select Generate Views.
-
Add data to the State and County SmartObjects.In this step, you run the views for the State and County SmartObjects, and then add sample data to them.
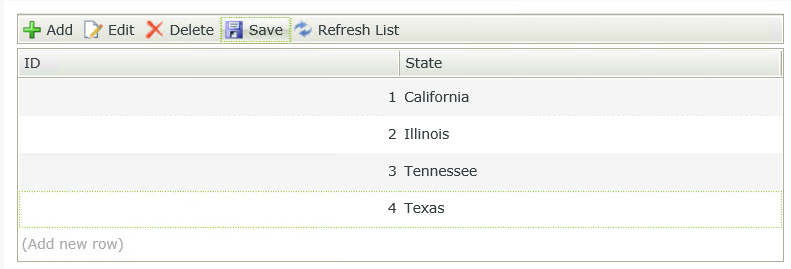
- From the Designer, locate the State Editable List view and click Run.

- Click the Add button and add data as shown below.
- Run the County Editable List view and use the table below to add data to the County SmartObject.
State_FK County California Los Angeles California San Diego Illinois McLean Illinois Cook Tennessee Shelby Tennessee Davidson Texas Harris Texas Bexer - The completed County list view.

- From the Designer, locate the State Editable List view and click Run.
-
Apply layout changes to the City Editable List View.In this step, you change the column locations and the column headers.
- From the Designer, right-click the City Editable List view and select Edit.

- Click and drag to rearrange the columns, on the layout, in this order: ID, City, County FK, State FK.
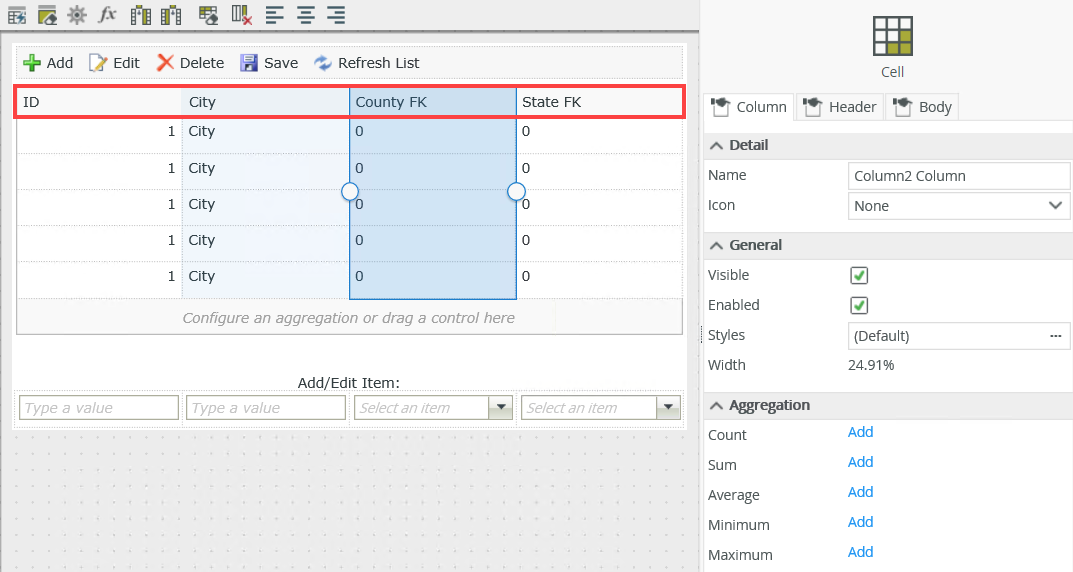
- Select the County FK column and change the header name to County.

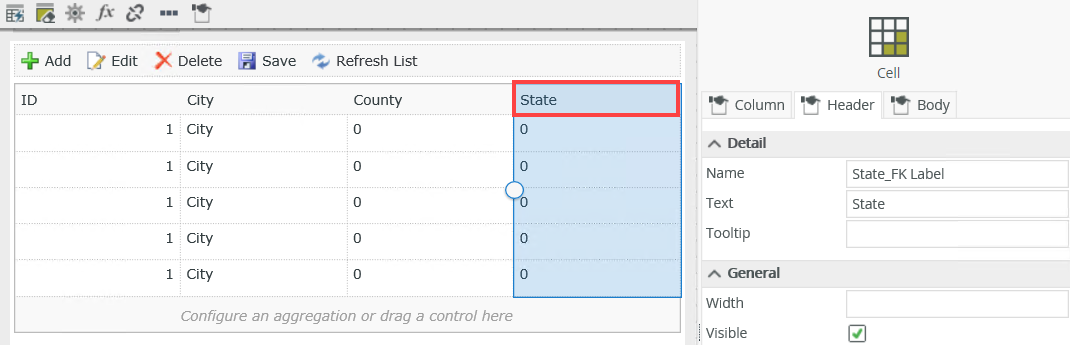
- Use the same steps to change the State FK column header to State. Click Finish.
- From the Designer, right-click the City Editable List view and select Edit.
-
Create a Country Form.In this step, you create a Country form and add three views (State, County and City) to the layout.
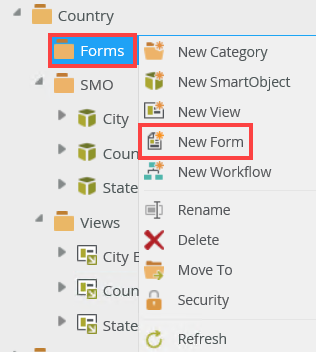
- From the Designer, right-click the Forms category and select New Form.
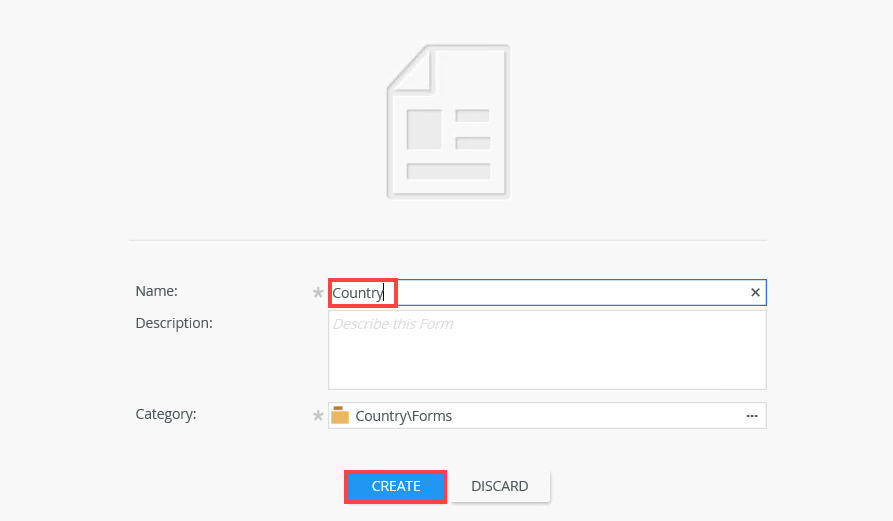
- Name this form Country and click Create.
- From the Views tab, click and drag the State Editable List view onto the canvas. Change the view title to State.
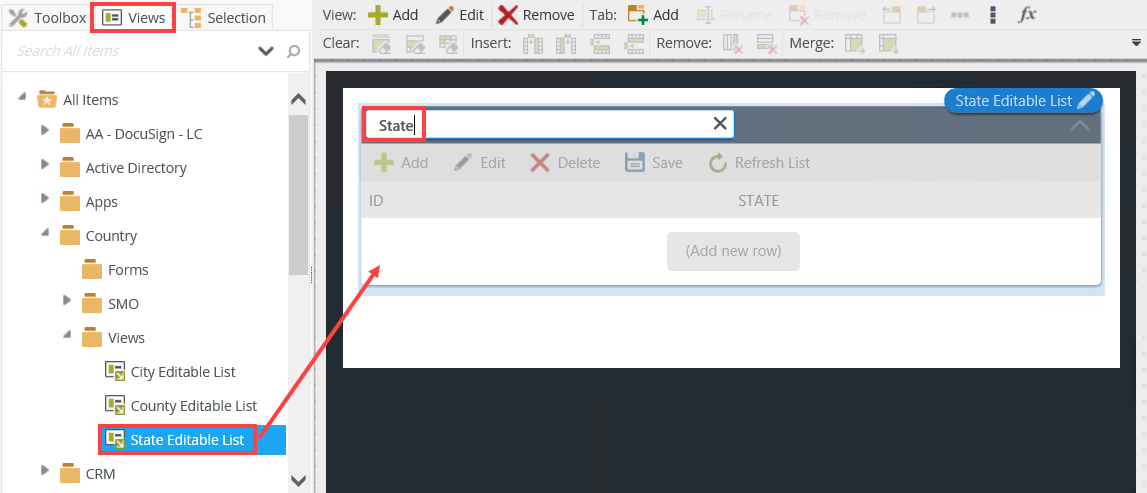
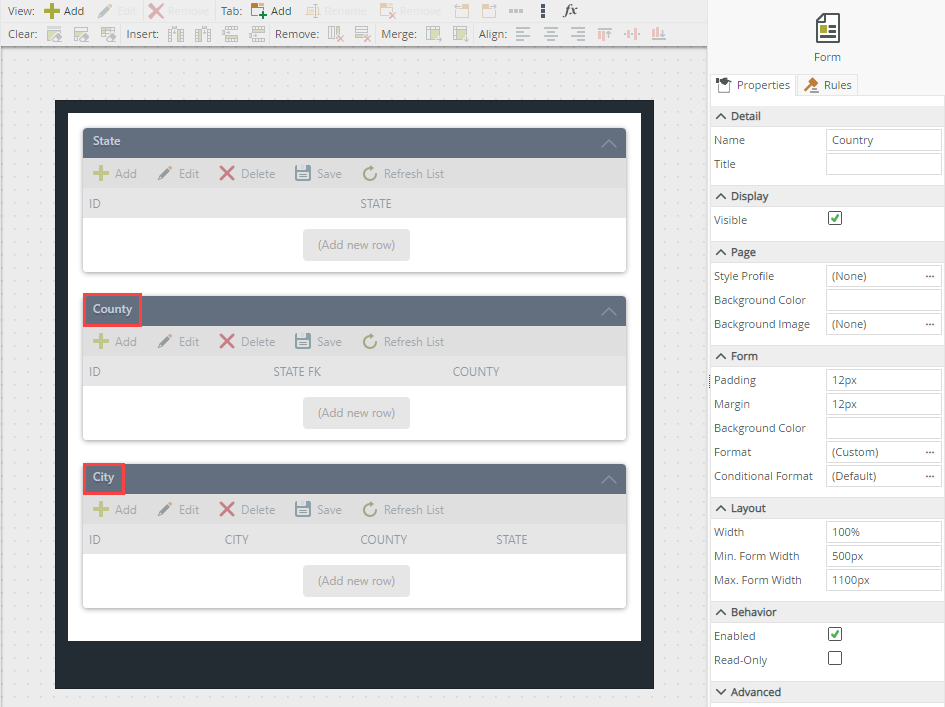
- Use the same steps and drag County Editable List and City Editable List views onto the canvas. Change the view titles to County and City. Click Finish to save the form.
- From the Designer, right-click the Forms category and select New Form.
-
Test the Solution.In this step, you run the Country form and use the City view on the form to add a new city and link it to the corresponding County and State.
- From the Designer, locate the Country form and click Run.

- In this example, you can collapse the State and County views to allow for more space on the form. In the City view, click Add.

- In the new row, type Malibu in the City field, select Los Angeles from the County drop-down and California from the State drop-down. Click Save.
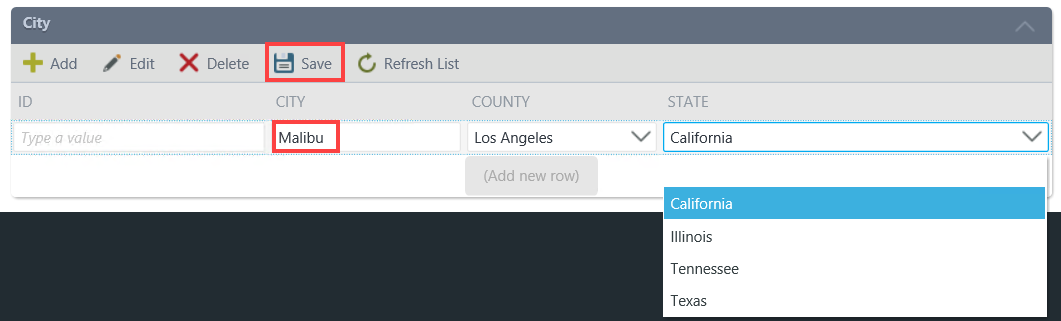
- By clicking Save, Malibu is linked as a city to Los Angeles county and California state.
- From the Designer, locate the Country form and click Run.
Review
In this How To, you built three SmartObjects called State, City, and County, then created associations between them. You then generated three views, created a form and added the views to the form. You used the City view to add cities in the City field and then selected a county and state from the drop down menus. When you saved your changes the new cities were added and linked to their county and state.