Part 4: Testing the Application
In Part 4, you will test the updated Leave Request application.
For this test, you will submit two Leave Request forms. You will access the approving manager's Outlook and action one of the requests using SmartActions to send the request back for rework. As the form originator, you will resubmit the request, then reject it as the approving manager. The second form that you submit, you will not action.
Step 12 Tasks
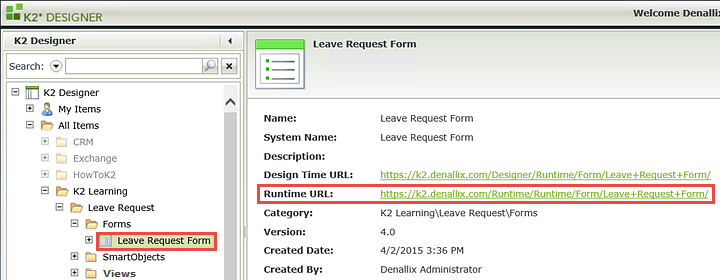
- Using the Runtime URL, submit two Leave Request forms. Make the Leave Start Date for one of the requests today's date. This will fire off the escalation since you have it configured to start within two days of the Leave Start Date.
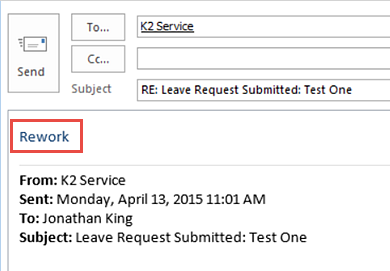
- Access the approving manager's Outlook and using SmartActions, reply to the request with Rework.
- Access the form originator's email and open the form. Edit the form entry in any manner you like, then resubmit it.
- As the approving manager, add some comments, then reject the resubmitted request. Confirm the email notification that is sent back to the form originator contains the manager's comments within the rejected email.
- Using the Runtime URL, open and submit two Leave Request forms. Make the Leave Start Date for one of the forms today's date. This will fire off the escalation that you configured (remember it executes if within two days of the start date). Confirm you cannot edit the Approver Comments field (it should be read-only for the form originator). Enter any leave type or comments you like for each form.
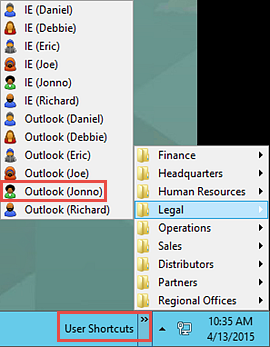
- Begin by closing any open browsers and any open instances of Outlook. Click on the User Shortcuts link found in the lower right corner of the screen. Expand the Legal folder, then click on Jonno's Outlook. Allow a minute or two for Outlook to open. If you see a message about syncing CRM, just let it complete. If you see a message about licensing, click Close to continue.
- Confirm there are two task notification emails for Jonno. Open one of the emails and reply with
Rework
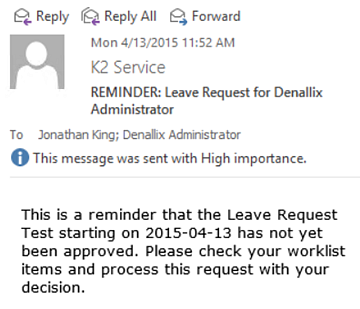
as the email message body. Send the email. - Confirm there is an escalation email for the task with today's date as the Leave Start Date.
- Now you will switch back and view the email that is sent back to the user for reworking their request. Close Jonno's Outlook and open Administrator's Outlook. (Start, then search for Outlook). Allow a minute or so for Outlook to open. Confirm there is a task notification email for Administrator. This time, click on the link Click to open worklist item so that you can open and edit your original request. (Remember if you are working in your own environment, you most likely will need to open your own Outlook.)
- Make a change of some kind to your form entries. Select Resubmitted from the Action options and click Submit. You should see a confirmation dialog, click OK. Close out of the browser.
- Close Administrator's Outlook and open Jonno's Outlook. Once again, you should see a new task notification email. This time, click the link Click to open worklist item so that you can access the form.
- Confirm that you can now enter content into the Approver Comments field. Recall that you edited the Workflow Task state and turned off the read-only option for the comments. Enter a comment. Select Rejected from the action options and submit the form. Click OK for the confirmation dialog, then close out of the browser.
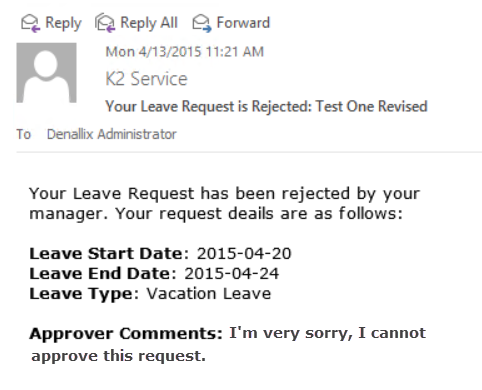
- Close Jonno's Outlook and open Administrator's Outlook. Confirm the rejected email arrived and there is content for the Approver Comments.
If you have time and would like to submit more leave requests so that you have additional content when you work through the Reports tutorial, feel free to do so! (The Reports tutorial uses the workflow process instances from the Leave Request tutorials for content.)
After you have submitted a form, confirm that the field entries are cleared (except the Employe Name and Email) and your new entry now shows up in the Previous Leave Requests List View. After you have submitted at least two forms, close your browser.
At this point, you need to open the approving manager's Outlook. If you are building this application on a K2-provided VM, you are most likely logged in as Denallix Administrator. Administrator's manager is Jonno, so you'll open Jonno's Outlook. If you are building this application within your own environment, open the Outlook account for the user assigned the manager approval task. The screenshots and usernames used in this tutorial assume you are using a K2-provided virtual machine, so your screens and users may be different if working through the steps in another environment.
As a reminder, you are going to action this request using SmartActions. SmartActions allow you to simply reply to a task notification email with one of the actions as the message body. K2 will read the action and move the workflow along accordingly.
STEP 12 REVIEW
If your testing was successful, then congratulations! You have extended the Leave Request application and have seen the Data, Forms and Workflow co-operate in a complete cycle from start to finish. You have completed the extended version of the Leave Request application.
The exercises in this tutorial expanded on the functionality and interaction of K2's components: Data, Forms, Workflows. Key to these exercises are the following:
Data
- SmartObjects can leverage connectivity with internal and external data sources.
- SmartObjects can be associated with form controls, creating an association that can automatically populate control values.
- SmartObject methods can be called from views, forms and workflows and are commonly used to create, save (update) or retrieve (list) SmartObject properties.
Forms
- Forms are containers for views and controls
- Forms can contain multiple views
- Views are logical sections of form content
- There are two types of views: Item Views contain the content from one record. List Views contain multiple records.
- Rules are comprised of Events, Conditions and Actions. Events are when something occurs, Conditions are if a specific criteria has been met and Actions do something if the Event and Condition has been met.
- Rules can be applied to different workflow states, essentially creating custom forms for workflow tasks
- Forms and views must be checked in before they can be exposed to users
Workflows
- Workflows are comprised of steps which in turn, have associated events. The main container for a workflow is called a process.
- There are two types of events: System tasks are performed by the K2 server such as sending an email. User tasks are performed by a human, such as making a decision of some kind.
- Escalations keep your workflows flowing by sending email reminder notices, redirecting the unactioned task to another user or expiring the task altogether.
- Workflows must be deployed before they can be exposed to users