Roles
The Roles node is used to create, edit, delete or save K2 roles. Roles are essentially “groups” defined in K2, and are most often used for task allocation logic. Sometimes it is not possible to define Groups in Active Directory or SharePoint for task allocation (perhaps the AD or SharePoint administrators are unwilling to define groups for other applications’ requirements), or sometimes groups may contain users authenticated through different mechanisms. In these cases, K2 provides an alternative approach known as Roles. K2 developers can use these Roles in the K2 workflow design tools as the destination when configuring a User Task step in a workflow. Roles are defined and stored on a K2 server, and the Role membership can be maintained by administrators without affecting the workflow design. Roles can contain one or more users or groups from one or more Security Labels.

Follow these steps to add Roles:
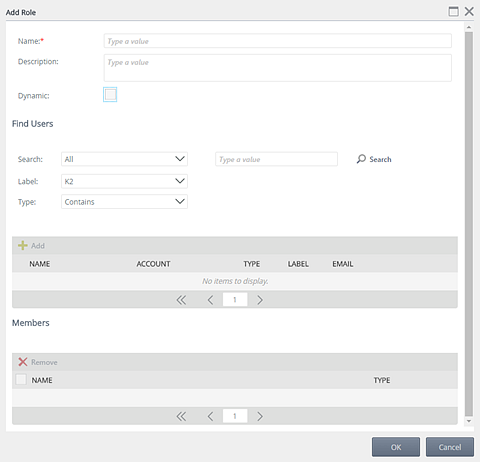
- Click New from the Roles view.

- The Add Role view opens.

Use the table below as a guideline for the configuration:
| Field Name | Description |
|---|---|
| Name | The name for the Role being created. Type a value in the field provided. |
| Description | Describe the Role being created. Type a value in the field provided. |
| Dynamic | This will allow a new user added to the role to immediately receive existing worklist items for that role. The user will receive worklist items at the time of log in or when the worklist is refreshed. Select the check box if you want the Role to be dynamic. If this option is not checked, changes applied to role membership will only take effect for new worklist items created after the Role is modified. |
| Search | Click the Search drop-down and select to search for users or groups. |
| Label | Click the Label drop-down and select the Security Provider label you want to search on. |
| Type | Click the Type drop-down and select the type of search that will be performed. |
| Search Button | Type a value in the text box provided and click Search. |
| Add Button | The matching users or groups will be returned in the first view. Select a user or group and click Add. The user or group will now be listed in the second view. You can add multiple users or groups by doing a new search and clicking the Add button again. |
| Remove Button | To remove Role Members, select the user or group from the second view and click Remove. The user or group will no longer be part of this Role. |
| Include check box | Each Role Member is set to be included in the Role by default. Select the check box to exclude the Role Member from the Role. |
| OK Button | Click OK to complete the configuration. This will take you back to the Roles view and the new Role will be listed. |
| Cancel Button | Click Cancel if you no longer want to complete the configuration. This will take you back to the Roles view. |
Follow these steps to edit a Role:
- Select the Role you want to edit.
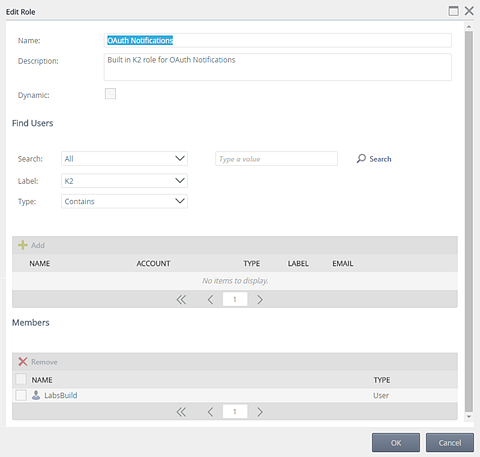
- The Edit button becomes available. Click Edit.

- The Edit Role view opens.

- Edit the information as required. Use the table provided in the Roles section as a guideline.
- Click OK to save the changes.
Follow these steps to delete a Role:
- Select the Role you want to delete using the check box in front of the Role. You can select multiple Roles to delete.
- The Delete button becomes available.
- Click Delete.

- Click OK on the confirmation message.
This option is only applicable when changing the Dynamic option for the Role. Follow these steps to save changes to a Role:
- Change the Dynamic behavior for the Role by clicking the Dynamic check box.
- Click Save.
