Activities
The Management Console in K2 Workspace is superseded by the K2 Management Site and you should use the K2 Management Site to administer your K2 environment, rather than Management Console in K2 Workspace. (In certain cases you may need to use the Management Console in K2 Workspace to perform tasks that are not exposed in the K2 Management Site.)
If an Activity in a workflow contains a client event, those activities will be listed as separate nodes. This function allows you to configure Action Rights per client event, in other words, specifying what actions specific users, groups or Roles are allowed to perform on an Activity.
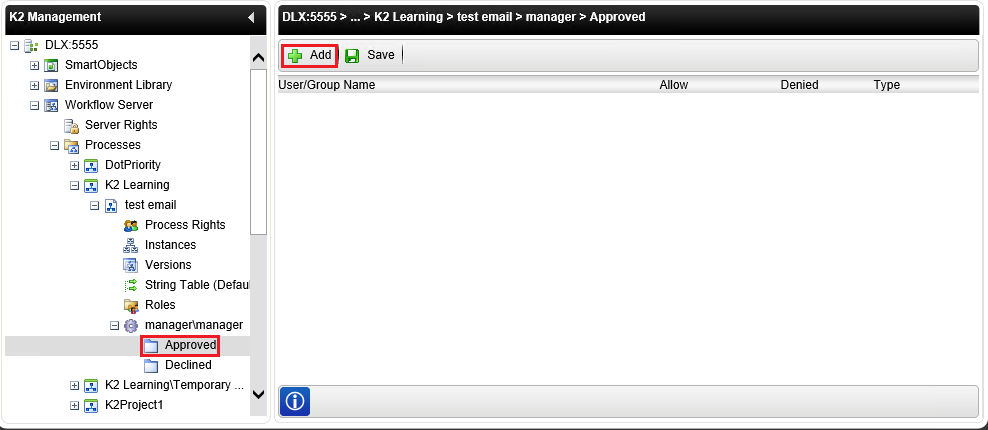
Clicking on the Client Event node will load the Task Rights screen, allowing an administrator to configure Allow or Denied rights for specific users or groups for each Action defined in that Client Event.

| Field | Description |
|---|---|
| User/Group Name | Presents the identity of the User or Group with rights associated with the Action or Client Event. |
| Allow | Allows the associated User/Group to participate within the Activity or Client Event. |
| Denied | Prevents the associated User/Group from accessing the Activity or Client Event. |
| Type | Presents the type of identity (i.e. User or Group). |
| Add | Allows an administrator to add User permissions to the Action or Event. |
| Save | Stores and activates the permissions configuration. |
The following steps discuss how to add Task Rights to Process Activities or Client Events:
- Select the required Process Activity or Client Event from a Process and Click the Add button.

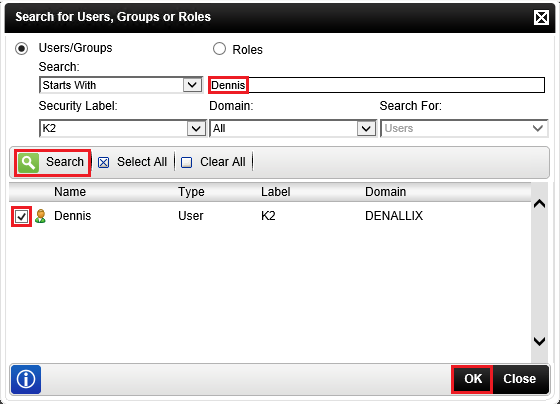
- On the Search for Users, Groups or Rolesscreen , selecting the Users/Groups option will display the following screen. Search for the required User or Group to give rights to.

Field Description Users/Groups Allows the user to only search for the available Users/Groups. Search Text Box Allows the user to enter the search text string. Security Label Provides a drop down selection of the security labels. Domain Provides a drop down selection of the domains. User/Group Name Presents the results of the search. Type Presents the user subtype - User or Group. Search Button Starts the search based on the options selected. Select All Selects all the returned search results in the list. Clear All Clears all the selected search results. -
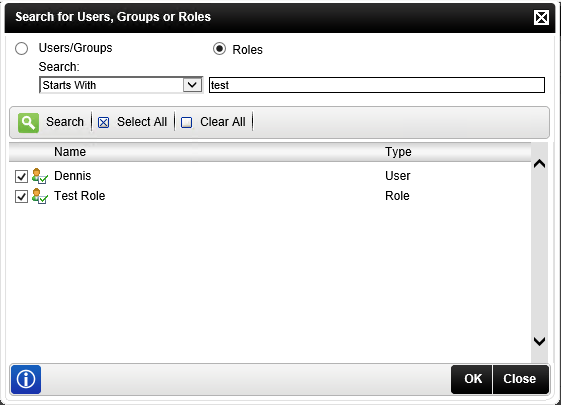
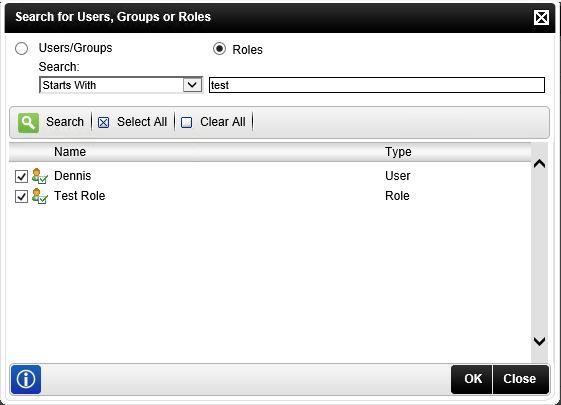
Selecting the Roles option will display the following screen:

Field Description Roles Allows the user to only search for the available Roles. Search Text Box Allows the user to enter the search text string. Name Presents the results of the search. Type Presents the user subtype - Role. Search Button Starts the search based on the options selected. Select All Selects all the returned search results in the list. Clear All Clears all the selected search results. - Search for the required Role and click the OK button.