SmartBox
The Management Console in K2 Workspace is superseded by the K2 Management Site and you should use the K2 Management Site to administer your K2 environment, rather than Management Console in K2 Workspace. (In certain cases you may need to use the Management Console in K2 Workspace to perform tasks that are not exposed in the K2 Management Site.)
This node configures security for the K2 SmartBox SmartObject data provider, including the ability to control who may create, update or delete SmartObject definitions in this storage area (design-time permissions), as well as runtime permissions to control who may execute what methods for SmartObjects that use SmartBox.
The SmartBox Administration section will allow you to define who may Create, Update or Delete SmartObjects that are deployed to the K2 SmartBox database. This security level is normally relevant at design time to prevent users from deploying SmartObject definitions to the SmartBox database. In practice, this setting can be useful to lock down change-control for a K2 environment.
Follow these steps to add a system action:
- Click the Add button on the Systems Action screen.

- On the Search for Users, Groups and Roles screen, search for the appropriate User, Group or Role.

- Select the appropriate User, Group or Role and click OK.
- Select the appropriate system actions for the chosen User, Group or Role.
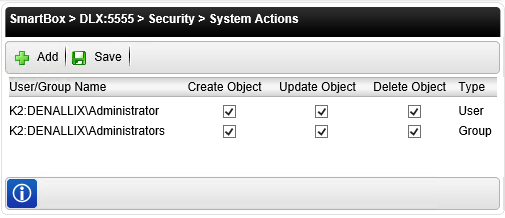
Field Description User/Group Name Lists the names of the users or groups with permissions associated with the Object System Actions Create Object Check this box to assign the User/Group permission to create/publish new SmartObject definitions Update Object Check this box to assign the User/Group permission to update existing SmartObject definitions Delete Object Check this box to assign the User/Group permissions to delete existing SmartObject definitions Type Auto-populated User or Group designation - Click the Save button.
You may define who may execute certain methods on specific SmartObjects at runtime. This is most often used to restrict runtime rights, for example preventing certain users or groups from executing the Delete method for a certain SmartBox-based SmartObject. To set this permission, select the relevant SmartObject and then Add rights and select the enabled methods for that User/Group.

| Field | Description |
|---|---|
| User/Group Name | Lists the names of the users or groups with permissions associated with the SmartObject. |
| SmartObject Methods Check Boxes [Create, Save, Delete, Load, Get List] | Check the box to assign the User/Group permissions to execute the associated method. |
| Modify Object | Check this box to assign the User/Group permission to Modify the SmartObject. |
| Type | User or Group designation. |
Follow these steps to add permissions to a user.
- Select the SmartObject to add user permissions.
- Click the Add button.
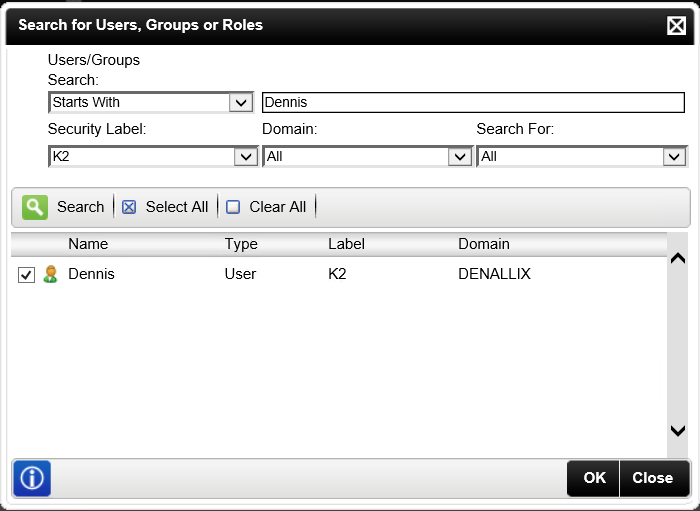
- On the Search for Users, Groups or Roles screen, search for the appropriate User, Group or Role. Select the chosen User.
- Select the appropriate permissions.

- Click the Save button.
The SmartObject Data Mapping section allows an Administrator to set security on associations to other SmartObjects. It is, in essence, data-level security for SmartBox SmartObjects 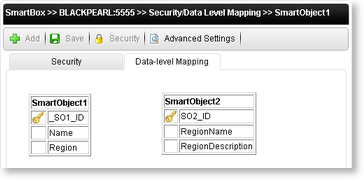
| Button | Description |
|---|---|
| Advanced Settings | Allows an administrator to configure the SmartObject Lookup Method |

| Option | Description |
|---|---|
| Lookup Method | A drop down containing the possible system lookup methods. |
| User/Group Name | Lists the system names of the Users/Groups with permissions associated with the SmartObject |
| Unique ID | Check this option to select the Unique ID. |
| Display Name | Check this box to select the Display Name. |
The SmartObject lookup feature can be used as a Data Level Security lookup object. An association is required between the SmartObjects in order for the lookup to know which SmartObjects are associated with one another.
We will create two SmartObjects and use one as a lookup for reporting purposes. Follow the steps below to create the lookup from K2 for Visual Studio:
-
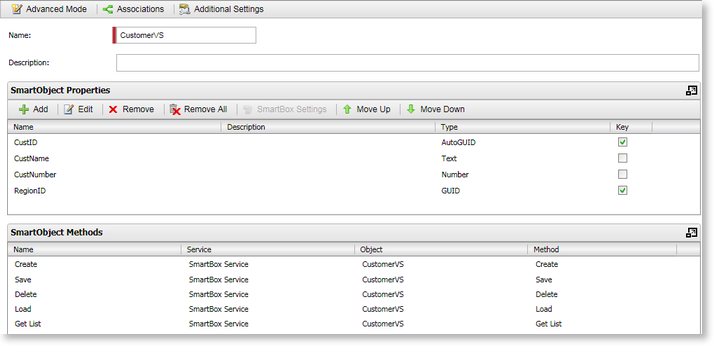
Create a Customer SmartObject.
- Create a Region SmartObject.
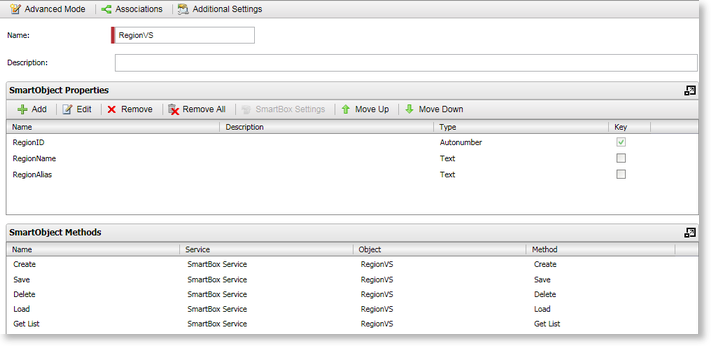
-
Click OK and deploy the project.
- Create a one to many association on the Customer SmartObject with the Region SmartObject using the RegionID as the mapping property. Deploy the project.
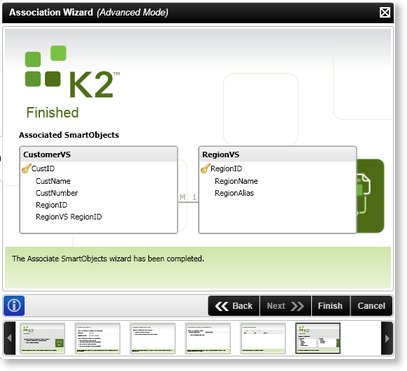
- Enter valid data into the SmartObjects.
- Go to K2 Management Console in K2 Workspace.
- Navigate to Server name: Port > SmartBox > Security and click on CustomerVS.
- Select the Data-level Mapping tab.
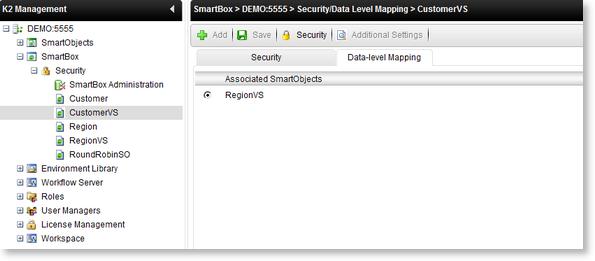
-
Click the Additional Settings button.
- Select RegionID as the Id Property, RegionName as the Display Property and Get List as the Lookup Method.
- Select RegionVS again and click on the Security button. Click on the Map … button next to the user you want to apply permissions to.
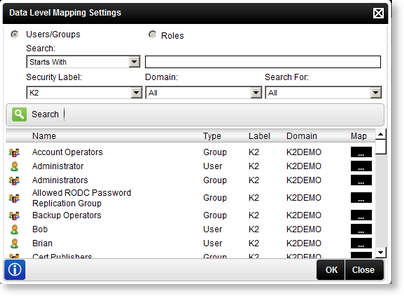
-
Select the Regions you want this user to view and click OK.

- When this user is logged in and data is retrieved from the Customer SmartObject, only information for the Northern and Southern regions will be displayed.