SharePoint Documents Wizard - Upload Document Destination
The Upload Document Destination wizard screen specifies the location where the document should be uploaded to.
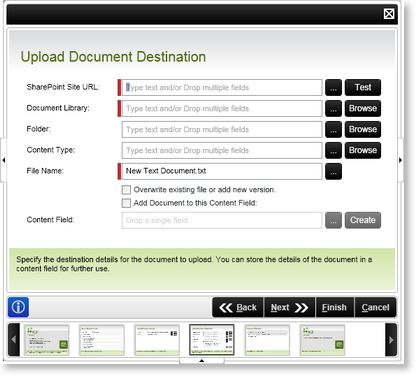
Fig. 1. SharePoint Documents Event Wizard - Upload Document Destination
| Feature | What it is | How to use it |
|---|---|---|
| SharePoint Site URL | Specifies the SharePoint Site URL where the document should be uploaded to | Specify the SharePoint Server URL e.g. http://SPSServer:121 OR use the ellipse button to open Context Browser and select the SharePoint URL |
| Document Library | A SharePoint Document Library provides a central repository for team documents. This is an alternative to storing files in shared folders | Enter the Name of the Document Library where the document should be uploaded to in the text box, or use the ellipse button to select a DataField or XML Node. Alternatively use the Browse button to select the Document Library from the SharePoint Site |
| Folder | A folder within the document library where the uploaded documents will be stored. | Provide a folder name as a destination for the document in the text box, or use the ellipse button to select a DataField or XML Node. Alternatively use the Browse button to select the required Folder |
| Content Type | Content Type is a customizable meta description of content that can include custom properties, a retention policy, and an associated set of workflows/business processes | Enter the name of the Content Type, OR use the Context Browser to select a DataField or XML Node. Alternatively use the Browse button to select the required Content Type |
| File Name | Adds the File Name | Enter the Name of the File to be uploaded |
| Overwrite Existing File/Add as new | Check this option if the uploaded file is to overwrite an existing file | Check this option |
| Add Document to this Process Field | Check this option to add a Document to this Process Field, as part of the workflow process | Check this option |
| Content Field | Locate the K2 Process Field in the Context Browser and drag it into the field box | Enter the Name of the Process Field by typing or drag-and-dropping it into the text box |
See Also
