Upload InfoPath Form Event Wizard - Upload Document Destination
The InfoPath Form Destination wizard screen specifies the location where the document should be uploaded to.
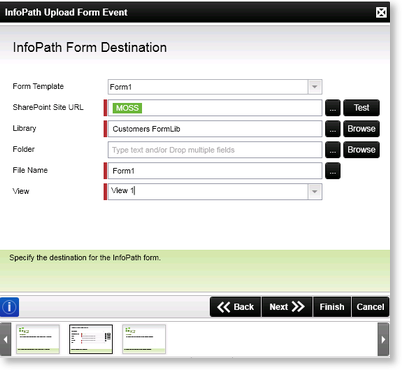
Fig. 1. InfoPath Upload Form Event Wizard - InfoPath Form Destination
| Feature | What it is | How to use it |
|---|---|---|
| Form Template | The Form Template field is pre-populated with all the InfoPath forms associated with the process | Select the required Form Template to be used |
| SharePoint Site URL | Specifies the SharePoint Site URL where the InfoPath form will be uploaded | Specify the SharePoint Server URL e.g. http://SPSServer:121 or use the ellipse button to open the Context Browser and select the SharePoint URL |
| Library | This field specifies the SharePoint Form Library where the InfoPath form will be uploaded | Enter the Name of the Form Library where the form should be uploaded to , or use the ellipse button to select a DataField or XML Node. Alternatively use the Browse button to select the Form Library from the SharePoint Site |
| Folder | A folder within the form library where the uploaded document will be stored. This is an optional field, but will allow forms to be stored in a folder in a library | Provide a folder name as a destination for the document in the text box, or use the ellipse button to select a DataField or XML Node. Alternatively use the Browse button to select the required Folder |
| File Name | Allows for a File Name to be specified. The uploaded form name does not necessarily have to be the same as the original form name | Enter the Name of the File to be uploaded |
| View | Represents the View that will be displayed when opening the uploaded document. If more than one View exists, all views will still be available, but the selected View will be opened when the document is opened in the new location | Select the View from the drop down list |
