Creating A Package using K2 Package and Deployment
K2 Package and Deployment can be used to create a package file containing all the information needed to re-create those artifacts in a different environment. For example, the tool can be used to create a package of a SmartObject definition, and then deploy that SmartObject definition to another K2 environment.
Two types of information can be packaged:
- Pointers that refer to artifacts that are already in the K2 environment.
- Artifacts plus their associated object data.
For more information regarding which types of artifacts are and are not supported, see the K2 Package and Deployment Overview and the Important Considerations topics.
When packaging and deploying Service Instance artifacts, ensure that the associated backend entities exist on the target environment before attempting to deploy the package. See K2 Package and Deployment Overview for more information.
Artifact validation continues to improve with each release of K2 Package and Deployment. Any validation errors that occur during the configuration of a package must be resolved before the package can be built.
Creating a new K2 Deployment Package
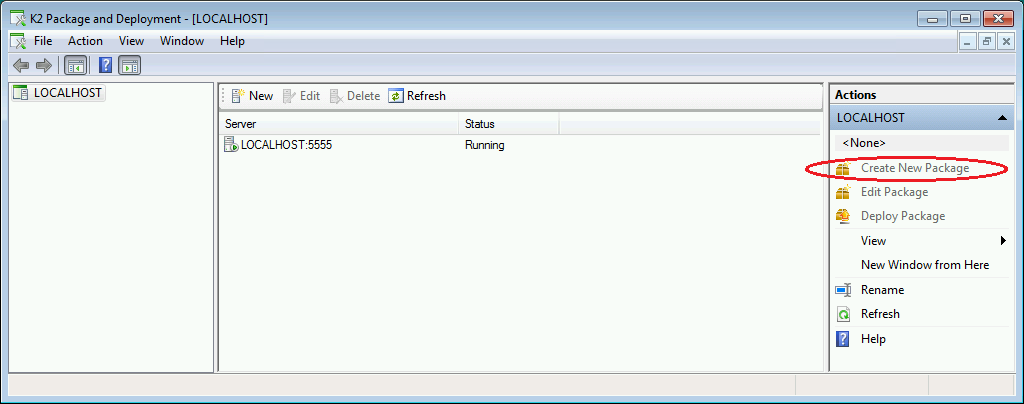
- Ensure that the relevant Server is highlighted by clicking it. Select the Create New Package option from the Microsoft Management Console window, or from the Actions window.
- Once the Create Package window has loaded, enter the name of the package in the Package Name text box, plus a description of what will be defined within the package. Use the Browse button to navigate to the location to which the package will be saved.

The Automatically include dependent items check box should only be deselected by administrator-level developers who have advanced knowledge of K2 systems. If this check box is deselected, K2 Package and Deployment will not check for artifact dependencies. This means that resulting packages may be created with dependency issues. Deploying a package with dependency issues may cause system errors. Workflows and SmartObjects have many levels of dependencies, and not including a given association or service instance could have serious consequences. If you deselect the Automatically include dependent items check box, you must manually expand and select each of the nodes and sub-nodes of the artifacts you wish to include in the package.
- Click on Next to navigate to the Add Items window.
- The Package and Deployment tool will query the K2 Server and compile a list of K2 artifacts which can be packaged. If K2 artifacts are not checked in, K2 Package and Deployment will not be able to reference them for packaging, and they will be marked with a red exclamation mark.
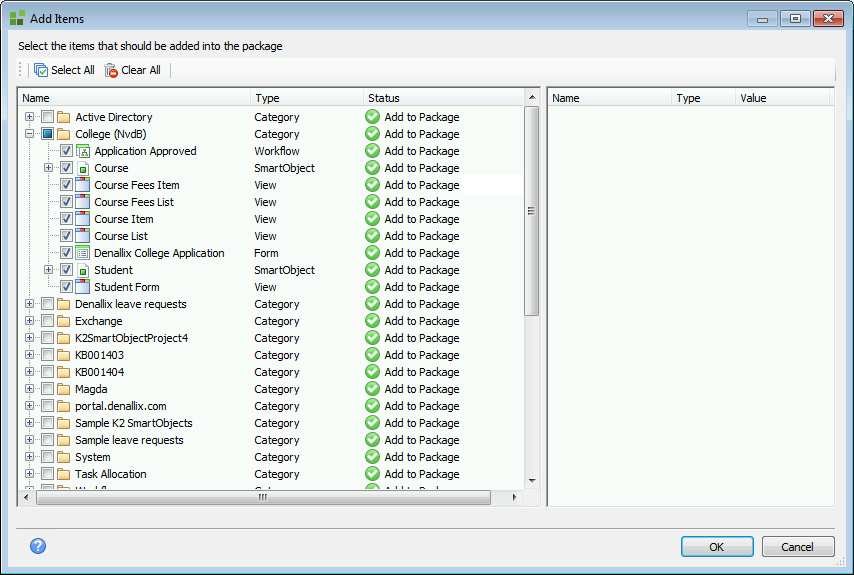
- Select the K2 artifact or artifacts you want to package.
- The Type column shows what the K2 artifact is defined as.
- Clicking on the K2 artifact in the left column will show the properties of the object in the right-hand column.
By default, SmartObjectData is deselected so that SmartObject SmartBox data from one environment is not automatically deployed to a new environment. This is done in order to prevent deployment packages from becoming oversized (due to the potentially large amount of data stored within a SmartObject). If you need to package the SmartBox data associated with a particular SmartObject, open the SmartObject node and manually select the required SmartObjectData. For more information, see K2 Package and Deployment Overview.
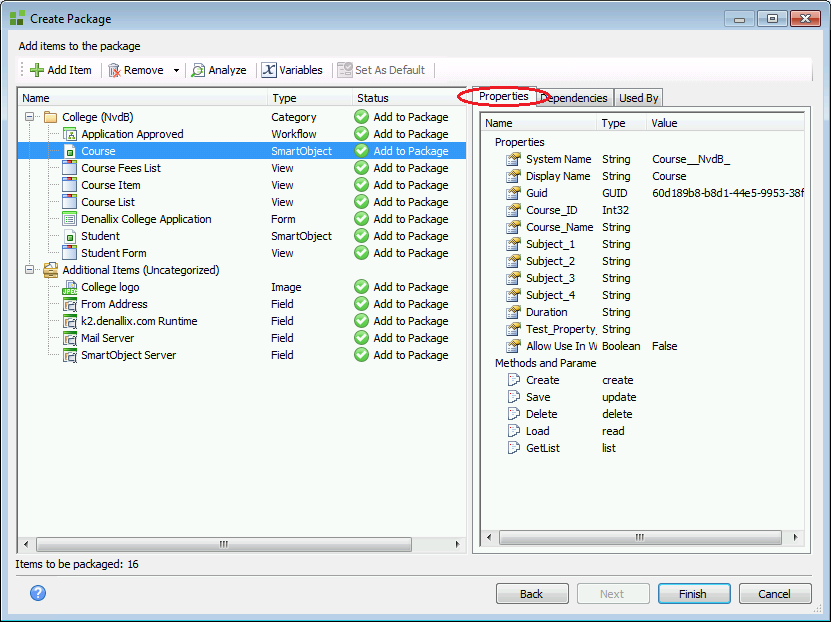
- Once you have selected one or more of the K2 artifacts listed, click OK to add them to the deployment package list. The Create Package screen will now display the selected artifacts. The right-hand window displays the artifact properties, dependencies, and what the artifact is used by. The number of items to be included in the package is displayed in the bottom left-hand corner of the window. In the screenshot below, the object Properties tab has been selected, allowing the user to view the properties of the selected object. The top menu provides options for adding, removing, re-analyzing, and creating or modifying the variables for a package.
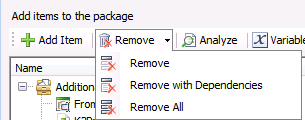
- The Remove option provides three sub-options; Remove, Remove with Dependencies, and Remove All. These provide the package creator with specialized artifact removal options. Artifacts that have been added to the package must be selected before using these sub-options.
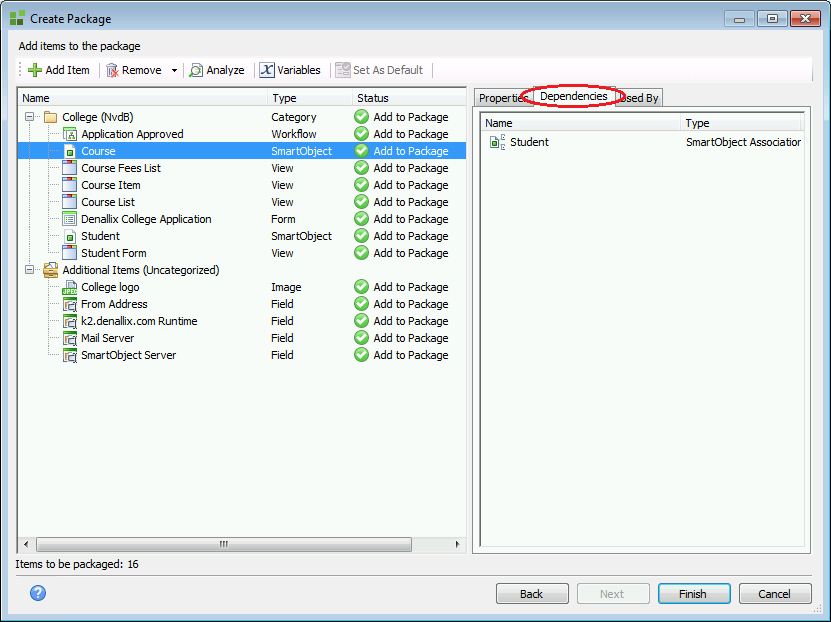
- In the screenshot below, the object Dependencies tab has been selected, allowing the user to view the dependencies for the selected object.
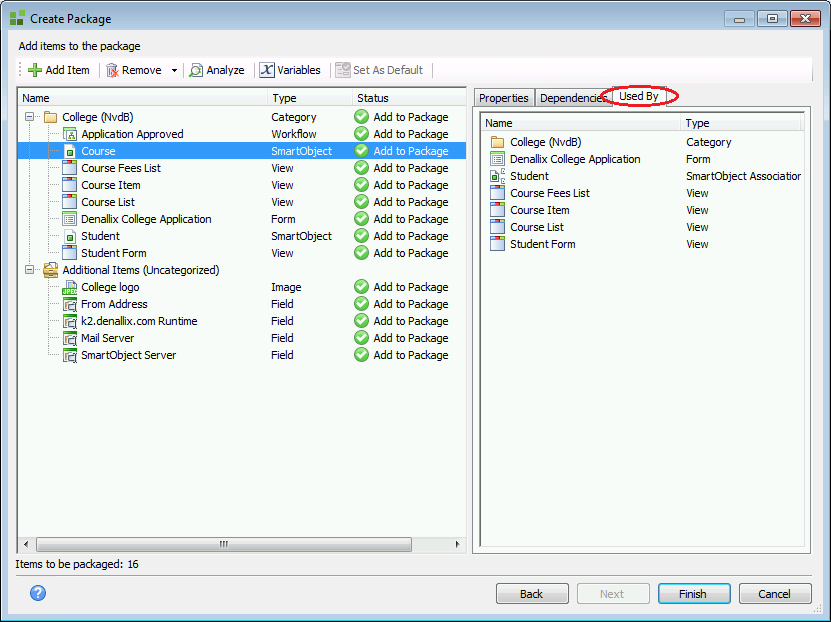
- In the screenshot below, the Used By tab has been selected, allowing the user to view other objects the selected object is used by.
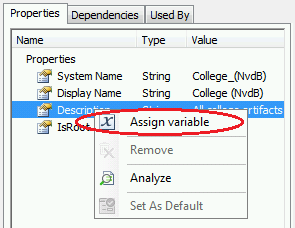
- At this point, you can create assignable variables for specific properties of any deployment package objects which require different values within a new environment (for example, service instance credentials). See the Assigning Variables topic for more information.
- Once any needed variables have been assigned, click Finish to create the package and close the Create Package dialogue.
Validation
Warning and Error messages shown in the Status property of an artifact need to be resolved before the package can be created. Double click on the status message to show more information about the warning or error status.