Deploying Application elements to a different SharePoint environment
Once you have created a K2 Application in a SharePoint List or Library, you can create a package of the K2 Application elements. This package can then be deployed to lists or libraries in other sites, web applications, site collections or a completely different SharePoint environment. This topic describes how to use the K2 package and deployment tools to create and deploy packages.
To create and deploy a package of the artifacts of a K2 for SharePoint List or Library, ensure that the user deploying the package has the following rights in the target K2 environment.
- Export Rights in K2
- SmartObject Publish rights. A check is performed to validate if SmartObject Publish rights have been set on specific SmartObjects that have been generated in the K2 Application.
The following table lists the K2 artifacts that are included or not included in deployment packages created with the Package and Deployment tool. You can assume that anything not explicitly listed as included in this table will not be included in the deployment package and may need to be migrated from the source environment to the target environment separately using the appropriate tools or interfaces for that component.
Note that the actual artifacts included in the package are based on selections used when the package is created, and you may need to manually add or remove selected items from the package depending on the artifacts used in your application. K2 will attempt to do a “best guess” as to all the K2 artifacts required for your Application but you should always double-check the artifacts identified by K2 for inclusion.
| K2 Artifact | Included in P and D Package? | Notes |
|---|---|---|
| Data - SmartObjects | Yes | Even SmartObjects used by the workflow will be included. |
| Workflows | Yes | When workflows were created outside of the SharePoint Application designer environment (for example with K2 Designer or K2 Studio), you may need to select those workflows manually for inclusion in the package. If they are somehow referenced, P and D will discover the dependency and auto-include them. |
| Forms and Views | Yes | Only SmartForms Forms and Views are included in the package. Custom user interfaces created with another technology are not included. |
| Custom SmartForms Controls | Yes | As of K2 4.6.9, custom controls are included in the package. |
| Reports | Yes | Only the generated reports for the Application are included by default. If you have created custom Forms and Views for reporting purposes, you may need to select those items manually. Any custom reports created with another technology (such as SSRS) will not be included in the K2 package. |
| SmartBox SmartObject Data | User Configurable | SmartBox SmartObject data is excluded by default. This can be manually configured during package creation. Packaged data can then be included or excluded when deploying the package. |
| Roles | Yes | Roles are deployed as empty. You need to add Role members after deployment. |
| Service Objects | Yes | |
| Categories | Yes | |
| Service Instances | Yes* | Some Service Instances , like the SharePoint, SAP, and Salesforce Service Instances, are included by reference only.The package contains the GUID or System Name of the Service Instances required by the SmartObjects in the package. If a service instance is found on the target that matches by service instance Name or GUID, it is automatically selected and you cannot select a different Service Instance. If no matching Service Instance is found it will show up as a missing reference. |
| Custom Service Instances | Yes | Only Custom Service Instances built using the Smartobject Service SDK can be included in the package. |
| Service Types and Service Brokers | By Reference Only* | Service Types and the associated Brokers must already exist in the target environment |
| Environment Library Fields | By Reference Only* | Environment Fields other than Miscellaneous (Misc) need to exist on the Target. Miscellaneous fields are included in the package. |
| Workflow Permissions | No | The deploying user account automatically gains Admin rights on the workflow. After a workflow is deployed, use the K2 Management site or K2 Workspace to set workflow permissions for the deployed workflow definition. This only needs to happen the first time a workflow is deployed since workflow permissions are version-agnostic. |
| Custom Service Brokers | No | Any customizations must be copied over and installed on the target K2 environment using the appropriate deployment mechanisms for those customizations. |
| Custom SmartForm Themes | No | Any customizations must be copied over and installed on the target K2 environment using the appropriate deployment mechanisms for those customizations. |
| Custom Workflow Wizards | No | Any customizations must be copied over and installed on the target K2 environment using the appropriate deployment mechanisms for those customizations. |
* By Reference Only means the definition of the item is not included, only a reference to the item to ensure it exists on the target environment.
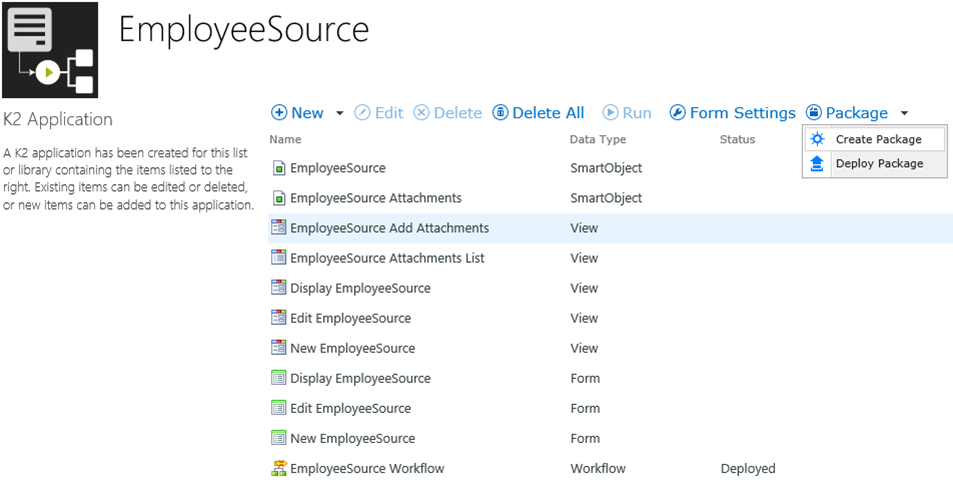
A K2 Package can be created from the K2 Application option of the SharePoint List or Library
When using the Package and Deploy tool to create or deploy a package in K2 for SharePoint, do not click the Back button in the browser to navigate back. Doing so may result in increased memory usage on the K2 server due to session management. The correct way to cancel out of the Deploy Package screens is to click the Cancel button at the bottom of the screen.
Step 1: Create Package
Select the Create Package option from the Package menu. A list of the K2 artifacts associated with this list or library will be presented.
Step 2: K2 artifacts
All K2 artifacts for the list or library are pre-selected. SmartBox data is excluded by default. Click on the SmartObject and use the Package Data/Exclude Data option to enable or disable the data packaging for that SmartObject. Click Next to continue creating the package.
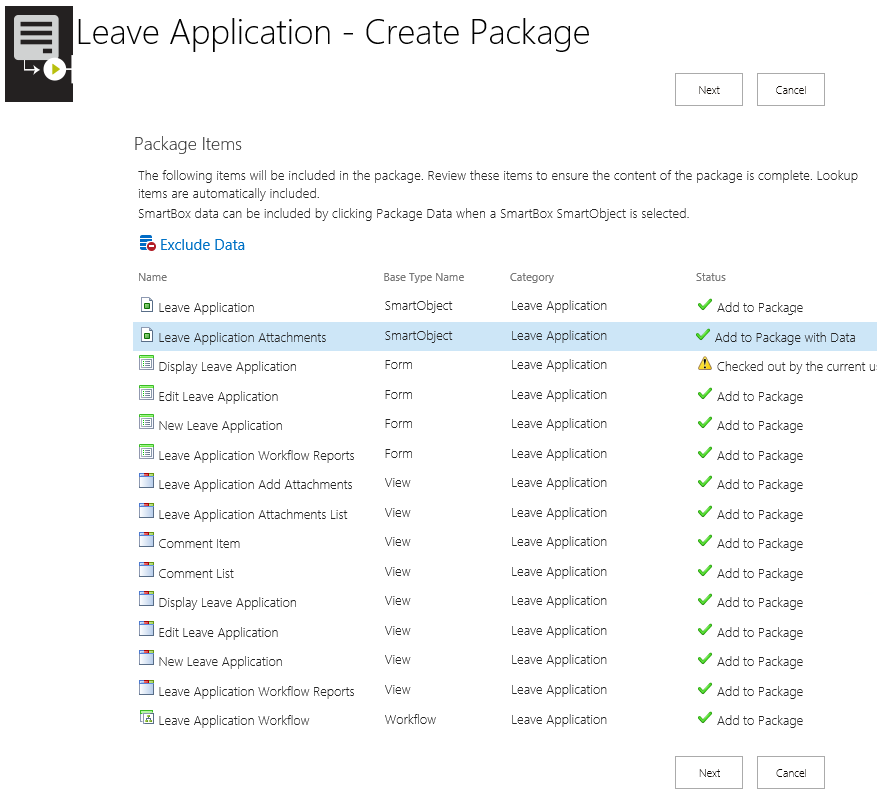
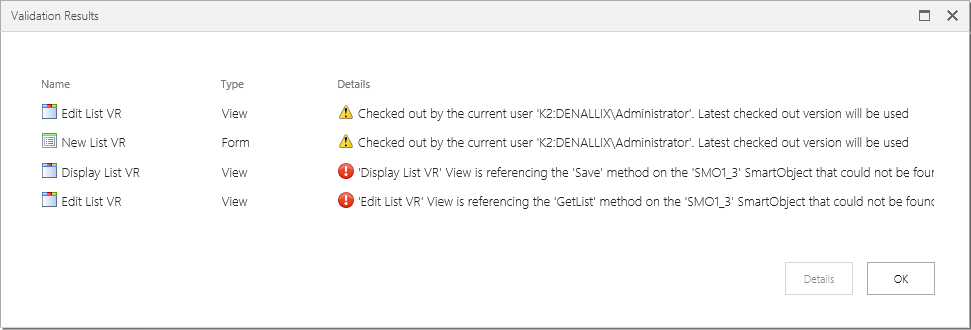
If Validation warnings occur, hover over the Status message for more information. When Validation errors are reported, click on the artifact presenting an error and use the Details button, or double click on the artifact for more information. Errors must be fixed before the package can be created.
Step 3: K2 Service Instances
K2 Service Instances may also be included in the package as additional items. We recommend that service instances are packaged by 'Reference Only". Click on the Exclude option to change the Status of the service instance from Add to Package to Package by Reference. Some K2 Service Instances are automatically excluded and packaged by reference only. System Items may also be listed by clicking on the Show/Hide System Items option.
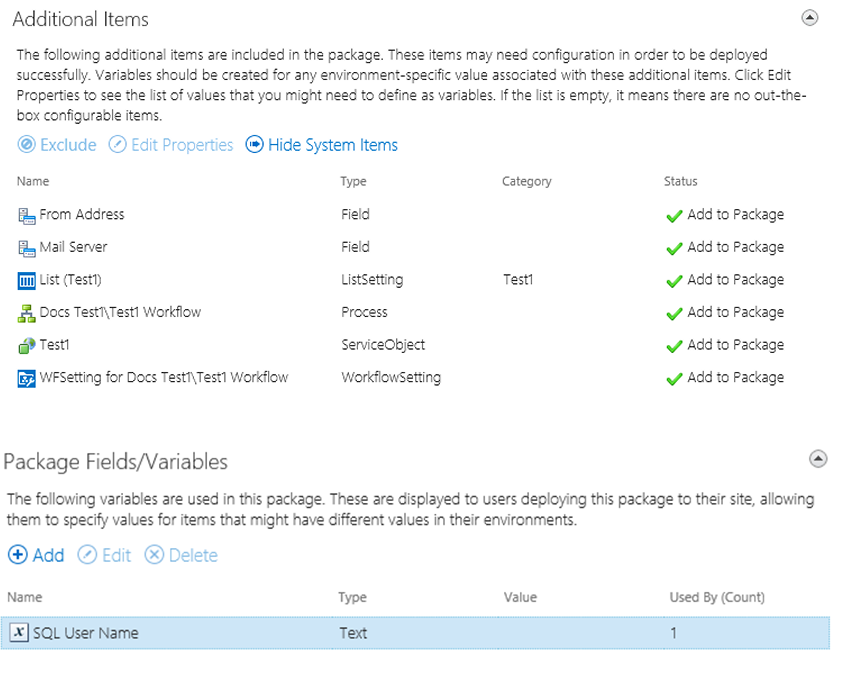
Variables can be added to the Package to help configure service instances, and workflow process Data and XML Fields.
Adding a Variable:
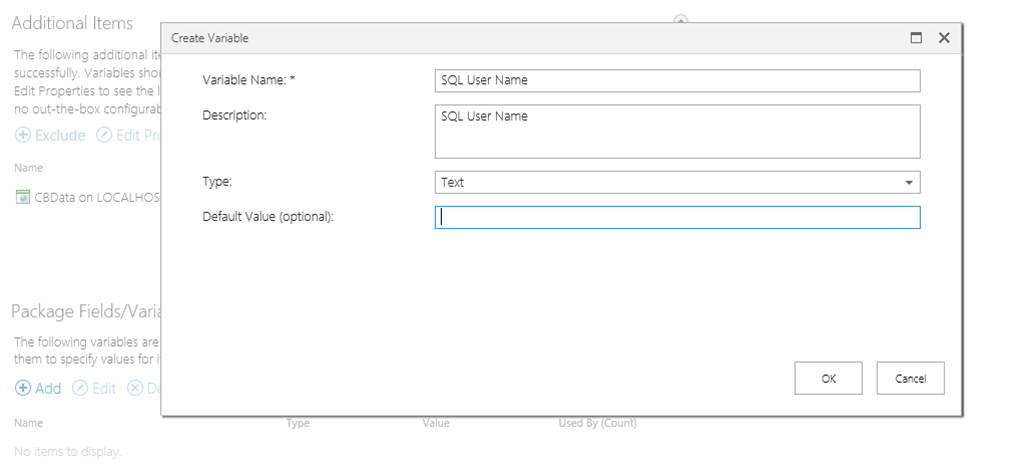
- Click on the Add option of the Package Fields/Variables screen.
- Fill in the Variable Name and a Description that identifies what the variable is for. Click on the Type drop down and select the data type. If there is a known value of this variable for the deployment environment, enter that in the Default Value text box.
Assigning Variables:
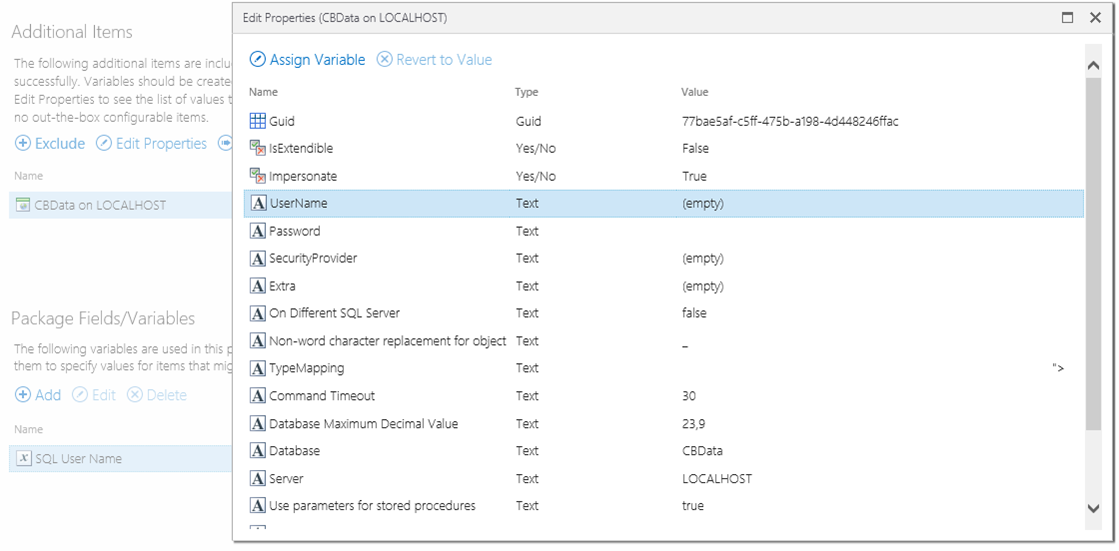
- To assign a variable to a field, select the service instance or workflow Data/XML field and click on the Edit Properties button. Select one of the properties and click on the Assign Variable button.
- You can either add a new variable, or use an existing variable.
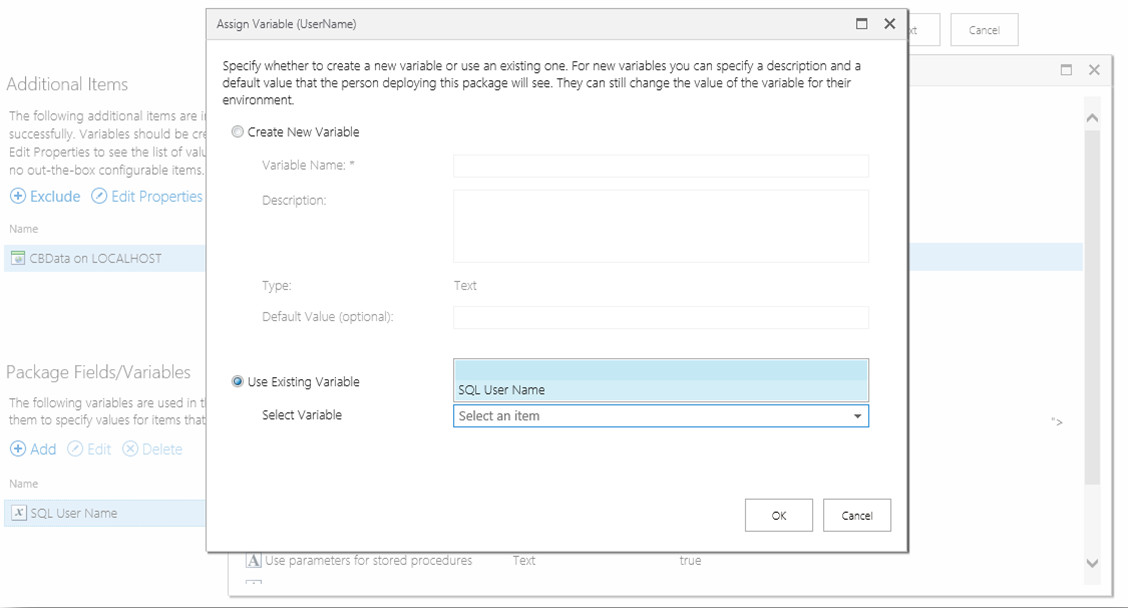
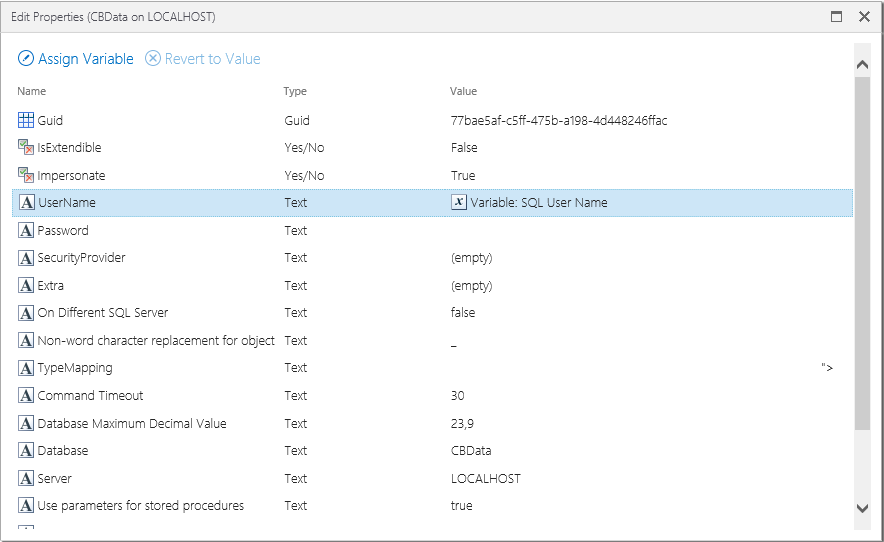
- After clicking on the OK button, the variable will be assigned to the property. Scroll down and click on the OK button to close the Edit Properties window.
Click Next to continue to the creation of the K2 package.
Step 4: K2 Package file
You may now save the created K2 Package file.
A K2 Package can be deployed from the K2 Application option of the SharePoint List or Library.
When using the Package and Deploy tool to create or deploy a package in K2 for SharePoint, do not click the Back button in the browser to navigate back. Doing so may result in increased memory usage on the K2 server due to session management. The correct way to cancel out of the Deploy Package screens is to click the Cancel button at the bottom of the screen.
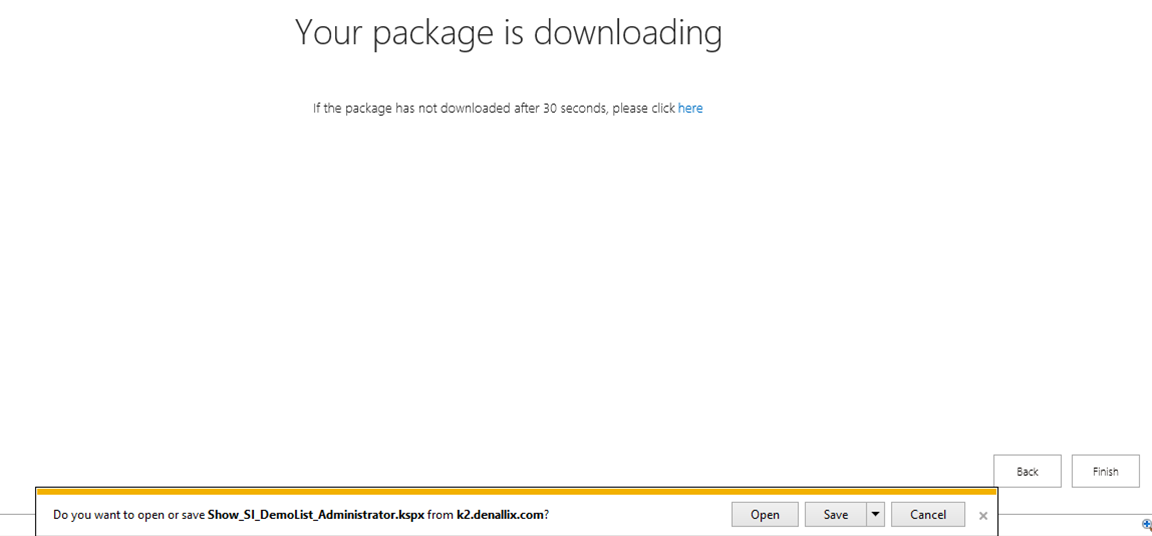
Step 1: Deploy Package
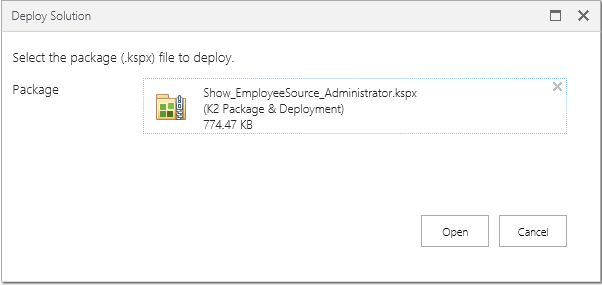
Click on the Deploy Package option from the Package menu item. The Deploy Solution package window will then show. Browse to where the K2 Package was saved and select the file. Click on Open to continue.
Step 2: Artifacts
The K2 Package will now load, and the artifacts within the package will be analyzed.
Step 3: Columns
Once the package is loaded, the Columns configuration screen will show. If the List or Library columns of the destination environment match the source environment, then the screen will automatically navigate to the Additional References.
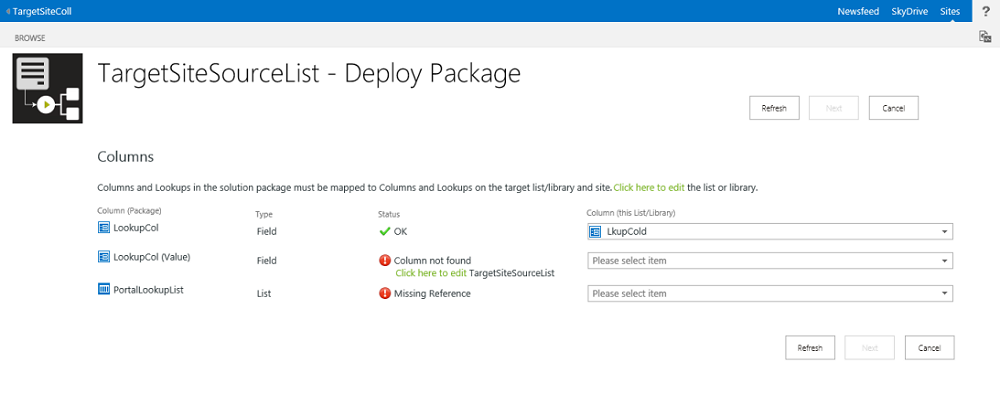
Use the destination Column drop down to select the matching column in this environment, or use the Click here to edit link to open the List or Library Settings screen so that you can add the required column. Use the Refresh button after changing settings so that the new properties are available.
If you select a Column object that does not match the original List or Library, a warning will display informing you of what columns are missing from the target.
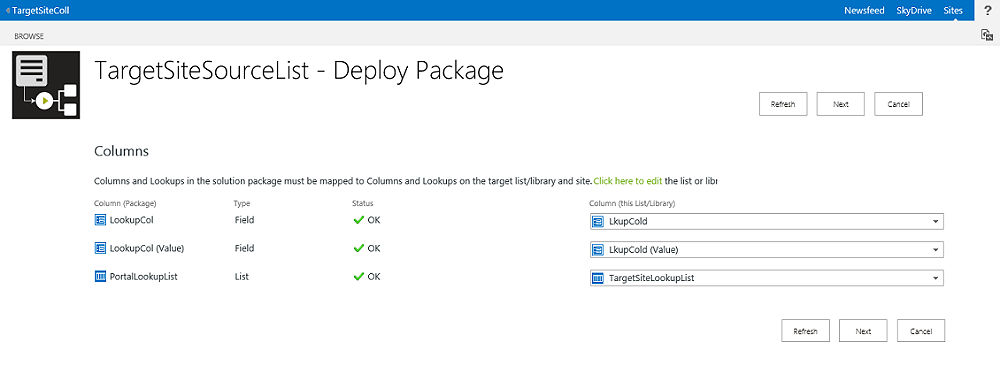
Click on Next once all the Columns show as OK in their Status property.
Step 4: Additional References
Once the Columns configuration is finalized, the Additional References configuration screen will show.
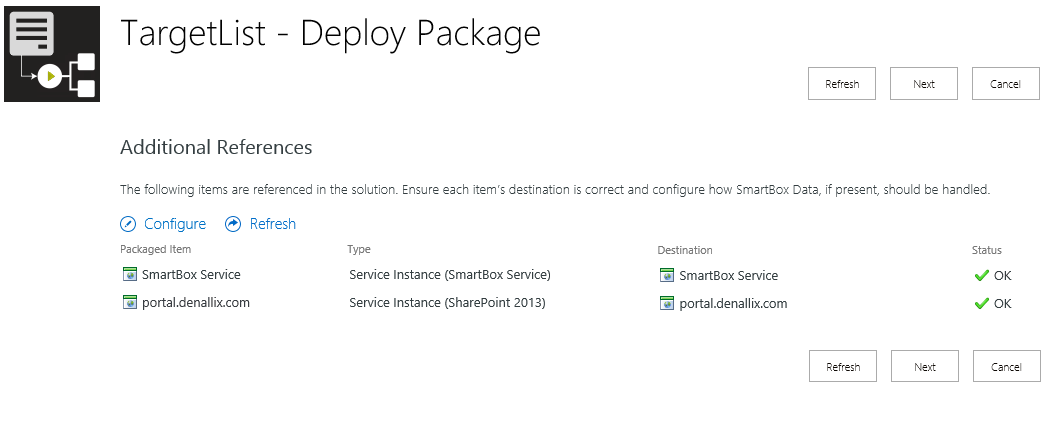
Use the Configure button to make any changes that are needed for this local environment. If SmartBox data was included in the package and you configure the parent SmartObject to use a SmartObject already deployed to the target environment (Use Existing), configure the SmartObject Data artifact to Do not Deploy to keep the data of the target environment, or Overwrite to write the packaged data to the target environment (overwriting the data already there). When deploying SmartObject Data artifacts with a new SmartObject (Create New) you have the option to Deploy or Do not Deploy the data.
If you have changed the configuration, then click on the Refresh button to re-analyze the artifacts in the package.
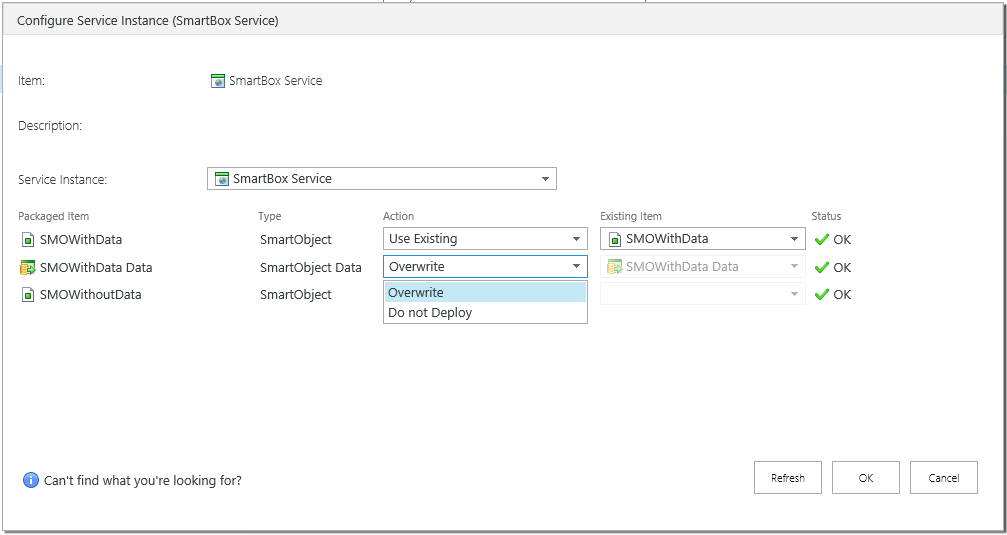
Some Service Instances are package specific and are not configurable. The drop down for those Service Instances will be grayed out.
When all the Additional References and Service Instances are correctly configured, click Next to continue.

Step 5: Variables
If there are Variables configured within the K2 Package, use this screen to edit the value of the variable to match this environment. Click Next to continue.
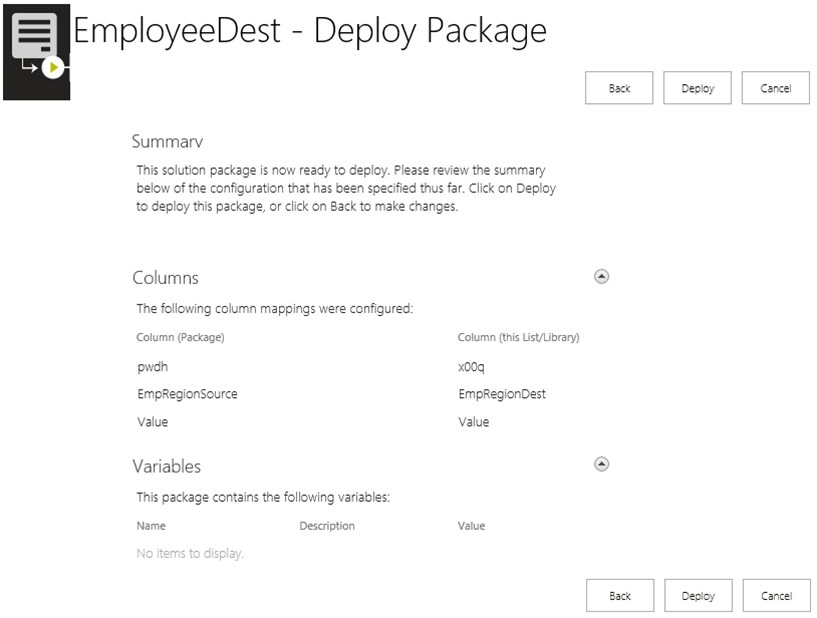
Step 6: Summary
A summary of the deployment will now display. If there are any issues, use the Back button to navigate back to the screen where that item can be configured. If everything is correct, click on the Deploy button to start the deployment of the package to this environment.
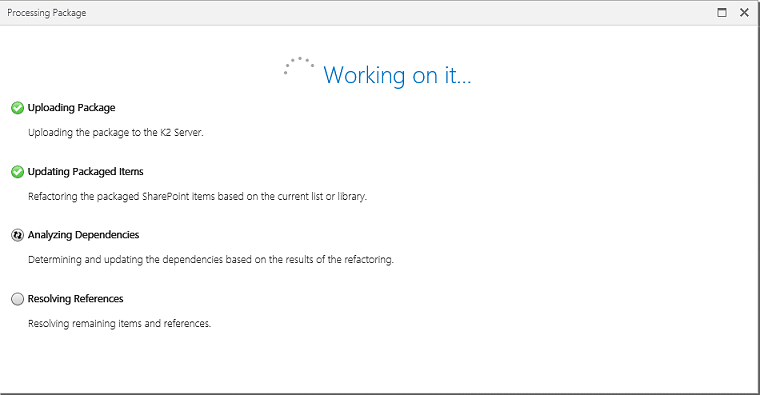
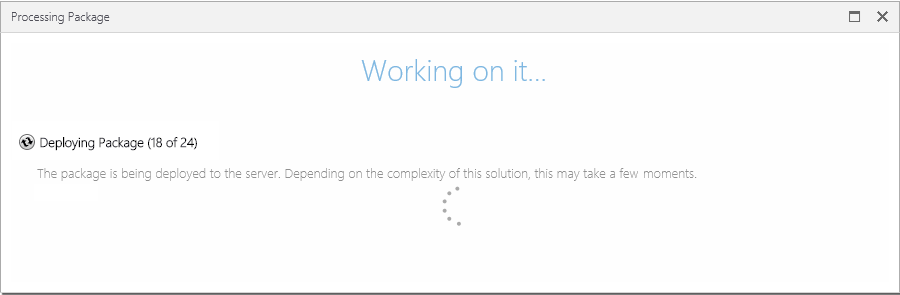
Step 7: Working
While the package is being deployed, the Working on it screen will show.
Step 8: Report
Once the package has been deployed, a summary report will show. If any errors occurred they will be reported here. Use the Download Log File button to save a local copy of the deployment log (the log file can be used to troubleshoot an issue. Click on OK to conclude the deployment process.
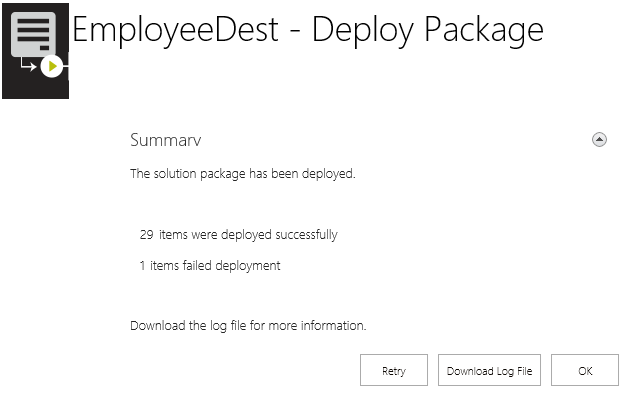
If any artifacts failed to deploy, use the log file to investigate what the problem is. Once the problem is resolved (i.e. the Mail Server is back online), click on the Retry button to re-deploy the package.
K2 Package and Deployment can package the following K2 artifacts created in the context of K2 for SharePoint:
- K2 SmartObjects
- K2 Forms
- K2 Workflows
- K2 Workflow Reports
K2 Package and Deployment will not package the following:
- SharePoint Lists or Libraries
- SharePoint items (data in the list or libraries)
- SharePoint fields, columns or content types
- SmartObject data
- Report data
Do not rename the system names of SharePoint auto-generated SmartObjects, views and forms.