Adding the SharePoint Security Token Service (STS) with the K2 Management site
This topic refers to legacy products, components or features. Therefore, this topic is offered "as is" and will no longer be updated. This topic does not infer that the product, component or feature is supported, or that the product, component or feature will continue to function as described herein.
K2 allows for the use of incoming claims from SharePoint 2010 CBA-enabled sites. K2 must be configured to register the SharePoint Security Token Service (STS) certificates and map the incoming claims that contain user and group information to the appropriate K2 User Manager. This topic explains the configuration settings required, and how to determine them.
Before continuing with this topic, ensure that the appropriate security labels and identity providers are set up in your K2 environment. See the Authentication and Authorization topics for more information.
Steps
- Open SharePoint 2010 Management Shell on your SharePoint Central Administration machine
- Run the following command in the Management Shell to obtain the STS thumbprint :
(Get-SPServiceApplication -Name SecurityTokenServiceApplication).SigningCertificateThumbprint
(This command also returns the thumbprint on a SharePoint 2013 system) - The result will be the SharePoint STS thumbprint. For example:
DA85A4B6802FB7AC711078173B01E5D9FF1FC73D
Copy and paste/make a note of this value since you will use this value in a later step.
- Open the Manage Issuers form in the K2 Management Site. See the image below as a reference.

- Click on New.

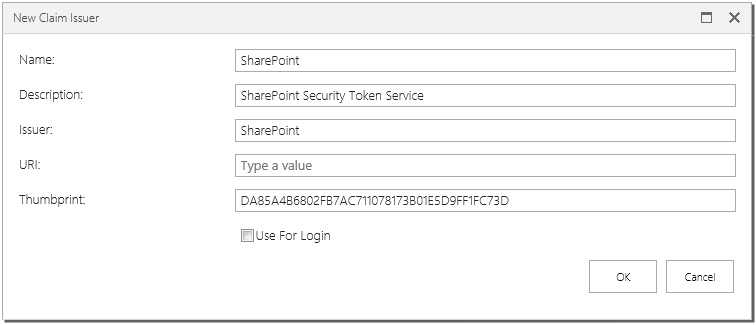
- Fill in the issuer information as shown below, using the issuer thumbprint from Step 1 and inserting it into the Thumbprint textbox

- Click OK to save changes
- Using the K2 management site, open the Manage Claims form. See the image below as a reference.

- Click on New in the Security Labels section

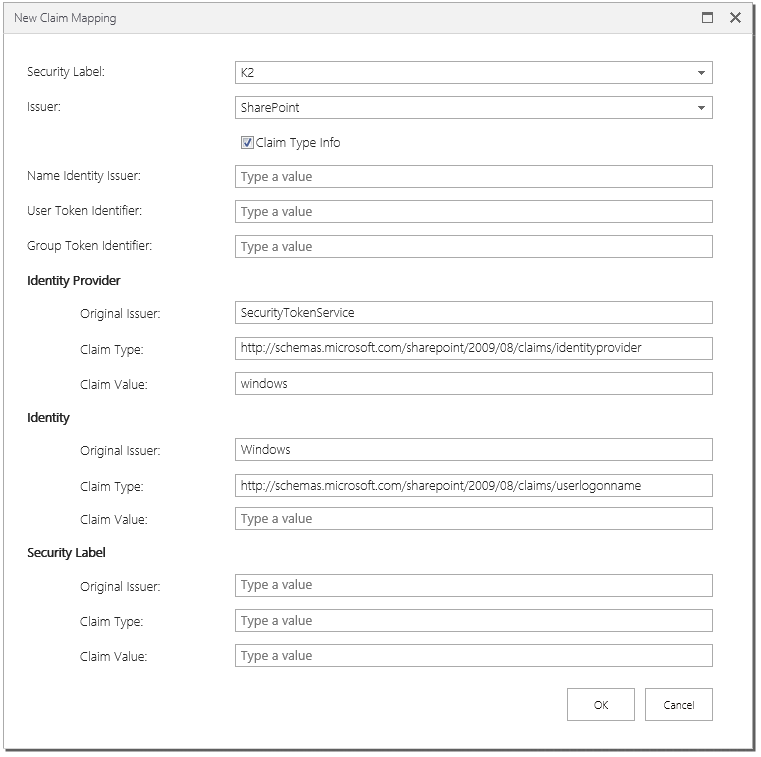
- Fill in the mapping information. In this example below uses the Windows STS. For Forms STS or ADFS STS, refer to the tables below this screenshot.Note that these values are case-senstive and must be entered in exactly the same case as defined in the source system

Forms STS
Parameter Value Security Label K2FORMS (this is the security label you have already set up for Forms Authentication). Identity Provider Claim Value forms:ldapmembershipprovider (this is the identity provider you have already set up for Forms Authentication). Identity Original Issuer Forms:LdapMembershipProvider (this is the identity Original Issuer you have already set up for Forms Authentication). ADFS STS
Parameter Value Security Label K2ADFS (this is the security label you have already set up for ADFS Authentication). Identity Provider Claim Value trusted:adfs (this is the identity provider you have already set up for ADFS Authentication). Identity Claim Type Depending on how you set up your SharePoint ADFS provider, this value could be:
http://schemas.xmlsoap.org/ws/2005/05/identity/claims/upn
or
http://schemas.xmlsoap.org/ws/2005/05/identity/claims/nameIdentity Original Issuer TrustedProvider:ADFS (this is the identity Original Issuer you have already set up for ADFS Authentication). - Click OK to save changes.
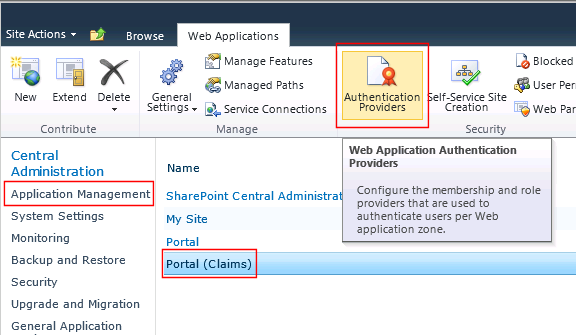
- Open the SharePoint Central Administration site.
- Select Application Management in the left-hand menu.
- Select your Claims web application. For example: Portal (Claims).
- Select Authentication Providers in the Web Applications ribbon

- Select Default on the Authentication Providers page.
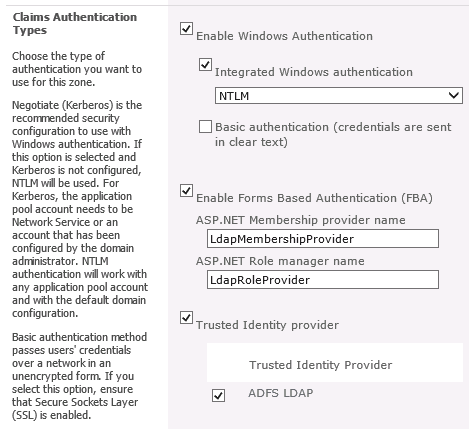
- Scroll down to Claims Authentication Types and select the authentication required.

- Click Save to continue.