Configure SmartForms for SQL Server User Manager (SQLUM)
This document outlines the configuration steps necessary for enabling SQL Server User Manager (SQLUM) for K2 smartforms sites.
Prerequisites
The following prerequisites are required for configuring SmartForms for SQLUM:
- K2 blackpearl **
- Microsoft .NET Framework **
** For version information, see the K2 Compatibility Matrix online.
High Level Configuration Steps
These high-level steps are provided for those familiar with configuring claims integration, for detailed steps see the Detailed Steps section below.
- [Optional] SSL-enable the web site that hosts the K2 smartforms virtual directories
- Configure the K2 SQLUM Security Provider
- Configure the K2 Forms STS for login
- Configure the Claim Mappings in K2
- Configure the Realm to Issuer Mappings in K2
Detailed Steps
It is not required to have your SmartForms site enabled for SSL but it is recommended.
- Open Internet Information Services (IIS) Manager.
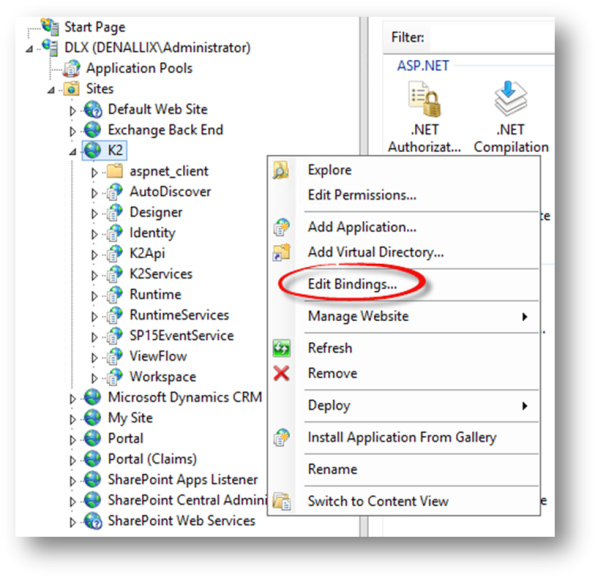
- In this example the K2 site is used. Right click the K2 site and select Edit Bindings.
- Click Add.
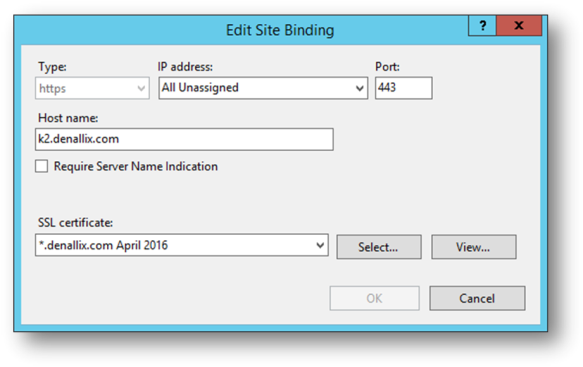
- Select https from the Type drop down list and type a new number into the Port field.
- Select the certificate used for your site. In this example it is the *.denallix.com April 2015 Certificate, which was purchased from a valid Certificate Authority.
When working with systems that are internal to the organization, Self-signed and Domain Certificates can work in the place of purchased certificates. If you plan to also integrate with an online system like Azure Active Directory you will need to use a purchased certificate.
- To make sure that the new HTTPS configuration is updated properly in the K2 configuration rerun the K2 blackpearl Setup Manager and the K2 SmartForms Setup Manager
In order for K2 to authenticate the users against SQLUM a K2 Security Provider needs to be installed and configured.
- Open SQL Manager and connect to the SQL Server where the K2 database is hosted.
- Execute the following query to register the SQLUM security provider.
USE K2
GO
-- DECLARATIONS
--SECURITY
DECLARE @SecurityLabelName NVARCHAR(20)= 'K2SQL'; -- Update as needed
DECLARE @SecurityLabelID UNIQUEIDENTIFIER ='8e8d5221-ee89-4cd7-99da-fcfcdf64abdb';
DECLARE @AuthSecurityProviderID UNIQUEIDENTIFIER ='fc1848e6-23f5-49d8-8c48-9f7b197c80b7';
DECLARE @AuthInit XML= N'<AuthInit>
<init>DLX,K2</init>
<login/>
<implementation assembly="SQLUM, Version=4.0.0.0, Culture=neutral, PublicKeyToken=16a2c5aaaa1b130d" type="SQLUM.K2UserManager"/>
</AuthInit>' -- XML configuration for the SQL provider, see K2 Help for more information on configuration values
--ROLES
DECLARE @RoleSecurityProviderID UNIQUEIDENTIFIER = @AuthSecurityProviderID;
DECLARE @RoleInit XML= N'<roleprovider>
<init>SA-LABSDLX,K2</init>
<login />
<implementation assembly="SQLUM, Version=4.0.0.0, Culture=neutral, PublicKeyToken=16a2c5aaaa1b130d" type="SQLUM.K2UserManager" />
<properties>
<user>
<property name="Name" type="System.String" />
<property name="Description" type="System.String" />
<property name="Email" type="System.String" />
<property name="Manager" type="System.String" />
<property name="DisplayName" type="System.String" />
</user>
<group>
<property name="Name" type="System.String" />
<property name="Description" type="System.String" />
<property name="Email" type="System.String" />
</group>
</properties>
</roleprovider>' -- XML configuration for the SQL provider, see K2 Help for more information on configuration values
DECLARE @DefaultLabel BIT= NULL;--1 = true, NULL and 0 = false
-- UPDATE TABLES
DELETE FROM [HostServer].[SecurityLabel]
WHERE SecurityLabelName= @SecurityLabelName;
INSERT INTO [HostServer].[SecurityLabel]
VALUES (@SecurityLabelID,@SecurityLabelName,@AuthSecurityProviderID,@AuthInit,@RoleSecurityProviderID,@RoleInit,@DefaultLabel)
- Restart the K2 blackpearl service.
In order to be able to use the K2 Forms STS for login, the Use for Login setting for the issuer needs to be set to true.
- Open the K2 Management site and browse to Authentication > Claims > Issuers.
- Select the K2 Forms STS and click Edit.
- Check the Use for Login checkbox and click OK.
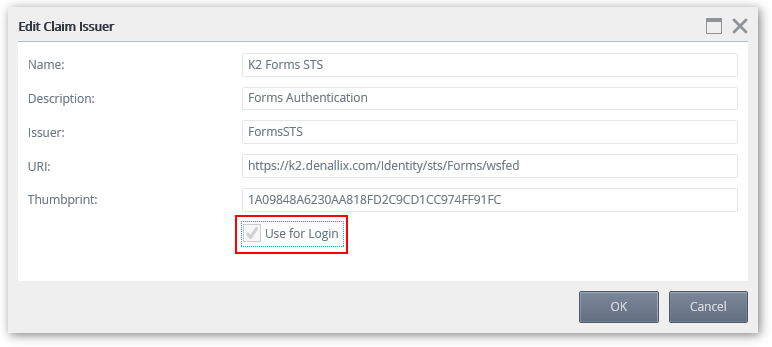
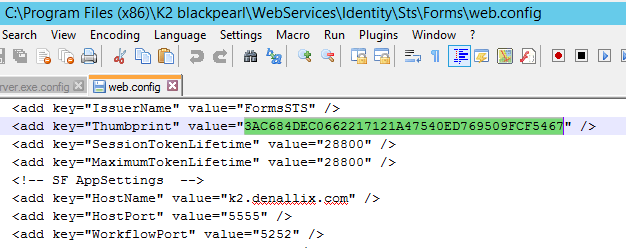
The thumbprint can be obtained from the web.config file located at the following address: C:\Program Files (x86)\K2 blackpearl\WebServices\Identity\Sts\Forms\web.config
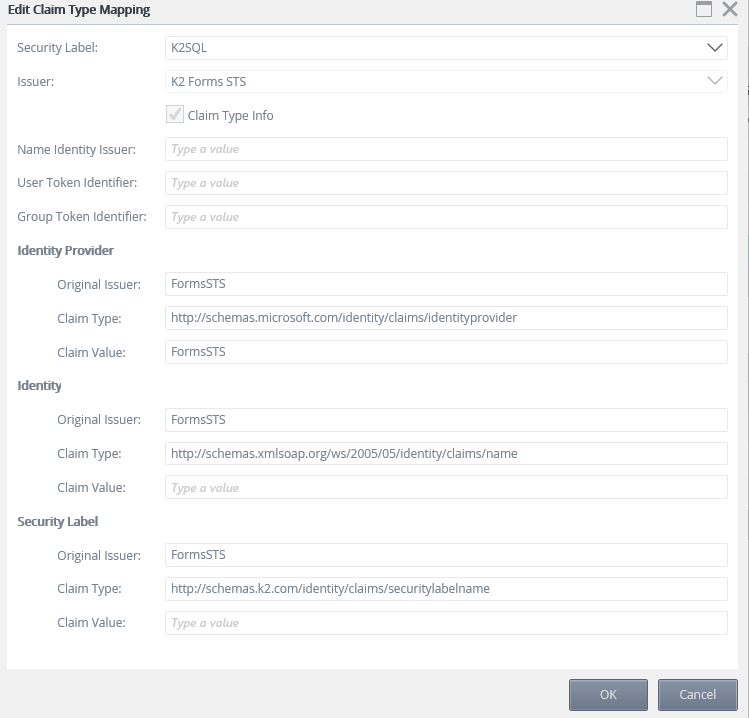
Claim mappings are used to identify the incoming claims and map them to the appropriate K2 security label.
- Open the K2 Management site and browse to Authentication > Claims > Claims.
- Click New on the Security Label section, the New Claim Mapping page opens.
- Select the Security Provider you configured in Step 2 from the Security Label drop down.
- Ensure the Claim Type Info checkbox is checked.
- Select K2 Forms STS from the Issuer drop down.
- For the Identity Provider Original Issuer textbox enter FormsSTS.
- For the Identity Provider Claim Type textbox enter http://schemas.microsoft.com/identity/claims/identityprovider.
- For the Identity Provider Claim Value textbox enter FormsSTS.
- For the Identity Original Issuer textbox enter FormsSTS.
- For the Identity Claim Type textbox enter http://schemas.xmlsoap.org/ws/2005/05/identity/claims/name.
- Leave the Identity Claim Value textbox empty as this claim will be different for each user at runtime.
- For Security Label Original Issuer textbox enter FormsSTS.
- For Security Label Claim Type textbox enter http://schemas.k2.com/identity/claims/securitylabelname.
- Click OK to add the mapping.
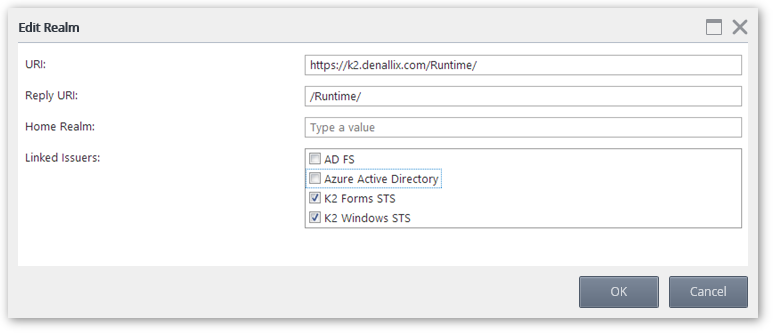
The Realm is the unique value that associates the SmartForms site with the claims authentication options. Audience URIs are the actual URLs that will be used to access the SmartForms site. Additional Audience URIs can be specified for a single Realm. For example if you use https://k2.denallix.com/Runtime and http://dlx:81/Runtime to access the SmartForms site you will need both URLs registered as Audience URIs.
- Open the K2 Management site and browse to Authentication > Claims > Realms.
- The list of Realms should be pre-configured with your Runtime, Designer, and View Flow realms and Audience URIs. For each realm that you want to enable SQLUM authentication on, follow the steps below:
- Select the desired Realm and click Edit.
- In the Edit Realm dialog use the check box list to select the desired issuers to map to the realm. For SQLUM select the K2 Forms STS.
- Click OK.
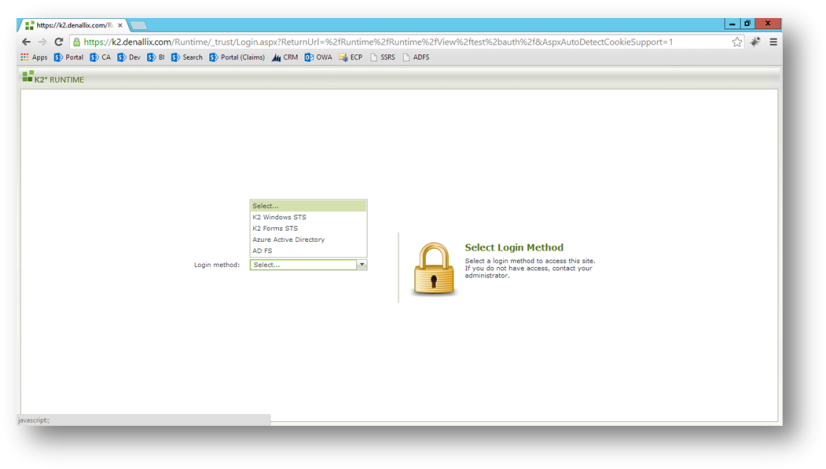
If K2 Forms STS is the only authentication configured in the Realm to Issuer mapping then you should be redirected to a login screen. If there are other authentication modes configured then you will see a page with a drop down that lets you select the authentication type that you want to use. You may need to clear your browser cache to clear any currently cached credentials.