K2 Workspace Website Configuration for a Standalone installation
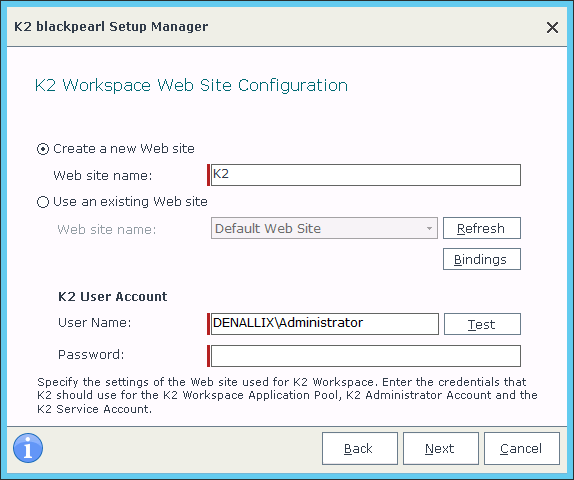
The K2 Workspace Website Configuration screen enables:
- The creation of the K2 Workspace website
- The ability to select an existing site if one exists
- If multiple IIS bindings are used, the installer will allow the user to select one
If you create a new site with the installer, a K2 Self Signed Certificate will be automatically generated and used. If you choose an existing site, that site must have a certificate.
 |
When selecting "Use an existing Web Site", this site must already exist. |
| Feature | Description |
|---|---|
|
Create a New Web Site |
If the user wants to create a new site, type the name in the Web Site Name field, and K2 will create it automatically. |
|
Use an Existing Web Site Name |
The name of the site that was created under IIS. Use the Bindings button to select which binding to use. Note: The site can be created without closing the K2 Setup Manager. Click Refresh to reload the list of available web site options. |
|
Test the User Account credentials |
To test the username / password combination, click the Test button. |
 |
If no site is listed in the Web Site drop down, one may need to be created. Type in the name of the web site you want to create, and K2 will do the rest. If a site was recently created and does not display, you may need to perform an IIS reset. Then, click the Refresh button on this page. |
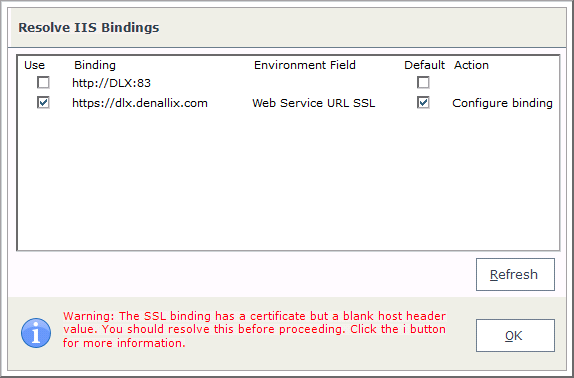
Bindings button and pop-up panel
|
Bindings refers to the bindings for the website as set up in IIS. |
The Bindings panel can be shown by clicking the Bindings button, but will otherwise be hidden as the Setup Manager takes care of Bindings configuration in the background, except under the following conditions:
- The Bindings panel will be shown if you have a Binding on your website set up in IIS with a wildcard certificate and with no host name entry. In this case the Bindings panel will show a Binding in this format:
https://[MachineName].[domain].com:443
You're free to use this if you do not want to set up a Host Header. If you want to use a Host Header, see the following points:- If you select this Binding and are using IIS 7.5, you will need to resolve the Binding by following the steps shown in this article: http://www.sslshopper.com/article-ssl-host-headers-in-iis-7.html
- If you are using IIS 8, simply edit the Binding in IIS and enter a host header.
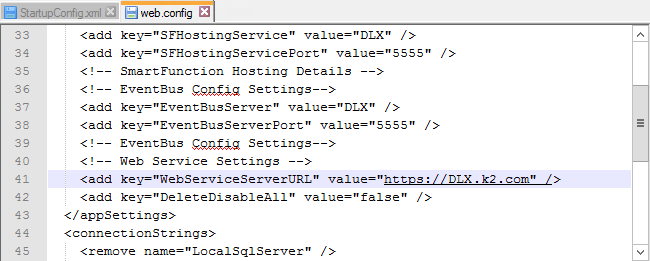
- The Bindings panel will be shown if the Setup Manager detects that the value (WebServiceServerURL) in the Workspace web.config file does not match the selected Binding in the Bindings panel. In this case you will need to select the Binding seen in the web.config for your site to work.
|
If, during an Upgrade or Reconfigure, the selected Bindings don't match the STS Issuers in the database, the Resolve STS Issuers panel will be shown. See the Resolve Security Token Service Issuers topic for more information. |
|
During an Upgrade or Reconfigure, if the Setup Manager detects that the selected IIS bindings do not match the Uri configured as the K2 Windows STS in the Identity.ClaimIssuer table of the K2 database, the Resolve Security Token Service Issuers panel will be displayed. |
What to do on this page
If the Workspace web site is going to be installed over a load balanced environment, enter the load balanced URL here. Also, if HTTPs is chosen for the web site, you need to have already set up the binding and certificate.er
To configure the K2 Workspace Web Site:
Option 1- Create a new web site:
 |
Enter the name for the New web site |
 |
Click Next to proceed |
 |
The Setup Manager will create the new Web site |
|
Two bindings will be created with the default set to HTTP. The bindings panel will not be shown unless you click on the Binding button and this is the only time a security certificate will be created (K2 self sign cert). |
Option 2 - Use an existing Web site
|
Select the web site to use from the Web Site drop down menu |
|
Click Next to proceed |
|
The bindings panel will be shown next and a default selected. If HTTPs is selected, you must use your own security certificate. Only 2 binding may be chosen, 1 of each type. |
