InfoPath Client Event
What does the InfoPath Client Event Wizard Do?
The InfoPath Client Event wizard provides integration of InfoPath forms as part of a process that uses InfoPath forms for client events (assigning tasks for users to action as part of the workflow). The InfoPath Client Event wizard can be chained to the configuration of the InfoPath Integration process wizard or invoked directly by placing an InfoPath Client Event in a process not previously configured with the InfoPath Integration Process wizard.
If the InfoPath Client Event wizard is placed onto a process that has not previously been configured with the InfoPath Integration Process wizard, the first few pages shown by the InfoPath Client Event wizard are pages from the InfoPath Integration Process wizard. With the InfoPath Client Event, any process can utilize an InfoPath form as part of a client event that you can use to take action on a workflow.
Note: InfoPath is a deprecated Microsoft product, and as such should not be used for new processes. Rather use ASPX forms or SmartForms. If you do use InfoPath forms note that they must be published in a version compatible with K2, namely InfoPath 2010.
Using the InfoPath Client Event Wizard
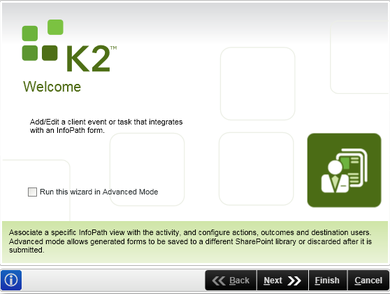
To start the InfoPath Client Event wizard, select the InfoPath Client Event wizard from the toolbox and drop it onto the design canvas or your activity.
If the InfoPath Integration wizard has not been configured prior to the InfoPath Client Event wizard, the K2 designer automatically opens the InfoPath Integration Process wizard for configuration followed by the InfoPath Client Event wizard.
| Field | Description | Sample Value |
|---|---|---|
| Run this wizard in Advanced Mode | Selecting this check box runs the InfoPath Integration Process wizard in advanced Mode | Click on the check box to run the wizard in advanced Mode |
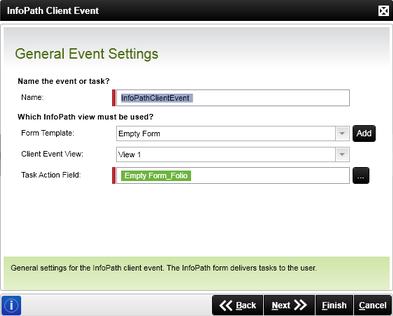
The General Event Settings Wizard page configures the settings for the InfoPath Client Event wizard.
| Field | Description | Sample Value |
|---|---|---|
| Name | Adds a name for the specific event or task | Type in a name or use the eclipse button to browse to an existing event or task |
| Form Template | Select the specific InfoPath Form Template View to use with the workflow | Click on the down arrow to browse form tTemplates and click on the one to use in the woorkflow. Click on the Add button to add a new Form Template. |
| Client Event View | Displays a list of available Views that can be used. This view is the view that is used as the first view of the InfoPath forms that is displayed to the user when opening the InfoPath form | Click on the down arrow to browse Client Event Views and select the Client Event View to be used with the workflow. |
| Task Action Field | The Task Action Field is used to select which workflow action to associate with the form. If the task action fields have not been bound in InfoPath, a message is displayed where the fields can be bound automatically by the wizard. Alternatively you could bind them manually within InfoPath before running the workflow. | Add a task action field to be used with the workflow if required. |
The task action field must be specified by the time the workflow is run for the form & workflow step to function.
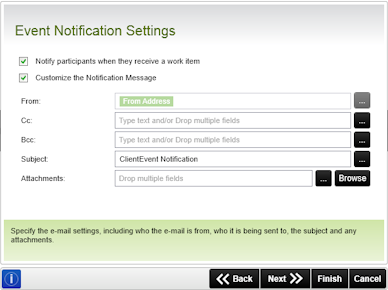
The Event Notification Settings Wizard page allows you to set whether an event notification should be sent to the destination user.
This step in the wizard is optional, if no configuration is required click Next to continue
| Field | Description | Sample Value |
|---|---|---|
| Notify participants when they receive a work item | Activates the event notification. | Select whether a notification should be sent to the destination user(s). |
| Customize the Notification Message |
Specifies that a customized notification message should be sent to the selected destination users. Selecting this option opens the Event Notification Message wizard page when the Next button is pressed. |
Select whether to customize the notification setting. |
| From | The address from which the email comes. | Either enter the address directly or use the ellipsis buttons to open the context browser and build an expression for the address. |
| Cc | The list of addresses to "carbon copy" the message to. | Either enter the addresses directly or use the ellipsis buttons to open the context browser and build an expression for the addresses. |
| Bcc | The list of addresses to "blind carbon copy" the message to. | Either enter the addresses directly or use the ellipsis buttons to open the context browser and build an expression for the addresses. |
| Subject | Supplies the customized subject line for the notification message. | Type in the relevant Subject for the notification message in the supplied text box. |
| Attachments | Lists either the files or the expressions / fields describing files to attach to the message. | Use the Browse button to select files to attach or the ellipsis buttons to open the context browser to drag fields describing the files. |
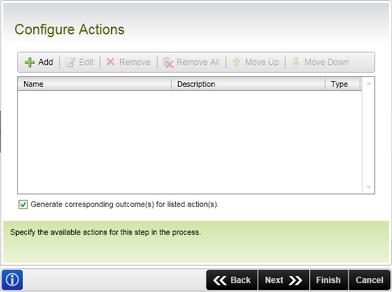
The actions determine the response that can be given at run time by the user. The action can be made to correspond to the outcome. The Configure Actions dialog enables you to custom create actions.
An action can have a type of Finish or Update.
- Finish - Finishes processes and moves onto the next activity. An action of this type always has a corresponding outcome.
- Update - Saves the activity and does not have an outcome
For every activity containing actions, at least one of the actions must be a Finish action.
| Field | Description | Sample Value |
|---|---|---|
| Add | Creates a new action, listing the action for the current activity | Click the Add button to add an action to the process |
| Edit | Edits the selected action | Click Edit to edit the selected action |
| Remove | Removes the selected action from the actions list | Click Remove to remove the selected action from the process |
| Remove All | Removes all the actions from the list when clicked | Click Remove All to remove all the actions from the list |
| Generate corresponding outcomes for listed actions | Actions can be configured to correspond to outcomes. Where the actions do, enable this option and the outcomes will be created automatically. | Select this check box to generate corresponding outcomes for listed actions |
| Move Up | Changes the order of the actions. Actions are listed in the order in which they appear at design time | Select the required Action and click Move Up to move the Action one place up |
| Move Down | Changes the order of the Actions. Actions are listed in the order in which they appear at design time | Select the required Action and click Move Down to move the Action one place down |
Configured Actions - Available as K2 SmartActions
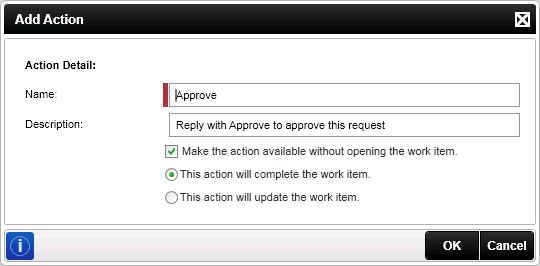
Shown below is a populated example of an action which, although normally used internal to the process and actioned by a user form, is used as a K2 SmartAction keyword response. The keyword is entered into an email initially sent by the K2 Server. A reply from the workflow participant with the action keyword is sent back to the K2 server, which then actions the task on the user's behalf, but only if that task is configured to be available without opening the work item.
For performance reasons, all configured actions are listed in the email but may not be available to action via SmartActions. It is up to you to configure the notification and server responses to guide the user when actions cannot be executed without opening the form
| Field | Description | Sample Value |
|---|---|---|
| Name | The name of the action which is available both as a SmartAction and a batch action | The name surfaces as an action when configuring a user form, it is also used as a keyword when actioning task list items by sending a message to the K2 server. |
| Description | The description can be used to describe the action and what the outcome of the action will be. | Populate the description field with comprehensive wording since the description can be added to a customized email later on. |
|
Make the action available without opening the work item |
Feature related to SmartActions and to batch actioning. No user form is required and the action can be used as a key word in an message type response to action a worklist item |
Enable to the option; this allows the action to surface in the object browser and be available as an action. |
|
This action will complete the work item |
This will finish the event and continue with the next step in the process | Click on the option button |
|
This action will update the work item |
This performs a save on the current Event and still waits at the current Event | Click on the option button |
The option "Make the action available without opening the work item." must be selected on the Add Action page of the client event for SmartActions to function.
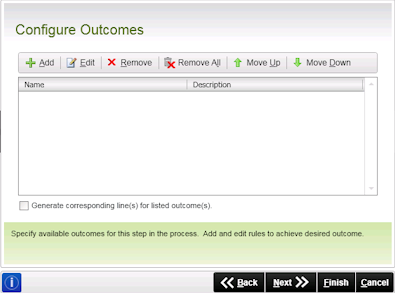
The Configure Outcomes page typically has outcomes generated automatically from actions on the preceding page. The outcomes page is also used to create the lines which connect the current activity to the next step in the process.
| Item | Description | Sample Value |
|---|---|---|
| Add | Adds a new item | Click on the button to add a new outcome |
| Edit | Edits an existing outcome | Select an outcome and click Edit |
| Remove | Removes the selected outcome | Highlight an outcome and Click Remove |
| Remove All | Clears the list of all existing outcomes | Once the outcomes have been removed they cannot be recovered |
| Move Up | Ascends the selected outcome | The selected outcome moves up the list each time the Move Up button is clicked |
| Move Dow | Descends the selected outcomes | The selected outcome moves down the list each time the Move Down button is clicked |
| Generate Corresponding line(s) for listed outcome(s) | Automatically generates the corresponding lines which will connect the current activity to the next one | Enable the check box for the lines to be generated automatically. |
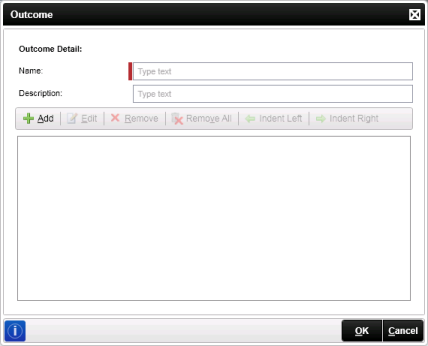
Add New Outcome
The Add Outcomes dialog adds a new outcome detail to the selected action.
| Field | Description | Sample Value |
|---|---|---|
| Name | Provides the outcome with a name | Type in a name for the outcome in the text box |
| Description | Provides the description of the new Outcome | Provide a description of the new outcome in the text box |
Add an Outcome Rule
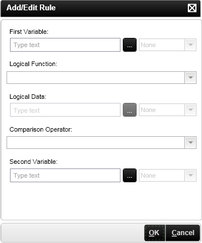
The Add button opens the Add Rule parameters dialog. The dialog is used to compose a line rule expression. This dialog is used to compose expressions for when there is only one rule or more than one. When there is more than one expression per rule, the expressions can be evaluated against each other to determine whether the rule will evaluate to true.
As demonstrated above, the Add / Edit rule dialog enables you to compose an expression that determine the flow of a process.
When composing a rule, if there is no compelling reason for the rule, there is no need to create one. If no expressions appears in the rule list, the Rule automatically resolves to true.
Using the Add / Edit Rule Dialog
The Add / Edit Rule dialog enables you to configure logical criteria to determine when the line rules run.
| Field | Description | Sample Value |
|---|---|---|
| First Variable | The first variable used in the rule expression |
|
| Logical Function | Defines the number of destination users that have actioned a default activity in a specific way | Click this option |
| Comparison Operator | The operator used to compare the first and second variables in the expression |
|
| Second Variable | The second variable used in the rule expression |
|
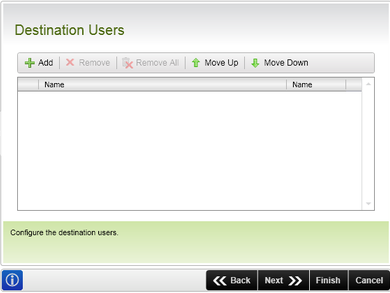
The Destination Users page identifies the who receives the work list item at runtime,
| Field | Description | Sample Value |
|---|---|---|
| Add | Adds a new destination user to the process | Click the Add button to add a destination user to the process |
| Remove | Removes the selected destination user from the outcomes list | Click Remove to remove the selected destination user from the process |
| Remove All | Removes all the destination users from the list | Click Remove All to remove all the destination users from the list |
| Name | Displays the name of the selected user or group | |
| Type | Determines if the destination user is an individual or role definition | Select from the drop-down the type of user |
It is best practice NOT to use the same user as destination user that is also configured as the SharePoint Farm Administrator, SharePoint System Account or the Application Pool Account. A user account should not be used as the SharePoint Farm Administrator, SharePoint System Account or the Application Pool Account.
This page shows that the InfoPath Client Event Wizard configuration has been completed.