Email Event
What does the E-mail Event Wizard Do?
The E-mail Event sends an e-mail to a specified address.
Why use the E-mail Event Wizard?
Use the E-mail Event to send an e-mail from a process that contains process information such as status values and attachments.
Watch a short video on How to use the E-mail wizard in a workflow (15 minutes).
Using the Email Event Wizard
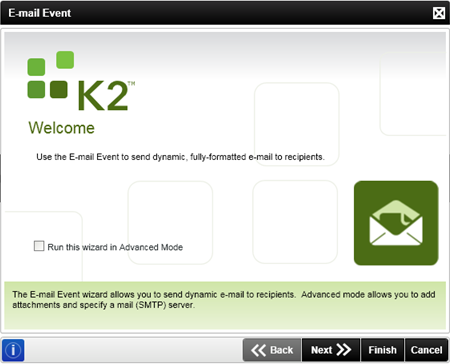
The E-mail Event wizard is available from the K2 Toolbox. To load the E-mail Event onto the canvas, drag it onto the design canvas. The E-mail Event wizard opens.
The Welcome page is the entry point to the wizard and is used to configure the e-mail event in either Standard or Advanced mode.
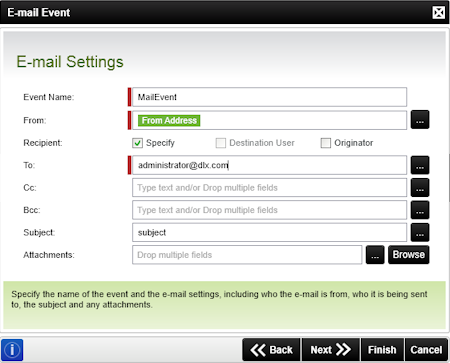
The Settings page captures the information required to send the e-mail to the recipients.
| Field | Description | Sample Value |
|---|---|---|
| Event Name | Capture a descriptive name for the Event. This name will be used in the process and activity instance. The SmartObject node in the object browser will also display this name. | Enter the Event Name e.g Expense Approved Mail. |
| From | The sender's address, it is also used when the destination user replies to the e-mail. | The From address is pre-populated with the value of the From Address environment library field. Enter the e-mail address e.g. Webmaster@K2.com, or use the ellipse button to open the Context Browser and drag the e-mail address or variable to the From field. |
| Recipient |
The options are:
Specify: Requires that the e-mail address be entered directly; a variable entered; or user selected from the data browser. This option is useful when the e-mail address does not change or the destination user is known and static.
|
Select an option. |
| To | The address to which the e-mail is to be sent - whether specified directly or resolved from the process originator or activity destination. In Advanced Mode the Open Advanced Address Collection icon next to the text box is used to specify multiple recipients by using the Message Destination Details page. |
Enter the To e-mail address or use the ellipse button to open Context Browser and drag the 'To' name or variable to the field. In Advanced mode click on the Open Advanced Address Collection icon next to the text box to open the Message Destination Details page. |
| Cc | Captures a Carbon Copy address to which the e-mail must be sent | Enter the CC e-mail address or use the ellipse button to open Context Browser and drag the CC name or variable to the field. In Advanced mode click on the Open Advanced Address Collection icon next to the text box to open the Message Destination Details wizard screen. |
| Bcc | Captures a Blind Carbon Copy e-mail address to which the e-mail will be sent | Enter the BCC e-mail address or use the ellipse button to open Context Browser and drag the BCC name or variable to the field. In Advanced mode click on the Open Advanced Address Collection icon next to the text box to open the Message Destination Details page. |
| Subject | The subject line of the e-mail - often one of the process or activity data fields is used to give context to the e-mail. | Enter the subject e.g. Leave Request Approved. |
| Attachments (Standard Mode) | Lists the location and file name of multiple or single files that must be attached to the mail when the mail is distributed to the recipients. |
Click the Browse button to select a path and file that is accessible by the K2 server at runtime or click the ellipsis button to open the Context Browser and drag the variable to the field. Expressions can also be used to build location and filename. See K2 E-Mail Event - Attachments for more information. |
| Importance (Advanced Mode)
The Importance field replaces the Attachments field when the wizard is run in advanced mode, which displays an additional page to configure multiple attachments. |
A level of importance can be set on an e-mail. The available levels are:
|
Click on the drop-down arrow and select one of the available options |
* The destination user is dependent on the destination rule configuration. If a destination rule or destination user has not been defined for the process the default destination user is used. This is an invalid destination as the default destination user is the K2 server account and will result in the Destination User check box displaying as unavailable. It is recommended that a destination rule is configured for the process activity.
** SharePoint groups do not have an e-mail property, so when SharePoint groups are used as destinations and the e-mail event is set to send mail to the destination user, the destination rule must be set to resolve all groups and roles to users.
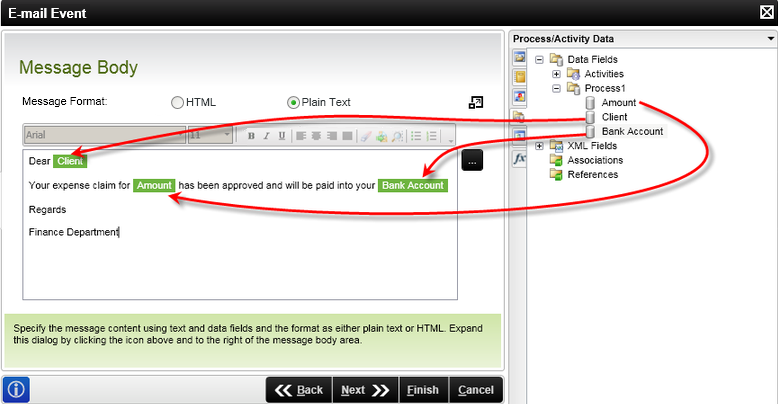
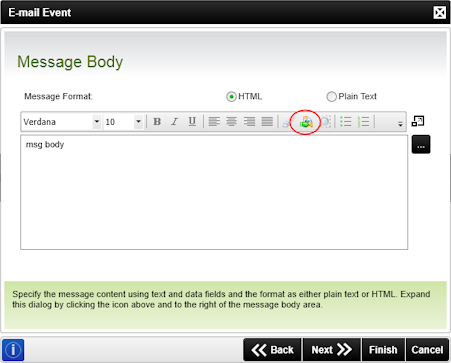
The e-mail message contents may be plain text, a combination of text and data fields or HTML. The data fields can be configured to be populated automatically depending on the criteria specified at design time.

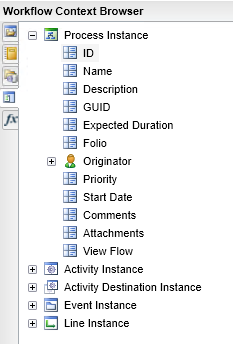
Dynamic e-mail messages can be created by dragging Data Fields and XML Fields from the Context Browser into the body of the message as shown below. The Data Field or XML Field's value are populated at runtime with the current values of the data and XML fields..
When using HTML as the message format, HTML can be loaded from a file in a network location or from a SharePoint Document Library. To access this functionality, click on the Load HTML Template icon as shown below.
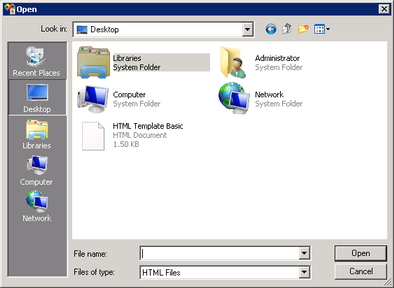
The Open File dialog opens. Navigate to where the HTML file resides and select the file. Click Open.
The HTML is loaded into the Preview pane as shown below.
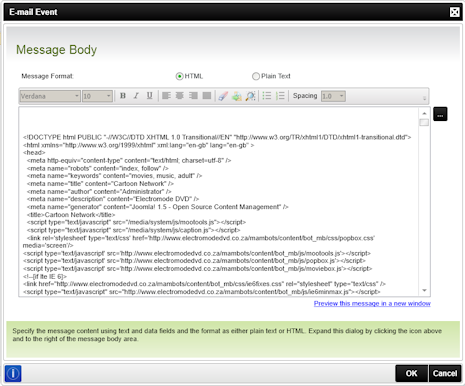
Once the message body has been populated with valid HTML, a Preview this message in a new window link appears. Clicking the link opens the HTML in a window for runtime preview
The e-mail attachments field (simple mode) or page(advanced mode) lists the location and file name of single or multiple files that must be attached to the e-mail. Multiple sources of files can be used for attachments, for example: files returned by a SmartObject method; a base64-encoded XML node; File inline functions; an expression that builds a file path accessible to the K2 server.
In simple mode, attachments are added to the e-mail by clicking the Browse button and locating the files to attach (these files and their location must be available at runtime from the K2 server) or by use of inline functions or fields dragged from the Context Browser (ellipsis button). The Browse button performs the GetFileFromLocation inline function, but allows you to browse the file system with the Open dialog for a file to attach. Each additional file attached to the e-mail displays in a green block, and blocks are separated by a white space but no manually entered delimiter is necessary.
Any combination of the multiple sources mentioned here can be used to retrieve or specify the e-mail attachments. For example, if a SmartObject returns two files and the GetFilesFromLocation function returns one, there will be three files attached to the e-mail.

E-mail Attachments - Workflow Context
Workflows that have attachments enabled include an Attachments node in under Process Instance in the context browser. You can use this node to add attachments to an e-mail.
For more information see How to use the Workflow Attachment and Workflow Comment SmartObjects
Advanced mode is selected on the wizard Welcome pageand differs from the Simple mode in the following ways:
- The Attachments field as seen in the image above for Simple mode is replaced with an E-mail Importance field (High, Normal or Low importance can be selected)
- A new E-mail Event Attachments page is added to the wizard.
The Attachments page is essentially an expanded version of the field from simple mode but allows you to configure multiple attachments on separate lines
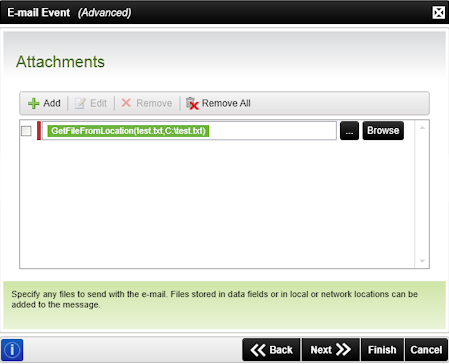
Only a single attachment can be added per line in advanced mode.
| Field | Description | Sample Value |
|---|---|---|
| Add | Add a field for an attachment | Adds a new attachment to the e-mail event |
| Edit | An attachment's configuration can be edited | Edits the existing, selected Mail attachment configuration |
| Remove | An attachment can be deleted if required | Removes the selected attachment listing |
| Remove All | All listed attachments can be removed from the e-mail | Removes all the attachment listings in the dialog |
Attachment File Considerations
The files attached to the e-mail must be stored in a location accessible by the process at runtime. For this to take place effectively, the document must be located in a document share on the network or in a SharePoint Document library. Removable document stores are not recommended Document shares are more reliable in the sense that less infrastructure is required to maintain the integrity of the document and its location. When a SharePoint library is used as the document source location, the document being stored in a shared SharePoint document library cannot be attached to the mail directly.
Also note that since the K2 Service account identity is used to retrieve the files, unless the event is configured to run as a different identity, the K2 Service account must have the proper permissions on the document storage location to read files. See the Run As topic for more information.
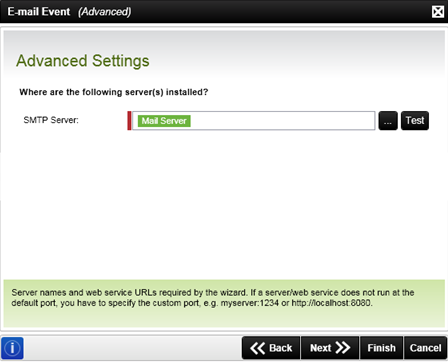
The Advanced Settings page is only available when the wizard is run in advanced mode. This mode enables you to specify a mail server. When configuring a mail server manually, include the server name and port.
| Field | Description | Sample Value |
|---|---|---|
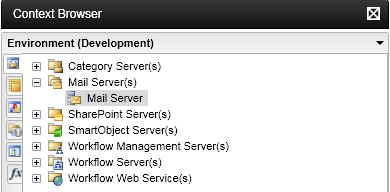
| SMTP server |
The field requires the name of the Mail Server in one of the following configurations
|
Note: This field is required for the Advanced Mode |
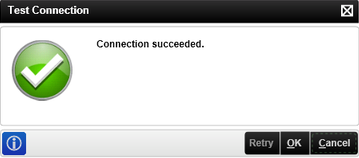
| Test | This button allows you to test the connection to the mail server |
Click on the Test button to test the mail server connection. If successful the following message is displayed:
If the test is unsuccessful check that the Mail Server's configuration |
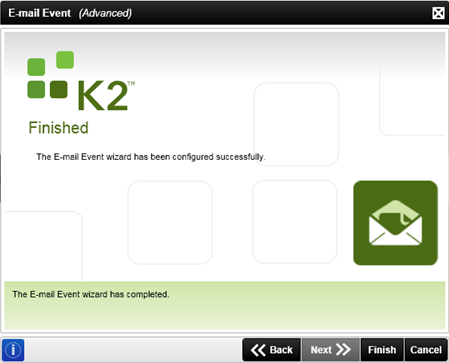
This completes the configuration of the E-mail Event wizard. The wizard can be rerun to make changes if necessary.