Escalations
What do escalation rules do?
The Escalation Rule handles the outcome of a process, activity or event item instance where the designated destination user (the user assigned a task) has not actioned the item within an allocated period.
How are they used?
- Escalations must be configured manually. When an escalation is not configured the process, the activity or event remains unactioned if the destination user does not action it - no further action is taken.
- The way you configure the escalation for the process, activity, or event item is the same. The difference between the escalations are the type of action templates which differ among the three.
The escalation principle applies to a process and an activity since an activity that is not completed prevents an entire process from completing. Escalations can be configured at the process, activity or event level. When configuring an escalation, the objective is to ensure that the process completes in the expected amount of time. When it does not, the escalation rule ensures that a compensating action is taken so that a process or task list item does not go unattended or unactioned. To facilitate this functionality, two base items are configured - an escalation rule and an action template. Two options are available when configuring the escalation rule. The options available when configuring an action template depend on whether the escalation applies to the process, activity or event.
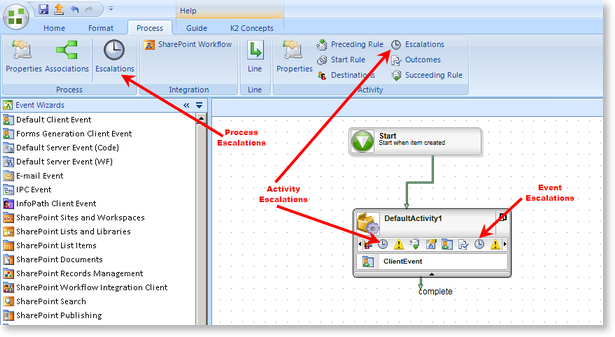
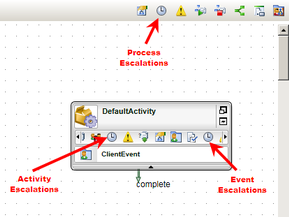
The escalation rule can be configured at the following levels in a process:
| Escalation Levels | |
|---|---|
| Process Level | The process escalates based on the conditions configured at process level |
| Activity Level | The process escalates when the activity is not actioned before the escalation takes place |
| Event Level | The event escalates only the event within the activity. Where multiple events exist within a single activity, one or more events can be expired. When the escalation expires the event, the activity continues to exist until it is completed or is expired by an activity escalation. |
The Add Escalation wizard enables you to select and configure an escalation template. The action template is a defined course of action performed when the escalation occurs. These two make up an escalation.
| Escalation Rule | Process | Default Activity | Event Item |
|---|---|---|---|
| Escalate On |

|
|
|
| Escalate After |
|
|
|
The action template is configured after the escalation rule is configured.
| Escalation Action Templates | Process | Default Activity | Event Item |
|---|---|---|---|
| Default |
|
|
|
|
|
|
|
|
| Expire Activity |
|
||
| Goto Activity |
|
|
|
| Redirect |
|
|

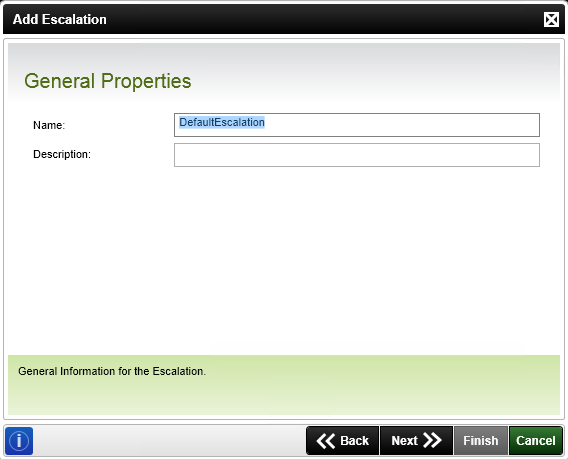
| Field | Description | Sample Value |
|---|---|---|
| Name | The name of the escalation which differentiates the current escalation from any existing or future escalations | |
| Description | Give the escalation rule with a description |
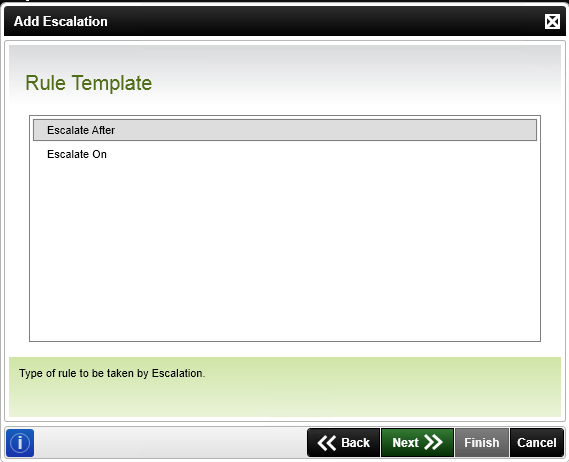
The Rule Template wizard page allows you to configure the escalation. Two types of rules are available for the escalation rule, namely Escalation On and Escalation After. The templates allow you to configure two different escalation mechanisms depending on your scenario.
Escalate After allows you to escalate after a certain number of days, hours, minutes or seconds. Escalate On allows you to escalate on a particular date/time, and that can be dynamic. Both allow you to repeat the escalation a configurable number of times.
| Field | Description | Notes |
|---|---|---|
| Escalate After | The escalation only takes place after the time period expires | Use this type of escalation if you need to escalate once an amount of time has passed |
| Escalate On | Escalates at a particular time | Use this type of escalation if an action or task must be completed within a specific time |
The Escalate After escalation rule is best suited for reusable short duration escalations. For example, submitting a support request or leave request, where a response is expected within a short time and the lack of action requires a short term escalation. The Escalate After rule template configures escalations in days, hours, minutes and seconds. The escalation can be repeated. All fields can be configured using dynamic fields.
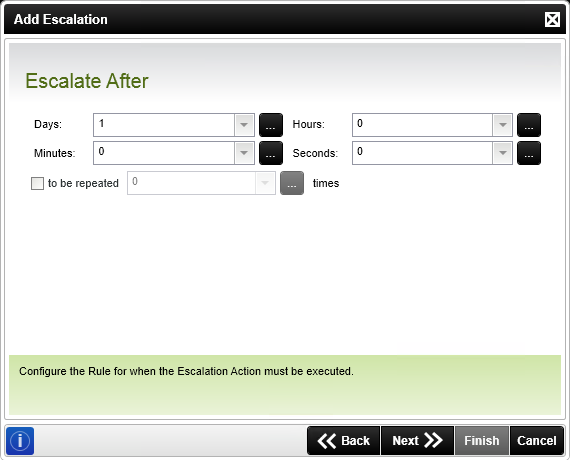
| Field | Description | Sample Value |
|---|---|---|
| Days / Hours / Minutes / Seconds | Set the time allocated for the escalation in Days, Hours, Minutes or Seconds |
Allocate the time manually or use dynamic fields from the context browser. You can also use inline functions to calculate a date and time in the future. |
| to be repeated | This optional setting allows you to repeat the escalation |
Enter a fixed value or use a data field to supply the repeat frequency |
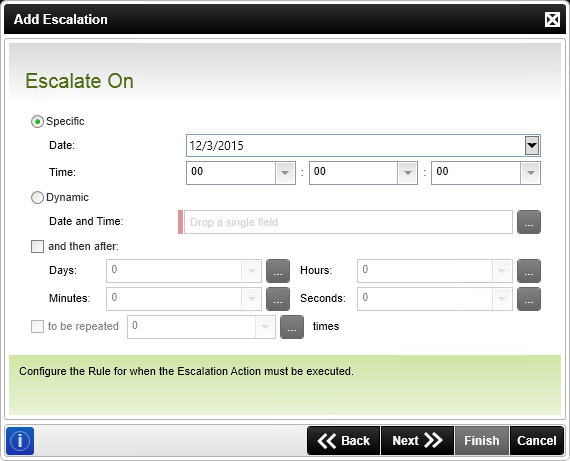
The Escalate On configuration allows you to select a specific date or a dynamic date. Only one of the two options can be selected. The escalation can be extended further by enabling the options for and then after and to be repeated.
Specifying an escalation date hard codes a date and or time by which the escalation occurs. The disadvantage with this option is that once the date is reached, the process needs to be redeployed to the server for new instances of the process to be created. The Specific date functions the same as a hard coded value. Unless it is changed, the escalation takes place if the date specified has expired.
The Dynamic date option allows more flexibility, and the date/time can be from a SmartObjects query, data fields, or an inline function .
Two options are available to extend the escalation using the options
- and then after, and / or
- to be repeated
These features are optional and activated by enabling one or both. The extension does not change the date but extends the time in days, hours, minutes, and seconds, and offers the option to repeat the time. The escalation extension is configured using dynamic fields.
| Specific (Date/Time) | |
|---|---|
| Date | Selects a specific date on which an escalation occurs |
| Time [Hours, Minutes, or Seconds] | Manually configures a set time for the escalation |
| Dynamic | |
| Date and Time | The dynamic date and time can be from a SmartObject, a data field, an inline function or anything else that you can drag from the context browser. |
Make a selection between the two options above. Both options below can be used to extend the escalation configuration.
| Extending the Escalation | |
|---|---|
| and then after | This time setting can be configured with a set value or use dynamic fields |
| to be repeated | This time setting can be configured with a set value or use dynamic fields |
When selecting the option to extend the escalation by selecting and then after or to be repeated, the extension is added to the date and only executes after the date has been reached AND the extension is complete. For example if you are using a dynamic date of 1/1/2017 and select and then after to be 1 Day, the escalation only fires on the dynamically set date PLUS the and then after value which is 1/2/2017 in this case.
It is important to note that the escalation only runs on the dynamically set date PLUS the and then after value. It does NOT fire once on the dynamically set date and then again one day later. It only fires once. If you need to fire an escalation more than once, use the to be repeated option to repeat the escalation one or more times.
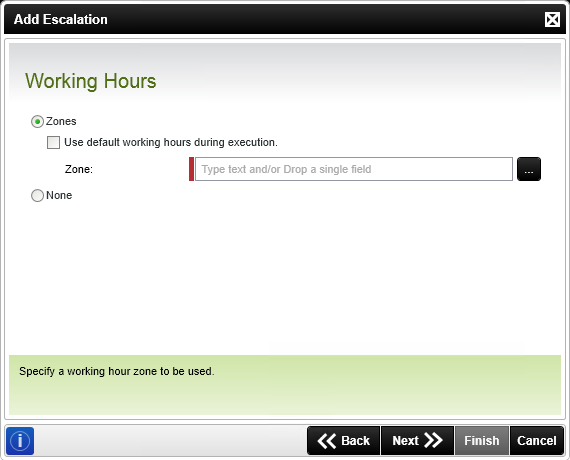
Time-based escalations accumulate time until the task is actioned unless the escalation differentiates between working and non-working hours. The Working Hours page uses Zones to determine when an escalation is active. The active state of the escalation takes into consideration which global time zone the destination user is in and provides an accurate report on the time taken for a task to complete.
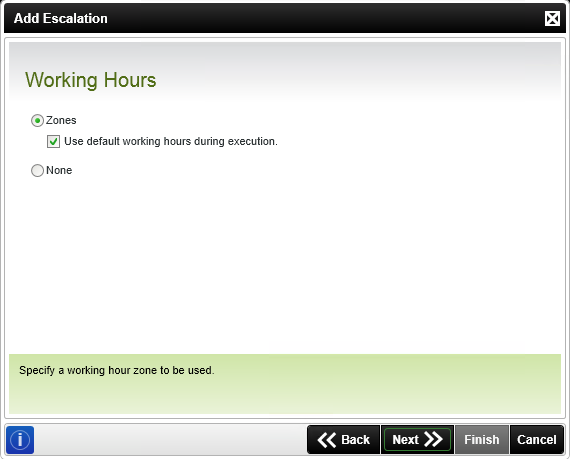
If the Use default working hours during execution is checked, it uses the default zone. If you uncheck the option, the Zone text box is enabled and allows you to drag a zone from the workflow management server node.
Zones are configured in K2 Workspace or K2 Management, and available in the object browser that is accessible by clicking on the Browse (...) button.
| Field | Description | Sample Value |
|---|---|---|
| Use default working hours during execution | Configures the K2 Server to use the default zone. Configure the default zone in the Working Hours management page. This option allows for dynamic zones which automatically change when the default zone is changed in management console. When the check box is unchecked the zone text box appears. | Enable or disable the option |
| Zone | Lists the time zone used when the default zone is not applied. Always uses the stipulated zone for escalation calculations. For the Zone text box to display, uncheck the Use default working hours during execution check box. | Click on the browse button to add a new time zone |
| None | Selecting None uses the K2 Server time to calculate the escalation time | Select the option button |
To add a zone, browse to Workflow Management Server > Zones. The zones that appear can be dropped into the Zone field.
| Field | Description | Sample Value |
|---|---|---|
| Zone | Displays the time zones configured in Workspace Management Server | Select a zone and click Add |
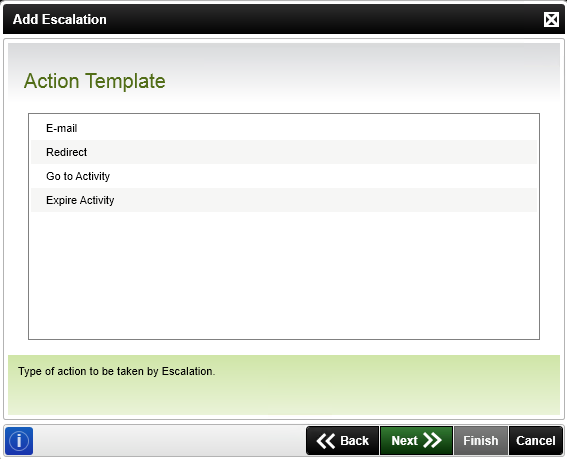
The Action Templates are determined by the context of the escalation.
The Action Template page displays the different system templates that enable you to configure the action taken by the system when the escalation rule is true (i.e. the escalation runs).
| Field | Description |
|---|---|
| An e-mail is sent to a recipient for the purpose of managing the process escalation | |
| Redirect | The activity is redirected |
| Goto Activity | Expires the current activity and moves onto another, specified activity |
| Expire Activity | Expires the current activity |
The e-mail escalation is an action that executes automatically and sends an e-mail. The e-mail acts as the notification to the originator, administrator or any specified recipient that the escalation has been run. The trigger for the e-mail escalation is time. Configure the page to escalate once an allocated time has expired. The E-mail Settings page allows you to configure the e-mail sent to the designated recipient to inform them that a process instance has not been actioned and that the time allocated to the process has expired. The E-mail Action Template is available in the following areas of the K2 Designer:
| Escalation Templates | Process | Default Activity | Event Item |
|---|---|---|---|
|
|
|
|
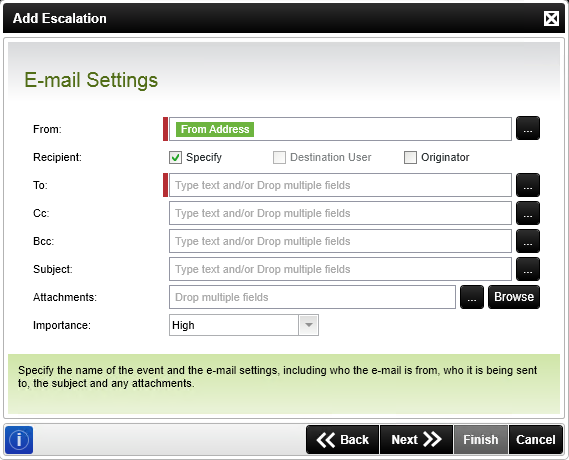
| Field | Description | Sample Value |
|---|---|---|
| From | The sender | Type the From mail address or open the ellipsis and select a dynamic field from the object browser |
| Recipient |
These settings enable advanced configuration of the Mail Settings.
|
If Specify is selected, type the Recipient mail address in the To text box or select a dynamic field from the object browser by clicking on the Advanced Address Collection icon |
| To | The mail recipient | If Specify is selected, type the Recipient mail address in the To text box or select a dynamic field from the object browser by clicking on the Advanced Address Collection icon |
| Cc | Copy a recipient | Type the mail address of the person to copy or open the ellipsis and select a dynamic field from the object browser |
| Bcc | Copy a recipient but without allowing the other recipients to view their address | Type the mail address of the person to blind copy or open the ellipsis and select a dynamic field from the object browser |
| Subject | A text field that contains the subject of the e-mail | Type the subject or open the ellipsis and select a dynamic field from the object browser |
| Attachments | Lists the location and file name of multiple or single files that must be attached to the mail when the mail is distributed to the recipients | Click the Browse button to select a path and file that is accessible by the K2 server at runtime or click the ellipsis button to open the Context Browser and drag the variable to the field. Expressions can also be used to build location and filename. See E-Mail Event - Attachments for more information |
| Importance | The status of importance of the mail. High, Normal and Low is available. The default is High | Select the status from the drop down menu |