Build a Simple Workflow Using K2 Studio
In the next five steps, you will build a very simple workflow using K2 Studio. You will add one user task and two system tasks. After deploying the workflow, you will add workflow rights (or permissions) from the K2 Management site. Finally, you will test the workflow by manually starting a number of process instances from the K2 Management site.
In Step 1, you will build your workflow using K2 Studio.
Step 1 Tasks
- In K2 Studio, create a new project and name it
Workflow Test
then create a new process and name it
Test Process - Add and configure a client event, naming it
User Decision
and choose only the option to notify participants when they receive a worklist item. - Add two actions and name them
Football
Soccer - Add the originator as the destination user.
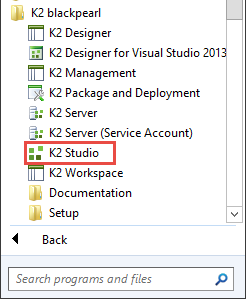
- Launch K2 Studio (Start > All Programs > K2 blackpearl > K2 Studio) (Depending on your K2 blackpearl 4.7 release number, the menu items may be slightly different from the image below. The K2 Studio link should be in place regardless.)
- Start by creating a new project (File > New) using
K2 Project for the K2 Type
and K2 Project for the K2 Template. Name the project
Workflow Test
then click Create. - Next you’ll add a new process (File > New) using
K2 Process for the K2 Type
and Blank Process for the K2 Template. Name the new process
Test Process
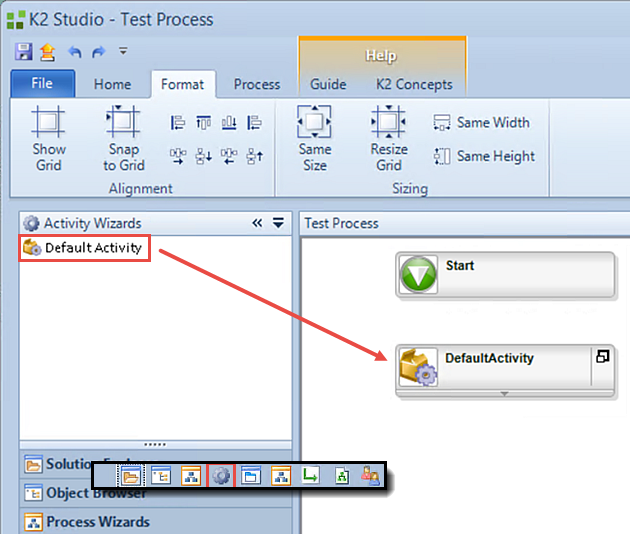
then click Create. - Click on the Activity Wizards bar or icon to expose thewizard options.
- Drag a DefaultActivity onto the canvas, just below the Start box.
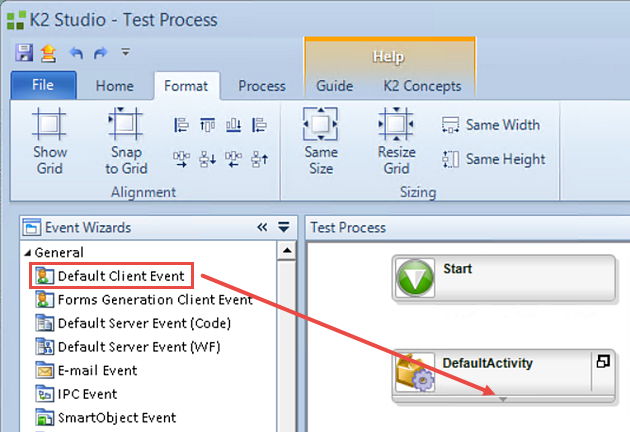
- Click the Event Wizards bar or icon to expose the wizard options.
- Drag a Default Client Event into the DefaultActivity activity. (A client event is just another name for a user task. You will see the terms user task, client task and client event. They are all the same thing.)
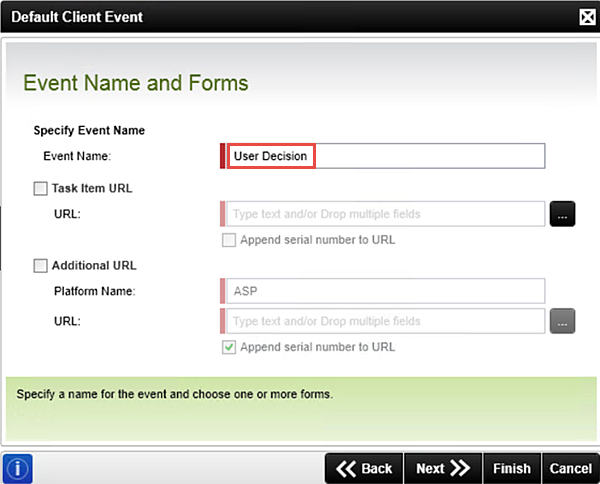
- The Default Client Event wizard opens. Click Next on the home
screen. Name the event
User Decision
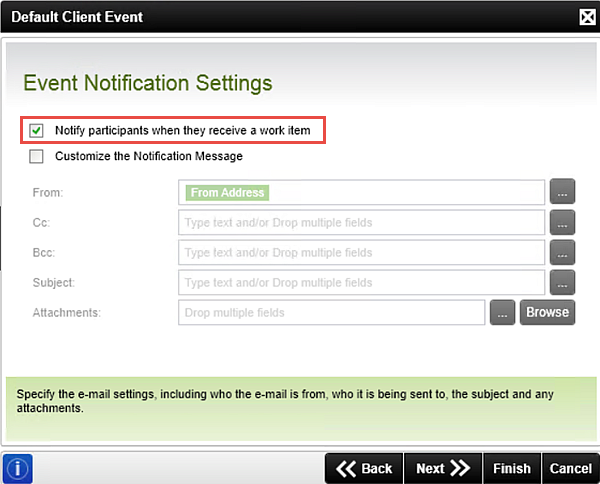
then click Next. - On the Event Notification Settings screen, CHECK the box to Notify participants when they receive a work item. Leave the remaining settings as is and click Next.
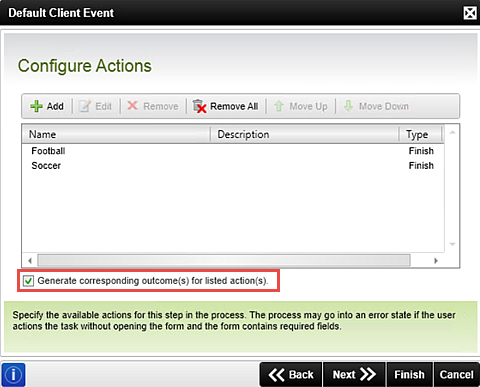
- On the Configure Actions screen, click Add. Enter
Football
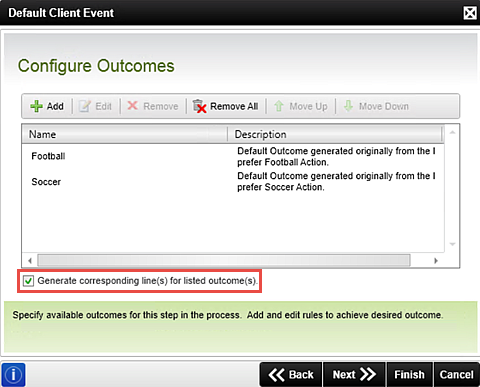
in the name field, then click OK. - On the Configure Outcomes screen, confirm that the Generate corresponding line(s) for listed outcome(s) box is CHECKED and click Next.
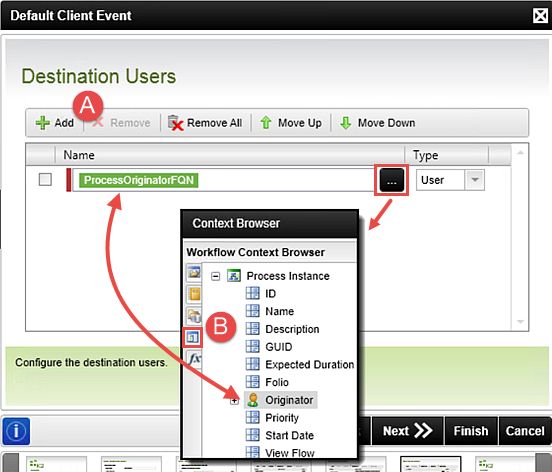
- On the Destination Users screen, click Add. Click the ellipses to the right of the name field to expose the Context Browser. Click the Workflow Context Browser icon, then expand the Process Instance node. Drag the Originator property into the Name field. Click Next, then Finish to complete the client event wizard.
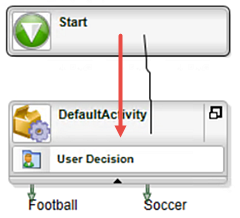
- Right-click inside the Start box and hold+drag down into the DefaultActivity to connect the two workflow steps.

K2 project files can contain a variety of configurations and elements. For example, one project might contain several SmartObjects and several workflow processes. For your installation testing, you will build a K2 project with a single K2 process. Recall that the process is the container for the workflow. The process defines the resources that will integrate with the workflow. You could opt to build a process based on SharePoint or just start with a blank slate, for example. This will allow you to make the necessary configurations for K2 to communicate and interact with specific environments. For your test, you are going to build a blank, or generic, process since you only want to test K2's communication between K2, Exchange and Active Directory.
After the process build is complete, your screen should look similar to the image below. (You may see the wizard bars instead of the wizard icons.) The left column contains the various K2 workflow wizards and browsers. The right side of the screen is devoted to the workflow canvas, where you will drag and drop workflow wizards and tools. At the bottom of the left column are the wizard icons (or bars), each of which containing a variety of wizards and tools you can use to build your workflow.

Your first step is to add an activity to your canvas, and then a user task (event) to that activity. The user task will be assigned to the workflow originator, or more specifically, the person who started the process instance from the K2 Management site.


Now you need to configure the decision options you want to give your participant. These are called actions. Common actions include approved, not approved, rework required. cancel, etc. To keep this workflow simple, you are going to configure two actions, Football and Soccer. (At a later point in the exercise, your participant will need to choose which of the two they prefer.)
Click Add once again and enter
Soccer
in the name field, then click OK.
Confirm that the Generate corresponding outcome(s) for listed action(s) box is CHECKED and click Next.
Here, you are telling K2 to create an outcome for each of your actions. The outcomes are basically the paths that the workflow could take depending on the action decision that is made. In the next step, you will see how K2 automatically creates lines for each of your outcomes. The lines then connect the user task outcomes to their corresponding activities and events.
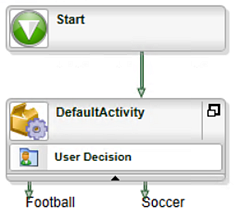
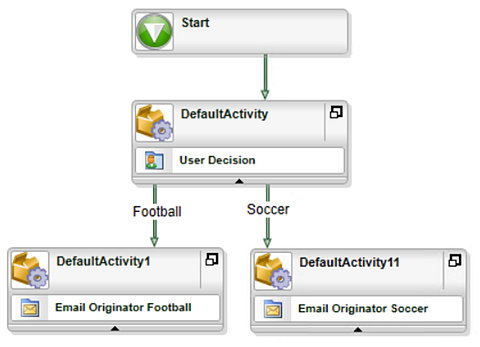
Your screen should look like the image below.
Now you want to tell K2 who to send the task to. This is sometimes referred to as the task participant and sometimes you'll see it referred to as the destination user. In your case, you want your user task assigned to the person who started the workflow (most likely you!). The person who starts a workflow is the originator and many times you will see this person referred to as the form originator, because typically, a workflow would start when a form is submitted. (To keep things simple, you are not going to use a form, but instead will fire off the workflow from the K2 Management site manually.)
You have one last minor detail to address before this step is complete. You need to connect the start box with user decision activity that you just added.
REVIEW
In Step 1 you created your workflow project and added a simple user or client event. You configured two outcomes, Football and Soccer, and added the process originator as the destination user. When you start a new instance of the workflow, K2 will send an email notification to the process originator. This will confirm the K2 server is able to see the process instance (Test Process) and the task manager is functioning properly by sending the task notification email through Exchange.
In Step 2, you will add and configure two system tasks, one for each of the outcomes (Football or Soccer) you configured in Step 1. The system task will send an email to the workflow originator indicating which of the two actions were selected as the outcome.
Step 2 Tasks
- Add another DefaultActivity to the canvas and add an email event to the new activity. Name the email event
Email Originator Football
and make the originator the only recipient. - For the subject line, enter
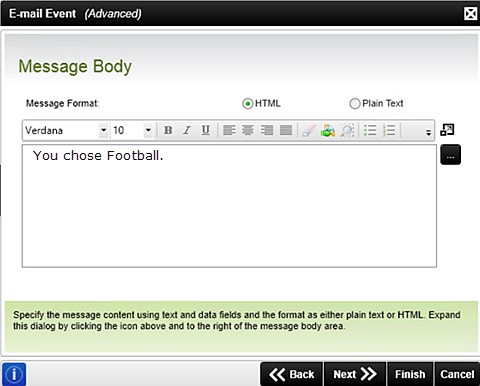
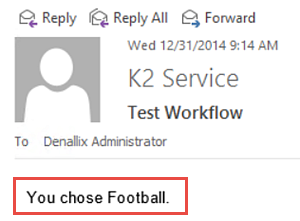
Test Workflow - For the message body, enter
You chose Football. - Copy and paste the football email activity and event to use as the Soccer email activity and event, then change the name to
Email Originator Soccer
then edit the message body to read
You chose Soccer.
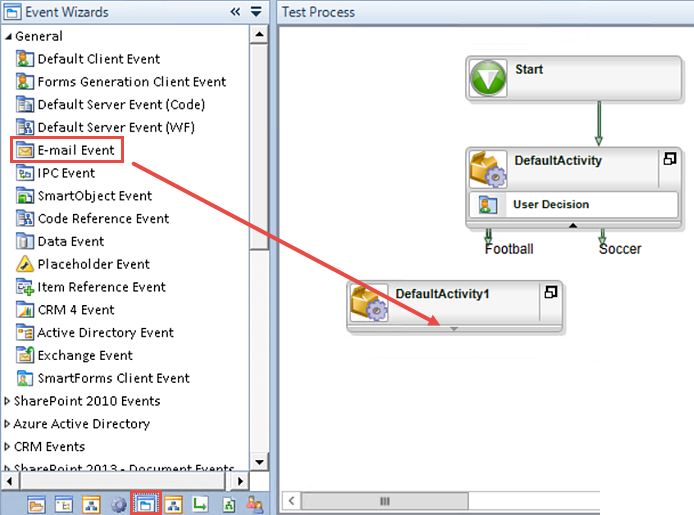
- Click the Activity Wizards bar or icon and add a new DefaultActivity to the workflow canvas, just below the existing DefaultActivity. Off-set the alignment to the left of the DefaultActivity.
- Click the Event Wizards bar or icon and add the E-mail Event to the DefaultActivity1.
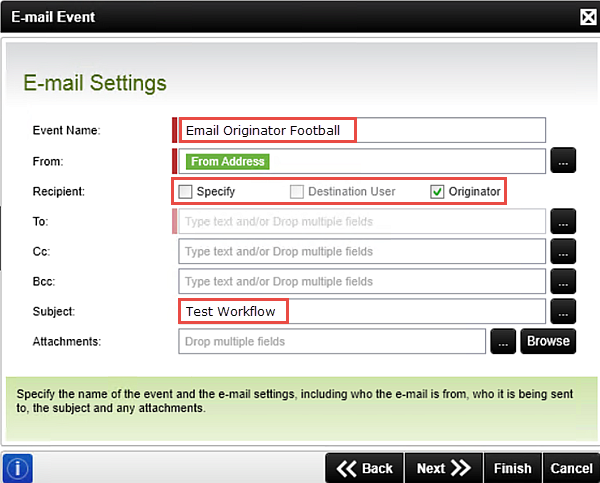
- The email event wizard opens. Click Next on the home screen. Change the
Event Name to
Email Originator Football
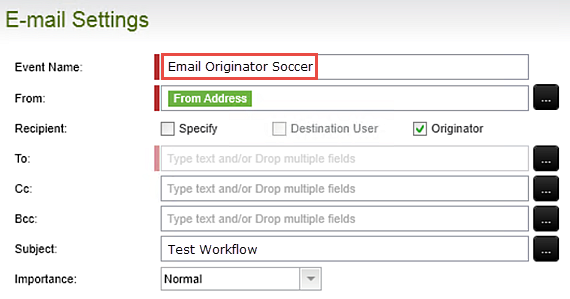
then UNCHECK Specify for the Recipient and CHECK Originator. For the Subject line, enter
Test Workflow
then click Next. - For the message body, enter
You chose Football.
Click Next then Finish. - Click the DefaultActivity1 icon to highlight it and keystroke CTRL-C to copy the activity. Then keystroke CTRL-V to paste a copy of the activity onto the canvas. Move the new activity so that it’s aligned to the right.
- Click the Email Originator Football event title in the (second) DefaultActivity11 to expose the wizard icon. Click the wizard icon to open the wizard.
- On the E-mail Event wizard home screen, click Next. Change the
Event Name to
Email Originator Soccer
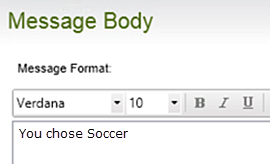
then leave the remaining values as they are and click Next. - Change the message body to
You chose Soccer.
There are no other changes in this wizard, so click Finish - Hover over the green arrow for the Football outcome line until you see the hand cursor. Click+drag the football outcome line into its corresponding DefaultActivity1. Repeat this step for the Soccer outcome line. Save your workflow. (File > Save)
Now that you have configured the confirmation email for the football outcome line, you need to do the same for the soccer outcome line. With K2, you can simply copy and paste activities for reuse within your workflow. (On a side note, you can also copy individual events and paste them into other activities for reuse as well.)
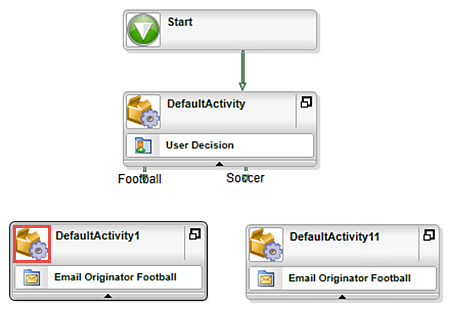

The last step in your workflow is to connect the football and soccer outcome lines with their corresponding activities.
REVIEW
In Step 2 you added two email events (which are system tasks) to the workflow, one for the football outcome line and one for the soccer outcome line. You configured a simple email message for both events. When you test your workflow, you will confirm that K2 sends the correct email message, depending on which user task action was selected.
Before you can start the Test Process workflow, it must be deployed to the K2 server. Deploying a workflow publishes it and makes it available to your users. If you make any changes to the workflow, you must deploy the workflow again to expose those changes to your users.
Step 3 Tasks
- Deploy the workflow.
- Deploy the workflow. (File > Deploy)
The Process Build bar will appear, followed by the Deploy Project wizard. On the Deploy Project wizard home screen, click Next. On the Server and Project Settings screen, click Next, then Finish. As the workflow is deployed, you will see a deploy-in-progress bar. When the bar disappears, confirm that you can see a deployment succeeded message in the status bar (located in the lower left corner of your screen). If you see the succeeded message, your project has been successfully deployed!
REVIEW
In Step 3 you deployed the Test Process workflow to the K2 server.
Before you can begin testing your application, you need to assign process rights, or permissions to the workflow. You need to tell K2 who can start this workflow and to what extent their permissions cover. For this project, you will assign all domain users start and view rights, meaning all users can start the workflow and view reports based on the process instance. K2 Studio does not have a mechanism for assigning process rights, so you must configure those settings from the K2 Management site. (K2 Designer includes process rights in the start configuration wizard, allowing you to assign permissions directly from the workflow.)
If you are not familiar with the K2 Management site, this step will serve as an introduction to this management and administration tool. From the K2 Management site, you can manage permissions, fix workflow errors, stop and start existing process instances and view workflow progression in the form of a flow chart, called View Flow (plus much more...). Since you are only testing your basic installation integrity, you will not cover any of these features and others found in the management site, but you should explore this tool as time allows and there are other tutorials which focus specifically on administering K2 using the K2 Management site.
Step 4 Tasks
- In the K2 Management site, assign all domain users start and view rights to the Test Process workflow.
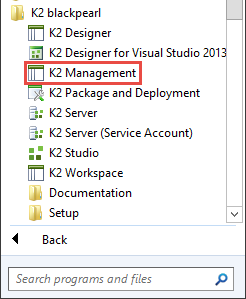
- Launch the K2 Management site (Start > All Programs > K2 blackpearl > K2 Management)
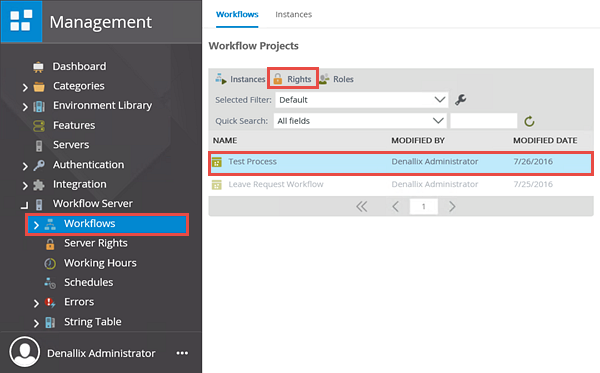
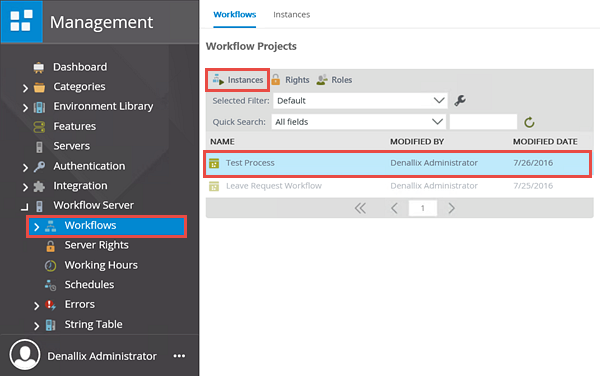
- From the Management menu, expand the Workflow Server node, then click Workflows. A list of deployed processes, or workflow projects, will appear in the central pane. Locate the Test Process workflow, then click to highlight it. Click the Rights button in the toolbar. (Your list of workflow projects may be different from the image below.)
- On the Workflow Rights screen, click Add. On the Add Users, Groups and Roles screen, confirm the Label is set to K2, then in the search text box, enter
domain users
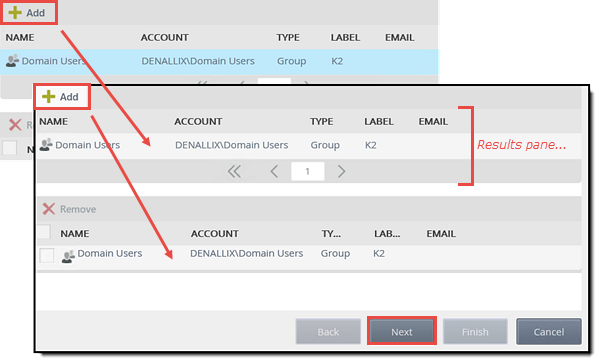
then click the spyglass or Search button. - You should see domain users appear in the results section. Click to highlight Domain Users, then click Add. Click Next to continue.
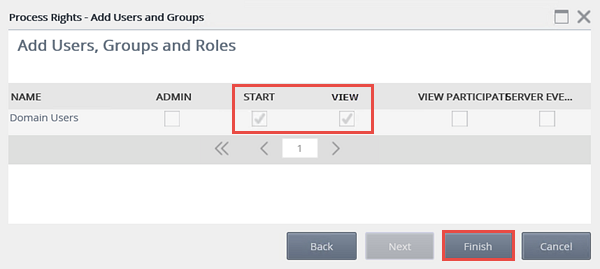
- CHECK the boxes for Start and View, then click Finish.
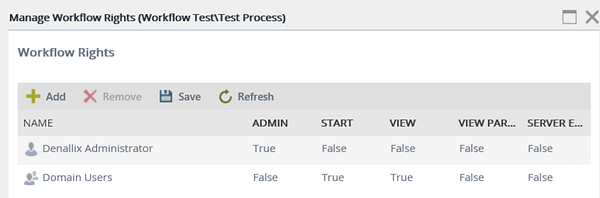
- You should see the permissions for all domain users have been added to this process. (If you are not working on a K2-provided VM, you will not see the Denallix Administrator entry.) Close the workflow rights window.

REVIEW
In Step 4 you assigned process rights, or workflow permissions to all domain users to start the workflow and view the Test Process workflow reports. Because K2 Studio does not have a wizard for workflow permissions, you used the process rights tool located in the K2 Management site. (On a side note, K2 Designer-created workflows have a built-in wizard for assigning process rights.)
To test your application, you will start an instance of the Test Process workflow from the K2 Management site. (A process instance is a single occurrence of a process, or workflow.) The process should then send a user task notification email to the workflow originator (this would be the person logged into the K2 Management site... you!). Using SmartActions, the user will reply to the email, choosing one of the outcome actions configured in the prior steps (football or soccer). A second confirmation email should then be sent back to the originator with the correct decision indicated.
Step 5 Tasks
- In the K2 Management site, start a new instance of the Test Process workflow.
- Confirm that the task notification email was received. Reply to the email with one of the actions in the message body.
- Confirm that the correct email confirmation was received in that it matches the task action you replied with in the prior step.
- In the K2 Management site, expand the Workflow Server node (if necessary) then click Workflows to expose the deployed workflow projects in the central pane. Click to highlight the Test Process workflow, then click the Instances button in the toolbar.
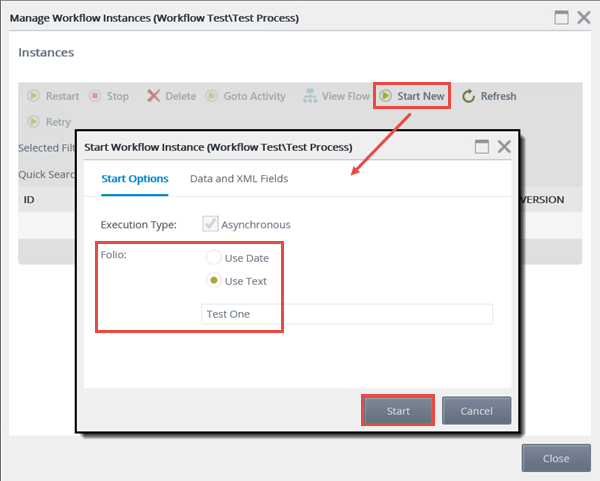
- On the Instances screen, click the Start New button in the toolbar. Change the Folio to the Use Text option and enter
Test One
in the text box, then click the Start button. Click OK when you see the success dialogue. - Open the workflow originator’s Outlook. Confirm that the task notification email was received.
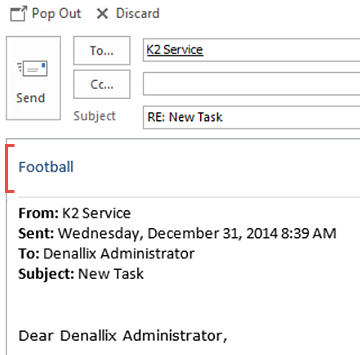
- Reply to the email with one of the actions in the message body.
- You’ll likely get an email indicating your SmartAction was successful. Wait a minute or two, then confirm the email event configured in the steps above is received. Confirm that the correct email was received in that it matches the task action you replied with in the prior step.
You should now see the process instance in the central pane, with the status set to active. This confirms that K2 has started the Test Process instance. Notice the Folio value reflects the manually entered text from the previous step.
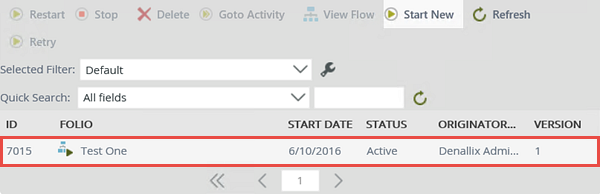
What is the Folio? The folio is a text field that is commonly used to distinguish one process instance from another process instance (of the same workflow). The folio is not required, nor does it have to be unique. Since all processes, or workflows, will have the same process name, using a unique folio value will aid in identifying the individual process instances of the workflow. This is especially useful when viewing workflow reports having many process instances.
To make the folio unique, you can use a combination of fields, such as a customer name combined with an order number. Setting the folio value typically comes from properties found in the context browser. The property values are variables that are replaced at runtime by actual content specific to the process instance.
You can also use the folio as a variable throughout your workflow. For example, if you assign a customer name as the folio, you can use the folio to customize emails so that the customer is referenced by their name.
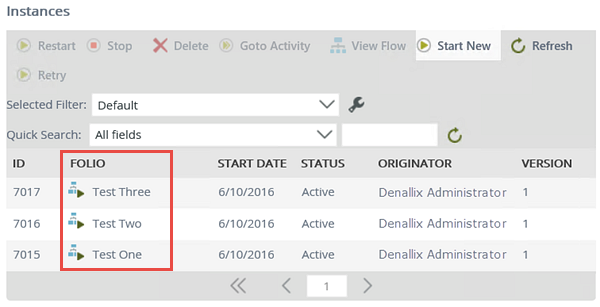
Three instances of the same workflow showing unique folio values
Domain\user name: Denallix\Administrator
Password: K2pass!
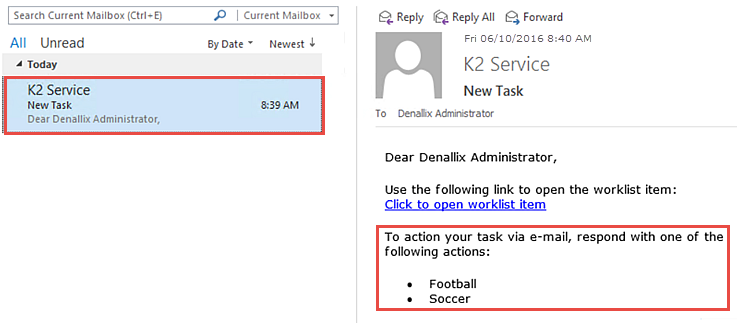
Notice in the message body, there is an option to action the task via e-mail. This is called SmartActions and it means that you can simply reply to the email with one of the action options in the body of the email. K2 will read the action and move the workflow along accordingly.
REVIEW
In this step you started an instance of the Test Process workflow from the K2 Management site. After confirming that a task notification email was received, you actioned the task using SmartActions, which allowed you to simply respond to the email with your action decision in the message body. All of these actions confirm K2's workflow server, management site, task actions and Exchange installation configurations are correct.
This concludes the Hello World (Studio) tutorial. Explore other K2 tutorials to learn more advanced concepts for K2 SmartObjects, K2 smartforms, K2 for SharePoint, Administering K2 and Reporting in K2.
This tutorial provided you with a simple testing protocol to confirm the integrity of your K2 blackpearl installation. For users who simply wanted a brief introduction into K2 Studio, this tutorial provided some basic terminology and application steps for building a workflow in K2 Studio and testing that workflow from the K2 Management site.