SmartObjects
From the Category System you can view, manage or edit SmartObjects that are deployed to the K2 environment. The SmartObject properties page provides links to delete, move, copy and edit the SmartObject. You can also execute the methods of the SmartObjects, for example to test that the SmartObject is behaving as expected.
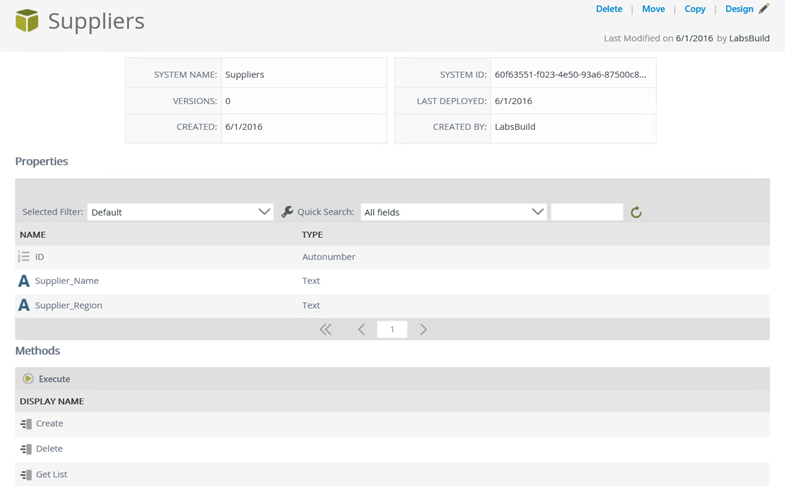
To view SmartObject properties, select the relevant SmartObject in the Category tree. The page on the right will populate with the properties for the selected SmartObject. 
| Field | Description |
|---|---|
| Delete | Delete the SmartObject. |
| Move | Move the SmartObject to another location within the Categories system. |
| Copy | Make a copy of the SmartObject in another location within the Categories system. |
| Design | Edit the SmartObject with K2 Designer. |
| System Name | Displays the SmartObject's System Name. |
| Versions | Displays the version history of the SmartObject. |
| Created | Displays the date that the SmartObject was created. |
| System ID | Displays the unique SmartObject ID in a GUID format. |
| Last Deployed | Displays when last the SmartObject was deployed to the server. |
| Created By | Displays the user who created the SmartObject. |
| Properties | Displays the Properties defined for the SmartObject, in a filterable list. |
| Methods | Displays the Methods defined for the SmartObject. These methods can be executed via the Execute option. |
To delete a SmartObject, follow the steps below:
- On the SmartObject properties page, click Delete.
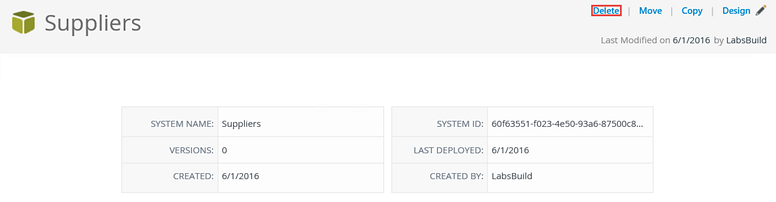
- Click OK on the confirmation dialog to confirm that you want to delete the SmartObject.
Follow these steps to move a SmartObject to another category:
- On the SmartObject properties page, click Move.
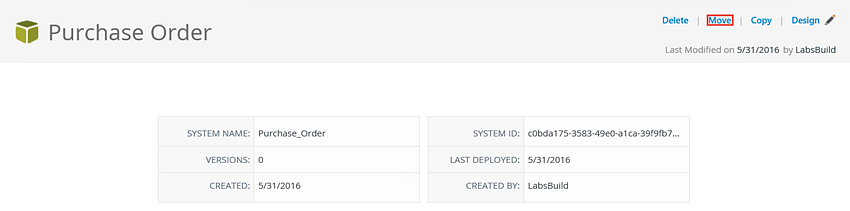
- In the dialog window that appears, navigate to another category and click on the category name to select it as the destination to move the SmartObject to. Click OK to continue.

- Click OK on the confirmation dialog box to move the SmartObject. The SmartObject will be moved to the new category and no longer appears in the old category. (You may need to refresh the category tree to see the change).
To make a copy of a SmartObject in another location in the Category tree, follow the steps below:
- On the SmartObject properties page, click Copy.
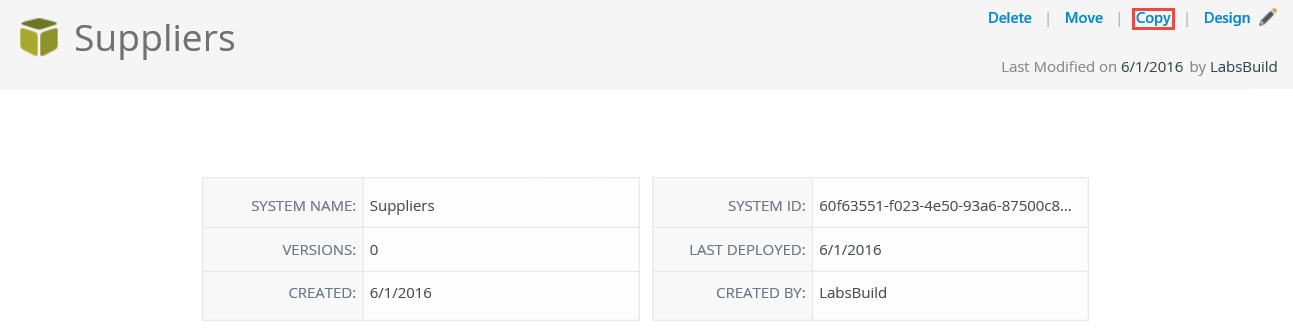
- The Copy SmartObject page will open. Provide a name for the new SmartObject, use the tree view to select the category where the new SmartObject should be created, and click OK.
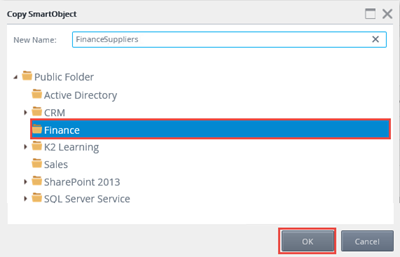
- Click OK on the dialog box to confirm you want to create a copy of the SmartObject.
To design (edit) a SmartObject in K2 Designer, follow the steps below:
- On the SmartObject properties page, click Design.

- The K2 Designer will open in a new tab with the relevant SmartObject selected. From here, you can Edit the SmartObject or perform other tasks like deleting the SmartObject or creating Views for the SmartObject.

The Methods list displays all the methods defined for the specified SmartObject. From here, you can execute the methods by selecting a method and clicking the Execute button.
Executing a SmartObject Method
If needed, you can call/test/execute a SmartObject method on-demand. For example, you may want to call a List method for a SmartObject to test that the SmartObject can retrieve data from the underlying system.
Follow these steps to execute a SmartObject Method:
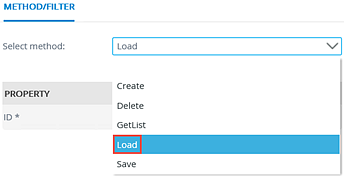
- On the SmartObject Properties page, select the SmartObject Method you want to execute in the Methods list, and click Execute.

- On the Execute SmartObject Method page, you can select another SmartObject Method to execute from the drop-down. (The methods available will depend on the SmartObject selected).
- Enter the values required to execute the SmartObject Method, and click Execute.
(Required values are indicated with an asterisk.)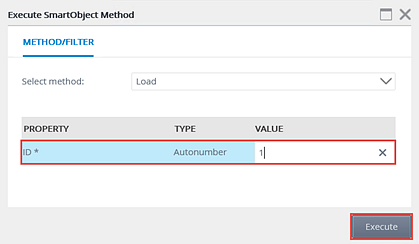
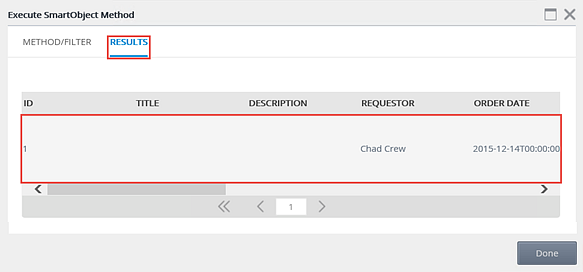
- The Results tab will open displaying the results after executing the SmartObject method. (If no results are returned, the SmartObject might not contain any data or the parameters entered in the previous screen may have filtered all records out).
To make it easier and quicker to find the SmartObject properties that you want to work with, you can use a predefined filter or the Quick Search filter.
The predefined filter allows you to create various filters that are saved for reuse when revisiting this page. Alternatively, if you want to quickly search for a SmartObject property you can use the Quick Search filter which allows you to search by predefined fields. However, the Quick Search is a once off search that is not saved.
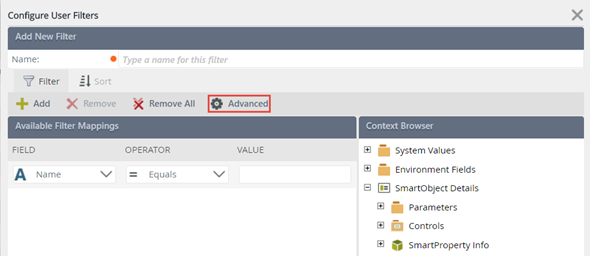
Create a Predefined Filter
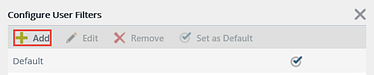
- Click the Settings icon next to the Selected Filter drop-down.

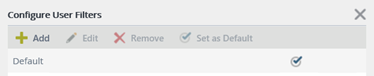
- The Configure User Filters page will open and you will see the existing Default filter.
- Click Add to create a new filter and type a Filter Name.
- Specify the Field, Operator and enter a Value for the new filter. (You can type the value in, or drag fields from the Context Browser.)
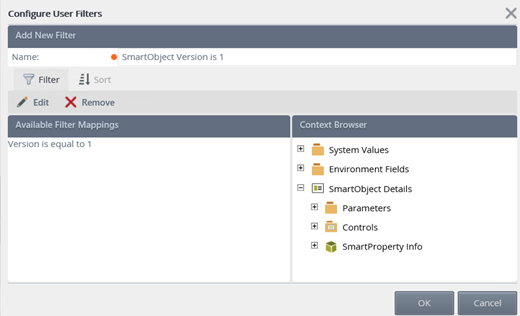
- To specify sorting on the new filter, click Sort.

- Select the column you want to sort on and the sort order from the drop-down menus.
- Click OK to complete the configuration.
- The new filter will display on the Configure User Filter page. If you want to set this filter as the default, select the filter and click Set as Default.

- Click OK.
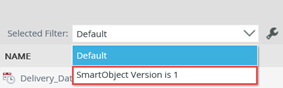
- You will now be able to select your new filter from the drop-down if the filter was not already set as the default filter.
Advanced Filter Configuration
To create an advanced filter follow the steps below:
- Click the Settings icon next to the Selected Filter drop-down.
- On the Configure User Filters page, click Advanced.
- On the Advanced Filter Configuration page, specify the conditions and expressions of the advanced filter. Here you can add and remove Conditions and Expressions. You can configure Conditions and Expressions by typing the required values or dragging values from the context browser.
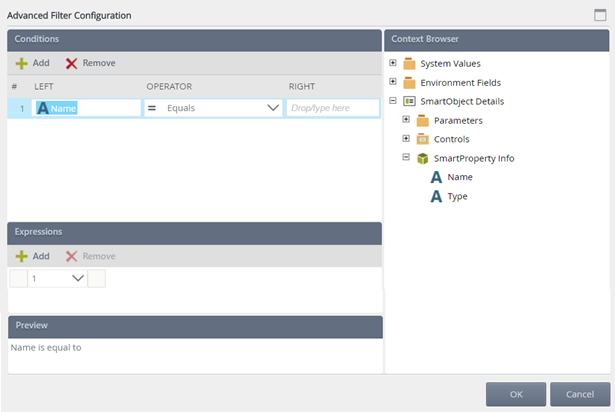
- Click OK.
Use the Quick Search filter
- To use the Quick Search functionality, click the drop-down next to Quick Search and select the field you want to use to search on.

- Enter a value in the text box and click Refresh or press the Enter key on your keyboard. The value you enter could either be the full value of the field or a partial value. Using a partial value will return all items containing the value in the name of the field.
- The items containing the specified criteria will now display.
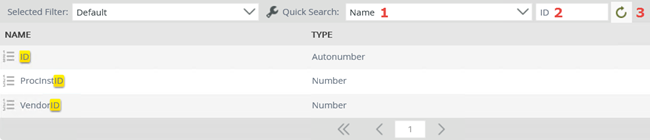
- To display the complete list of items again, clear the text box and click Refresh.